A Mail Delivery Mystery: Exim, systemd, setuid, and Docker, oh my! 10 Oct 5:44 PM (12 days ago)
On mail.quux, a node of NNCPNET (the NNCP-based peer-to-peer email network), I started noticing emails not being delivered. They were all in the queue, frozen, and Exim’s log had entries like:
unable to set gid=5001 or uid=5001 (euid=100): local delivery to [redacted] transport=nncp
Weird.
Stranger still, when I manually ran the queue with sendmail -qff -v, they all delivered fine.
Huh.
Well, I thought, it was a one-off weird thing. But then it happened again.
Upon investigating, I observed that this issue was happening only on messages submitted by SMTP. Which, on these systems, aren’t that many.
While trying different things, I tried submitting a message to myself using SMTP. Nothing to do with NNCP at all. But look at this:
jgoerzen@[redacted] R=userforward defer (-1): require_files: error for /home/jgoerzen/.forward: Permission denied
Strraaannnge….
All the information I could find about this, even a FAQ entry, said that the problem is that Exim isn’t setuid root. But it is:
-rwsr-xr-x 1 root root 1533496 Mar 29 2025 /usr/sbin/exim4
This problem started when I upgraded to Debian Trixie. So what changed there?
There are a lot of possibilities; this is running in Docker using my docker-debian-base system, which runs a regular Debian in Docker, including systemd.
I eventually tracked it down to Exim migrating from init.d to systemd in trixie, and putting a bunch of lockdowns in its service file. After a bunch of trial and error, I determined that I needed to override this set of lockdowns to make it work. These overrides did the trick:
ProtectClock=false
PrivateDevices=false
RestrictRealtime=false
ProtectKernelModules=false
ProtectKernelTunables=false
ProtectKernelLogs=false
ProtectHostname=false
I don’t know for sure if the issue is related to setuid. But if it is, there’s nothing that immediately jumps out at me about any of these that would indicate a problem with setuid.
I also don’t know if running in Docker makes any difference.
Anyhow, problem fixed, but mystery not solved!


I’m Not Very Popular, Thankfully. That Makes The Internet Fun Again 9 Oct 4:59 PM (13 days ago)
“Like and subscribe!”
“Help us get our next thousand (or million) followers!”
I was using Linux before it was popular. Back in the day where you had to write Modelines for your XF86Config file — and do it properly, or else you might ruin your monitor. Back when there wasn’t a word processor (thankfully; that forced me to learn LaTeX, which I used to write my papers in college).
I then ran Linux on an Alpha, a difficult proposition in an era when web browsers were either closed-source or too old to be useful; all sorts of workarounds, including emulating Digital UNIX.
Recently I wrote a deep dive into the DOS VGA text mode and how to achieve it on a modern UEFI Linux system.
Nobody can monetize things like this. I am one of maybe a dozen or two people globally that care about that sort of thing. That’s fine.
Today, I’m interested in things like asynchronous communication, NNCP, and Gopher. Heck, I’m posting these words on a blog. Social media displaced those, right?
Some of the things I write about here have maybe a few dozen people on the planet interested in them. That’s fine.
I have no idea how many people read my blog. I have no idea where people hear about my posts from. I guess I can check my Mastodon profile to see how many followers I have, but it’s not something I tend to do. I don’t know if the number is going up or down, or if it is all that much in Mastodon terms (probably not).
Thank goodness.
Since I don’t have to care about what’s popular, or spend hours editing video, or thousands of dollars on video equipment, I can just sit down and write about what interests me. If that also interests you, then great. If not, you can find what interests you — also fine.
I once had a colleague that was one of these “plugged into Silicon Valley” types. He would periodically tell me, with a mixture of excitement and awe, that one of my posts had made Hacker News.
This was always news to me, because I never paid a lot of attention over there. Occasionally that would bring in some excellent discussion, but more often than not, it was comments from people that hadn’t read or understood the article trying to appear smart by arguing with what it — or rather, what they imagined it said, I guess.
The thing I value isn’t subscriber count. It’s discussion. A little discussion in the comments or on Mastodon – that’s perfect, even if only 10 people read the article. I have the most fun in a community.
And I’ll go on writing about NNCP and Gopher and non-square DOS pixels, with audiences of dozens globally. I have no advertisers to keep happy, and I enjoy it, so why not?
A Twisty Maze of Ill-Behaved Bots 1 Oct 7:01 PM (21 days ago)
Like many, bot traffic has been causing significant issues for my hosted server recently. I’ve been noticing a dramatic increase in bots that do not respect robots.txt, especially the crawl-delay I have set there. Not only that, but many of them are sending user-agent strings that are quite precisely matching what desktop browsers send. That is, they don’t identify themselves.
They posed a particular problem on two sites: my blog, and the lists.complete.org archives.
The list archives is a completely static site, but it has many pages, so the bots that are ill-behaved absolutely hammer it following links.
My blog runs WordPress. It has fewer pages, but by using PHP, doesn’t need as many hits to start to bog down. Also, there is a Mastodon thundering herd problem, and since I participate on Mastodon, this hits my server.
The solution was one of layers.
I had already added a crawl-delay line to robots.txt. It helped a bit, but many bots these days aren’t well-behaved. Next, I added WP Super Cache to my WordPress installation. I also enabled APCu in PHP and installed APCu Manager. Again, each step helped. Again, not quite enough.
Finally, I added Anubis. Installing it (especially if using the Docker container) was under-documented, but I figured it out. By default, it is designed to block AI bots and try to challenge everything with “Mozilla” in its user-agent (which is most things) with a Javascript challenge.
That’s not quite what I want. If a bot is well-behaved, AI or otherwise, it will respect my robots.txt and I can more precisely control it there. Also, I intentionally support non-Javascript browsers on many of the sites I host, so I wanted to be judicious. Eventually I configured Anubis to only challenge things that present a user-agent that looks fully like a real browser. In other words, real browsers should pass right through, and bad bots pretending to be real browsers will fail.
That was quite effective. It reduced load further to the point where things are ordinarily fairly snappy.
I had previously been using mod_security to block some bots, but it seemed to be getting in the way of the Fediverse at times. When I disabled it, I observed another increase in speed. Anubis was likely going to get rid of those annoying bots itself anyhow.
As a final step, I migrated to a faster hosting option. This post will show me how well it survives the Mastodon thundering herd!
Update: Yes, it handled it quite nicely now.
Running an Accurate 80×25 DOS-Style Console on Modern Linux Is Possible After All 18 Sep 4:58 AM (last month)
Here, in classic Goerzen deep dive fashion, is more information than you knew you wanted about a topic you’ve probably never thought of. I found it pretty interesting, because it took me down a rabbit hole of subsystems I’ve never worked with much and a mishmash of 1980s and 2020s tech.
I had previously tried and failed to get an actual 80x25 Linux console, but I’ve since figured it out!
This post is about the Linux text console – not X or Wayland. We’re going to get the console right without using those systems. These instructions are for Debian trixie, but should be broadly applicable elsewhere also. The end result can look like this:
(That’s a Wifi Retromodem that I got at VCFMW last year in the Hayes modem case)
What’s a pixel?
How would you define a “pixel” these days? Probably something like “a uniquely-addressable square dot in a two-dimensional grid”.
In the world of VGA and CRTs, that was just a logical abstraction. We got an API centered around that because it was convenient. But, down the VGA cable and on the device, that’s not what a pixel was.
A pixel, back then, was a time interval. On a multisync monitor, which were common except in the very early days of VGA, the timings could be adjusted which produced logical pixels of different sizes. Those screens often had a maximum resolution but not necessarily a “native resolution” in the sense that an LCD panel does. Different timings produced different-sized pixels with equal clarity (or, on cheaper monitors, equal fuzziness).
A side effect of this was that pixels need not be square. And, in fact, in the standard DOS VGA 80x25 text mode, they weren’t.
You might be seeing why DVI, DisplayPort, and HDMI replaced VGA for LCD monitors: with a VGA cable, you did a pixel-to-analog-timings conversion, then the display did a timings-to-pixels conversion, and this process could be a bit lossy. (Hence why you sometimes needed to fill the screen with an image and push the “center” button on those older LCD screens)
(Note to the pedantically-inclined: yes I am aware that I have simplified several things here; for instance, a color LCD pixel is made up of approximately 3 sub-dots of varying colors, and that things like color eInk displays have two pixel grids with different sizes of pixels layered atop each other, and printers are another confusing thing altogether, and and and…. MOST PEOPLE THINK OF A PIXEL AS A DOT THESE DAYS, OK?)
What was DOS text mode?
We think of this as the “standard” display: 80 columns wide and 25 rows tall. 80x25. By the time Linux came along, the standard Linux console was VGA text mode – something like the 4th incarnation of text modes on PCs (after CGA, MDA, and EGA). VGA also supported certain other sizes of characters giving certain other text dimensions, but if I cover all of those, this will explode into a ridiculously more massive page than it already is.
So to display text on an 80x25 DOS VGA system, ultimately characters and attributes were written into the text buffer in memory. The VGA system then rendered it to the display as a 720x400 image (at 70Hz) with non-square pixels such that the result was approximately a 4:3 aspect ratio.
The font used for this rendering was a bitmapped one using 8x16 cells. You might do some math here and point out that 8 * 80 is only 640, and you’d be correct. The fonts were 8x16 but the rendered cells were 9x16. The extra pixel was normally used for spacing between characters. However, in line graphics mode, characters 0xC0 through 0xDF repeated the 8th column in the position of the 9th, allowing the continuous line-drawing characters we’re used to from TUIs.
Problems rendering DOS fonts on modern systems
By now, you’re probably seeing some of the issues we have rendering DOS screens on more modern systems. These aren’t new at all; I remember some of these from back in the days when I ran OS/2, and I think also saw them on various terminals and consoles in OS/2 and Windows.
Some issues you’d encounter would be:
- Incorrect aspect ratio caused by using the original font and rendering it using 1:1 square pixels (resulting in a squashed appearance)
- Incorrect aspect ratio for ANOTHER reason, caused by failing to render column 9, resulting in text that is overall too narrow
- Characters appearing to be touching each other when they shouldn’t (failing to render column 9; looking at you, dosbox)
- Gaps between line drawing characters that should be continuous, caused by rendering column 9 as empty space in all cases
Character set issues
DOS was around long before Unicode was. In the DOS world, there were codepages that selected the glyphs for roughly the high half of the 256 possible characters. CP437 was the standard for the USA; others existed for other locations that needed different characters. On Unix, the USA pre-Unicode standard was Latin-1. Same concept, but with different character mappings.
Nowadays, just about everything is based on UTF-8. So, we need some way to map our CP437 glyphs into Unicode space. If we are displaying DOS-based content, we’ll also need a way to map CP437 characters to Unicode for display later, and we need these maps to match so that everything comes out right. Whew.
So, let’s get on with setting this up!
Selecting the proper video mode
As explained in my previous post, proper hardware support for DOS text mode is limited to x86 machines that do not use UEFI. Non-x86 machines, or x86 machines with UEFI, simply do not contain the necessary support for it. As these are now standard, most of the time, the text console you see on Linux is actually the kernel driving the video hardware in graphics mode, and doing the text rendering in software.
That’s all well and good, but it makes it quite difficult to actually get an 80x25 console.
First, we need to be running at 720x400. This is where I ran into difficulty last time. I realized that my laptop’s LCD didn’t advertise any video modes other than its own native resolution. However, almost all external monitors will, and 720x400@70 is a standard VGA mode from way back, so it should be well-supported.
You need to find the Linux device name for your device. You can look at the possible devices with ls -l /sys/class/drm. If you also have a GUI, xrandr may help too. But in any case, each directory under /sys/class/drm has a file named modes, and if you cat them all, you will eventually come across one with a bunch of modes defined. Drop the leading “card0” or whatever from the directory name, and that’s your device. (Verify that 720x400 is in modes while you’re at it.)
Now, you’re going to edit /etc/default/grub and add something like this to GRUB_CMDLINE_LINUX_DEFAULT:
video=DP-1:720x400@70
Of course, replace DP-1 with whatever your device is.
Now you can run update-grub and reboot. You should have a 720x400 display.
At first, I thought I had succeeded by using Linux’s built-in VGA font with that mode. But it looked too tall. After noticing that repeated 0s were touching, I got suspicious about the missing 9th column in the cells. stty -a showed that my screen was 90x25, which is exactly what it would show if I was using 8x16 instead of 9x16 cells. Sooo…. I need to prepare a 9x16 font.
Preparing a font
Here’s where it gets complicated.
I’ll give you the simple version and the hard mode.
The simple mode is this: Download https://www.complete.org/downloads/CP437-VGA.psf.gz and stick it in /usr/local/etc, then skip to the “Activating the font” section below.
The font assembled here is based on the Ultimate Oldschool PC Font Pack v2.2, which is (c) 2016-2020 VileR and licensed under Creative Commons Attribution-ShareAlike 4.0 International License. My psf file is derived from this using the instructions below.
Building it yourself
First, install some necessary software: apt-get install fontforge bdf2psf
Start by going to the Oldschool PC Font Pack Download page. Download oldschool_pc_font_pack_v2.2_FULL.zip and unpack it.
The file we’re interested in is otb - Bm (linux bitmap)/Bm437_IBM_VGA_9x16.otb. Open it in fontforge by running fontforge BmPlus_IBM_VGA_9x16.otb. When it asks if you will load the bitmap fonts, hit select all, then yes. Go to File -> generate fonts. Save in a BDF, no need for outlines, and use “guess” for resolution.
Now you have a file such as Bm437_IBM_VGA_9x16-16.bdf. Excellent.
Now we need to generate a Unicode map file. We will make sure this matches the system’s by enumerating every character from 0x00 to 0xFF, converting it from CP437 to Unicode, and writing the appropriate map.
Here’s a Python script to do that:
for i in range(0, 256):
    cp437b = b'%c' % i
    uni = ord(cp437b.decode('cp437'))
    print(f"U+{uni:04x}")
Save that file as genmap.py and run python3 genmap.py > cp437-uni.
Now, we’re ready to build the psf file:
bdf2psf --fb Bm437_IBM_VGA_9x16-16.bdf \
  /dev/null cp437-uni 256 CP437-VGA.psf
By convention, we normally store these files gzipped, so gzip CP437-VGA.psf.
You can test it on the console with setfont CP437-VGA.psf.gz.
Now copy this file into /usr/local/etc.
Activating the font
Now, edit /etc/default/console-setup. It should look like this:
# CONFIGURATION FILE FOR SETUPCON

# Consult the console-setup(5) manual page.

ACTIVE_CONSOLES="/dev/tty[1-6]"

CHARMAP="UTF-8"

CODESET="Lat15"
FONTFACE="VGA"
FONTSIZE="8x16"
FONT=/usr/local/etc/CP437-VGA.psf.gz

VIDEOMODE=

# The following is an example how to use a braille font
# FONT='lat9w-08.psf.gz brl-8x8.psf'
At this point, you should be able to reboot. You should have a proper 80x25 display! Log in and run stty -a to verify it is indeed 80x25.
Using and testing CP437
Part of the point of CP437 is to be able to access BBSs, ANSI art, and similar.
Now, remember, the Linux console is still in UTF-8 mode, so we have to translate CP437 to UTF-8, then let our font map translate it back to CP437. A weird trip, but it works.
Let’s test it using the Textfiles ANSI art collection. In the artworks section, I randomly grabbed a file near the top: borgman.ans. Download that, and display with:
clear; iconv -f CP437 -t UTF-8 < borgman.ans
You should see something similar to – but actually more accurate than – the textfiles PNG rendering of it, which you’ll note has an incorrect aspect ratio and some rendering issues. I spot-checked with a few others and they seemed to look good. belinda.ans in particular tries quite a few characters and should give you a good sense if it is working.
Use with interactive programs
That’s all well and good, but you’re probably going to want to actually use this with some interactive program that expects CP437. Maybe Minicom, Kermit, or even just telnet?
For this, you’ll want to apt-get install luit. luit maps CP437 (or any other encoding) to UTF-8 for display, and then of course the Linux console maps UTF-8 back to the CP437 font.
Here’s a way you can repeat the earlier experiment using luit to run the cat program:
clear; luit -encoding CP437 cat borgman.ans
You can run any command under luit. You can even run luit -encoding CP437 bash if you like. If you do this, it is probably a good idea to follow my instructions on generating locales on my post on serial terminals, and then within luit, set LANG=en_us.IBM437. But note especially that you can run programs like minicom and others for accessing BBSs under luit.
Final words
This gave you a nice DOS-type console. Although it doesn’t have glyphs for many codepoints, it does run in UTF-8 mode and therefore is compatible with modern software.
You can achieve greater compatibility with more UTF-8 codepoints with the DOS font, at the expense of accuracy of character rendering (especially for the double-line drawing characters) by using /usr/share/bdf2psf/standard.equivalents instead of /dev/null in the bdf2psf command.
Or you could go for another challenge, such as using the DEC vt-series fonts for coverage of ISO-8859-1. But just using fonts extracted from DEC ROM won’t work properly, because DEC terminals had even more strangeness going on than DOS fonts.
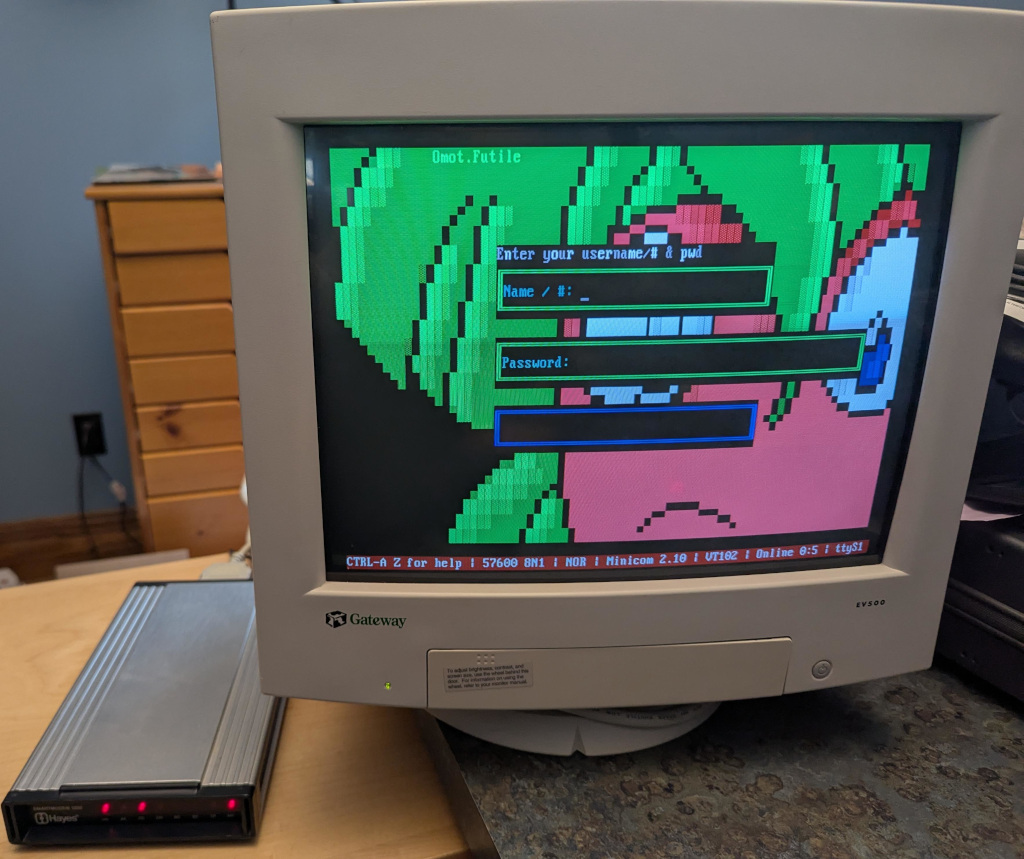
Installing and Using Debian With My Decades-Old Genuine DEC vt510 Serial Terminal 17 Sep 4:49 AM (last month)
Six years ago, I was inspired to buy a DEC serial terminal. Since then, my collection has grown to include several DEC models, an IBM 3151, a Wyse WY-55, a Televideo 990, and a few others.
When you are running a terminal program on Linux or MacOS, what you are really running is a terminal emulator. In almost all cases, the terminal emulator is emulating one of the DEC terminals in the vt100 through vt520 line, which themselves use a command set based on an ANSI standard.
In short, you spend all day using a program designed to pretend to be the exact kind of physical machine I’m using for this experiment!
I have long used my terminals connected to a Raspberry Pi 4, but due to the difficulty of entering a root filesystem encryption password using a serial console on a Raspberry Pi, I am switching to an x86 Mini PC (with a N100 CPU).
While I have used a terminal with the Pi, I’ve never before used it as a serial console all the way from early boot, and I have never installed Debian using the terminal to run the installer. A serial terminal gives you a login prompt. A serial console gives you access to kernel messages, the initrd environment, and sometimes even the bootloader.
This might be fun, I thought.
I selected one of my vt510 terminals for this. It is one of my newer ones, having been built in 1993. But it has a key feature: I can remap Ctrl to be at the caps lock position, something I do on every other system I use anyhow. I could have easily selected an older one from the 1980s.

Kernel configuration
To enable a serial console for Linux, you need to pass a parameter on the kernel command line. See the kernel documentaiton for more. I very frequently see instructions that are incomplete; they particularly omit flow control, which is most definitely needed for these real serial terminals.
I run my terminal at 57600 bps, so the parameter I need is console=ttyS0,57600n8r. The “r” means to use hardware flow control (ttyS0 corresponds to the first serial port on the system; use ttyS1 or something else as appropriate for your situation). While booting the Debian installer, according to Debian’s instructions, it may be useful to also add TERM=vt102 (the installer doesn’t support the vt510 terminal type directly). The TERM parameter should not be specified on a running system after instlalation.
Booting the Debian installer
When you start the Debian installer, to get it into serial mode, you have a couple of options:
- You can use a traditional display and keyboard just long enough to input the kernel parameters described above
- You can edit the bootloader configuration on the installer’s filesystem prior to booting from it
Option 1 is pretty easy. Option 2 is hard mode, but not that bad.
On x86, the Debian installer boots in at least two different ways: it uses GRUB if you’re booting under UEFI (which is most systems these days), or ISOLINUX if you are booting from the BIOS.
If using GRUB, the file to edit on the installer image is boot/grub/grub.cfg.
Near the top, add these lines:
serial --unit=0 --speed=57600 --word=8 --parity=no --stop=1
terminal_input console serial
terminal_output console serial
Unit 0 corresponds to ttyS0 as above.
GRUB’s serial command does not support flow control. If your terminal gets corrupted during the GRUB stage, you may need to configure it to a slower speed.
Then, find the “linux” line under the “Install” menuentry. Edit it to insert console=ttyS0,57600n8r TERM=vt102 right after the vga=788.
Save, unmount, and boot. You should see the GRUB screen displayed on your serial terminal. Select the Install option and the installer begins.
If you are using BIOS boot, I’m sure you can do something similar with the files in the isolinux directory, but haven’t researched it.
Now, you can install Debian like usual!
Configuring the System
I was pleasantly surprised to find that Debian’s installer took care of many, but not all, of the things I want to do in order to make the system work nicely with a serial terminal. You can perform these steps from a chroot under the installer environment before a reboot, or later in the running system.
First, while Debian does set up a getty (the program that displays the login prompt) on the serial console by default, it doesn’t enable hardware flow control. So let’s do that.
Configuring the System: agetty with systemd
Run systemctl edit serial-getty@ttyS0.service. This opens an editor that lets you customize the systemd configuration for a given service without having to edit the file directly. All you really need to do is modify the agetty command, so we just override it. At the top, in the designated area, write:
[Service]
ExecStart=
ExecStart=-/sbin/agetty --wait-cr -8 -h -L=always %I 57600 vt510
The empty ExecStart= line is necessary to tell systemd to remove the existing ExecStart command (otherwise, it will logically contain two ExecStart lines, which is an error).
These arguments say:
- –wait-cr means to wait for the user to press Return at the terminal before attempting to display the login prompt
- -8 tells it to assume 8-bit mode on the serial line
- -h enables hardware flow control
- -L=always enables local line mode, disabling monitoring of modem control lines
- %I substitutes the name of the port from systemd
- 57600 gives the desired speed, and vt510 gives the desired setting for the TERM environment variable
The systemd documentation refers to this page about serial consoles, which gives more background. However, I think it is better to use the systemctl edit method described here, rather than just copying the config file, since this lets things like new configurations with new Debian versions take effect.
Configuring the System: Kernel and GRUB
Your next stop is the /etc/default/grub file. Debian’s installer automatically makes some changes here. There are three lines you want to change. First, near the top, edit GRUB_CMDLINE_LINUX_DEFAULT and add console=tty0 console=ttyS0,57600n8r. By specifying console twice, you allow output to go both to the standard display and to the serial console. By specifying the serial console last, you make it be the preferred one for things like entering the root filesystem password.
Next, towards the bottom, make sure these two lines look like this:
GRUB_TERMINAL="console serial"
GRUB_SERIAL_COMMAND="serial --unit=0 --speed=57600 --word=8 --parity=no --stop=1"
Finally, near the top, you may want to raise the GRUB_TIMEOUT to somewhere around 10 to 20 seconds since things may be a bit slower than you’re used to.
Save the file and run update-grub.
Now, GRUB will display on both your standard display and the serial console. You can edit the boot command from either. If you have a VGA or HDMI monitor attached, for instance, and need to not use the serial console, you can just edit the Linux command line in GRUB and remove the reference to ttyS0 for one boot. Easy!
That’s it. You now have a system that is fully operational from a serial terminal.
My original article from 2019 has some additional hints, including on how to convert from UTF-8 for these terminals.
Update 2025-09-17: It is also useful to set up proper locales. To do this, first edit /etc/locale.gen. Make sure to add, or uncomment:
en_US ISO-8859-1
en_US.IBM437 IBM437
en_US.UTF-8 UTF-8
Then run locale-gen. Normally, your LANG will be set to en_us.UTF-8, which will select the appropriate encoding. Plain en_US will select ISO-8859-1, which you need for the vt510. Then, add something like this to your ~/.bashrc:
if [ `tty` = "/dev/ttyS0" -o "$TERM" = "vt510" ]; then
        stty -iutf8
        # might add ixon ixoff
        export LANG=en_US
        export MANOPT="-E ascii"
        stty rows 25
fi

if [ "$TERM" = "screen" -o "$TERM" = "vt100" ]; then
    export LANG=en_US.utf8
fi
Finally, in my ~/.screenrc, I have this. It lets screen convert between UTF-8 and ISO-8859-1:
defencoding UTF-8
startup_message off
vbell off
termcapinfo * XC=B%,‐-,
maptimeout 5
bindkey -k ku stuff ^[OA
bindkey -k kd stuff ^[OB
bindkey -k kr stuff ^[OC
bindkey -k kl stuff ^[OD
I just want an 80×25 console, but that’s no longer possible 15 Sep 5:53 PM (last month)
Update 2025-09-18: I figured out how to do this, at least for many non-laptop screens. This post still contains a lot of good background detail, however.
Somehow along the way, a feature that I’ve had across DOS, OS/2, FreeBSD, and Linux — and has been present on PCs for more than 40 years — is gone.
That feature, of course, is the 80×25 text console.
Linux has, for awhile now, rendered its text console using graphic modes. You can read all about it here. This has been necessary because only PCs really had the 80×25 text mode (Raspberry Pis, for instance, never did), and even they don’t have it when booted with UEFI.
I’ve lately been annoyed that:
- The console is a different size on every screen — both in terms of size of letters and the dimensions of it
- If a given machine has more than one display, one or both of them will have parts of the console chopped off
- My system seems to run with three different resolutions or fonts at different points of the boot process. One during the initrd, and two different ones during the remaining boot.
And, I wanted to run some software on the console that was designed with 80×25 in mind. And I’d like to be able to plug in an old VGA monitor and have it just work if I want to do that.
That shouldn’t be so hard, right? Well, the old vga= option that you are used to doesn’t work when you booted from UEFI or on non-x86 platforms. Most of the tricks you see online for changing resolutions, etc., are no longer relevant. And things like setting a resolution with GRUB are useless for systems that don’t use GRUB (including ARM).
VGA text mode uses 8×16 glyphs in 9×16 cells, where the pixels are non-square, giving a native resolution of 720×400 (which historically ran at 70Hz), which should have streched pixels to make a 4:3 image.
While it is possible to select a console font, and 8×16 fonts are present and supported in Linux, it appears to be impossible to have a standard way to set 720×400 so that they present in a reasonable size, at the correct aspect ratio, with 80×25.
Tricks like nomodeset no longer work on UEFI or ARM systems. It’s possible that kmscon or something like it may help, but I’m not even certain of that (video=eDP1:720×400 produced an error saying that 720×400 wasn’t a supported mode, so I’m unsure kmscon would be any better.) Not that it matters; all the kmscon options to select a font or zoom are broken, and it doesn’t offer mode selection anyhow.
I think I’m going to have to track down an old machine.
Sigh.
Performant Full-Disk Encryption on a Raspberry Pi, but Foiled by Twisty UARTs 11 Sep 5:41 AM (last month)
In my post yesterday, ARM is great, ARM is terrible (and so is RISC-V), I described my desire to find ARM hardware with AES instructions to support full-disk encryption, and the poor state of the OS ecosystem around the newer ARM boards.
I was anticipating buying either a newer ARM SBC or an x86 mini PC of some sort.
More-efficient AES alternatives
Always one to think, “what if I didn’t have to actually buy something”, I decided to research whether it was possible to use encryption algorithms that are more performant on the Raspberry Pi 4 I already have.
The answer was yes. From cryptsetup benchmark:
root@mccoy:~# cryptsetup benchmark --cipher=xchacha12,aes-adiantum-plain64
# Tests are approximate using memory only (no storage IO).
#            Algorithm |       Key |      Encryption |      Decryption
xchacha12,aes-adiantum        256b       159.7 MiB/s       160.0 MiB/s
xchacha20,aes-adiantum        256b       116.7 MiB/s       169.1 MiB/s
    aes-xts                   256b        52.5 MiB/s        52.6 MiB/s
With best-case reads from my SD card at 45MB/s (with dd if=/dev/mmcblk0 of=/dev/null bs=1048576 status=progress), either of the ChaCha-based algorithms will be fast enough. “Great,” I thought. “Now I can just solve this problem without spending a dollar.”
But not so fast.
Serial terminals vs. serial consoles
My primary use case for this device is to drive my actual old DEC vt510 terminal. I have long been able to do that by running a getty for my FTDI-based USB-to-serial converter on /dev/ttyUSB0. This gets me a login prompt, and I can do whatever I need from there.
This does not get me a serial console, however. The serial console would show kernel messages and could be used to interact with the pre-multiuser stages of the system — that is, everything before the loging prompt. You can use it to access an emergency shell for repair, etc.
Although I have long booted that kernel with console=tty0 console=ttyUSB0,57600, the serial console has never worked but I’d never bothered investigating because the text terminal was sufficient.
You might be seeing where this is going: to have root on an encrypted LUKS volume, you have to enter the decryption password in the pre-multiuser environment (which happens to be on the initramfs).
So I started looking. First, I extracted the initrd with cpio and noticed that the ftdi_sio and usbserial modules weren’t present. Added them to /etc/initramfs-tools/modules and rebooted; no better.
So I found the kernel’s serial console guide, which explicitly notes “To use a serial port as console you need to compile the support into your kernel”. Well, I have no desire to custom-build a kernel on a Raspberry Pi with MicroSD storage every time a new kernel comes out.
I thought — well I don’t stricly need the kernel to know about the console on /dev/ttyUSB0 for this; I just need the password prompt — which comes from userspace — to know about it.
So I looked at the initramfs code, and wouldn’t you know it, it uses /dev/console. Looking at /proc/consoles on that system, indeed it doesn’t show ttyUSB0. So even though it is possible to load the USB serial driver in the initramfs, there is no way to make the initramfs use it, because it only uses whatever the kernel recognizes as a console, and the kernel won’t recognize this. So there is no way to use a USB-to-serial adapter to enter a password for an encrypted root filesystem.
Drat.
The on-board UARTs?
I can hear you know: “The Pi already has on-board serial support! Why not use that?”
Ah yes, the reason I don’t want to use that is because it is difficult to use that, particularly if you want to have RTS/CTS hardware flow control (or DTR/DSR on these old terminals, but that’s another story, and I built a custom cable to map it to RTS/CTS anyhow).
Since you asked, I’ll take you down this unpleasant path.
The GPIO typically has only 2 pins for serial communication: 8 and 10, for TX and RX, respectively.
But dive in and you get into a confusing maze of UARTs. The “mini UART”, the one we are mostly familiar with on the Pi, does not support hardware flow control. The PL011 does. So the natural question is: how do we switch to the PL011, and what pins does it use? Great questions, and the answer is undocumented, at least for the Pi 4.
According to that page, for the Pi 4, the primary UART is UART1, UART1 is the mini UART, “the secondary UART is not normally present on the GPIO connector” and might be used by Bluetooth anyway, and there is no documented pin for RTS/CTS anyhow. (Let alone some of the other lines modems use) There are supposed to be /dev/ttyAMA* devices, but I don’t have those. There’s an enable_uart kernel parameter, which does things like stop the mini UART from changing baud rates every time the VPU changes clock frequency (I am not making this up!), but doesn’t seem to control the PL011 UART selection. This page has a program to do it, and map some GPIO pins to RTS/CTS, in theory.
Even if you get all that working, you still have the problem that the Pi UARTs (all of them of every type) is 3.3V and RS-232 is 5V, so unless you get a converter, you will fry your Pi the moment you connect it to something useful. So, you’re probably looking at some soldering and such just to build a cable that will work with an iffy stack.
So, I could probably make it work given enough time, but I don’t have that time to spare working with weird Pi serial problems, so I have always used USB converters when I need serial from a Pi.
Conclusion
I bought a fanless x86 micro PC with a N100 chip and all the ports I might want: a couple of DB-9 serial ports, some Ethernet ports, HDMI and VGA ports, and built-in wifi. Done.
ARM is great, ARM is terrible (and so is RISC-V) 10 Sep 5:16 AM (last month)
I’ve long been interested in new and different platforms. I ran Debian on an Alpha back in the late 1990s and was part of the Alpha port team; then I helped bootstrap Debian on amd64. I’ve got somewhere around 8 Raspberry Pi devices in active use right now, and the free NNCPNET Internet email service I manage runs on an ARM instance at a cloud provider.
ARM-based devices are cheap in a lot of ways: they use little power and there are many single-board computers based on them that are inexpensive. My 8-year-old’s computer is a Raspberry Pi 400, in fact.
So I like ARM.
I’ve been looking for ARM devices that have accelerated AES (Raspberry Pi 4 doesn’t) so I can use full-disk encryption with them. There are a number of options, since ARM devices are starting to go more mid-range. Radxa’s ROCK 5 series of SBCs goes up to 32GB RAM. The Orange Pi 5 Max and Ultra have up to 16GB RAM, as does the Raspberry Pi 5. Pine64’s Quartz64 has up to 8GB of RAM. I believe all of these have the ARM cryptographic extensions. They’re all small and most are economical.
But I also dislike ARM. There is a terrible lack of standardization in the ARM community. They say their devices run Linux, but the default there is that every vendor has their own custom Debian fork, and quite likely kernel fork as well. Most don’t maintain them very well.
Imagine if you were buying x86 hardware. You might have to manage AcerOS, Dellbian, HPian, etc. Most of them have no security support (particularly for the kernel). Some are based on Debian 11 (released in 2021), some Debian 12 (released in 2023), and none on Debian 13 (released a month ago).
That is exactly the situation we have on ARM. While Raspberry Pi 4 and below can run Debian trixie directly, Raspberry Pi has not bothered to upstream support for the Pi 5 yet, and Raspberry Pi OS is only based on Debian bookworm (released in 2023) and very explicitly does not support a key Debian feature: you can’t upgrade from one Raspberry Pi OS release to the next, so it’s a complete reinstall every 2 years instead of just an upgrade. OrangePiOS only supports Debian bookworm — but notably, their kernel is mostly stuck at 5.10 for every image they have (bookworm shipped with 6.1 and bookworm-backports supports 6.12).
Radxa has a page on running Debian on one specific board, they seem to actually not support Debian directly, but rather their fork Radxa OS. There’s a different installer for every board; for instance, this one for the Rock 4D. Looking at it, I can see that it uses files from here and here, with custom kernel, gstreamer, u-boot, and they put zfs in main for some reason.
From Pine64, the Quartz64 seems to be based on an ancient 4.6 or 4.19 kernel. Perhaps, though, one might be able to use Debian’s Pine A64+ instructions on it. Trixie doesn’t have a u-boot image for the Quartz64 but it does have device tree files for it.
RISC-V seems to be even worse; not only do we have this same issue there, but support in trixie is more limited and so is performance among the supported boards.
The alternative is x86-based mini PCs. There are a bunch based on the N100, N150, or Celeron. Many of them support AES-NI and the prices are roughly in line with the higher-end ARM units. There are some interesting items out there; for instance, the Radxa X4 SBC features both an N100 and a RP2040. Fanless mini PCs are available from a number of vendors. Companies like ZimaBoard have interesting options like the ZimaBlade also.
The difference in power is becoming less significant; it seems the newer ARM boards need 20W or 30W power supplies, and that may put them in the range of the mini PCs. As for cost, the newer ARM boards need a heat sink and fan, so by the time you add SBC, fan, storage, etc. you’re starting to get into the price range of the mini PCs.
It is great to see all the options of small SBCs with ARM and RISC-V processors, but at some point you’ve got to throw up your hands and go “this ecosystem has a lot of problems” and consider just going back to x86. I’m not sure if I’m quite there yet, but I’m getting close.
Update 2025-09-11: I found a performant encryption option for the Pi 4, but was stymied by serial console problems; see the update post.
btrfs on a Raspberry Pi 9 Sep 6:01 AM (last month)
I’m something of a filesystem geek, I guess. I first wrote about ZFS on Linux 14 years ago, and even before I used ZFS, I had used ext2/3/4, jfs, reiserfs, xfs, and no doubt some others.
I’ve also used btrfs. I last posted about it in 2014, when I noted it has some advantages over ZFS, but also some drawbacks, including a lot of kernel panics.
Since that comparison, ZFS has gained trim support and btrfs has stabilized. The btrfs status page gives you an accurate idea of what is good to use on btrfs.
Background: Moving towards ZFS and btrfs
I have been trying to move everything away from ext4 and onto either ZFS or btrfs. There are generally several reasons for that:
- The checksums for every block help detect potential silent data corruption
- Instant snapshots make consistent backups of live systems a lot easier, and without the hassle and wasted space of LVM snapshots
- Transparent compression and dedup can save a lot of space in storage-constrained environments
For any machine with at least 32GB of RAM (plus my backup server, which has only 8GB), I run ZFS. While it lacks some of the flexibility of btrfs, it has polish. zfs list -o space shows a useful space accounting. zvols can be behind VMs. With my project simplesnap, I can easily send hourly backups with ZFS, and I choose to send them over NNCP in most cases.
I have a few VMs in the cloud (running Debian, of course) that I use to host things like this blog, my website, my gopher site, the quux NNCP public relay, and various other things.
In these environments, storage space can be expensive. For that matter, so can RAM. ZFS is RAM-hungry, so that rules out ZFS. I’ve been running btrfs in those environments for a few years now, and it’s worked out well. I do async dedup, lzo or zstd compression depending on the needs, and the occasional balance and defrag.
Filesystems on the Raspberry Pi
I run Debian trixie on all my Raspberry Pis; not Raspbian or Raspberry Pi OS for a number of reasons. My 8-yr-old uses a Raspberry Pi 400 as her primary computer — and loves it! She doesn’t do web browsing, but plays Tuxpaint, some old DOS games like Math Blaster via dosbox, and uses Thunderbird for a locked-down email account.
But it was SLOW. Just really, glacially, slow, especially for Thunderbird.
My first step to address that was to get a faster MicroSD card to hold the OS. That was a dramatic improvement. It’s still slow, but a lot faster.
Then, I thought, maybe I could use btrfs with LZO compression to reduce the amount of I/O and speed things up further? Analysis showed things were mostly slow due to I/O, not CPU, constraints.
The conversion
Rather than use the btrfs in-place conversion from ext4, I opted to dar it up (like tar), run mkfs.btrfs on the SD card, then unpack the archive back onto it. Easy enough, right?
Well, not so fast. The MicroSD card is 128GB, and the entire filesystem is 6.2GB. But after unpacking 100MB onto it, I got an out of space error.
btrfs has this notion of block groups. By default, each block group is dedicated to either data or metadata. btrfs fi df and btrfs fi usage will show you details about the block groups.
btrfs allocates block groups greedily (the ssd_spread mount option I use may have exacerbated this). What happened was it allocated almost the entire drive to data block groups, trying to spread the data across it. It so happened that dar archived some larger files first (maybe /boot), so btrfs was allocating data and metadata blockgroups assuming few large files. But then it started unpacking one of the directories in /usr with lots of small files (maybe /usr/share/locale). It quickly filled up the metadata block group, and since the entire SD card had been allocated to different block groups, I got ENOSPC.
Deleting a few files and running btrfs balance resolved it; now it allocated 1GB to metadata, which was plenty. I re-ran the dar extract and now everything was fine. See more details on btrfs balance and block groups.
This was the only btrfs problem I encountered.
Benchmarks
I timed two things prior to switching to btrfs: how long it takes to boot (measured from the moment I turn on the power until the moment the XFCE login box is displayed), and how long it takes to start Thunderbird.
After switching to btrfs with LZO compression, somewhat to my surprise, both measures were exactly the same!
Why might this be?
It turns out that SD cards are understood to be pathologically bad with random read performance. Boot and Thunderbird both are likely doing a lot of small random reads, not large streaming reads. Therefore, it may be that even though I have reduced the total I/O needed, the impact is unsubstantial because the real bottleneck is the “seeks” across the disk.
Still, I gain the better backup support and silent data corruption prevention, so I kept btrfs.
SSD mount options and MicroSD endurance
btrfs has several mount options specifically relevant to SSDs. Aside from the obvious trim support, they are ssd and ssd_spread. The documentation on this is vague and my attempts to learn more about it found a lot of information that was outdated or unsubstantiated folklore.
Some reports suggest that “older” SSDs will benefit from ssd_spread, but that it may have no effect or even a harmful effect on newer ones, and can at times cause fragmentation or write amplification. I could find nothing to back this up, though. And it seems particularly difficult to figure out what kind of wear leveling SSD firmware does. MicroSD firmware is likely to be on the less-advanced side, but still, I have no idea what it might do. In any case, with btrfs not updating blocks in-place, it should be better than ext4 in the most naive case (no wear leveling at all) but may have somewhat more write traffic for the pathological worst case (frequent updates of small portions of large files).
One anecdotal report I read — and can’t find anymore, somehow — was from a person that had set up a sort of torture test for SD cards, with reports that ext4 lasted a few weeks or months before the MicroSDs failed, while btrfs lasted years.
If you are looking for a MicroSD card, by the way, The Great MicroSD Card Survey is a nice place to start.
For longevity: I mount all my filesystems with noatime already, so I continue to recommend that. You can also consider limiting the log size in /etc/systemd/journald.conf, running daily fstrim (which may be more successful than live trims in all filesystems).
Conclusion
I’ve been pretty pleased with btrfs. The concerns I have today relate to block groups and maintenance (periodic balance and maybe a periodic defrag). I’m not sure I’d be ready to say “put btrfs on the computer you send to someone that isn’t Linux-savvy” because the chances of running into issues are higher than with ext4. Still, for people that have some tech savvy, btrfs can improve reliability and performance in other ways.
Dreams of Late Summer 6 Sep 2:07 PM (last month)
Here on a summer night in the grass and lilac smell
Drunk on the crickets and the starry sky,
Oh what fine stories we could tell
With this moonlight to tell them by.A summer night, and you, and paradise,
So lovely and so filled with grace,
Above your head, the universe has hung its lights,
And I reach out my hand and touch your face.
I sit outside today, at the picnic table on our side porch. I was called out here; in late summer, the cicadas and insects of the plains are so loud that I can hear them from inside our old farmhouse.
I sit and hear the call and response of buzzing cicadas, the chirp of crickets during their intermission. The wind rustles off and on through the treetops. And now our old cat has heard me, and she comes over, spreading tan cat hair across my screen. But I don’t mind; I hear her purr as she comes over to relax nearby.
Aside from the gentle clack of my keyboard as I type, I hear no sounds of humans. Occasionally I hear the distant drone of a small piston airplane, and sometimes the faint horn of a train, 6 miles away.
As I look up, I see grass, the harvested wheat field, the trees, and our gravel driveway. Our road is on the other side of a hill. I see no evidence of it from here, but I know it’s there. Maybe 2 or 3 vehicles will pass on a day like today; if they’re tall delivery trucks, I’ll see their roof glide silently down the road, and know the road is there. The nearest paved road is several miles away, so not much comes out here.
I reflect of those times years ago, when this was grandpa’s house, and the family would gather on Easter. Grandpa hid not just Easter eggs, but Easter bags all over the yard. This yard. Here’s the tree that had a nice V-shaped spot to hide things in; there’s the other hiding spot.
I reflect on the wildlife. This afternoon, it’s the insects that I hear. On a foggy, cool, damp morning, the birds will be singing from all the trees, the fog enveloping me with unseen musical joy. On a quiet evening, the crickets chirp and the coyotes howl in the distance.
Now the old cat has found my lap. She sits there purring, tail swishing. 12 years ago when she was a kitten, our daughter hadn’t yet been born. She is old and limps, and is blind in one eye, but beloved by all. Perfectly content with life, she stretches and relaxes.
I have visited many wonderful cities in this world. I’ve seen Aida at the Metropolitan Opera, taken trains all over Europe, wandered the streets of San Francisco and Brussels and Lindos, visited the Christmas markets in the lightly-snowy evenings in Regensburg, felt the rumble of the Underground beneath me in London. But rarely do the city people come here.
Oh, some of them think they’ve visited the country. But no, my friends, no; if you don’t venture beyond the blacktop roads, you’ve not experienced it yet. You’ve not gone to a restaurant “in town”, recognized by several old friends. You’ve not stopped by the mechanic — the third generation of that family fixing cars that belong to yours — who more often than not tells you that you don’t need to fix that something just yet. You’ve not sat outside, in this land where regular people each live in their own quiet Central Park. You’ve not seen the sunset, with is majestic reds and oranges and purples and blues and grays, stretching across the giant iMax dome of the troposphere, suspended above the hills and trees to the west. You’ve not visited the grocery store, with your car unlocked and keys in the ignition, unconcerned about vehicle theft. You’ve not struggled with words when someone asks “what city are you from” and you lack the vocabulary to help them understand what it means when you say “none”.
Out there in the land of paved roads and bright lights, the problems of the world churn. The problems near and far: a physical and mental health challenges with people we know, global problems with politics and climate.
But here, this lazy summer afternoon, I forget about the land of the paved roads and bright lights. As it should be; they’ve forgotten the land of the buzzing cicadas and muddy roads.
I believe in impulse, in all that is green,
In the foolish vision that comes out true.
I believe that all that is essential is unseen,
And for this lifetime, I believe in you.All of the lovers and the love they made:
Nothing that was between them was a mistake.
All that we did for love’s sake,
Was not wasted and will never fade.All who have loved will be forever young
And walk in grandeur on a summer night
Along the avenue.They live in every song that is sung,
In every painting of pure light,
In every pas de deux.O love that shines from every star,
Love reflected in the silver moon;
It is not here, but it is not far.
Not yet, but it will be here soon.
No two days are alike. But this day comes whenever I pause to let it.
May you find the buzzing cicadas and muddy roads near you, wherever you may be.
Poetry from “A Summer Night” by Garrison Keillor
I Learned We All Have Linux Seats, and I’m Not Entirely Pleased 11 Jun 6:12 AM (4 months ago)
I recently wrote about How to Use SSH with FIDO2/U2F Security Keys, which I now use on almost all of my machines.
The last one that needed this was my Raspberry Pi hooked up to my DEC vt510 terminal and IBM mechanical keyboard. Yes I do still use that setup!
To my surprise, generating a key on it failed. I very quickly saw that /dev/hidraw0 had incorrect permissions, accessible only to root.
On other machines, it looks like this:
crw-rw----+ 1 root root 243, 16 May 24 16:47 /dev/hidraw16
And, if I run getfacl on it, I see:
# file: dev/hidraw16
# owner: root
# group: root
user::rw-
user:jgoerzen:rw-
group::---
mask::rw-
other::---
Yes, something was setting an ACL on it. Thus began to saga to figure out what was doing that.
Firing up inotifywatch, I saw it was systemd-udevd or its udev-worker. But cranking up logging on that to maximum only showed me that uaccess was somehow doing this.
I started digging. uaccess turned out to be almost entirely undocumented. People say to use it, but there’s no description of what it does or how. Its purpose appears to be to grant access to devices to those logged in to a machine by dynamically adding them to ACLs for devices. OK, that’s a nice goal, but why was machine A doing this and not machine B?
I dug some more. I came across a hint that uaccess may only do that for a “seat”. A seat? I’ve not heard of that in Linux before.
Turns out there’s some information (older and newer) about this out there. Sure enough, on the machine with KDE, loginctl list-sessions shows me on seat0, but on the machine where I log in from ttyUSB0, it shows an empty seat.
But how to make myself part of the seat? I tried various udev rules to add the “seat” or “master-of-seat” tags, but nothing made any difference.
I finally gave up and did the old-fashioned rule to just make it work already:
TAG=="security-device",SUBSYSTEM=="hidraw",GROUP="mygroup"
I still don’t know how to teach logind to add a seat for ttyUSB0, but oh well. At least I learned something. An annoying something, but hey.
This all had a laudable goal, but when there are so many layers of indirection, poorly documented, with poor logging, it gets pretty annoying.
How to Use SSH with FIDO2/U2F Security Keys 17 May 4:53 AM (5 months ago)
For many years now, I’ve been using an old YubiKey along with the free tier of Duo Security to add a second factor to my SSH logins. This is klunky, and has a number of drawbacks (dependency on a cloud service and Internet among them).
I decided it was time to upgrade, so I recently bought a couple of YubiKey 5 series security keys. These support FIDO2/U2F, which make it so much easier to integrate with ssh.
But in researching how to do this, I found a lot of pages online with poor instructions. Either they didn’t explain what was going on very well, or suggested what I came to learn were insecure practices, or — most often — both.
It turns out this whole process is quite easy. But I wanted to understand how it worked.
So, I figured it out, set it up myself, and then put up a new, comprehensive page on my website: https://www.complete.org/easily-using-ssh-with-fido2-u2f-hardware-security-keys/. I hope it helps!
Memoirs of the Early Internet 26 Apr 10:22 AM (5 months ago)
The Internet is an amazing place, and occasionally you can find things on the web that have somehow lingered online for decades longer than you might expect.
Today I’ll take you on a tour of some parts of the early Internet.
The Internet, of course, is a “network of networks” and part of its early (and continuing) promise was to provide a common protocol that all sorts of networks can use to interoperate with each other. In the early days, UUCP was one of the main ways universities linked with each other, and eventually UUCP and the Internet sort of merged (but that’s a long story).
Let’s start with some Usenet maps, which were an early way to document the UUCP modem links between universities. Start with this PDF. The first page is a Usenet map (which at the time mostly flowed over UUCP) from April of 1981. Notice that ucbvax, a VAX system at Berkeley, was central to the map.
ucbvax continued to be a central node for UUCP for more than a decade; on page 5 of that PDF, you’ll see that it asks for a “Path from a major node (eg, ucbvax, devcax, harpo, duke)”. Pre-Internet email addresses used a path; eg, mark@ucbvax was duke!decvax!ucbvax!mark to someone. You had to specify the route from your system to the recipient on your email To line. If you gave out your email address on a business card, you would start it from a major node like ucbvax, and the assumption was that everyone would know how to get from their system to the major node.
On August 19, 1994, ucbvax was finally turned off. TCP/IP had driven UUCP into more obscurity; by then, it was mostly used by people without a dedicated Internet connection to get on the Internet, rather than an entire communication network of its own. A few days later, Cliff Frost posted a memoir of ucbvax; an obscurbe bit of Internet lore that is fun to read.
UUCP was ad-hoc, and by 1984 there was an effort to make a machine-parsable map to help automate routing on UUCP. This was called the pathalias project, and there was a paper about it. The Linux network administration guide even includes a section on pathalias.
Because UUCP mainly flowed over phone lines, long distance fees made it quite expensive. In 1985, the Stargate Project was formed, with the idea of distributing Usenet by satellite. The satellite link was short-lived, but the effort eventually morphed into UUNET. It was initially a non-profit, but eventually became a commercial backbone provider, and later ISP. Over a long series of acquisitions, UUNET is now part of Verizon. An article in ;login: is another description of this history.
IAPS has an Internet in 1990 article, which includes both pathalias data and an interesting map of domain names to UUCP paths.
As I was pondering what interesting things a person could do with NNCPNET Internet email, I stumbled across a page on getting FTP files via e-mail. Yes, that used to be a thing! I remember ftpmail@decwrl.dec.com.
It turns out that page is from a copy of EFF’s (Extended) Guide to the Internet from 1994. Wow, what a treasure! It has entries such as A Slice of Life in my Virtual Community, libraries with telnet access, Gopher, A Statement of Principle by Bruce Sterling, and I could go on. You can also get it as a PDF from Internet Archive.
UUCP is still included with modern Linux and BSD distributions. It was part of how I experienced the PC and Internet revolution in rural America. It lacks modern security, but NNCP is to UUCP what ssh is to telnet.
NNCPNET Can Optionally Exchange Internet Email 25 Apr 5:01 PM (6 months ago)
A few days ago, I announced NNCPNET, the email network based atop NNCP. NNCPNET lets anyone run a real mail server on a network that supports all sorts of topologies for transport, from Internet to USB drives. And verification is done at the NNCP protocol level, so a whole host of Internet email bolt-ons (SPF, DMARC, DKIM, etc.) are unnecessary.
Shortly after announcing NNCPNET, I added an Internet bridge. This lets you get your own DOMAIN.nncpnet.org domain, and from there route email to and from the Internet using a gateway node. Simple, effective, and a way to get real email to and from your laptop or Raspberry Pi without having to have a static IP, SPF, DMARC, DKIM, etc.
It’s a volunteer-run, free, service. Give it a try!
Announcing the NNCPNET Email Network 9 Apr 4:52 PM (6 months ago)
From 1995 to 2019, I ran my own mail server. It began with a UUCP link, an expensive long-distance call for me then. Later, I ran a mail server in my apartment, then ran it as a VPS at various places.
But running an email server got difficult. You can’t just run it on a residential IP. Now there’s SPF, DKIM, DMARC, and TLS to worry about. I recently reviewed mail hosting services, and don’t get me wrong: I still use one, and probably will, because things like email from my bank are critical.
But we’ve lost the ability to tinker, to experiment, to have fun with email.
Not anymore. NNCPNET is an email system that runs atop NNCP. I’ve written a lot about NNCP, including a less-ambitious article about point-to-point email over NNCP 5 years ago. NNCP is to UUCP what ssh is to telnet: a modernization, with modern security and features. NNCP is an asynchronous, onion-routed, store-and-forward network. It can use as a transport anything from the Internet to a USB stick.
NNCPNET is a set of standards, scripts, and tools to facilitate a broader email network using NNCP as the transport. You can read more about NNCPNET on its wiki!
The “easy mode” is to use the Docker container (multi-arch, so you can use it on your Raspberry Pi) I provide, which bundles:
- Exim mail server
- NNCP
- Verification and routing tools I wrote. Because NNCP packets are encrypted and signed, we get sender verification “for free”; my tools ensure the From: header corresponds with the sending node.
- Automated nodelist tools; it will request daily nodelist updates and update its configurations accordingly, so new members can be communicated with
- Integration with the optional, opt-in Internet email bridge
It is open to all. The homepage has a more extensive list of features.
I even have mailing lists running on NNCPNET; see the interesting addresses page for more details.
There is extensive documentation, and of course the source to the whole thing is available.
The gateway to Internet SMTP mail is off by default, but can easily be enabled for any node. It is a full participant, in both directions, with SPF, DKIM, DMARC, and TLS.
You don’t need any inbound ports for any of this. You don’t need an always-on Internet connection. You don’t even need an Internet connection at all. You can run it from your laptop and still use Thunderbird to talk to it via its optional built-in IMAP server.
Why You Should (Still) Use Signal As Much As Possible 27 Mar 6:51 PM (6 months ago)
As I write this in March 2025, there is a lot of confusion about Signal messenger due to the recent news of people using Signal in government, and subsequent leaks.
The short version is: there was no problem with Signal here. People were using it because they understood it to be secure, not the other way around.
Both the government and the Electronic Frontier Foundation recommend people use Signal. This is an unusual alliance, and in the case of the government, was prompted because it understood other countries had a persistent attack against American telephone companies and SMS traffic.
So let’s dive in. I’ll cover some basics of what security is, what happened in this situation, and why Signal is a good idea.
This post isn’t for programmers that work with cryptography every day. Rather, I hope it can make some of these concepts accessible to everyone else.
What makes communications secure?
When most people are talking about secure communications, they mean some combination of these properties:
- Privacy - nobody except the intended recipient can decode a message.
- Authentication - guarantees that the person you are chatting with really is the intended recipient.
- Ephemerality - preventing a record of the communication from being stored. That is, making it more like a conversation around the table than a written email.
- Anonymity - keeping your set of contacts to yourself and even obfuscating the fact that communications are occurring.
If you think about it, most people care the most about the first two. In fact, authentication is a key part of privacy. There is an attack known as man in the middle in which somebody pretends to be the intended recipient. The interceptor reads the messages, and then passes them on to the real intended recipient. So we can’t really have privacy without authentication.
I’ll have more to say about these later. For now, let’s discuss attack scenarios.
What compromises security?
There are a number of ways that security can be compromised. Let’s think through some of them:
Communications infrastructure snooping
Let’s say you used no encryption at all, and connected to public WiFi in a coffee shop to send your message. Who all could potentially see it?
- The owner of the coffee shop’s WiFi
- The coffee shop’s Internet provider
- The recipient’s Internet provider
- Any Internet providers along the network between the sender and the recipient
- Any government or institution that can compel any of the above to hand over copies of the traffic
- Any hackers that compromise any of the above systems
Back in the early days of the Internet, most traffic had no encryption. People were careful about putting their credit cards into webpages and emails because they knew it was easy to intercept them. We have been on a decades-long evolution towards more pervasive encryption, which is a good thing.
Text messages (SMS) follow a similar path to the above scenario, and are unencrypted. We know that all of the above are ways people’s texts can be compromised; for instance, governments can issue search warrants to obtain copies of texts, and China is believed to have a persistent hack into western telcos. SMS fails all four of our attributes of secure communication above (privacy, authentication, ephemerality, and anonymity).
Also, think about what information is collected from SMS and by who. Texts you send could be retained in your phone, the recipient’s phone, your phone company, their phone company, and so forth. They might also live in cloud backups of your devices. You only have control over your own phone’s retention.
So defenses against this involve things like:
- Strong end-to-end encryption, so no intermediate party – even the people that make the app – can snoop on it.
- Using strong authentication of your peers
- Taking steps to prevent even app developers from being able to see your contact list or communication history
You may see some other apps saying they use strong encryption or use the Signal protocol. But while they may do that for some or all of your message content, they may still upload your contact list, history, location, etc. to a central location where it is still vulnerable to these kinds of attacks.
When you think about anonymity, think about it like this: if you send a letter to a friend every week, every postal carrier that transports it – even if they never open it or attempt to peak inside – will be able to read the envelope and know that you communicate on a certain schedule with that friend. The same can be said of SMS, email, or most encrypted chat operators. Signal’s design prevents it from retaining even this information, though nation-states or ISPs might still be able to notice patterns (every time you send something via Signal, your contact receives something from Signal a few milliseconds later). It is very difficult to provide perfect anonymity from well-funded adversaries, even if you can provide very good privacy.
Device compromise
Let’s say you use an app with strong end-to-end encryption. This takes away some of the easiest ways someone could get to your messages. But it doesn’t take away all of them.
What if somebody stole your phone? Perhaps the phone has a password, but if an attacker pulled out the storage unit, could they access your messages without a password? Or maybe they somehow trick or compel you into revealing your password. Now what?
An even simpler attack doesn’t require them to steal your device at all. All they need is a few minutes with it to steal your SIM card. Now they can receive any texts sent to your number - whether from your bank or your friend. Yikes, right?
Signal stores your data in an encrypted form on your device. It can protect it in various ways. One of the most important protections is ephemerality - it can automatically delete your old texts. A text that is securely erased can never fall into the wrong hands if the device is compromised later.
An actively-compromised phone, though, could still give up secrets. For instance, what if a malicious keyboard app sent every keypress to an adversary? Signal is only as secure as the phone it runs on – but still, it protects against a wide variety of attacks.
Untrustworthy communication partner
Perhaps you are sending sensitive information to a contact, but that person doesn’t want to keep it in confidence. There is very little you can do about that technologically; with pretty much any tool out there, nothing stops them from taking a picture of your messages and handing the picture off.
Environmental compromise
Perhaps your device is secure, but a hidden camera still captures what’s on your screen. You can take some steps against things like this, of course.
Human error
Sometimes humans make mistakes. For instance, the reason a reporter got copies of messages recently was because a participant in a group chat accidentally added him (presumably that participant meant to add someone else and just selected the wrong name). Phishing attacks can trick people into revealing passwords or other sensitive data. Humans are, quite often, the weakest link in the chain.
Protecting yourself
So how can you protect yourself against these attacks? Let’s consider:
- Use a secure app like Signal that uses strong end-to-end encryption where even the provider can’t access your messages
- Keep your software and phone up-to-date
- Be careful about phishing attacks and who you add to chat rooms
- Be aware of your surroundings; don’t send sensitive messages where people might be looking over your shoulder with their eyes or cameras
There are other methods besides Signal. For instance, you could install GnuPG (GPG) on a laptop that has no WiFi card or any other way to connect it to the Internet. You could always type your messages on that laptop, encrypt them, copy the encrypted text to a floppy disk (or USB device), take that USB drive to your Internet computer, and send the encrypted message by email or something. It would be exceptionally difficult to break the privacy of messages in that case (though anonymity would be mostly lost). Even if someone got the password to your “secure” laptop, it wouldn’t do them any good unless they physically broke into your house or something. In some ways, it is probably safer than Signal. (For more on this, see my article How gapped is your air?)
But, that approach is hard to use. Many people aren’t familiar with GnuPG. You don’t have the convenience of sending a quick text message from anywhere. Security that is hard to use most often simply isn’t used. That is, you and your friends will probably just revert back to using insecure SMS instead of this GnuPG approach because SMS is so much easier.
Signal strikes a unique balance of providing very good security while also being practical, easy, and useful. For most people, it is the most secure option available.
Signal is also open source; you don’t have to trust that it is as secure as it says, because you can inspect it for yourself. Also, while it’s not federated, I previously addressed that.
Government use
If you are a government, particularly one that is highly consequential to the world, you can imagine that you are a huge target. Other nations are likely spending billions of dollars to compromise your communications. Signal itself might be secure, but if some other government can add spyware to your phones, or conduct a successful phishing attack, you can still have your communications compromised.
I have no direct knowledge, but I think it is generally understood that the US government maintains communications networks that are entirely separate from the Internet and can only be accessed from secure physical locations and secure rooms. These can be even more secure than the average person using Signal because they can protect against things like environmental compromise, human error, and so forth. The scandal in March of 2025 happened because government employees were using Signal rather than official government tools for sensitive information, had taken advantage of Signal’s ephemerality (laws require records to be kept), and through apparent human error had directly shared this information with a reporter. Presumably a reporter would have lacked access to the restricted communications networks in the first place, so that wouldn’t have been possible.
This doesn’t mean that Signal is bad. It just means that somebody that can spend billions of dollars on security can be more secure than you. Signal is still a great tool for people, and in many cases defeats even those that can spend lots of dollars trying to defeat it.
And remember - to use those restricted networks, you have to go to specific rooms in specific buildings. They are still not as convenient as what you carry around in your pocket.
Conclusion
Signal is practical security. Do you want phone companies reading your messages? How about Facebook or X? Have those companies demonstrated that they are completely trustworthy throughout their entire history?
I say no. So, go install Signal. It’s the best, most practical tool we have.
This post is also available on my website, where it may be periodically updated.
Censorship Is Complicated: What Internet History Says about Meta/Facebook 8 Jan 5:59 AM (9 months ago)
In light of this week’s announcement by Meta (Facebook, Instagram, Threads, etc), I have been pondering this question: Why am I, a person that has long been a staunch advocate of free speech and encryption, leery of sites that talk about being free speech-oriented? And, more to the point, why an I — a person that has been censored by Facebook for mentioning the Open Source social network Mastodon — not cheering a “lighter touch”?
The answers are complicated, and take me back to the early days of social networking. Yes, I mean the 1980s and 1990s.
Before digital communications, there were barriers to reaching a lot of people. Especially money. This led to a sort of self-censorship: it may be legal to write certain things, but would a newspaper publish a letter to the editor containing expletives? Probably not.
As digital communications started to happen, suddenly people could have their own communities. Not just free from the same kinds of monetary pressures, but free from outside oversight (parents, teachers, peers, community, etc.) When you have a community that the majority of people lack the equipment to access — and wouldn’t understand how to access even if they had the equipment — you have a place where self-expression can be unleashed.
And, as J. C. Herz covers in what is now an unintentional history (her book Surfing on the Internet was published in 1995), self-expression WAS unleashed. She enjoyed the wit and expression of everything from odd corners of Usenet to the text-based open world of MOOs and MUDs. She even talks about groups dedicated to insults (flaming) in positive terms.
But as I’ve seen time and again, if there are absolutely no rules, then whenever a group gets big enough — more than a few dozen people, say — there are troublemakers that ruin it for everyone. Maybe it’s trolling, maybe it’s vicious attacks, you name it — it will arrive and it will be poisonous.
I remember the debates within the Debian community about this. Debian is one of the pillars of the Internet today, a nonprofit project with free speech in its DNA. And yet there were inevitably the poisonous people. Debian took too long to learn that allowing those people to run rampant was causing more harm than good, because having a well-worn Delete key and a tolerance for insults became a requirement for being a Debian developer, and that drove away people that had no desire to deal with such things. (I should note that Debian strikes a much better balance today.)
But in reality, there were never absolutely no rules. If you joined a BBS, you used it at the whim of the owner (the “sysop” or system operator). The sysop may be a 16-yr-old running it from their bedroom, or a retired programmer, but in any case they were letting you use their resources for free and they could kick you off for any or no reason at all. So if you caused trouble, or perhaps insulted their cat, you’re banned. But, in all but the smallest towns, there were other options you could try.
On the other hand, sysops enjoyed having people call their BBSs and didn’t want to drive everyone off, so there was a natural balance at play. As networks like Fidonet developed, a sort of uneasy approach kicked in: don’t be excessively annoying, and don’t be easily annoyed. Like it or not, it seemed to generally work. A BBS that repeatedly failed to deal with troublemakers could risk removal from Fidonet.
On the more institutional Usenet, you generally got access through your university (or, in a few cases, employer). Most universities didn’t really even know they were running a Usenet server, and you were generally left alone. Until you did something that annoyed somebody enough that they tracked down the phone number for your dean, in which case real-world consequences would kick in. A site may face the Usenet Death Penalty — delinking from the network — if they repeatedly failed to prevent malicious content from flowing through their site.
Some BBSs let people from minority communities such as LGBTQ+ thrive in a place of peace from tormentors. A lot of them let people be themselves in a way they couldn’t be “in real life”. And yes, some harbored trolls and flamers.
The point I am trying to make here is that each BBS, or Usenet site, set their own policies about what their own users could do. These had to be harmonized to a certain extent with the global community, but in a certain sense, with BBSs especially, you could just use a different one if you didn’t like what the vibe was at a certain place.
That this free speech ethos survived was never inevitable. There were many attempts to regulate the Internet, and it was thanks to the advocacy of groups like the EFF that we have things like strong encryption and a degree of freedom online.
With the rise of the very large platforms — and here I mean CompuServe and AOL at first, and then Facebook, Twitter, and the like later — the low-friction option of just choosing a different place started to decline. You could participate on a Fidonet forum from any of thousands of BBSs, but you could only participate in an AOL forum from AOL. The same goes for Facebook, Twitter, and so forth. Not only that, but as social media became conceived of as very large sites, it became impossible for a person with enough skill, funds, and time to just start a site themselves. Instead of neading a few thousand dollars of equipment, you’d need tens or hundreds of millions of dollars of equipment and employees.
All that means you can’t really run Facebook as a nonprofit. It is a business. It should be absolutely clear to everyone that Facebook’s mission is not the one they say it is — “[to] give people the power to build community and bring the world closer together.” If that was their goal, they wouldn’t be creating AI users and AI spam and all the rest. Zuck isn’t showing courage; he’s sucking up to Trump and those that will pay the price are those that always do: women and minorities.
Really, the point of any large social network isn’t to build community. It’s to make the owners their next billion. They do that by convincing people to look at ads on their site. Zuck is as much a windsock as anyone else; he will adjust policies in whichever direction he thinks the wind is blowing so as to let him keep putting ads in front of eyeballs, and stomp all over principles — even free speech — doing it. Don’t expect anything different from any large commercial social network either. Bluesky is going to follow the same trajectory as all the others.
The problem with a one-size-fits-all content policy is that the world isn’t that kind of place. For instance, I am a pacifist. There is a place for a group where pacifists can hang out with each other, free from the noise of the debate about pacifism. And there is a place for the debate. Forcing everyone that signs up for the conversation to sign up for the debate is harmful. Preventing the debate is often also harmful. One company can’t square this circle.
Beyond that, the fact that we care so much about one company is a problem on two levels. First, it indicates how succeptible people are to misinformation and such. I don’t have much to offer on that point. Secondly, it indicates that we are too centralized.
We have a solution there: Mastodon. Mastodon is a modern, open source, decentralized social network. You can join any instance, easily migrate your account from one server to another, and so forth. You pick an instance that suits you. There are thousands of others you can choose from. Some aggressively defederate with instances known to harbor poisonous people; some don’t.
And, to harken back to the BBS era, if you have some time, some skill, and a few bucks, you can run your own Mastodon instance.
Personally, I still visit Facebook on occasion because some people I care about are mainly there. But it is such a terrible experience that I rarely do. Meta is becoming irrelevant to me. They are on a path to becoming irrelevant to many more as well. Maybe this is the moment to go “shrug, this sucks” and try something better.
(And when you do, feel free to say hi to me at @jgoerzen@floss.social on Mastodon.)
Review of Reputable, Functional, and Secure Email Service 16 May 2024 9:42 AM (last year)
I last reviewed email services in 2019. That review focused a lot of attention on privacy. At the time, I selected mailbox.org as my provider, and have been using them for these 5 years since. However, both their service and their support have gone significantly downhill since, so it is time for me to look at other options.
Here I am focusing strongly on email. Some of the providers mentioned here provide other services (IM, video calls, groupware, etc.), and to the extent they do, I am ignoring them.
What Matters in 2024
I want to start off by acknowledging that what you need in email probably depends on your circumstances and the country in which you live. For me, I begin by naming that the largest threat most of us face isn’t from state actors but from criminals: hackers, ransomware gangs, etc. It is important to take as many steps as possible to secure one’s account against that. Privacy and security are both part of the mix. I still value privacy but I am acknowledging, as Migadu does, that “Email as we know it and encryption are incompatible.” Although some of these services strongly protect parts of the conversation, the reality is that most people will be emailing people using plain old email services which don’t. For stronger security, something like Signal would be needed. (I wrote about Signal in 2021 also.)
Interestingly, OpenPGP support seems to be something of a standard feature in the providers I reviewed by this point. All or almost all of them provide integration with browser-based encryption as well as server-side encryption if you prefer that.
Although mailbox.org can automatically PGP-encrypt every message that arrives in plaintext, for general use, this is unwieldy; there isn’t good tooling for searching mailboxes where every message is encrypted, etc. So I never enabled that feature at Mailbox. I still value security and privacy, but a pragmatic approach addresses the most pressing threats first.
My criteria
The basic requirements for an email service include:
- Ability to use my own domains
- Strong privacy policy
- Ability for me to use my own IMAP and SMTP clients on both desktop and mobile
- It must be extremely reliable
- It must not be free
- It must have excellent support for those rare occasions when it is needed
- Support for basic aliases
Why do I say it must not be free? Because if someone is providing a service with the quality I’m talking about here, and not charging for it, it implies something is fishy: either they are unscrupulous, are financially unstable, or the product is something else like ads. I am not aware of any provider that matches the other criteria with a free account anyhow. These providers range from about $30 to $90 per year, so cheaper than a Netflix subscription.
Immediately, this rules out several options:
- Proton doesn’t let me use my own clients on mobile (their bridge is desktop-only)
- Tuta also doesn’t let me use my own clients
- Posteo doesn’t let me use my own domain
- mxroute.com lacks a strong privacy policy, and its policy has numerous causes for concern (for instance, “If you repeatedly send email to invalid/unroutable recipients, they may be published on our GitHub”)
I will have a bit more to say about a couple of these providers below.
There are some additional criteria that are strongly desired but not absolutely required:
- Ability to set individual access passwords for every device/app
- Support for two-factor authentication (2FA/TFA/TOTP) for web-based access
- Support for basics in filtering: ability to filter on envelope recipient (so if I get BCC’d, I can still filter), and ability to execute more than one action on filter match (eg, deliver to two folders, or deliver to a folder and forward to someone else)
IMAP and SMTP don’t really support 2FA, so by setting individual passwords for every device, you can at least limit the blast radius and cut off a specific device if something is (or might be) compromised.
The candidates
I considered these providers: Startmail, Mailfence, Runbox, Fastmail, Kolab, Mailbox.org, and Migadu. I’ll review each, and highlight the pricing of the plan I would most likely use. Each provider offers multiple plans; some may be more expensive and some may be cheaper than the one I reviewed. I included a link to each provider’s full pricing information so you can compare for your needs.
I set up trials with each of these (except Mailbox.org, with which I already had a paid account). It so happend that I had actual questions for support for each one, which gave me an opportunity to see how support responded. I did not fabricate questions, and would not have contacted support if I didn’t have real ones. (This means that I asked different questions of each provider, because they were the REAL questions I had.) I’ll jump to the spoiler right now: I eventually chose Migadu, with Fastmail and Mailfence as close seconds.
I looked for providers myself, and also solicited recommendations in a Mastodon thread.
Mailbox.org
I begin with Mailbox, as it was my top choice in 2019 and the incumbent.
Until this year, I had been quite happy with it. I had cause to reach their support less than once a year on average, and each time they replied the same day or next day. Now, however, they are failing on reliability and on support.
Their spam filter has become overly aggressive. It has blocked quite a bit of legitimate mail. When contacting their support about a prior issue earlier this year, they initially took 4 days to reply, and then 6 days to reply after that. Ouch. They had me disable some spam settings.
It didn’t really help. I continue to lose mail. I don’t know how much, because they block a lot of it before it even hits the spam folder. One of my friends texted to say mail was dropping. I raised a new ticket with mailbox, which took them 5 days to reply to. Their reply was unhelpful. “As the Internet is not a static system, unforeseen events can always occur.” Well yes, that’s true, and I get it, false positives exist with email. But this was from an ISP’s mail system with an address that had been established for years, and it was part of a larger pattern of rejecting quite a bit of legit mail. And every interaction with them recently hasn’t resulted in them actually doing anything to resolve anything. It’s just a paragraph or two of reply that does nothing and helps nothing.
When I complained that it took 5 days to reply, they said “We have not been able to reply sooner as we are currently experiencing a high volume of customer enquiries.” Even though their SLA for my account is a not-great “48 business hour” turnaround, they still missed it and their reason is “we’re busy.” I finally asked what RBL had caught the blocked email, since when I checked, the sender wasn’t on any RBL. Mailbox’s reply: they only keep their logs for 7 days, so next time I should contact them within 7 days. Which, of course, I DID; it was them that kept delaying. Ugh! It’s like they’ve become a cable company.
Even worse is how they have been blocking mail from GrapheneOS’s discussion form. See their thread about it. In short, Graphene’s mail server has a clean reputation and Mailbox has no problem with it. But because one of Graphene’s IPv6 webservers has an IPv6 allocation of a size Mailbox doesn’t like, they drop mail. It’s ridiculous, and Mailbox was dismissive of this well-known and well-regarded Open Source project. So if the likes of GrapheneOS can’t get good faith effort to deliver their mail, what chance does an individual like me have?
I’m sorry, but I’m literally paying you to deliver email for me and provide good support. If you can’t do either of those, you don’t get to push that problem down onto me. Hire appropriate staff.
On the technical side, they support aliases, my own clients, and have a reasonable privacy policy. Their 2FA support exists for the web interface (though weirdly not the support site), though it is somewhat weird. They do not support app passwords.
A somewhat unique feature is the @secure.mailbox.org domain. If you try to receive mail at that address, mailbox.org will block it unless it uses TLS. Same for sending. This isn’t E2EE, but it does at least require things not be in plaintext for the last hop to Mailbox.
Verdict: not recommended due to poor reliability and support.
Mailbox.Org summary:
- Website: https://mailbox.org/en/
- Reliability: iffy due to over-aggressive spam filtering
- Support: Poor; takes 4-6 days for a reply and replies are unhelpful
- Individual access passwords: No
- 2FA: Yes, but with a PIN instead of a password as the other factor
- Filtering: Full SIEVE feature set and GUI editor
- Spam settings: greylisting on/off, reject some/all spam, etc. But they’re insufficient to address Mailbox’s overzealousness, which support says I cannot workaround within the interface.
- Server storage location: Germany
- Plan as reviewed: standard [pricing link]
- Cost per year: EUR 30 (about $33)
- Mail storage included: 10GB
- Limits on send/receive volume: none
- Aliases: 50 on your domain name, 25 on mailbox.org
- Additional mailboxes: Available; each one at the same fee as the primary mailbox
Startmail
I really wanted to like Startmail. Its “vault” is an interesting idea and should contribute to the security and privacy of an account. They clearly care about privacy.
It falls down in filtering. They have no way to filter on envelope recipient (BCC or similar). Their support confirmed this to me and that’s a showstopper.
Startmail support was also as slow as Mailbox, taking 5 days to respond to me.
Two showstoppers right there.
Verdict: Not recommended due to slow support responsiveness and weak filtering.
Startmail summary:
- Website: https://www.startmail.com/
- Reliability: Seems to be fine
- Support: Mediocre; Took 5 days for a reply, but the reply was helpful
- Individual app access passwords: Yes
- 2FA: Yes
- Filtering: Poor; cannot filter on envelope recipient, and can’t build filters with multiple actions
- Spam settings: None
- Server storage location: The Netherlands
- Plan as reviewed: Custom domain (trial was Personal), [pricing link]
- Cost per year: $70
- Mail storage included: 20GB
- Limits on send/receive volume: none
- Aliases: unlimited, with lots of features: can set expiration, etc.
- Additional mailboxes: not available
Kolab
Kolab Now is mainly positioned as a full groupware service, but they do have a email-only option which I investigated. There isn’t much documentation about it compared to other providers, and also not much in the way of settings. You can turn greylisting on or off. And…. that’s it.
It has a full suite of filtering options. They set an X-Envelope-To header which you can use with the arbitrary header match to do the right thing even for BCC situations. Filters can have multiple conditions and multiple actions. It is SIEVE-based and you can download your SIEVE definitions.
If you enable 2FA, you disable IMAP and SMTP; not great.
Verdict: Not an impressive enough email featureset to justify going with it.
Kolab Now summary:
- Website: https://kolabnow.com/
- Reliability: Seems to be fine
- Support: Fine responsiveness (next day)
- Invidiaul app passwords: no
- 2FA: Yes, but if you enable it, they disable IMAP and SMTP
- Filtering: Excellent
- Spam settings: Only greylisting on/off
- Server storage location: Switzerland; they have lots of details on their setup
- Plan as reviewed: “Just email” [pricing link]
- Cost per year: CHF 60, about $66
- Mail storage included: 5GB
- Limitations on send/receive volume: None
- Aliases: Yes. Not sure if there are limits.
- Additional mailboxes: Yes if you set up a group account. “Flexible pricing based on user count” is not documented anywhere I could find.
Mailfence
Mailfence is another option, somewhat similar to Startmail but without the unique vault. I had some questions about filters, and support was quite responsive, responding in a couple of hours.
Some of their copy on their website is a bit misleading, but support clarified when I asked them. They do not offer encryption at rest (like most of the entries here).
Mailfence’s filtering system is the kind I’d like to see. It allows multiple conditions and multiple actions for each rule, and has some unique actions as well (notify by SMS or XMPP). Support says that “Recipients” matches envelope recipients. However, one ommission is that I can’t match on arbitrary headers; only the canned list of headers they provide.
They have only two spam settings:
- spam filter on/off
- whitelist
Given some recent complaints about their spam filter being overly aggressive, I find this lack of control somewhat concerning. (However, I discount complaints about people begging for more features in free accounts; free won’t provide the kind of service I’m looking for with any provider.) There are generally just very few settings for email as well.
Verdict: Response and helpful support, filtering has the right structure but lacks arbitrary header match. Could be a good option.
Mailfence summary:
- Website: https://mailfence.com/
- Reliability: Seems to be fine
- Support: Excellent responsiveness and helpful replies (after some initial confusion about my question of greylisting)
- Individual app access passwords: No. You can set a per-service password (eg, an IMAP password), but those will be shared with all devices speaking that protocol.
- 2FA: Yes
- Filtering: Good; only misses the ability to filter on arbitrary headers
- Spam settings: Very few
- Server storage location: Belgium
- Plan as reviewed: Entry [pricing link]
- Cost per year: $42
- Mail storage included: 10GB, with a maximum of 50,000 messages
- Limits on send/receive volume: none
- Aliases: 50. Aliases can’t be deleted once created (there may be an exeption to this for aliases on your own domain rather than mailfence.com)
- Additional mailboxes: Their page on this is a bit confusing, and the pricing page lacks the information promised. It looks like you can pay the same $42/year for additional mailboxes, with a limit of up to 2 additional paid mailboxes and 2 additional free mailboxes tied to the account.
Runbox
This one came recommended in a Mastodon thread. I had some questions about it, and support response was fantastic – I heard from two people that were co-founders of the company! Even within hours, on a weekend. Incredible! This kind of response was only surpassed by Migadu.
I initially wrote to Runbox with questions about the incoming and outgoing message limits, which I hadn’t seen elsewhere, as well as the bandwidth limit. They said the bandwidth limit is no longer enforced on paid accounts. The incoming and outgoing limits are enforced, and all email (even spam) counts towards the limit. Notably the outgoing limit is per recipient, so if you send 10 messages to your 50-recipient family group, that’s the limit. However, they also indicated a willingness to reset the limit if something happens. Unfortunately, hitting the limit results in a hard bounce (SMTP 5xx) rather than a temporary failure (SMTP 4xx) so it can result in lost mail. This means I’d be worried about some attack or other weirdness causing me to lose mail.
Their filter is a pain point. Here are the challenges:
- You can’t directly match on a BCC recipient. Support advised to use a “headers” match, which will search for something anywhere in the headers. This works and is probably “good enough” since this data is in the Received: headers, but it is a little more imprecise.
- They only have a “contains”, not an “equals” operator. So, for instance, a pattern searching for “test@example.com” would also match “newtest@example.com”. Support advised to put the email address in angle brackets to avoid this. That will work… mostly. Angle brackets aren’t always required in headers.
- There is no way to have multiple actions on the filter (there is just no way to file an incoming message into two folders). This was the ultimate showstopper for me.
Support advised they are planning to upgrade the filter system in the future, but these are the limitations today.
Verdict: A good option if you don’t need much from the filtering system. Lots of privacy emphasis.
Runbox summary:
- Website: https://runbox.com/
- Reliability: Seems to be fine, except returning 5xx codes if per-day limits are exceeded
- Support: Excellent responsiveness and replies from founders
- Individual app passwords: Yes
- 2FA: Yes
- Filtering: Poor
- Spam settings: Very few
- Server storage location: Norway
- Plan as reviewed: Mini [pricing link]
- Cost per year: $35
- Mail storage included: 10GB
- Limited on send/receive volume: Receive 5000 messages/day, Send 500 recipients/day
- Aliases: 100 on runbox.com; unlimited on your own domain
- Additional mailboxes: $15/yr each, also with 10GB non-shared storage per mailbox
Fastmail
Fastmail came recommended to me by a friend I’ve known for decades.
Here’s the thing about Fastmail, compared to all the services listed above: It all just works. Everything. Filtering, spam prevention, it is all there, all feature-complete, and all just does the right thing as you’d hope. Their filtering system has a canned dropdown for “To/Cc/Bcc”, it supports multiple conditions and multiple actions, and just does the right thing. (Delivering to multiple folders is a little cumbersome but possible.) It has a particularly strong feature set around administering multiple accounts, including things like whether users can prevent admins from reading their mail.
The not-so-great part of the picture is around privacy. Fastmail is based in Australia, where the government has extensive power around spying on data, even to the point of forcing companies to add wiretap capabilities. Fastmail’s privacy policy states user data may be held in Australia, USA, India, and Netherlands. By default, they share data with unidentified “spam companies”, though you can disable this in settings. On the other hand, they do make a good effort towards privacy.
I contacted support with some questions and got back a helpful response in three hours. However, one of the questions was about in which countries my particular data would be stored, and the support response said they would have to get back to me on that. It’s been several days and no word back.
Verdict: A featureful option that “just works”, with a lot of features for managing family accounts and the like, but lacking in the privacy area.
Fastmail summary:
- Website: https://www.fastmail.com/
- Reliability: Seems to be fine
- Support: Good response time on most questions; dropped the ball on one tha trequired research
- Individual app access passwords: Yes
- 2FA: Yes
- Filtering: Excellent
- Spam settings: Can set filter aggressiveness, decide whether to share spam data with “spam-fighting companies”, configure how to handle backscatter spam, and evaluate the personal learning filter.
- Server storage locations: Australia, USA, India, and The Netherlands. Legal jurisdiction is Australia.
- Plan as reviewed: Individual [pricing link]
- Cost per year: $60
- Mail storage included: 50GB
- Limits on send/receive volume: 300/hour
- Aliases: Unlimited from what I can see
- Additional mailboxes: No; requires a different plan for that
Migadu
Migadu was a service I’d never heard of, but came recommended to me on Mastodon.
I listed Migadu last because it is a class of its own compared to all the other options. Every other service is basically a webmail interface with a few extra settings tacked on.
Migadu has a full-featured email admin console in addition. By that I mean you can:
- View usage graphs (incoming, outgoing, storage) over time
- Manage DNS (if you want Migadu to run your nameservers)
- Manage multiple domains, and cross-domain relationships with mailboxes
- View a limited set of logs
- Configure accounts, reset their passwords if needed/authorized, etc.
- Configure email address rewrite rules with wildcards and so forth
Basically, if you were the sort of person that ran your own mail servers back in the day, here is Migadu giving you most of that functionality. Effectively you have a web interface to do all the useful stuff, and they handle the boring and annoying bits. This is a really attractive model.
Migadu support has been fantastic. They are quick to respond, and went above and beyond. I pointed out that their X-Envelope-To header, which is needed for filtering by BCC, wasn’t being added on emails I sent myself. They replied 5 hours later indicating they had added the feature to add X-Envelope-To even for internal mails! Wow! I am impressed.
With Migadu, you buy a pool of resources: storage space and incoming/outgoing traffic. What you do within that pool is up to you. You can set up users (“mailboxes”), aliases, domains, whatever you like. It all just shares the pool. You can restrict users further so that an individual user has access to only a subset of the pool resources.
I was initially concerned about Migadu’s daily send/receive message count limits, but in visiting with support and reading the documentation, what really comes out is that Migadu is a service with a personal touch. Hitting the incoming traffic limit will cause a SMTP temporary fail (4xx) response so you won’t lose legit mail – and support will work with you if it’s a problem for legit uses. In other words, restrictions are “soft” and they are interpreted reasonably.
One interesting thing about Migadu is that they do not offer accounts under their domain. That is, you MUST bring your own domain. That’s pretty easy and cheap, of course. It also puts you in a position of power, because it is easy to migrate email from one provider to another if you own the domain.
Filtering is done via SIEVE. There is a GUI editor which lets you accomplish most things, though it has an odd blind spot where you can’t file a message into multiple folders. However, you can edit a SIEVE ruleset directly and you get the full SIEVE featureset, which is extensive (and does support filing a message into multiple folders). I note that the SIEVE :envelope match doesn’t work, but Migadu adds an X-Envelope-To header which is just as good.
I particularly love a company that tells you all the reasons you might not want to use them. Migadu’s pro/con list is an honest drawbacks list (of course, their homepage highlights all the features!).
Verdict: Fantastically powerful, excellent support, and good privacy. I chose this one.
Migadu summary:
- Website: https://migadu.com/
- Reliability: Excellent
- Support: Fantastic. Good response times and they added a feature (or fixed a bug?) a few hours after I requested it.
- Individual access passwords: Yes. Create “identities” to support them.
- 2FA: Yes, on both the admin interface and the webmail interface
- Filtering: Excellent, based on SIEVE. GUI editor doesn’t support multiple actions when filing into a folder, but full SIEVE functionality is exposed.
- Spam settings:
- On the domain level, filter aggressiveness, Greylisting on/off, black and white lists
- On the mailbox level, filter aggressiveness, black and whitelists, action to take with spam; compatible with filters.
- Server storage location: France; legal jurisdiction Switzerland
- Plan as reviewed: mini [pricing link]
- Cost per year: $90
- Mail storage included: 30GB (“soft” quota)
- Limits on send/receive volume: 1000 messgaes in/day, 100 messages out/day (“soft” quotas)
- Aliases: Unlimited on an unlimited number of domains
- Additional mailboxes: Unlimited and free; uses pooled quotas, but individual quotas can be set
Others
Here are a few others that I didn’t think worthy of getting a trial:
- mxroute was recommended by several. Lots of concerning things in their policy, such as:
- if you repeatedly send mail to unroutable recipients, they may publish the addresses on Github
- they will terminate your account if they think you are “rude” or want to contest a charge
- they reserve the right to cancel your service at any time for any (or no) reason.
- Proton keeps coming up, and I will not consider it so long as I am locked into their client on mobile.
- Skiff comes up sometimes, but they were acquired by Notion.
- Disroot comes up; this discussion highlights a number of reasons why I avoid them. Their Terms of Service (ToS) is inconsistent with a general-purpose email account (I guess for targeting nonprofits and activists, that could make sense). Particularly laughable is that they claim to be friends of Open Source, but then would take down your account if you upload “copyrighted” material. News flash: in order for an Open Source license to be meaningful, the underlying work is copyrighted. It is perfectly legal to upload copyrighted material when you wrote it or have the license to do so!
Conclusions
There are a lot of good options for email hosting today, and in particular I appreciate the excellent personal support from companies like Migadu and Runbox. Support small businesses!
Photographic comparison: Is the Kobo Libra Colour display worse than the Kobo Libra 2? 7 May 2024 2:16 PM (last year)
I’ve been using E Ink-based ereaders for quite a number of years now. I’ve had my Kobo Libra 2 for a few years, and was looking forward to the Kobo Libra Colour — the first color E Ink display in a mainstream ereader line.
I found the display to be a mixed bag; contrast seemed a lot worse on B&W images, and the device “backlight” (it’s not technically a “back” light) seemed to cause a particular contrast reduction in dark mode. I went searching for information on this. I found a lot of videos on “Kobo Libra 2 vs Libra Colour” and so forth, but they were all pretty much useless. These were the mistakes they made:
- Being videos. Photos would show the differences in better detail.
- Shooting videos with cameras with automatic light levels. Since the thing we’re trying to evaluate here is how much darker the Kobo Libra Colour screen is than the Kobo Libra screen, having a camera that automatically adjusts for brighter or darker images defeats the purpose. Cell phone cameras (still and video) all do this by default and I saw evidence of it in all the videos.
- Placing the two devices side-by-side instead of in identical locations for subsequent shots. This led to different shadows on each device (because OF COURSE the people shooting videos had to have their phone and head between the light source and the device), again preventing a good comparison.
So I dug out my Canon DSLR, tripod, and set up shots. Every shot here is set at ISO 100. Every shot in the same setting has the same exposure settings, which I document. The one thing I forgot to shut off was automatic white balance; you can notice it is active if you look closely at the backgrounds, but WB isn’t really relevant to this comparison anyhow.
Because there has also been a lot of concern about how well fine B&W details will show up on the Kobo Libra Colour screen, I shot all photos using a PDF test image from the open source hplip package (testpage.ps.gz converted to PDF). This also rules out font differences between the devices. I ensured a full screen refresh before each shot.
This is all because color E Ink is effectively a filter called Kaleido over the B&W layer. This causes dimming and some other visual effects.
You can click on any image here to see a full-resolution view. The full-size images are the exact JPEG coming from the camera, with only two modifications: 1) metadata has been redacted for privacy reasons, and 2) some images were losslessly rotated after the shoot.
OK, onwards!
Outdoors, bright sun, shot from directly overhead
Bright sun is ideal lighting for an E Ink display. They need no lighting at all in this scenario, and in fact, if you turn on their internal display light, it will probably not be very noticeable. Of course, this is in contrast to phone LCD screens, for which bright sunlight is the worst.
Scene: Morning sunlight reaching the ereaders at an angle. The angle was sufficient so that no shadows were cast by the camera or tripod.
Device light: Off on both
Exposure: 1/160, f16, ISO 100
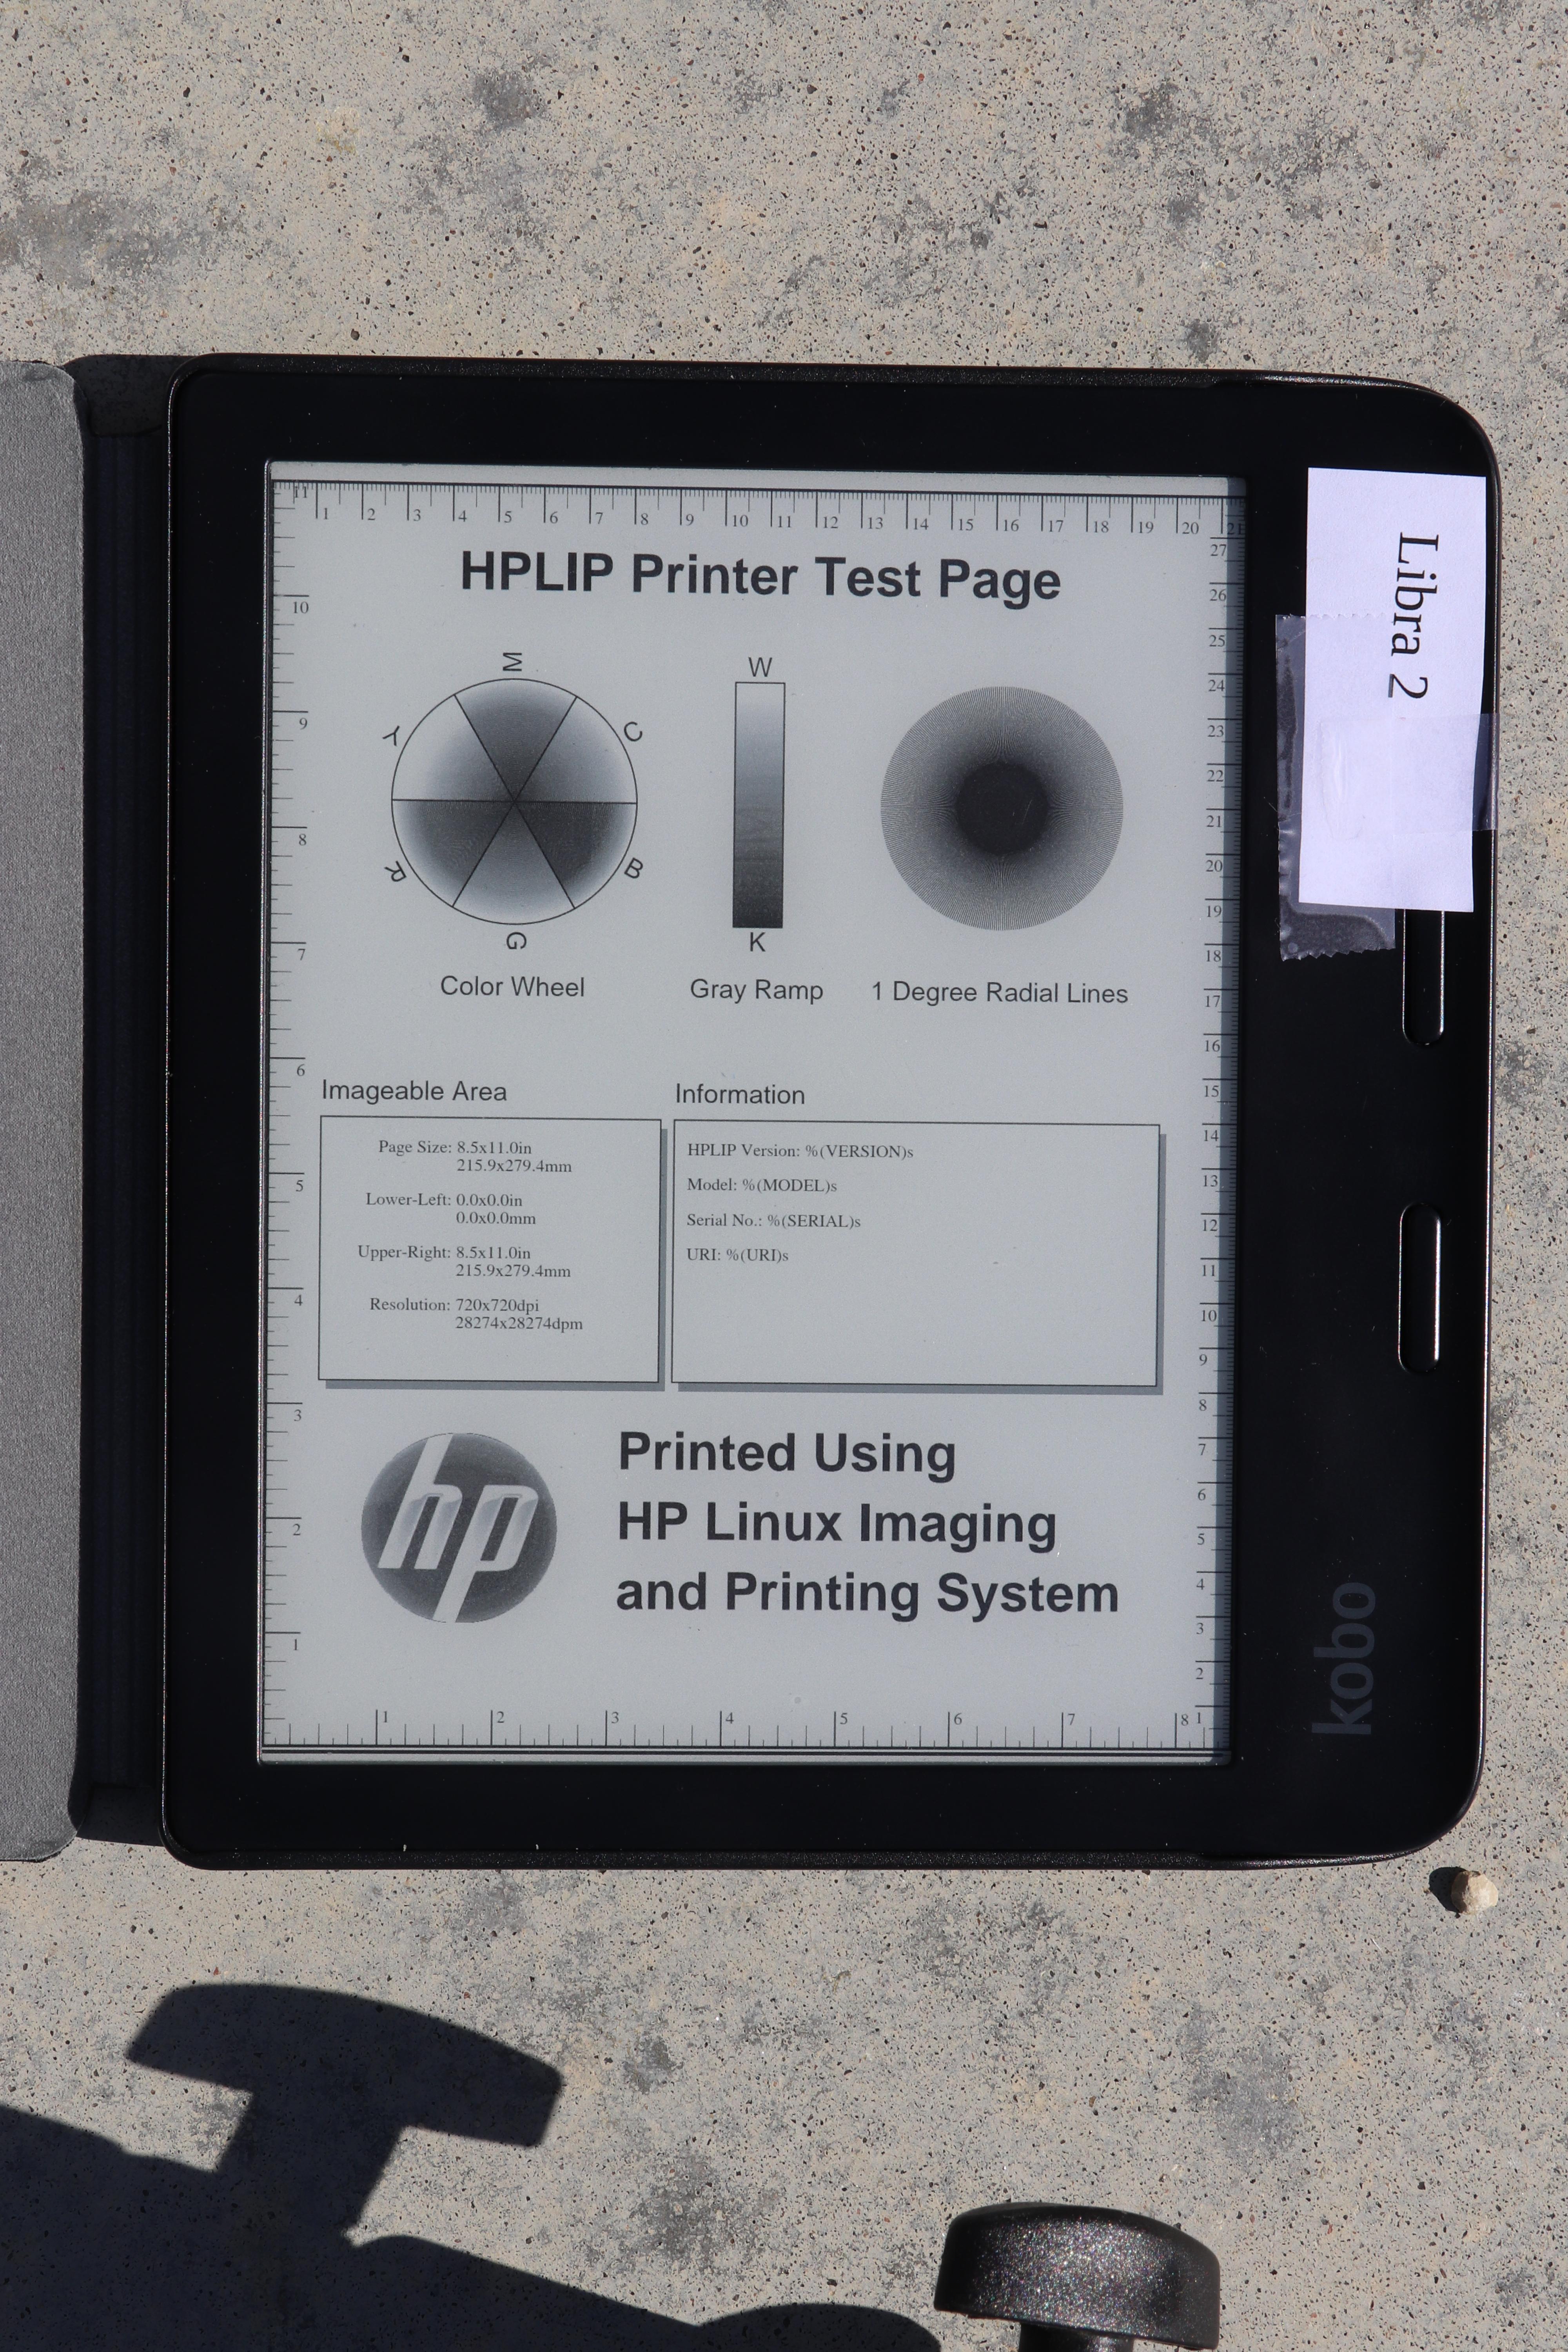

You can see how much darker the Libra Colour is here. Though in these bright conditions, it is still plenty bright. There may actually be situations in which the Libra 2 is too bright in direct sunlight, requiring a person to squint or whatnot.
Looking at the radial lines, it is a bit difficult to tell because the difference in brightness, but I don’t see a hugely obvious reduction in quality in the Libra 2. Later I have a shot where I try to match brightness, and we’ll check it out again there.
Outdoors, shade, shot from directly overhead
For the next shot, I set the ereaders in shade, but still well-lit with the diffuse sunlight from all around.
The first two have both device lights off. For the third, I set the device light on the Kobo Colour to 100%, full cool shade, to try to see how close I could get it to the Libra 2 brightness. (Sorry it looks like I forgot to close the toolbar on the Colour for this set, but it doesn’t modify the important bits of the underlying image.)
Device light: Initially off on both
Exposure: 1/60, f6.4, ISO 100


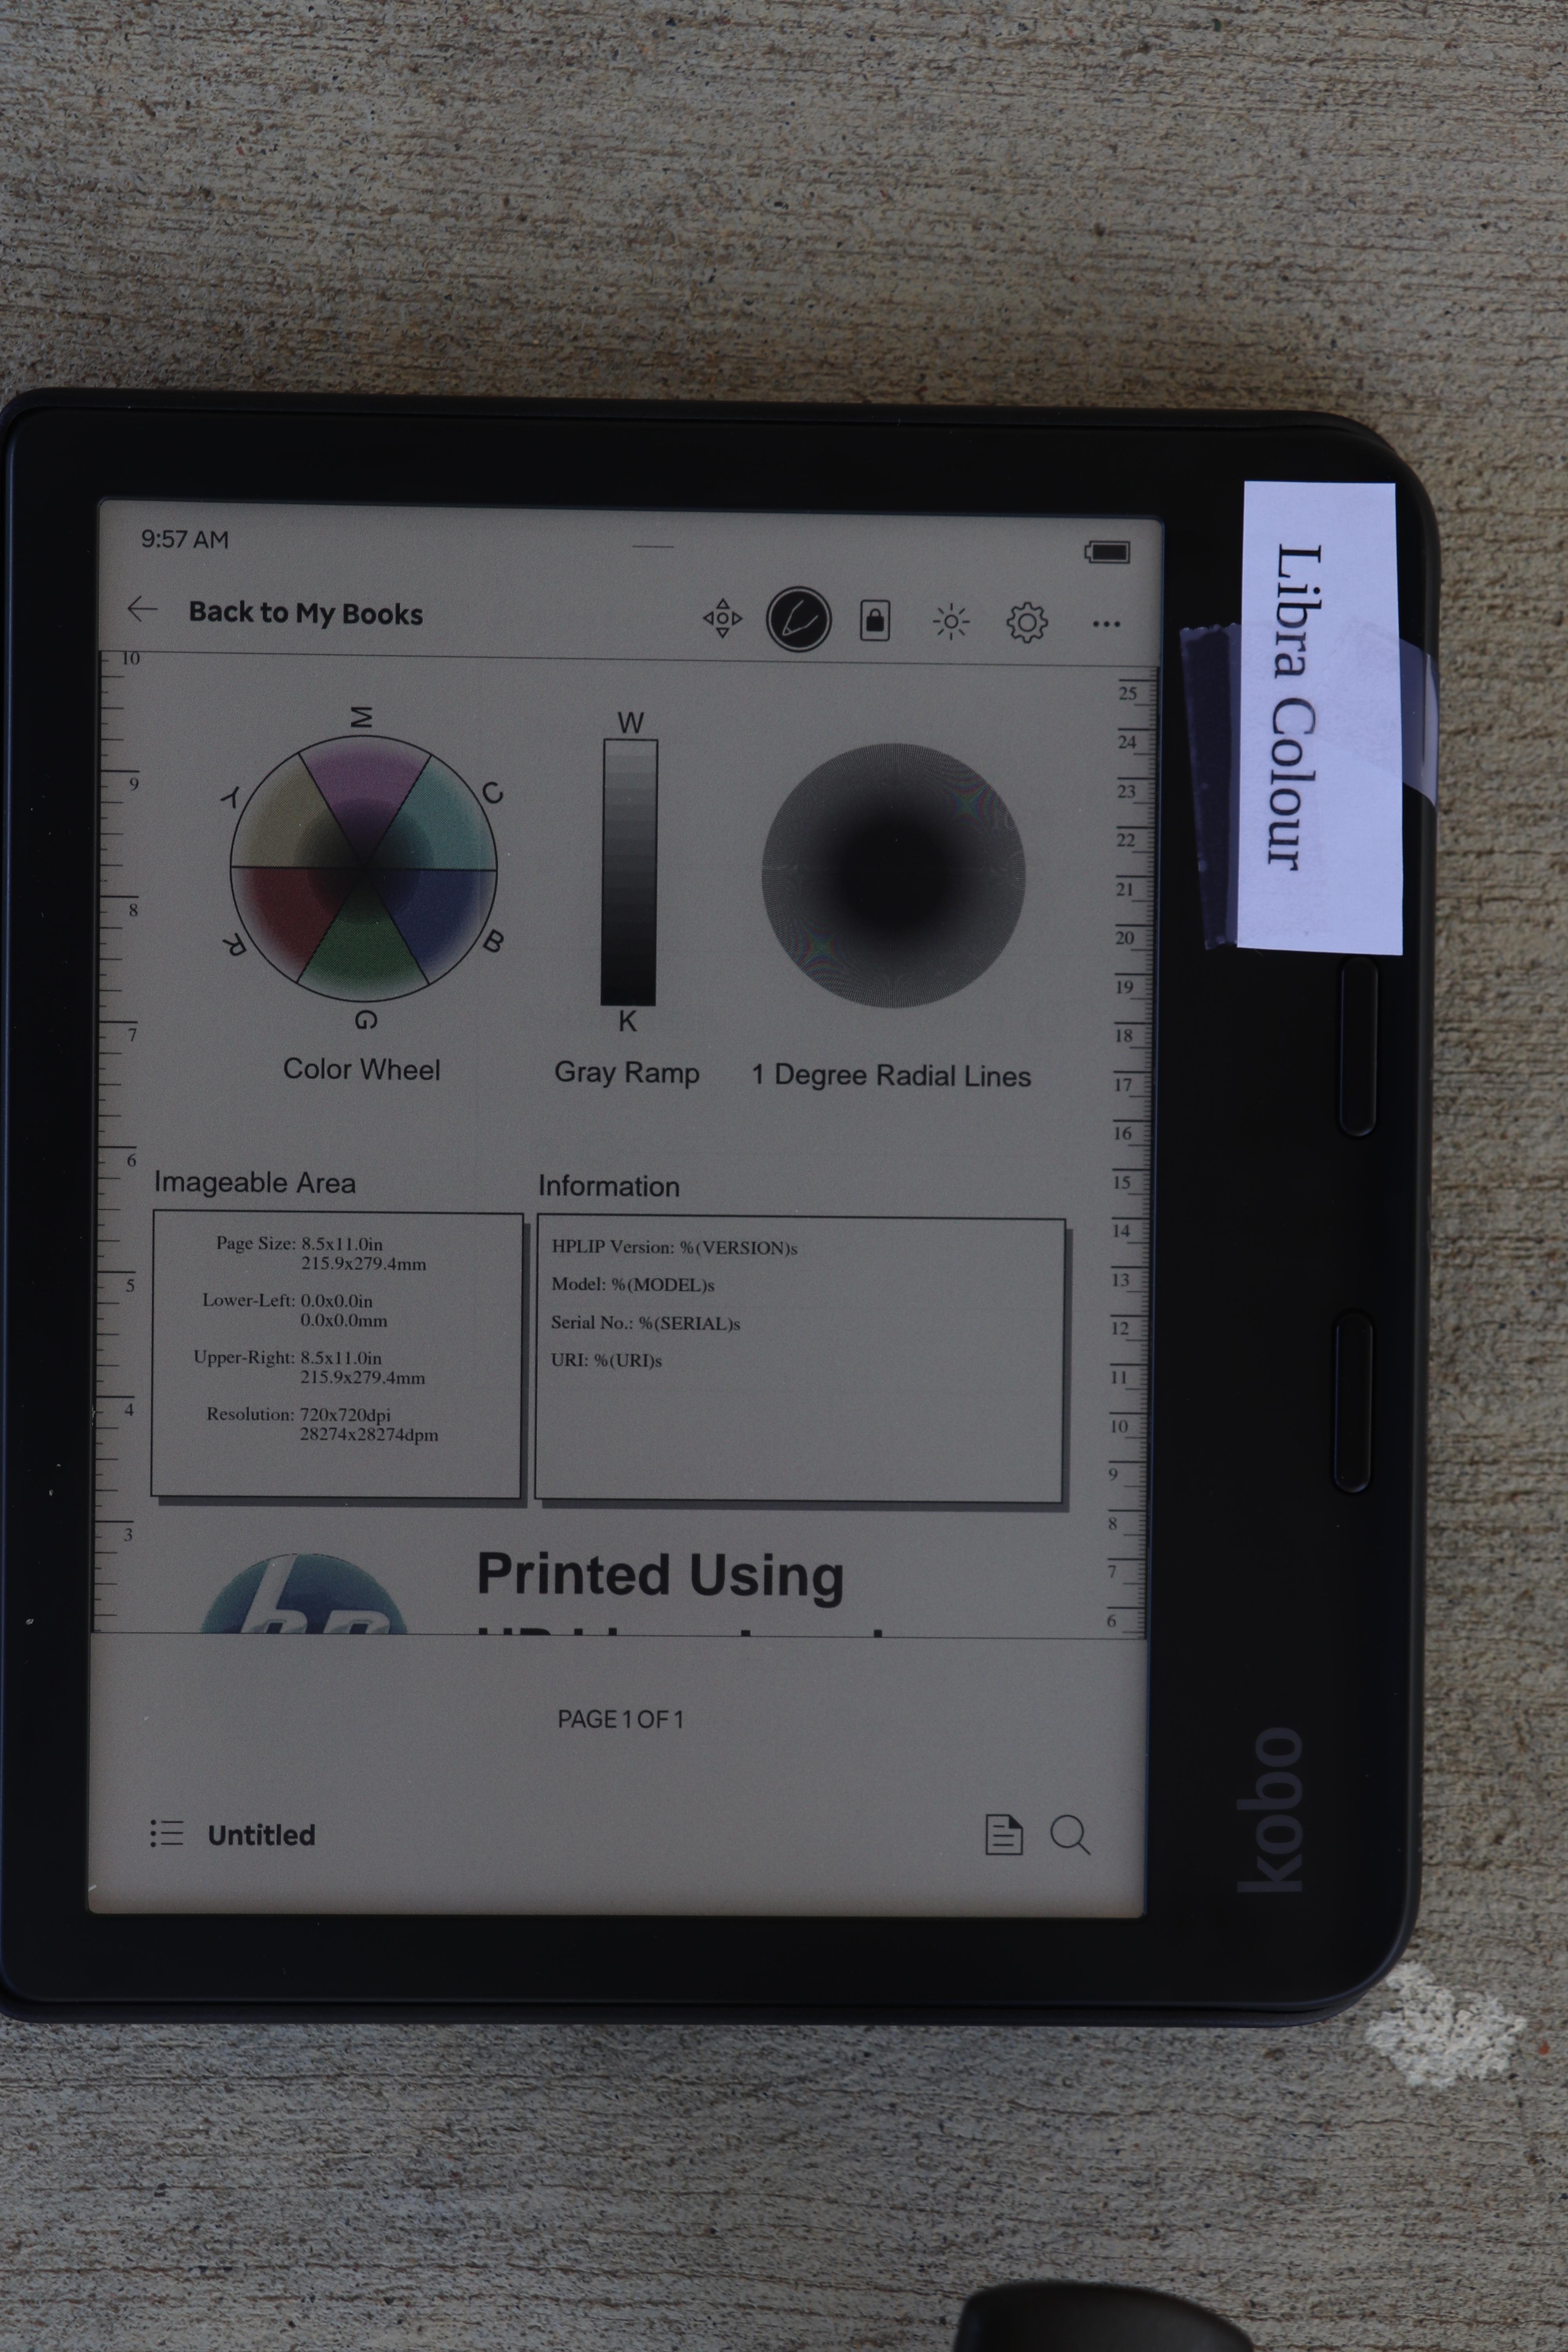
Here you can see the light on the Libra Colour was nearly able to match the brightness on the Libra 2.
Indoors, room lit with overhead and window light, device light off
We continue to move into dimmer light with this next shot.
Device light: Off on both
Exposure: 1/4, f5, ISO 100


Indoors, room lit with overhead and window light, device light on
Now we have the first head-to-head with the device light on. I set the Libra 2 to my favorite warmth setting, found a brightness that looked good, and then tried my best to match those settings on the Libra Colour. My camera’s light meter aided in matching brightness.
Device light: On (Libra 2 at 40%, Libra Colour at 59%)
Exposure: 1/8, f5, ISO 100
(Apparently I am terrible at remembering to dismiss menus, sigh.)
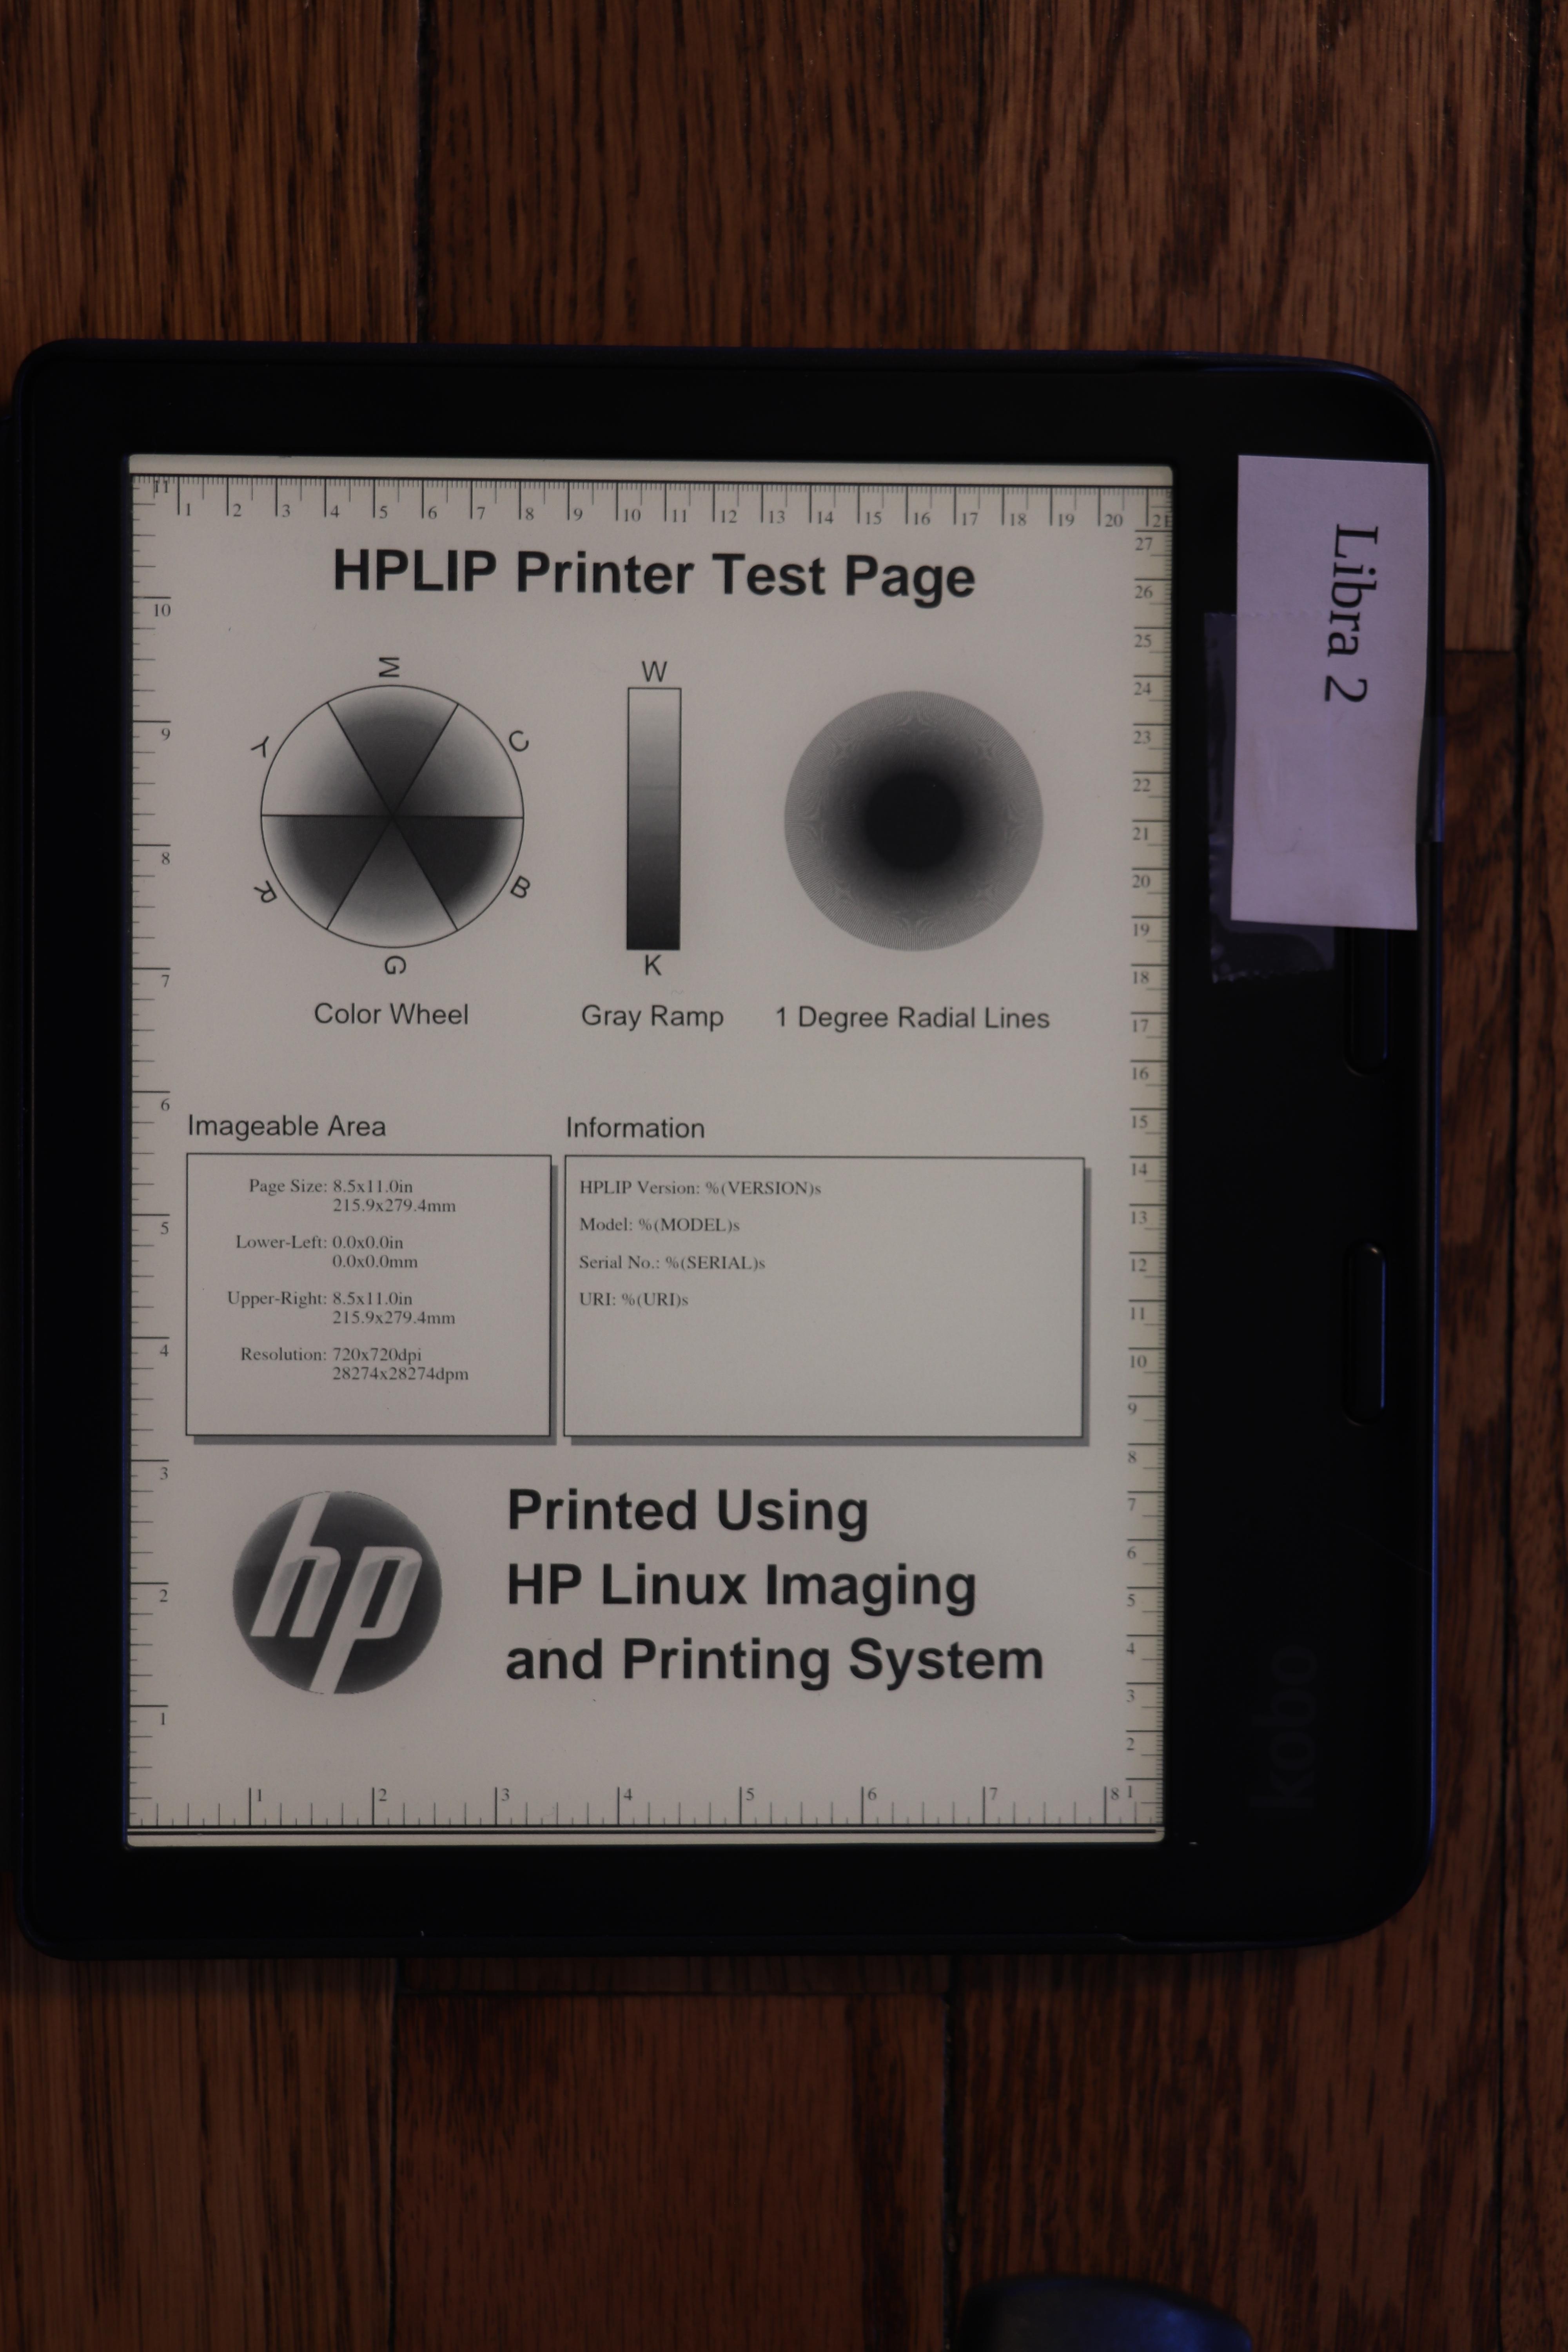
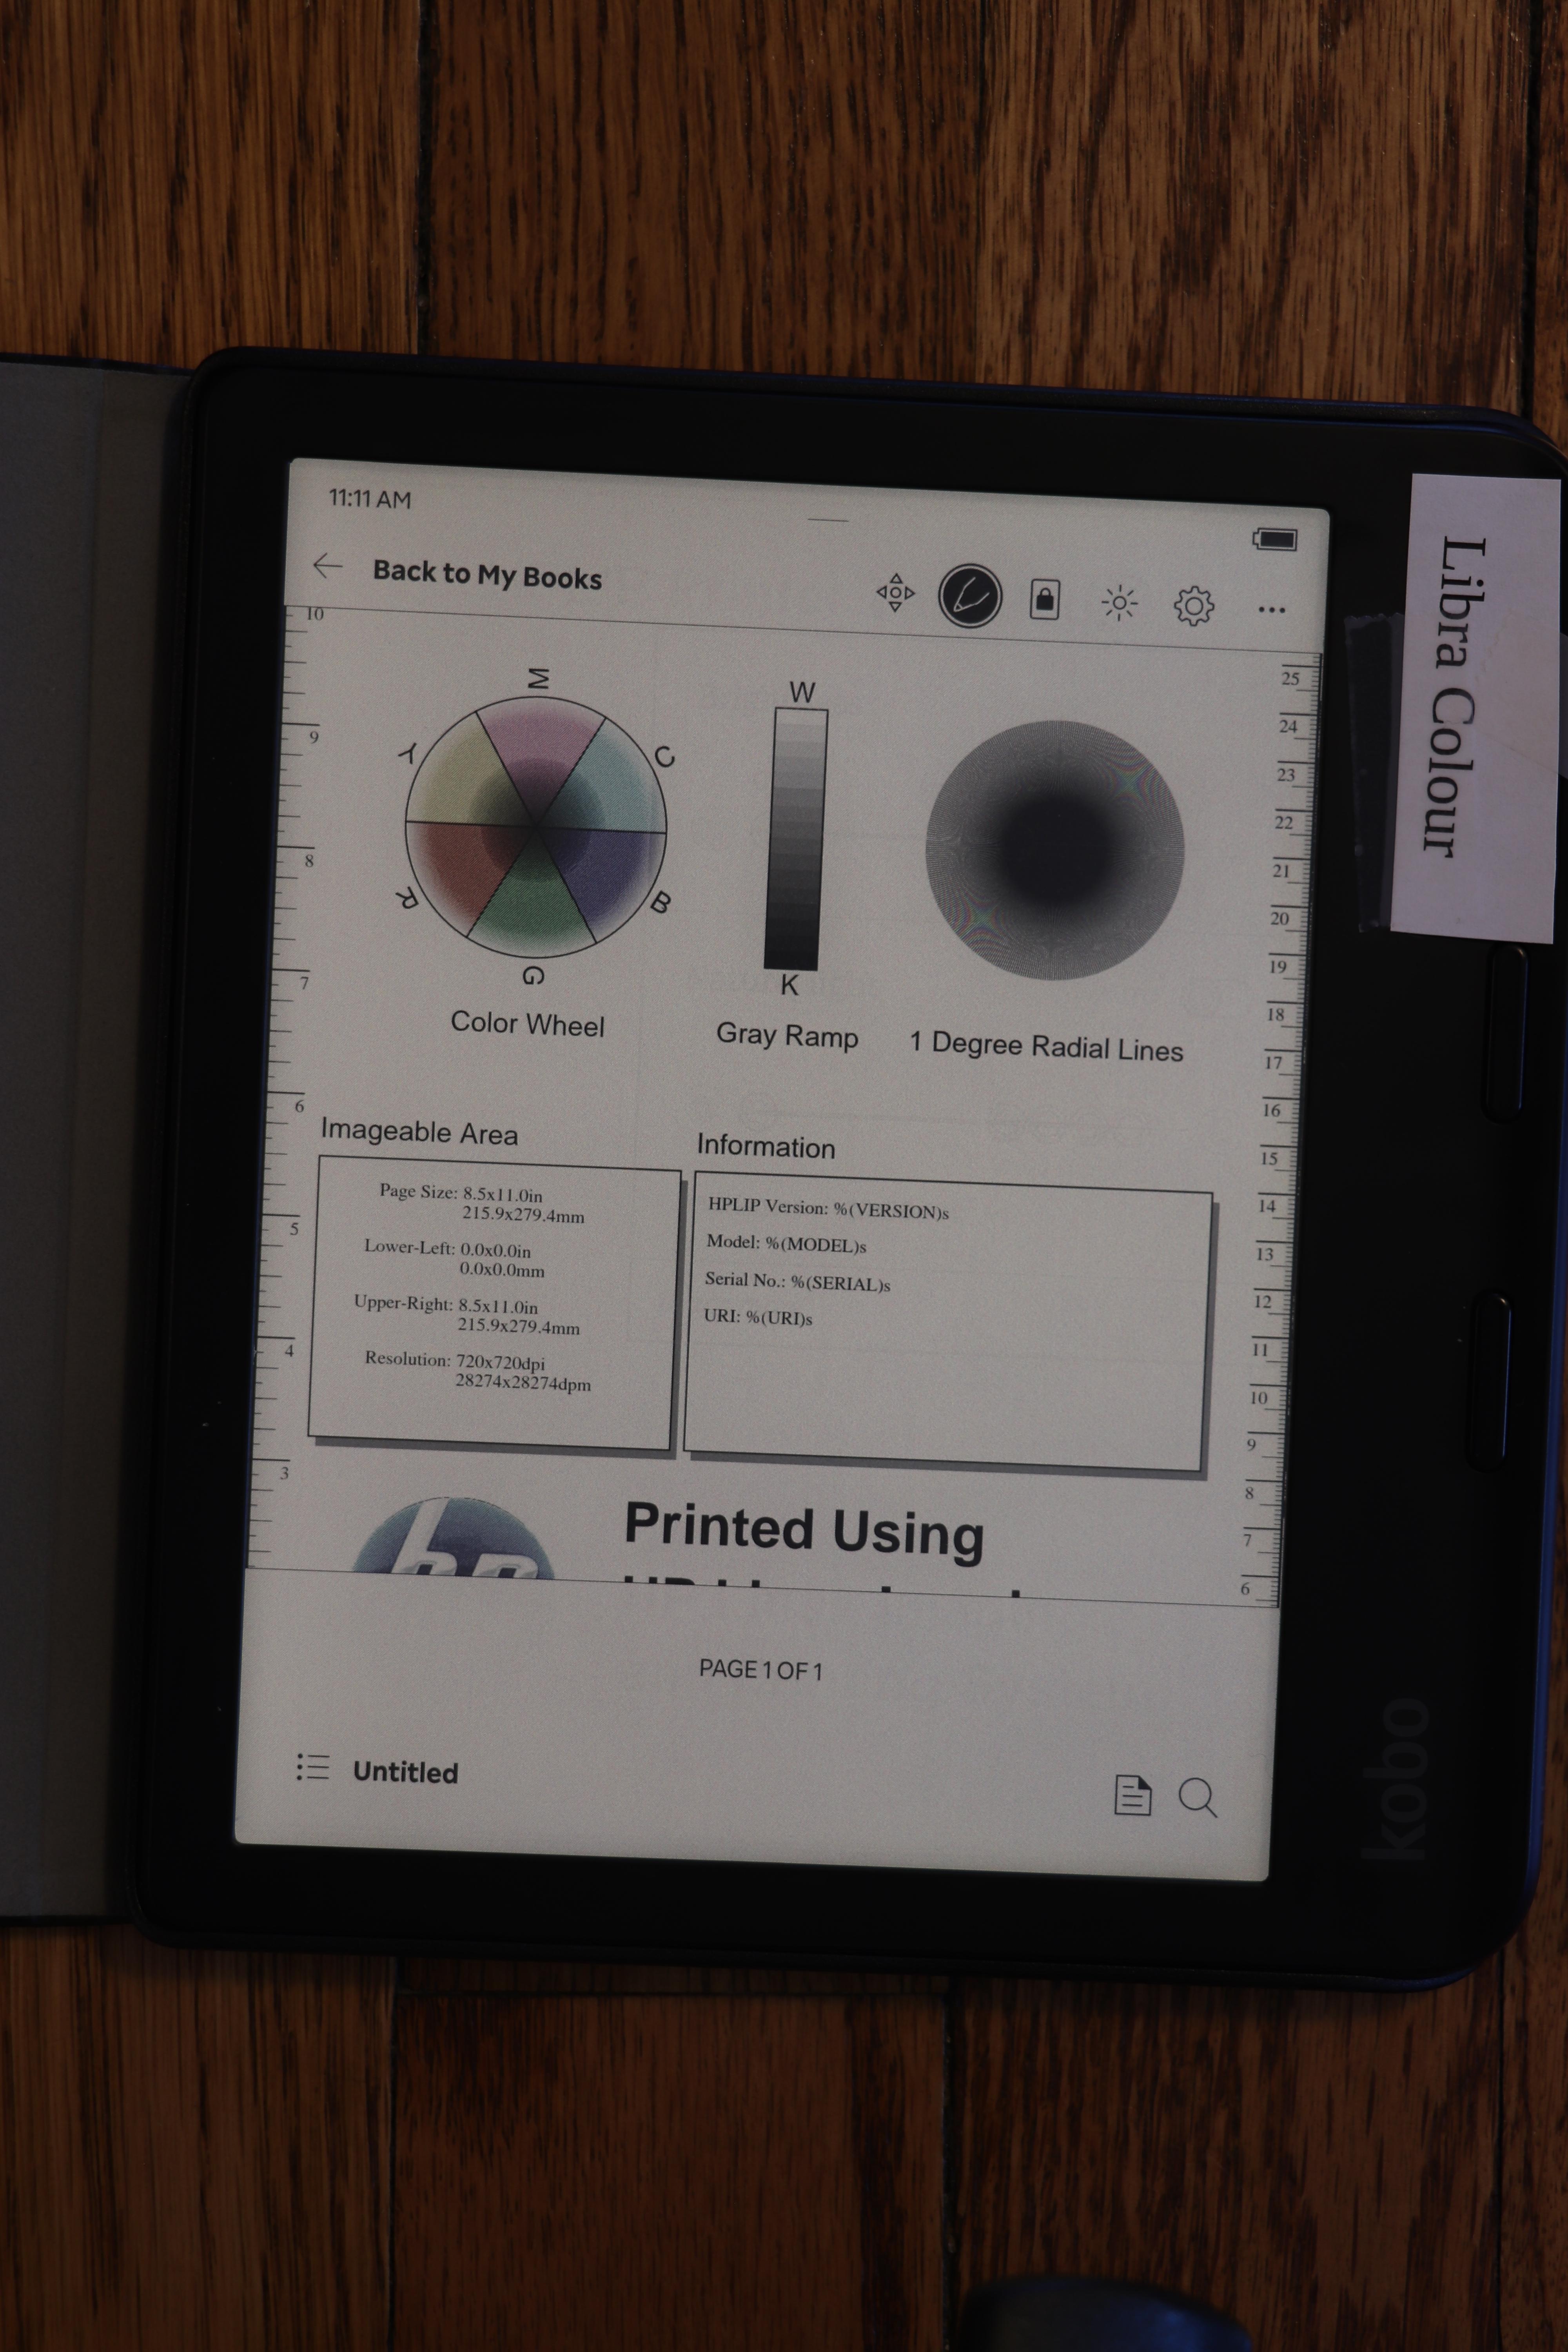
Indoors, dark room, dark mode, at an angle
The Kobo Libra Colour surprised me with its dark mode. When viewed at an oblique angle, the screen gets pretty washed out. I maintained the same brightness settings here as I did above. It is much more noticeable when the brightness is set down to my preferred nighttime level (4%), or with a more significant angle.
Since you can’t see my tags, the order of the photos here will be: Libra 2 (standard orientation), Colour (standard orientation), Colour (turned around.
Device light: On (as above)
Exposure: 1/4, f5.6, ISO 100


Notice how I said I maintained the same brightness settings as before, and yet the Libra Colour looks brighter than the Libra 2 here, whereas it looked the same in the prior non-dark mode photos. Here’s why. I set the exposure of each set of shots based on camera metering. As we have seen from the light-off photos, the brightness of a white pixel is a lot less on a Libra Colour than on the Libra 2. However, it is likely that the brightness of a black pixel is about that same. Therefore, contrast on the Libra Colour is lower than on the Libra 2. The traditional shot is majority white pixels, so to make the Libra Colour brightness match that of the Libra 2, I had to crank up the brightness on the Libra Colour to compensate for the darker “white” background. With me so far?
Now with the inverted image, you can see what that does. It doesn’t just raise the brightness of the white pixels, but it also raises the brightness of the black pixels. This is expected because we didn’t raise contrast, only brightness.
Also, in the last image, you can see it is brighter to the right. Again, other conditions that are more difficult to photograph make that much more pronounced. Viewing the Libra Colour from one side (but not the other), in dark mode, with the light on, produces noticeably worse contrast on one side.
Conclusions
This isn’t a slam dunk. Let’s walk through this:
I don’t think there is any noticeable loss of detail on the Libra Colour. The radial lines appeared as well defined on it as on the Libra 2. Oddly, with the backlight, some striations were apparent in the gray gradient test, but I wouldn’t be using an E Ink device for clear photographic reproduction anyhow.
If you read mostly black and white: If you had been using a Kobo Libra Colour and were handed a Libra 2, you would go, “Wow! What an upgrade! The screen is so much brighter!” There’s little reason to get a Libra Colour. The Libra 2 might be hard to find these days, but the new Clara BW (with a 6″ instead of the 7″ screen on the Libra series) might be just the thing for you. The Libra 2 is at home in any lighting, from direct sun to pitch black, and has all the usual E Ink benefits (eg, battery life measured in weeks) and drawbacks (slower refresh rate) that we’re all used to.
If you are interested in photographic color reproduction mostly indoors: Consider a small tablet. The Libra Colour’s 4096 colors are going to appear washed out compared to what you’re used to on a LCD screen.
If you are interested in color content indoors and out: The Libra Colour might be a good fit. It could work well for things where superb color rendition isn’t essential — for instance, news stories (the Pocket integration or Calibre’s news feature could be nice there), comics, etc.
In a moderately-lit indoor room, it looks like the Libra Colour’s light can lead it to results that approach Libra 2 quality. So if most of your reading is in those conditions, perhaps the Libra Colour is right for you.
As a final aside, I wrote in this article about the Kobo devices. I switched from Kindles to Kobos a couple of years ago due to the greater openness of the Kobo devices (you can add things like Nickel Menu and KOReader to them, and they have built-in support for more useful formats), their featureset, and their cost. The top-of-the-line Kindle devices will have a screen very similar if not identical to the Libra 2, so you can very easily consider this to be a comparison between the Oasis and the Libra Colour as well.
Facebook is Censoring Stories about Climate Change and Illegal Raid in Marion, Kansas 6 Apr 2024 6:00 AM (last year)
It is, sadly, not entirely surprising that Facebook is censoring articles critical of Meta.
The Kansas Reflector published an artical about Meta censoring environmental articles about climate change — deeming them “too controversial”.
Facebook then censored the article about Facebook censorship, and then after an independent site published a copy of the climate change article, Facebook censored it too.
The CNN story says Facebook apologized and said it was a mistake and was fixing it.
Color me skeptical, because today I saw this:

Yes, that’s right: today, April 6, I get a notification that they removed a post from August 12. The notification was dated April 4, but only showed up for me today.
I wonder why my post from August 12 was fine for nearly 8 months, and then all of a sudden, when the same website runs an article critical of Facebook, my 8-month-old post is a problem. Hmm.
Riiiiiight. Cybersecurity.
This isn’t even the first time they’ve done this to me.
On September 11, 2021, they removed my post about the social network Mastodon (click that link for screenshot). A post that, incidentally, had been made 10 months prior to being removed.
While they ultimately reversed themselves, I subsequently wrote Facebook’s Blocking Decisions Are Deliberate — Including Their Censorship of Mastodon.
That this same pattern has played out a second time — again with something that is a very slight challenege to Facebook — seems to validate my conclusion. Facebook lets all sort of hateful garbage infest their site, but anything about climate change — or their own censorship — gets removed, and this pattern persists for years.
There’s a reason I prefer Mastodon these days. You can find me there as @jgoerzen@floss.social.
So. I’ve written this blog post. And then I’m going to post it to Facebook. Let’s see if they try to censor me for a third time. Bring it, Facebook.
The xz Issue Isn’t About Open Source 4 Apr 2024 2:07 PM (last year)
You’ve probably heard of the recent backdoor in xz. There have been a lot of takes on this, most of them boiling down to some version of:
The problem here is with Open Source Software.
I want to say not only is that view so myopic that it pushes towards the incorrect, but also it blinds us to more serious problems.
Now, I don’t pretend that there are no problems in the FLOSS community. There have been various pieces written about what this issue says about the FLOSS community (usually without actionable solutions). I’m not here to say those pieces are wrong. Just that there’s a bigger picture.
So with this xz issue, it may well be a state actor (aka “spy”) that added this malicious code to xz. We also know that proprietary software and systems can be vulnerable. For instance, a Twitter whistleblower revealed that Twitter employed Indian and Chinese spies, some knowingly. A recent report pointed to security lapses at Microsoft, including “preventable” lapses in security. According to the Wikipedia article on the SolarWinds attack, it was facilitated by various kinds of carelessness, including passwords being posted to Github and weak default passwords. They directly distributed malware-infested updates, encouraged customers to disable anti-malware tools when installing SolarWinds products, and so forth.
It would be naive indeed to assume that there aren’t black hat actors among the legions of programmers employed by companies that outsource work to low-cost countries — some of which have challenges with bribery.
So, given all this, we can’t really say the problem is Open Source. Maybe it’s more broad:
The problem here is with software.
Maybe that inches us closer, but is it really accurate? We have all heard of Boeing’s recent issues, which seem to have some element of root causes in corporate carelessness, cost-cutting, and outsourcing. That sounds rather similar to the SolarWinds issue, doesn’t it?
Well then, the problem is capitalism.
Maybe it has a role to play, but isn’t it a little too easy to just say “capitalism” and throw up our hands helplessly, just as some do with FLOSS as at the start of this article? After all, capitalism also brought us plenty of products of very high quality over the years. When we can point to successful, non-careless products — and I own some of them (for instance, my Framework laptop). We clearly haven’t reached the root cause yet.
And besides, what would you replace it with? All the major alternatives that have been tried have even stronger downsides. Maybe you replace it with “better regulated capitalism”, but that’s still capitalism.
Then the problem must be with consumers.
As this argument would go, it’s consumers’ buying patterns that drive problems. Buyers — individual and corporate — seek flashy features and low cost, prizing those over quality and security.
No doubt this is true in a lot of cases. Maybe greed or status-conscious societies foster it: Temu promises people to “shop like a billionaire”, and unloads on them cheap junk, which “all but guarantees that shipments from Temu containing products made with forced labor are entering the United States on a regular basis“.
But consumers are also people, and some fraction of them are quite capable of writing fantastic software, and in fact, do so.
So what we need is some way to seize control. Some way to do what is right, despite the pressures of consumers or corporations.
Ah yes, dear reader, you have been slogging through all these paragraphs and now realize I have been leading you to this:
Then the solution is Open Source.
Indeed. Faults and all, FLOSS is the most successful movement I know where people are bringing us back to the commons: working and volunteering for the common good, unleashing a thousand creative variants on a theme, iterating in every direction imaginable. We have FLOSS being vital parts of everything from $30 Raspberry Pis to space missions. It is bringing education and communication to impoverished parts of the world. It lets everyone write and release software. And, unlike the SolarWinds and Twitter issues, it exposes both clever solutions and security flaws to the world.
If an authentication process in Windows got slower, we would all shrug and mutter “Microsoft” under our breath. Because, really, what else can we do? We have no agency with Windows.
If an authentication process in Linux gets slower, anybody that’s interested — anybody at all — can dive in and ask “why” and trace it down to root causes.
Some look at this and say “FLOSS is responsible for this mess.” I look at it and say, “this would be so much worse if it wasn’t FLOSS” — and experience backs me up on this.
FLOSS doesn’t prevent security issues itself.
What it does do is give capabilities to us all. The ability to investigate. Ability to fix. Yes, even the ability to break — and its cousin, the power to learn.
And, most rewarding, the ability to contribute.
Live Migrating from Raspberry Pi OS bullseye to Debian bookworm 3 Jan 2024 2:33 PM (last year)
I’ve been getting annoyed with Raspberry Pi OS (Raspbian) for years now. It’s a fork of Debian, but manages to omit some of the most useful things. So I’ve decided to migrate all of my Pis to run pure Debian. These are my reasons:
- Raspberry Pi OS has, for years now, specified that there is no upgrade path. That is, to get to a newer major release, it’s a reinstall. While I have sometimes worked around this, for a device that is frequently installed in hard-to-reach locations, this is even more important than usual. It’s common for me to upgrade machines for a decade or more across Debian releases and there’s no reason that it should be so much more difficult with Raspbian.
- As I noted in Consider Security First, the security situation for Raspberry Pi OS isn’t as good as it is with Debian.
- Raspbian lags behind Debian – often times by 6 months or more for major releases, and days or weeks for bug fixes and security patches.
- Raspbian has no direct backports support, though Raspberry Pi 3 and above can use Debian’s backports (per my instructions as Installing Debian Backports on Raspberry Pi)
- Raspbian uses a custom kernel without initramfs support
It turns out it is actually possible to do an in-place migration from Raspberry Pi OS bullseye to Debian bookworm. Here I will describe how. Even if you don’t have a Raspberry Pi, this might still be instructive on how Raspbian and Debian packages work.
WARNINGS
Before continuing, back up your system. This process isn’t for the neophyte and it is entirely possible to mess up your boot device to the point that you have to do a fresh install to get your Pi to boot. This isn’t a supported process at all.
Architecture Confusion
Debian has three ARM-based architectures:
- armel, for the lowest-end 32-bit ARM devices without hardware floating point support
- armhf, for the higher-end 32-bit ARM devices with hardware float (hence “hf”)
- arm64, for 64-bit ARM devices (which all have hardware float)
Although the Raspberry Pi 0 and 1 do support hardware float, they lack support for other CPU features that Debian’s armhf architecture assumes. Therefore, the Raspberry Pi 0 and 1 could only run Debian’s armel architecture.
Raspberry Pi 3 and above are capable of running 64-bit, and can run both armhf and arm64.
Prior to the release of the Raspberry Pi 5 / Raspbian bookworm, Raspbian only shipped the armhf architecture. Well, it was an architecture they called armhf, but it was different from Debian’s armhf in that everything was recompiled to work with the more limited set of features on the earlier Raspberry Pi boards. It was really somewhere between Debian’s armel and armhf archs. You could run Debian armel on those, but it would run more slowly, due to doing floating point calculations without hardware support. Debian’s raspi FAQ goes into this a bit.
What I am going to describe here is going from Raspbian armhf to Debian armhf with a 64-bit kernel. Therefore, it will only work with Raspberry Pi 3 and above. It may theoretically be possible to take a Raspberry Pi 2 to Debian armhf with a 32-bit kernel, but I haven’t tried this and it may be more difficult. I have seen conflicting information on whether armhf really works on a Pi 2. (If you do try it on a Pi 2, ignore everything about arm64 and 64-bit kernels below, and just go with the linux-image-armmp-lpae kernel per the ARMMP page)
There is another wrinkle: Debian doesn’t support running 32-bit ARM kernels on 64-bit ARM CPUs, though it does support running a 32-bit userland on them. So we will wind up with a system with kernel packages from arm64 and everything else from armhf. This is a perfectly valid configuration as the arm64 – like x86_64 – is multiarch (that is, the CPU can natively execute both the 32-bit and 64-bit instructions).
(It is theoretically possible to crossgrade a system from 32-bit to 64-bit userland, but that felt like a rather heavy lift for dubious benefit on a Pi; nevertheless, if you want to make this process even more complicated, refer to the CrossGrading page.)
Prerequisites and Limitations
In addition to the need for a Raspberry Pi 3 or above in order for this to work, there are a few other things to mention.
If you are using the GPIO features of the Pi, I don’t know if those work with Debian.
I think Raspberry Pi OS modified the desktop environment more than other components. All of my Pis are headless, so I don’t know if this process will work if you use a desktop environment.
I am assuming you are booting from a MicroSD card as is typical in the Raspberry Pi world. The Pi’s firmware looks for a FAT partition (MBR type 0x0c) and looks within it for boot information. Depending on how long ago you first installed an OS on your Pi, your /boot may be too small for Debian. Use df -h /boot to see how big it is. I recommend 200MB at minimum. If your /boot is smaller than that, stop now (or use some other system to shrink your root filesystem and rearrange your partitions; I’ve done this, but it’s outside the scope of this article.)
You need to have stable power. Once you begin this process, your pi will mostly be left in a non-bootable state until you finish. (You… did make a backup, right?)
Basic idea
The basic idea here is that since bookworm has almost entirely newer packages then bullseye, we can “just” switch over to it and let the Debian packages replace the Raspbian ones as they are upgraded. Well, it’s not quite that easy, but that’s the main idea.
Preparation
First, make a backup. Even an image of your MicroSD card might be nice. OK, I think I’ve said that enough now.
It would be a good idea to have a HDMI cable (with the appropriate size of connector for your particular Pi board) and a HDMI display handy so you can troubleshoot any bootup issues with a console.
Preparation: access
The Raspberry Pi OS by default sets up a user named pi that can use sudo to gain root without a password. I think this is an insecure practice, but assuming you haven’t changed it, you will need to ensure it still works once you move to Debian. Raspberry Pi OS had a patch in their sudo package to enable it, and that will be removed when Debian’s sudo package is installed. So, put this in /etc/sudoers.d/010_picompat:
pi ALL=(ALL) NOPASSWD: ALL
Also, there may be no password set for the root account. It would be a good idea to set one; it makes it easier to log in at the console. Use the passwd command as root to do so.
Preparation: bluetooth
Debian doesn’t correctly identify the Bluetooth hardware address. You can save it off to a file by running hcitool dev > /root/bluetooth-from-raspbian.txt. I don’t use Bluetooth, but this should let you develop a script to bring it up properly.
Preparation: Debian archive keyring
You will next need to install Debian’s archive keyring so that apt can authenticate packages from Debian. Go to the bookworm download page for debian-archive-keyring and copy the URL for one of the files, then download it on the pi. For instance:
wget http://http.us.debian.org/debian/pool/main/d/debian-archive-keyring/debian-archive-keyring_2023.3+deb12u1_all.deb
Use sha256sum to verify the checksum of the downloaded file, comparing it to the package page on the Debian site.
Now, you’ll install it with:
dpkg -i debian-archive-keyring_2023.3+deb12u1_all.deb
Package first steps
From here on, we are making modifications to the system that can leave it in a non-bootable state.
Examine /etc/apt/sources.list and all the files in /etc/apt/sources.list.d. Most likely you will want to delete or comment out all lines in all files there. Replace them with something like:
deb http://deb.debian.org/debian/ bookworm main non-free-firmware contrib non-free
deb http://security.debian.org/debian-security bookworm-security main non-free-firmware contrib non-free
deb https://deb.debian.org/debian bookworm-backports main non-free-firmware contrib non-free
(you might leave off contrib and non-free depending on your needs)
Now, we’re going to tell it that we’ll support arm64 packages:
dpkg --add-architecture arm64
And finally, download the bookworm package lists:
apt-get update
If there are any errors from that command, fix them and don’t proceed until you have a clean run of apt-get update.
Moving /boot to /boot/firmware
The boot FAT partition I mentioned above is mounted at /boot by Raspberry Pi OS, but Debian’s scripts assume it will be at /boot/firmware. We need to fix this. First:
umount /boot
mkdir /boot/firmware
Now, edit fstab and change the reference to /boot to be to /boot/firmware. Now:
mount -v /boot/firmware
cd /boot/firmware
mv -vi * ..
This mounts the filesystem at the new location, and moves all its contents back to where apt believes it should be. Debian’s packages will populate /boot/firmware later.
Installing the first packages
Now we start by installing the first of the needed packages. Eventually we will wind up with roughly the same set Debian uses.
apt-get install linux-image-arm64
apt-get install firmware-brcm80211=20230210-5
apt-get install raspi-firmware
If you get errors relating to firmware-brcm80211 from any commands, run that install firmware-brcm80211 command and then proceed. There are a few packages that Raspbian marked as newer than the version in bookworm (whether or not they really are), and that’s one of them.
Configuring the bootloader
We need to configure a few things in /etc/default/raspi-firmware before proceeding. Edit that file.
First, uncomment (or add) a line like this:
KERNEL_ARCH="arm64"
Next, in /boot/cmdline.txt you can find your old Raspbian boot command line. It will say something like:
root=PARTUUID=...
Save off the bit starting with PARTUUID. Back in /etc/default/raspi-firmware, set a line like this:
ROOTPART=PARTUUID=abcdef00
(substituting your real value for abcdef00).
This is necessary because the microSD card device name often changes from /dev/mmcblk0 to /dev/mmcblk1 when switching to Debian’s kernel. raspi-firmware will encode the current device name in /boot/firmware/cmdline.txt by default, which will be wrong once you boot into Debian’s kernel. The PARTUUID approach lets it work regardless of the device name.
Purging the Raspbian kernel
Run:
dpkg --purge raspberrypi-kernel
Upgrading the system
At this point, we are going to run the procedure beginning at section 4.4.3 of the Debian release notes. Generally, you will do:
apt-get -u upgrade
apt full-upgrade
Fix any errors at each step before proceeding to the next. Now, to remove some cruft, run:
apt-get --purge autoremove
Inspect the list to make sure nothing important isn’t going to be removed.
Removing Raspbian cruft
You can list some of the cruft with:
apt list '~o'
And remove it with:
apt purge '~o'
I also don’t run Bluetooth, and it seemed to sometimes hang on boot becuase I didn’t bother to fix it, so I did:
apt-get --purge remove bluez
Installing some packages
This makes sure some basic Debian infrastructure is available:
apt-get install wpasupplicant parted dosfstools wireless-tools iw alsa-tools
apt-get --purge autoremove
Installing firmware
Now run:
apt-get install firmware-linux
Resolving firmware package version issues
If it gives an error about the installed version of a package, you may need to force it to the bookworm version. For me, this often happened with firmware-atheros, firmware-libertas, and firmware-realtek.
Here’s how to resolve it, with firmware-realtek as an example:
-
Go to
https://packages.debian.org/PACKAGENAME– for instance, https://packages.debian.org/firmware-realtek. Note the version number in bookworm – in this case, 20230210-5. -
Now, you will force the installation of that package at that version:
apt-get install firmware-realtek=20230210-5 -
Repeat with every conflicting package until done.
-
Rerun
apt-get install firmware-linuxand make sure it runs cleanly.
Also, in the end you should be able to:
apt-get install firmware-atheros firmware-libertas firmware-realtek firmware-linux
Dealing with other Raspbian packages
The Debian release notes discuss removing non-Debian packages. There will still be a few of those. Run:
apt list '?narrow(?installed, ?not(?origin(Debian)))'
Deal with them; mostly you will need to force the installation of a bookworm version using the procedure in the section Resolving firmware package version issues above (even if it’s not for a firmware package). For non-firmware packages, you might possibly want to add --mark-auto to your apt-get install command line to allow the package to be autoremoved later if the things depending on it go away.
If you aren’t going to use Bluetooth, I recommend apt-get --purge remove bluez as well. Sometimes it can hang at boot if you don’t fix it up as described above.
Set up networking
We’ll be switching to the Debian method of networking, so we’ll create some files in /etc/network/interfaces.d. First, eth0 should look like this:
allow-hotplug eth0
iface eth0 inet dhcp
iface eth0 inet6 auto
And wlan0 should look like this:
allow-hotplug wlan0
iface wlan0 inet dhcp
    wpa-conf /etc/wpa_supplicant/wpa_supplicant.conf
Raspbian is inconsistent about using eth0/wlan0 or renamed interface. Run ifconfig or ip addr. If you see a long-named interface such as enx<something> or wlp<something>, copy the eth0 file to the one named after the enx interface, or the wlan0 file to the one named after the wlp interface, and edit the internal references to eth0/wlan0 in this new file to name the long interface name.
If using wifi, verify that your SSIDs and passwords are in /etc/wpa_supplicant/wpa_supplicant.conf. It should have lines like:
network={
   ssid="NetworkName"
   psk="passwordHere"
}
(This is where Raspberry Pi OS put them).
Deal with DHCP
Raspberry Pi OS used dhcpcd, whereas bookworm normally uses isc-dhcp-client. Verify the system is in the correct state:
apt-get install isc-dhcp-client
apt-get --purge remove dhcpcd dhcpcd-base dhcpcd5 dhcpcd-dbus
Set up LEDs
To set up the LEDs to trigger on MicroSD activity as they did with Raspbian, follow the Debian instructions. Run apt-get install sysfsutils. Then put this in a file at /etc/sysfs.d/local-raspi-leds.conf:
class/leds/ACT/brightness = 1
class/leds/ACT/trigger = mmc1
Prepare for boot
To make sure all the /boot/firmware files are updated, run update-initramfs -u. Verify that root in /boot/firmware/cmdline.txt references the PARTUUID as appropriate. Verify that /boot/firmware/config.txt contains the lines arm_64bit=1 and upstream_kernel=1. If not, go back to the section on modifying /etc/default/raspi-firmware and fix it up.
The moment arrives
Cross your fingers and try rebooting into your Debian system:
reboot
For some reason, I found that the first boot into Debian seems to hang for 30-60 seconds during bootstrap. I’m not sure why; don’t panic if that happens. It may be necessary to power cycle the Pi for this boot.
Troubleshooting
If things don’t work out, hook up the Pi to a HDMI display and see what’s up. If I anticipated a particular problem, I would have documented it here (a lot of the things I documented here are because I ran into them!) So I can’t give specific advice other than to watch boot messages on the console. If you don’t even get kernel messages going, then there is some problem with your partition table or /boot/firmware FAT partition. Otherwise, you’ve at least got the kernel going and can troubleshoot like usual from there.
Consider Security First 2 Jan 2024 3:38 PM (last year)
I write this in the context of my decision to ditch Raspberry Pi OS and move everything I possibly can, including my Raspberry Pi devices, to Debian. I will write about that later.
But for now, I wanted to comment on something I think is often overlooked and misunderstood by people considering distributions or operating systems: the huge importance of getting security updates in an automated and easy way.
Background
Let’s assume that these statements are true, which I think are well-supported by available evidence:
-
Every computer system (OS plus applications) that can do useful modern work has security vulnerabilities, some of which are unknown at any given point in time;
-
During the lifetime of that computer system, some of these vulnerabilities will be discovered. For a (hopefully large) subset of those vulnerabilities, timely patches will become available.
Now then, it follows that applying those timely patches is a critical part of having a system that it as secure as possible. Of course, you have to do other things as well – good passwords, secure practices, etc – but, fundamentally, if your system lacks patches for known vulnerabilities, you’ve already lost at the security ballgame.
How to stay patched
There is something of a continuum of how you might patch your system. It runs roughly like this, from best to worst:
-
All components are kept up-to-date automatically, with no intervention from the user/operator
-
The operator is automatically alerted to necessary patches, and they can be easily installed with minimal intervention
-
The operator is automatically alerted to necessary patches, but they require significant effort to apply
-
The operator has no way to detect vulnerabilities or necessary patches
It should be obvious that the first situation is ideal. Every other situation relies on the timeliness of human action to keep up-to-date with security patches. This is a fallible situation; humans are busy, take trips, dismiss alerts, miss alerts, etc. That said, it is rare to find any system living truly all the way in that scenario, as you’ll see.
What is “your system”?
A critical point here is: what is “your system”? It includes:
- Your kernel
- Your base operating system
- Your applications
- All the libraries needed to run all of the above
Some OSs, such as Debian, make little or no distinction between the base OS and the applications. Others, such as many BSDs, have a distinction there. And in some cases, people will compile or install applications outside of any OS mechanism. (It must be stressed that by doing so, you are taking the responsibility of patching them on your own shoulders.)
How do common systems stack up?
-
Debian, with its support for unattended-upgrades, needrestart, debian-security-support, and such, is largely category 1. It can automatically apply security patches, in most cases can restart the necessary services for the patch to take effect, and will alert you when some processes or the system must be manually restarted for a patch to take effect (for instance, a kernel update). Those cases requiring manual intervention are category 2. The debian-security-support package will even warn you of gaps in the system. You can also use debsecan to scan for known vulnerabilities on a given installation.
-
FreeBSD has no way to automatically install security patches for things in the packages collection. As with many rolling-release systems, you can’t automate the installation of these security patches with FreeBSD because it is not safe to blindly update packages. It’s not safe to blindly update packages because they may bring along more than just security patches: they may represent major upgrades that introduce incompatibilities, etc. Unlike Debian’s practice of backporting fixes and thus producing narrowly-tailored patches, forcing upgrades to newer versions precludes a “minimal intervention” install. Therefore, rolling release systems are category 3.
-
Things such as Snap, Flatpak, AppImage, Docker containers, Electron apps, and third-party binaries often contain embedded libraries and such for which you have no easy visibility into their status. For instance, if there was a bug in libpng, would you know how many of your containers had a vulnerability? These systems are category 4 – you don’t even know if you’re vulnerable. It’s for this reason that my Debian-based Docker containers apply security patches before starting processes, and also run unattended-upgrades and friends.
The pernicious library problem
As mentioned in my last category above, hidden vulnerabilities can be a big problem. I’ve been writing about this for years. Back in 2017, I wrote an article focused on Docker containers, but which applies to the other systems like Snap and so forth. I cited a study back then that “Over 80% of the :latest versions of official images contained at least one high severity vulnerability.” The situation is no better now. In December 2023, it was reported that, two years after the critical Log4Shell vulnerability, 25% of apps were still vulnerable to it. Also, only 21% of developers ever update third-party libraries after introducing them into their projects.
Clearly, you can’t rely on these images with embedded libraries to be secure. And since they are black box, they are difficult to audit.
Debian’s policy of always splitting libraries out from packages is hugely beneficial; it allows finegrained analysis of not just vulnerabilities, but also the dependency graph. If there’s a vulnerability in libpng, you have one place to patch it and you also know exactly what components of your system use it.
If you use snaps, or AppImages, you can’t know if they contain a deeply embedded vulnerability, nor could you patch it yourself if you even knew. You are at the mercy of upstream detecting and remedying the problem – a dicey situation at best.
Who makes the patches?
Fundamentally, humans produce security patches. Often, but not always, patches originate with the authors of a program and then are integrated into distribution packages. It should be noted that every security team has finite resources; there will always be some CVEs that aren’t patched in a given system for various reasons; perhaps they are not exploitable, or are too low-impact, or have better mitigations than patches.
Debian has an excellent security team; they manage the process of integrating patches into Debian, produce Debian Security Advisories, maintain the Debian Security Tracker (which maintains cross-references with the CVE database), etc.
Some distributions don’t have this infrastructure. For instance, I was unable to find this kind of tracker for Devuan or Raspberry Pi OS. In contrast, Ubuntu and Arch Linux both seem to have active security teams with trackers and advisories.
Implications for Raspberry Pi OS and others
As I mentioned above, I’m transitioning my Pi devices off Raspberry Pi OS (Raspbian). Security is one reason. Although Raspbian is a fork of Debian, and you can install packages like unattended-upgrades on it, they don’t work right because they use the Debian infrastructure, and Raspbian hasn’t modified them to use their own infrastructure. I don’t see any Raspberry Pi OS security advisories, trackers, etc. In short, they lack the infrastructure to support those Debian tools anyhow.
Not only that, but Raspbian lags behind Debian in both new releases and new security patches, sometimes by days or weeks.
Live Migrating from Raspberry Pi OS bullseye to Debian bookworm contains instructions for migrating Raspberry Pis to Debian.
The Grumpy Cricket (And Other Enormous Creatures) 25 Dec 2023 11:23 AM (last year)
This Christmas, one of my gifts to my kids was a text adventure (interactive fiction) game for them. Now that they’ve enjoyed it, I’m releasing it under the GPL v3.
As interactive fiction, it’s like an e-book, but the reader is also the player, guiding the exploration of the world.
The Grumpy Cricket is designed to be friendly for a first-time player of interactive fiction. There is no way to lose the game or to die. There is an in-game hint system providing context-sensitive hints anytime the reader types HINT. There are splashes of humor throughout that got all three of my kids laughing.
I wrote it in 2023 for my kids, which range in age from 6 to 17. That’s quite a wide range, but they all were enjoying it.
You can download it, get the source, or play it online in a web browser at https://www.complete.org/the-grumpy-cricket/
It’s More Important To Recognize What Direction People Are Moving Than Where They Are 13 Nov 2023 4:02 PM (last year)
I recently read a post on social media that went something like this (paraphrased):
“If you buy an EV, you’re part of the problem. You’re advancing car culture and are actively hurting the planet. The only ethical thing to do is ditch your cars and put all your effort into supporting transit. Anything else is worthless.”
There is some truth there; supporting transit in areas it makes sense is better than having more cars, even EVs. But of course the key here is in areas it makes sense.
My road isn’t even paved. I live miles from the nearest town. And get into the remote regions of the western USA and you’ll find people that live 40 miles from the nearest neighbor. There’s no realistic way that mass transit is ever going to be a thing in these areas. And even if it were somehow usable, sending buses over miles where nobody lives just to reach the few that are there will be worse than private EVs. And because I can hear this argument coming a mile away, no, it doesn’t make sense to tell these people to just not live in the country because the planet won’t support that anymore, because those people are literally the ones that feed the ones that live in the cities.
The funny thing is: the person that wrote that shares my concerns and my goals. We both care deeply about climate change. We both want positive change. And I, ahem, recently bought an EV.
I have seen this play out in so many ways over the last few years. Drive a car? Get yelled at. Support the wrong politician? Get a shunning. Not speak up loudly enough about the right politician? That’s a yellin’ too.
The problem is, this doesn’t make friends. In fact, it hurts the cause. It doesn’t recognize this truth:
It is more important to recognize what direction people are moving than where they are.
I support trains and transit. I’ve donated money and written letters to politicians. But, realistically, there will never be transit here. People in my county are unable to move all the way to transit. But what can we do? Plenty. We bought an EV. I’ve been writing letters to the board of our local electrical co-op advocating for relaxation of rules around residential solar installations, and am planning one myself. It may well be that our solar-powered transportation winds up having a lower carbon footprint than the poster’s transit use.
Pick your favorite cause. Whatever it is, consider your strategy: What do you do with someone that is very far away from you, but has taken the first step to move an inch in your direction? Do you yell at them for not being there instantly? Or do you celebrate that they have changed and are moving?
How Gapped is Your Air? 15 Sep 2023 2:33 PM (2 years ago)
Sometimes we want better-than-firewall security for things. For instance:
- An industrial control system for a municipal water-treatment plant should never have data come in or out
- Or, a variant of the industrial control system: it should only permit telemetry and monitoring data out, and nothing else in or out
- A system dedicated to keeping your GPG private keys secure should only have material to sign (or decrypt) come in, and signatures (or decrypted data) go out
- A system keeping your tax records should normally only have new records go in, but may on occasion have data go out (eg, to print a copy of an old record)
In this article, I’ll talk about the “high side” (the high-security or high-sensitivity systems) and the “low side” (the lower-sensitivity or general-purpose systems). For the sake of simplicity, I’ll assume the high side is a single machine, but it could as well be a whole network.
Let’s focus on examples 3 and 4 to make things simpler. Let’s consider the primary concern to be data exfiltration (someone stealing your data), with a secondary concern of data integrity (somebody modifying or destroying your data).
You might think the safest possible approach is Airgapped – that is, there is literal no physical network connection to the machine at all. This help! But then, the problem becomes: how do we deal with the inevitable need to legitimately get things on or off of the system? As I wrote in Dead USB Drives Are Fine: Building a Reliable Sneakernet, by using tools such as NNCP, you can certainly create a “sneakernet”: using USB drives as transport.
While this is a very secure setup, as with most things in security, it’s less than perfect. The Wikipedia airgap article discusses some ways airgapped machines can still be exploited. It mentions that security holes relating to removable media have been exploited in the past. There are also other ways to get data out; for instance, Debian ships with gensio and minimodem, both of which can transfer data acoustically.
But let’s back up and think about why we think of airgapped machines as so much more secure, and what the failure modes of other approaches might be.
What about firewalls?
You could very easily set up high-side machine that is on a network, but is restricted to only one outbound TCP port. There could be a local firewall, and perhaps also a special port on an external firewall that implements the same restrictions. A variant on this approach would be two computers connected directly by a crossover cable, though this doesn’t necessarily imply being more secure.
Of course, the concern about a local firewall is that it could potentially be compromised. An external firewall might too; for instance, if your credentials to it were on a machine that got compromised. This kind of dual compromise may be unlikely, but it is possible.
We can also think about the complexity in a network stack and firewall configuration, and think that there may be various opportunities to have things misconfigured or buggy in a system of that complexity. Another consideration is that data could be sent at any time, potentially making it harder to detect. On the other hand, network monitoring tools are commonplace.
On the other hand, it is convenient and cheap.
I use a system along those lines to do my backups. Data is sent, gpg-encrypted and then encrypted again at the NNCP layer, to the backup server. The NNCP process on the backup server runs as an untrusted user, and dumps the gpg-encrypted files to a secure location that is then processed by a cron job using Filespooler. The backup server is on a dedicated firewall port, with a dedicated subnet. The only ports allowed out are for NNCP and NTP, and offsite backups. There is no default gateway. Not even DNS is permitted out (the firewall does the appropriate redirection). There is one pinhole allowed out, where a subset of the backup data is sent offsite.
I initially used USB drives as transport, and it had no network connection at all. But there were disadvantages to doing this for backups – particularly that I’d have no backups for as long as I’d forget to move the drives. The backup system also would have clock drift, and the offsite backup picture was more challenging. (The clock drift was a problem because I use 2FA on the system; a password, plus a TOTP generated by a Yubikey)
This is “pretty good” security, I’d think.
What are the weak spots? Well, if there were somehow a bug in the NNCP client, and the remote NNCP were compromised, that could lead to a compromise of the NNCP account. But this itself would accomplish little; some other vulnerability would have to be exploited on the backup server, because the NNCP account can’t see plaintext data at all. I use borgbackup to send a subset of backup data offsite over ssh. borgbackup has to run as root to be able to access all the files, but the ssh it calls runs as a separate user. A ssh vulnerability is therefore unlikely to cause much damage. If, somehow, the remote offsite system were compromised and it was able to exploit a security issue in the local borgbackup, that would be a problem. But that sounds like a remote possibility.
borgbackup itself can’t even be used over a sneakernet since it is not asynchronous. A more secure solution would probably be using something like dar over NNCP. This would eliminate the ssh installation entirely, and allow a complete isolation between the data-access and the communication stacks, and notably not require bidirectional communication. Logic separation matters too. My Roundup of Data Backup and Archiving Tools may be helpful here.
Other attack vectors could be a vulnerability in the kernel’s networking stack, local root exploits that could be combined with exploiting NNCP or borgbackup to gain root, or local misconfiguration that makes the sandboxes around NNCP and borgbackup less secure.
Because this system is in my basement in a utility closet with no chairs and no good place for a console, I normally manage it via a serial console. While it’s a dedicated line between the system and another machine, if the other machine is compromised or an adversary gets access to the physical line, credentials (and perhaps even data) could leak, albeit slowly.
But we can do much better with serial lines. Let’s take a look.
Serial lines
Some of us remember RS-232 serial lines and their once-ubiquitous DB-9 connectors. Traditionally, their speed maxxed out at 115.2Kbps.
Serial lines have the benefit that they can be a direct application-to-application link. In my backup example above, a serial line could directly link the NNCP daemon on one system with the NNCP caller on another, with no firewall or anything else necessary. It is simply up to those programs to open the serial device appropriately.
This isn’t perfect, however. Unlike TCP over Ethernet, a serial line has no inherent error checking. Modern programs such as NNCP and ssh assume that a lower layer is making the link completely clean and error-free for them, and will interpret any corruption as an attempt to tamper and sever the connection. However, there is a solution to that: gensio. In my page Using gensio and ser2net, I discuss how to run NNCP and ssh over gensio. gensio is a generic framework that can add framing, error checking, and retransmit to an unreliable link such as a serial port. It can also add encryption and authentication using TLS, which could be particularly useful for applications that aren’t already doing that themselves.
More traditional solutions for serial communications have their own built-in error correction. For instance, UUCP and Kermit both were designed in an era of noisy serial lines and might be an excellent fit for some use cases. The ZModem protocol also might be, though it offers somewhat less flexibility and automation than Kermit.
I have found that certain USB-to-serial adapters by Gearmo will actually run at up to 2Mbps on a serial line! Look for the ones on their spec pages with a FTDI chipset rated at 920Kbps. It turns out they can successfully be driven faster, especially if gensio’s relpkt is used. I’ve personally verified 2Mbps operation (Linux port speed 2000000) on Gearmo’s USA-FTDI2X and the USA-FTDI4X. (I haven’t seen any single-port options from Gearmo with the 920Kbps chipset, but they may exist).
Still, even at 2Mbps, speed may well be a limiting factor with some applications. If what you need is a console and some textual or batch data, it’s probably fine. If you are sending 500GB backup files, you might look for something else. In theory, this USB to RS-422 adapter should work at 10Mbps, but I haven’t tried it.
But if the speed works, running a dedicated application over a serial link could be a nice and fairly secure option.
One of the benefits of the airgapped approach is that data never leaves unless you are physically aware of transporting a USB stick. Of course, you may not be physically aware of what is ON that stick in the event of a compromise. This could easily be solved with a serial approach by, say, only plugging in the cable when you have data to transfer.
Data diodes
A traditional diode lets electrical current flow in only one direction. A data diode is the same concept, but for data: a hardware device that allows data to flow in only one direction.
This could be useful, for instance, in the tax records system that should only receive data, or the industrial system that should only send it.
Wikipedia claims that the simplest kind of data diode is a fiber link with transceivers connected in only one direction. I think you could go one simpler: a serial cable with only ground and TX connected at one end, wired to ground and RX at the other. (I haven’t tried this.)
This approach does have some challenges:
-
Many existing protocols assume a bidirectional link and won’t be usable
-
There is a challenge of confirming data was successfully received. For a situation like telemetry, maybe it doesn’t matter; another observation will come along in a minute. But for sending important documents, one wants to make sure they were properly received.
In some cases, the solution might be simple. For instance, with telemetry, just writing out data down the serial port in a simple format may be enough. For sending files, various mitigations, such as sending them multiple times, etc., might help. You might also look into FEC-supporting infrastructure such as blkar and flute, but these don’t provide an absolute guarantee. There is no perfect solution to knowing when a file has been successfully received if the data communication is entirely one-way.
Audio transport
I hinted above that minimodem and gensio both are software audio modems. That is, you could literally use speakers and microphones, or alternatively audio cables, as a means of getting data into or out of these systems. This is pretty limited; it is 1200bps, and often half-duplex, and could literally be disrupted by barking dogs in some setups. But hey, it’s an option.
Airgapped with USB transport
This is the scenario I began with, and named some of the possible pitfalls above as well. In addition to those, note also that USB drives aren’t necessarily known for their error-free longevity. Be prepared for failure.
Concluding thoughts
I wanted to lay out a few things in this post. First, that simply being airgapped is generally a step forward in security, but is not perfect. Secondly, that both physical and logical separation matter. And finally, that while tools like NNCP can make airgapped-with-USB-drive-transport a doable reality, there are also alternatives worth considering – especially serial ports, firewalled hard-wired Ethernet, data diodes, and so forth. I think serial links, in particular, have been largely forgotten these days.
Note: This article also appears on my website, where it may be periodically updated.
A Maze of Twisty Little Pixels, All Tiny 12 Sep 2023 5:40 AM (2 years ago)
Two years ago, I wrote Managing an External Display on Linux Shouldn’t Be This Hard. Happily, since I wrote that post, most of those issues have been resolved.
But then you throw HiDPI into the mix and it all goes wonky.
If you’re running X11, basically the story is that you can change the scale factor, but it only takes effect on newly-launched applications (which means a logout/in because some of your applications you can’t really re-launch). That is a problem if, like me, you sometimes connect an external display that is HiDPI, sometimes not, or your internal display is HiDPI but others aren’t. Wayland is far better, supporting on-the-fly resizes quite nicely.
I’ve had two devices with HiDPI displays: a Surface Go 2, and a work-issued Thinkpad. The Surface Go 2 is my ultraportable Linux tablet. I use it sparingly at home, and rarely with an external display. I just put Gnome on it, in part because Gnome had better on-screen keyboard support at the time, and left it at that.
On the work-issued Thinkpad, I really wanted to run KDE thanks to its tiling support (I wound up using bismuth with it). KDE was buggy with Wayland at the time, so I just stuck with X11 and ran my HiDPI displays at lower resolutions and lived with the fuzziness.
But now that I have a Framework laptop with a HiDPI screen, I wanted to get this right.
I tried both Gnome and KDE. Here are my observations with both:
Gnome
I used PaperWM with Gnome. PaperWM is a tiling manager with a unique horizontal ribbon approach. It grew on me; I think I would be equally at home, or maybe even prefer it, to my usual xmonad-style approach. Editing the active window border color required editing ~/.local/share/gnome-shell/extensions/paperwm@hedning:matrix.org/stylesheet.css and inserting background-color and border-color items in the paperwm-selection section.
Gnome continues to have an absolutely terrible picture for configuring things. It has no less than four places to make changes (Settings, Tweaks, Extensions, and dconf-editor). In many cases, configuration for a given thing is split between Settings and Tweaks, and sometimes even with Extensions, and then there are sometimes options that are only visible in dconf. That is, where the Gnome people have even allowed something to be configurable.
Gnome installs a power manager by default. It offers three options: performance, balanced, and saver. There is no explanation of the difference between them. None. What is it setting when I change the pref? A maximum frequency? A scaling governor? A balance between performance and efficiency cores? Not only that, but there’s no way to tell it to just use performance when plugged in and balanced or saver when on battery. In an issue about adding that, a Gnome dev wrote “We’re not going to add a preference just because you want one”. KDE, on the other hand, aside from not mucking with your system’s power settings in this way, has a nice panel with “on AC” and “on battery” and you can very easily tweak various settings accordingly. The hostile attitude from the Gnome developers in that thread was a real turnoff.
While Gnome has excellent support for Wayland, it doesn’t (directly) support fractional scaling. That is, you can set it to 100%, 200%, and so forth, but no 150%. Well, unless you manage to discover that you can run gsettings set org.gnome.mutter experimental-features "['scale-monitor-framebuffer']" first. (Oh wait, does that make a FIFTH settings tool? Why yes it does.) Despite its name, that allows you to select fractional scaling under Wayland. For X11 apps, they will be blurry, a problem that is optional under KDE (more on that below).
Gnome won’t show the battery life time remaining on the task bar. Yikes. An extension might work in some cases. Not only that, but the Gnome battery icon frequently failed to indicate AC charging when AC was connected, a problem that didn’t exist on KDE.
Both Gnome and KDE support “night light” (warmer color temperatures at night), but Gnome’s often didn’t change when it should have, or changed on one display but not the other.
The appindicator extension is pretty much required, as otherwise a number of applications (eg, Nextcloud) don’t have their icon display anywhere. It does, however, generate a significant amount of log spam. There may be a fix for this.
Unlike KDE, which has a nice inobtrusive popup asking what to do, Gnome silently automounts USB sticks when inserted. This is often wrong; for instance, if I’m about to dd a Debian installer to it, I definitely don’t want it mounted. I learned this the hard way. It is particularly annoying because in a GUI, there is no reason to mount a drive before the user tries to access it anyhow. It looks like there is a dconf setting, but then to actually mount a drive you have to open up Files (because OF COURSE Gnome doesn’t have a nice removable-drives icon like KDE does) and it’s a bunch of annoying clicks, and I didn’t want to use the GUI file manager anyway. Same for unmounting; two clicks in KDE thanks to the task bar icon, but in Gnome you have to open up the file manager, unmount the drive, close the file manager again, etc.
The ssh agent on Gnome doesn’t start up for a Wayland session, though this is easily enough worked around.
The reason I completely soured on Gnome is that after using it for awhile, I noticed my laptop fans spinning up. One core would be constantly busy. It was busy with a kworker events task, something to do with sound events. Logging out would resolve it. I believe it to be a Gnome shell issue. I could find no resolution to this, and am unwilling to tolerate the decreased battery life this implies.
The Gnome summary: it looks nice out of the box, but you quickly realize that this is something of a paper-thin illusion when you try to actually use it regularly.
KDE
The KDE experience on Wayland was a little bit opposite of Gnome. While with Gnome, things start out looking great but you realize there are some serious issues (especially battery-eating), with KDE things start out looking a tad rough but you realize you can trivially fix them and wind up with a very solid system.
Compared to Gnome, KDE never had a battery-draining problem. It will show me estimated battery time remaining if I want it to. It will do whatever I want it to when I insert a USB drive. It doesn’t muck with my CPU power settings, and lets me easily define “on AC” vs “on battery” settings for things like suspend when idle.
KDE supports fractional scaling, to any arbitrary setting (even with the gsettings thing above, Gnome still only supports it in 25% increments). Then the question is what to do with X11-only applications. KDE offers two choices. The first is “Scaled by the system”, which is also the only option for Gnome. With that setting, the X11 apps effectively run natively at 100% and then are scaled up within Wayland, giving them a blurry appearance on HiDPI displays. The advantage is that the scaling happens within Wayland, so the size of the app will always be correct even when the Wayland scaling factor changes. The other option is “Apply scaling themselves”, which uses native X11 scaling. This lets most X11 apps display crisp and sharp, but then if the system scaling changes, due to limitations of X11, you’ll have to restart the X apps to get them to be the correct size. I appreciate the choice, and use “Apply scaling by themselves” because only a few of my apps aren’t Wayland-aware.
I did encounter a few bugs in KDE under Wayland:
sddm, the display manager, would be slow to stop and cause a long delay on shutdown or reboot. This seems to be a known issue with sddm and Wayland, and is easily worked around by adding a systemd TimeoutStopSec.
Konsole, the KDE terminal emulator, has weird display artifacts when using fractional scaling under Wayland. I applied some patches and rebuilt Konsole and then all was fine.
The Bismuth tiling extension has some pretty weird behavior under Wayland, but a 1-character patch fixes it.
On Debian, KDE mysteriously installed Pulseaudio instead of Debian’s new default Pipewire, but that was easily fixed as well (and Pulseaudio also works fine).
Conclusions
I’m sticking with KDE. Given that I couldn’t figure out how to stop Gnome from deciding to eat enough battery to make my fan come on, the decision wasn’t hard. But even if it weren’t for that, I’d have gone with KDE. Once a couple of things were patched, the experience is solid, fast, and flawless. Emacs (my main X11-only application) looks great with the self-scaling in KDE. Gimp, which I use occasionally, was terrible with the blurry scaling in Gnome.
Update: Corrected the gsettings command
For the First Time In Years, I’m Excited By My Computer Purchase 11 Sep 2023 3:56 PM (2 years ago)
Some decades back, when I’d buy a new PC, it would unlock new capabilities. Maybe AGP video, or a PCMCIA slot, or, heck, sound.
Nowadays, mostly new hardware means things get a bit faster or less crashy, or I have some more space for files. It’s good and useful, but sorta… meh.
Not this purchase.
Cory Doctorow wrote about the Framework laptop in 2021:
There’s no tape. There’s no glue. Every part has a QR code that you can shoot with your phone to go to a service manual that has simple-to-follow instructions for installing, removing and replacing it. Every part is labeled in English, too!
The screen is replaceable. The keyboard is replaceable. The touchpad is replaceable. Removing the battery and replacing it takes less than five minutes. The computer actually ships with a screwdriver.
Framework had been on my radar for awhile. But for various reasons, when I was ready to purchase, I didn’t; either the waitlist was long, or they didn’t have the specs I wanted.
Lately my aging laptop with 8GB RAM started OOMing (running out of RAM). My desktop had developed a tendency to hard hang about once a month, and I researched replacing it, but the cost was too high to justify.
But when I looked into the Framework, I thought: this thing could replace both. It is a real shift in perspective to have a laptop that is nearly as upgradable as a desktop, and can be specced out to exactly what I wanted: 2TB storage and 64GB RAM. And still cheaper than a Macbook or Thinkpad with far lower specs, because the Framework uses off-the-shelf components as much as possible.
Cory Doctorow wrote, in The Framework is the most exciting laptop I’ve ever broken:
The Framework works beautifully, but it fails even better… Framework has designed a small, powerful, lightweight machine – it works well. But they’ve also designed a computer that, when you drop it, you can fix yourself. That attention to graceful failure saved my ass.
I like small laptops, so I ordered the Framework 13. I loaded it up with the 64GB RAM and 2TB SSD I wanted. Frameworks have four configurable ports, which are also hot-swappable. I ordered two USB-C, one USB-A, and one HDMI. I put them in my preferred spots (one USB-C on each side for easy docking and charging). I put Debian on it, and it all Just Worked. Perfectly.
Now, I orderd the DIY version. I hesitated about this — I HATE working with laptops because they’re all so hard, even though I KNEW this one was different — but went for it, because my preferred specs weren’t available in a pre-assembled model.
I’m glad I did that, because assembly was actually FUN.
I got my box. I opened it. There was the bottom shell with the motherboard and CPU installed. Here are the RAM sticks. There’s the SSD. A minute or two with each has them installed. Put the bezel on the screen, attach the keyboard — it has magnets to guide it into place — and boom, ready to go. Less than 30 minutes to assemble a laptop nearly from scratch. It was easier than assembling most desktops.
So now, for the first time, my main computing device is a laptop. Rather than having a desktop and a laptop, I just have a laptop. I’ll be able to upgrade parts of it later if I want to. I can rearrange the ports. And I can take all my most important files with me. I’m quite pleased!
Try the Last Internet Kermit Server 4 Aug 2023 2:51 PM (2 years ago)
$ grep kermit /etc/services
kermit          1649/tcp
What is this mysterious protocol? Who uses it and what is its story?
This story is a winding one, beginning in 1981. Kermit is, to the best of my knowledge, the oldest actively-maintained software package with an original developer still participating. It is also a scripting language, an Internet server, a (scriptable!) SSH client, and a file transfer protocol.
And my first use of it was talking to my HP-48GX calculator over a 9600bps serial link. Yes, that calculator had a Kermit server built in.
But let’s back up and talk about serial ports and Modems.
Serial Ports and Modems
In my piece The PC & Internet Revolution in Rural America, I recently talked about getting a modem – what an excitement it was to get one! I realize that many people today have never used a serial line or a modem, so let’s briefly discuss.
Before Ethernet and Wifi took off in a big way, in the 1990s-2000s, two computers would talk to each other over a serial line and a modem. By modern standards, these were slow; 300bps was a common early speed. They also (at least in the beginning) had no kind of error checking. Characters could be dropped or changed. Sometimes even those speeds were faster than the receiving device could handle. Some serial links were 7-bit, and wouldn’t even pass all 7-bit characters; for instance, sending a Ctrl-S could lock up a remote until you sent Ctrl-Q.
And computers back in the 1970s and 1980s weren’t as uniform as they are now. They used different character sets, different line endings, and even had different notions of what a file is. Today’s notion of a file as whatever set of binary bytes an application wants it to be was by no means universal; some systems treated a file as a set of fixed-length records, for instance.
So there were a lot of challenges in reliably moving files between systems. Kermit was introduced to reliably move files between systems using serial lines, automatically working around the varieties of serial lines, detecting errors and retransmitting, managing transmit speeds, and adapting between architectures as appropriate. Quite a task! And perhaps this explains why it was supported on a calculator with a primitive CPU by today’s standards.
Serial communication, by the way, is still commonplace, though now it isn’t prominent in everyone’s home PC setup. It’s used a lot in industrial equipment, avionics, embedded systems, and so forth.
The key point about serial lines is that they aren’t inherently multiplexed or packetized. Whereas an Ethernet network is designed to let many dozens of applications use it at once, a serial line typically runs only one (unless it is something like PPP, which is designed to do multiplexing over the serial line).
So it become useful to be able to both log in to a machine and transfer files with it. That is, incidentally, still useful today.
Kermit and XModem/ZModem
I wondered: why did we end up with two diverging sets of protocols, created at about the same time? The Kermit website has the answer: essentially, BBSs could assume 8-bit clean connections, so XModem and ZModem had much less complexity to worry about. Kermit, on the other hand, was highly flexible. Although ZModem came out a few years before Kermit had its performance optimizations, by about 1993 Kermit was on par or faster than ZModem.
Beyond serial ports
As LANs and the Internet came to be popular, people started to use telnet (and later ssh) to connect to remote systems, rather than serial lines and modems. FTP was an early way to transfer files across the Internet, but it had its challenges. Kermit added telnet support, as well as later support for ssh (as a wrapper around the ssh command you already know). Now you could easily log in to a machine and exchange files with it without missing a beat.
And so it was that the Internet Kermit Service Daemon (IKSD) came into existence. It allows a person to set up a Kermit server, which can authenticate against local accounts or present anonymous access akin to FTP.
And so I established the quux.org Kermit Server, which runs the Unix IKSD (part of the Debian ckermit package).
Trying Out the quux.org Kermit Server
There are more instructions on the quux.org Kermit Server page! You can connect to it using either telnet or the kermit program. I won’t duplicate all of the information here, but here’s what it looks like to connect:
$ kermit
C-Kermit 10.0 Beta.08, 15 Dec 2022, for Linux+SSL (64-bit)
 Copyright (C) 1985, 2022,
  Trustees of Columbia University in the City of New York.
  Open Source 3-clause BSD license since 2011.
Type ? or HELP for help.
(/tmp/t/) C-Kermit>iksd /user:anonymous kermit.quux.org
 DNS Lookup...  Trying 135.148.101.37...  Reverse DNS Lookup... (OK)
Connecting to host glockenspiel.complete.org:1649
 Escape character: Ctrl-\ (ASCII 28, FS): enabled
Type the escape character followed by C to get back,
or followed by ? to see other options.
----------------------------------------------------

 >>> Welcome to the Internet Kermit Service at kermit.quux.org <<<

To log in, use 'anonymous' as the username, and any non-empty password

Internet Kermit Service ready at Fri Aug  4 22:32:17 2023
C-Kermit 10.0 Beta.08, 15 Dec 2022
kermit

Enter e-mail address as Password: [redacted]

Anonymous login.

You are now connected to the quux kermit server.

Try commands like HELP, cd gopher, dir, and the like.  Use INTRO
for a nice introduction.

(~/) IKSD>
You can even recursively download the entire Kermit mirror: over 1GB of files!
Conclusions
So, have fun. Enjoy this experience from the 1980s.
And note that Kermit also makes a better ssh client than ssh in a lot of ways; see ideas on my Kermit page.
This page also has a permanent home on my website, where it may be periodically updated.
Backing Up and Archiving to Removable Media: dar vs. git-annex 11 Jul 2023 5:53 PM (2 years ago)
This is the fourth in a series about archiving to removable media (optical discs such as BD-Rs and DVD+Rs or portable hard drives). Here are the first three parts:
- In part 1, I laid out my goals for the project, and considered a number of tools before determining dar and git-annex were my leading options.
- In part 2, I took a deep dive into git-annex and simulated using it for this project.
- In part 3, I did the same with dar.
- And in this part, I want to put it together to come up with an initial direction to pursue.
I want to state at the outset that this is not a general review of dar or git-annex. This is an analysis of how those tools stack up to a particular use case. Neither tool focuses on this use case, and I note it is particularly far from the more common uses of git-annex. For instance, both tools offer support for cloud storage providers and special support for ssh targets, but neither of those are in-scope for this post.
Comparison Matrix
As part of this project, I made a comparison matrix which includes not just dar and git-annex, but also backuppc, bacula/bareos, and borg. This may give you some good context, and also some reference for other projects in this general space.
Reviewing the Goals
I identified some goals in part 1. They are all valid. As I have thought through the project more, I feel like I should condense them into a simpler ordered list, with the first being the most important. I omit some things here that both dar and git-annex can do (updates/incrementals, for instance; see the expanded goals list in part 1). Here they are:
- The tool must not modify the source data in any way.
- It must be simple to create or update an archive. Processes that require a lot of manual work, are flaky, or are difficult to do correctly, are unlikely to be done correctly and often. If it’s easy to do right, I’m more likely to do it. Put another way: an archive never created can never be restored.
- The chances of a successful restore by someone that is not me, that doesn’t know Linux, and is at least 10 years in the future, should be maximized. This implies a simple toolset, solid support for dealing with media errors or missing media, etc.
- Both a partial point-in-time restore and a full restore should be possible. The full restore must, at minimum, provide a consistent directory tree; that is, deletions, additions, and moves over time must be accurately reflected. Preserving modification times is a near-requirement, and preserving hard links, symbolic links, and other POSIX metadata is a significant nice-to-have.
- There must be a strategy to provide redundancy; for instance, a way for one set of archive discs to be offsite, another onsite, and the two to be periodically swapped.
- Use storage space efficiently.
Let’s take a look at how the two stack up against these goals.
Goal 1: Not modifying source data
With dar, this is accomplished. dar --create does not modify source data (and even has a mode to avoid updating atime) so that’s done.
git-annex normally does modify source data, in that it typically replaces files with symlinks into its hash-indexed storage directory. It can instead use hardlinks. In either case, you will wind up with files that have identical content (but may have originally been separate, non-linked files) linked together with git-annex. This would cause me trouble, as well as run the risk of modifying timestamps. So instead of just storing my data under a git-annex repo as is its most common case, I use the directory special remote with importtree=yes to sort of “import” the data in. This, plus my desire to have the repos sensible and usable on non-POSIX operating systems, accounts for a chunk of the git-annex complexity you see here. You wouldn’t normally see as much complexity with git-annex (though, as you will see, even without the directory special remote, dar still has less complexity).
Winner: dar, though I demonstrated a working approach with git-annex as well.
Goal 2: Simplicity of creating or updating an archive
Let us simply start by recognizing this:
- Number of commands to create a first dar archive, including all splits: 1
- Number of commands to create a first git-annex archive, with just the first two splits: 58
- Number of commands to create a dar incremental: 1
- Number of commands to update the last git-annex drive: 10
- Number of commands to do a full restore of all slices and both archives with dar: 2 (1 if dar_manager used)
- Number of commands to do a full restore of just the first two drive with git-annex: 9 (but my process may not be correct)
Both tools have a lot of power, but I must say, it is easier to wrap my head around what dar is doing than what git-annex is doing. Everything dar does is with files: here are the files to archive, here is an archive file, here is a detached (isolated) catalog. It is very straightforward. It took me far less time to develop my dar page than my git-annex page, despite having existing familiarity with both tools. As I pointed out in part 2, I still don’t fully understand how git-annex syncs metadata. Unsolved mysteries from that post include why the two git-annex drives had no idea what was on the other drives, and why the export operation silenty did nothing. Additionally, for the optical disc case, I had to create a restricted-size filesystem/dataset for git-annex to write into in order to get the desired size limit.
Looking at the optical disc case, dar has a lot of nice infrastructure built in. With –pause and –execute, it can very easily be combined with disc burning operations. –slice will automatically limit the size of a given slice, regardless of how much disk space is free, meaning that the git-annex tricks of creating smaller filesystems/datasets are unnecessary with dar.
To create an initial full backup with dar, you just give it the size of the device, and it will automatically split up the archive, with hooks to integrate for burning or changing drives. About as easy as you could get.
With git-annex, you would run the commands to have it fill up the initial filesystem, then burn the disc (or remove the drive), then run the commands to create another repo on the second filesystem, and so forth.
With hard drives, with git-annex you would do something similar; let it fill up a repo on a drive, and if it exits with a space error, swap in the next. With dar, you would slice as with an optical disk. Dar’s slicing is less convenient in this case, though, as it assumes every drive is the same size — and yours may not be. You could work around that by using a slice size no bigger than the smallest drive, and putting multiple slices on larger drives if need be. If a single drive is large enough to hold your entire data set, though, you need not worry about this with either tool.
Here’s a warning about git-annex: it won’t store anything beneath directories named .git. My use case doesn’t have many of those. If your use case does, you’re going to have to figure out what to do about it. Maybe rename them to something else while the backup runs? In any case, it is simply a fact that git-annex cannot back up git repositories, and this cuts against being able to back up things correctly.
Another point is that git-annex has scalability concerns. If your archive set gets into the hundreds of thousands of files, you may need to split it into multiple distinct git-annex repositories. If this occurs — and it will in my case — it may serve to dull the shine of some of git-annex’s features such as location tracking.
A detour down the update strategies path
Update strategies get a little more complicated with both. First, let’s consider: what exactly should our update strategy be?
For optical discs, I might consider doing a monthly update. I could burn a disc (or more than one, if needed) regardless of how much data is going to go onto it, because I want no more than a month’s data lost in any case. An alternative might be to spool up data until I have a disc’s worth, and then write that, but that could possibly mean months between actually burning a disc. Probably not good.
For removable drives, we’re unlikely to use a new drive each month. So there it makes sense to continue writing to the drive until it’s full. Now we have a choice: do we write and preserve each month’s updates, or do we eliminate intermediate changes and just keep the most recent data?
With both tools, the monthly burn of an optical disc turns out to be very similar to the initial full backup to optical disc. The considerations for spanning multiple discs are the same. With both tools, we would presumably want to keep some metadata on the host so that we don’t have to refer to a previous disc to know what was burned. In the dar case, that would be an isolated catalog. For git-annex, it would be a metadata-only repo. I illustrated both of these in parts 2 and 3.
Now, for hard drives. Assuming we want to continue preserving each month’s updates, with dar, we could just write an incremental to the drive each month. Assuming that the size of the incremental is likely far smaller than the size of the drive, you could easily enough do this. More fancily, you could look at the free space on the drive and tell dar to use that as the size of the first slice. For git-annex, you simply avoid calling drop/dropunused. This will cause the old versions of files to accumulate in .git/annex. You can get at them with git annex commands. This may imply some degree of elevated risk, as you are modifying metadata in the repo each month, which with dar you could chmod a-w or even chattr +i the archive files once written. Hopefully this elevated risk is low.
If you don’t want to preserve each month’s updates, with dar, you could just write an incremental each month that is based on the previous drive’s last backup, overwriting the previous. That implies some risk of drive failure during the time the overwrite is happening. Alternatively, you could write an incremental and then use dar to merge it into the previous incremental, creating a new one. This implies some degree of extra space needed (maybe on a different filesystem) while doing this. With git-annex, you would use drop/dropunused as I demonstrated in part 2.
The winner for goal 2 is dar. The gap is biggest with optical discs and more narrow with hard drives, thanks to git-annex’s different options for updates. Still, I would be more confident I got it right with dar.
Goal 3: Greatest chance of successful restore in the distant future
If you use git-annex like I suggested in part 2, you will have a set of discs or drives that contain a folder structure with plain files in them. These files can be opened without any additional tools at all. For sheer ability to get at raw data, git-annex has the edge.
When you talk about getting a consistent full restore — without multiple copies of renamed files or deleted files coming back — then you are going to need to use git-annex to do that.
Both git-annex and dar provide binaries. Dar provides a win64 version on its Sourceforge page. On the author’s releases site, you can find the win64 version in addition to a statically-linked x86_64 version for Linux. The git-annex install page mostly directs you to package managers for your distribution, but the downloads page also lists builds for Linux, Windows, and Mac OS X. The Linux version is dynamic, but ships most of its .so files alongside. The Windows version requires cygwin.dll, and all versions require you to also install git itself. Both tools are in package managers for Mac OS X, Debian, FreeBSD, and so forth. Let’s just say that you are likely to be able to run either one on a future Windows or Linux system.
There are also GUI frontends for dar, such as DARGUI and gdar. This can increase the chances of a future person being able to use the software easily. git-annex has the assistant, which is based on a different use case and probably not directly helpful here.
When it comes to doing the actual restore process using software, dar provides the easier process here.
For dealing with media errors and the like, dar can integrate with par2. While technically you could use par2 against the files git-annex writes, that’s more cumbersome to manage to the point that it is likely not to be done. Both tools can deal reasonably with missing media entirely.
I’m going to give the edge on this one to git-annex; while dar does provide the easier restore and superior tools for recovering from media errors, the ability to access raw data as plain files without any tools at all is quite compelling. I believe it is the most critical advantage git-annex has, and it’s a big one.
Goal 4: Support high-fidelity partial and full restores
Both tools make it possible to do a full restore reflecting deletions, additions, and so forth. Dar, as noted, is easier for this, but it is possible with git-annex. So, both can achieve a consistent restore.
Part of this goal deals with fidelity of the restore: preserving timestamps, hard and symbolic links, ownership, permissions, etc. Of these, timestamps are the most important for me.
git-annex can’t do any of that. dar does all of it.
Some of this can be worked around using mtree as I documented in part 2. However, that implies a need to also provide mtree on the discs for future users, and I’m not sure mtree really exists for Windows. It also cuts against the argument that git-annex discs can be used without any tools. It is true, they can, but all you will get is filename and content; no accurate date. Timestamps are often highly relevant for everything from photos to finding an elusive document or record.
Winner: dar.
Goal 5: Supporting backup strategies with redundancy
My main goal here is to have two separate backup sets: one that is offsite, and one that is onsite. Depending on the strategy and media, they might just always stay that way, or periodically rotate. For instance, with optical discs, you might just burn two copies of every disc and store one at each place. For hard drives, since you will be updating the content of them, you might swap them periodically.
This is possible with both tools. With both tools, if using the optical disc scheme I laid out, you can just burn two identical copies of each disc.
With the hard drive case, with dar, you can keep two directories of isolated catalogs, one for each drive set. A little identifier file on each drive will let you know which set to use.
git-annex can track locations itself. As I demonstrated in part 2, you can make each drive its own repo, add all drives from a given drive set to a git-annex group. When initializing a drive, you tell git-annex what group it’s a prt of. From then on, git-annex knows what content is in each group and will add whatever a given drive’s group needs to that drive.
It’s possible to do this with both, but the winner here is git-annex.
Goal 6: Efficient use of storage
Here are situations in which one or the other will be more efficient:
- Lots of small files: dar, due to reduced filesystem overhead
- Compressible data: dar (git-annex doesn’t support compression)
- Renamed files: git-annex (it will detect the sha256 match and avoid storing a duplicate copy)
- Identical files: git-annex, unless they are hardlinked already (again, detects the sha256 match)
- Small modifications to files (eg, ID3 tags on MP3s, EXIF data on photos, etc): dar (it supports rsync-style binary deltas)
The winner depends on your particular situation.
Other notes
While not part of the goals above, dar is capable of using tapes directly. While not as common, they are often used in communities of people that archive lots of data.
Conclusions
Overall, dar is the winner for me. It is simpler in most areas, easier to get correct, and scales very well.
git-annex does, however, have some quite compelling points. Being able to access files as plain files is huge, and its location tracking is nicer than dar’s, even when using dar_manager.
Both tools are excellent and I recommend them both – and for more than the particular scenario shown here. Both have fantastic and responsive authors.
Using dar for Data Archiving 16 Jun 2023 5:16 PM (2 years ago)
This is the third post in a series about data archiving to removable media (optical discs and hard drives). In the first, I explained the difference between backing up and archiving, established goals for the project, and said I’d evaluate git-annex and dar. The second post evaluated git-annex, and now it’s time to look at dar. The series will conclude with a post comparing git-annex with dar.
What is dar?
I could open with the same thing I did with git-annex, just changing the name of the program: “[dar] is a fantastic and versatile program that does… well, it’s one of those things that can do so much that it’s a bit hard to describe.” It is, fundamentally, an archiver like tar or zip (makes one file representing a bunch of other files), but it goes far beyond that. dar’s homepage lays out a comprehensive list of features, which I will try to summarize here.
- Dar itself is both a library (with C++ and Python bindings) for interacting with data, and a CLI tool (dar itself).
- Alongside this, there is an ecosystem of tools around dar, including GUIs for multiple platforms, backup scripts, and FUSE implementations.
- Dar is like tar in that it can read and write files sequentially if desired. Dar archives can be streamed, just like tar archives. But dar takes it further; if you have dar_slave on the remote end, random access is possible over ssh (dramatically speeding up certain operations).
- Dar is like zip in that a dar archive contains a central directory (called a catalog) which permits random access to the contents of an archive. In other words, you don’t have to read an entire archive to extract just one file (assuming the archive is on disk or something that itself permits random access). Also, dar can compress each file individually, rather than the tar approach of compressing the archive as a whole. This increases archive performance (dar knows not to try to compress already-compressed data), boosts restore resilience (corruption of one part of an archive doesn’t invalidate the entire rest of it), and boosts restore performance (permitting random access).
- Dar can split an archive into multiple pieces called slices, and it can even split member files among the slices. The catalog contains information allowing you to know which slice(s) a given file is saved in.
- The catalog can also be saved off in a file of its own (dar calls this an “isolated catalog”). Isolated catalogs record just metadata about files archived.
- dar_manager can assemble a database by reading archives or isolated catalogs, letting you know where files are stored and facilitating restores using the minimal number of discs.
- Dar supports differential/incremental backups, which record changes since the last backup. These backups record not just additions, but also deletions. dar can optionally use rsync-style binary deltas to minimize the space needed to record changes. Dar does not suffer from GNU tar’s data loss bug with incrementals.
- Dar can “slice and dice” archives like Perl does strings. The usage notes page shows how you can merge archives, create decremental archives (where the full backup always reflects the current state of the system, and incrementals go backwards in time instead of forwards), etc. You can change the compression algorithm on an existing archive, re-slice it, etc.
- Dar is extremely careful about preserving all metadata: hard links, sparse files, symlinks, timestamps (including subsecond resolution), EAs, POSIX ACLs, resource forks on Mac, detecting files being modified while being read, etc. It makes a nice way to copy directories, sort of similar to rsync -avxHAXS.
So to tie this together for this project, I will set up a 400MB slice size (to mimic what I did with git-annex), and see how dar saves the data and restores it.
Isolated cataloges aren’t strictly necessary for this, but by using them (and/or dar_manager), we can build up a database of files and locations and thus directly compare dar to git-annex location tracking.
Walkthrough: Creating the first archive
As with the git-annex walkthrough, I’ll set some variables to make it easy to remember:
- $SOURCEDIR is the directory being backed up
- $DRIVE is the directory for backups to be stored in. Since dar can split by a specified size, I don’t need to make separate filesystems to simulate the separate drive experience as I did with git-annex.
- $CATDIR will hold isolated catalogs
- $DARDB points to the dar_manager database
OK, we can run the backup immediately. No special setup is needed. dar supports both short-form (single-character) parameters and long-form ones. Since the parameters probably aren’t familiar to everyone, I will use the long-form ones in these examples.
Here’s how we create our initial full backup. I’ll explain the parameters below:
$ dar \

  --verbose \

  --create $DRIVE/bak1 \

  --on-fly-isolate $CATDIR/bak1 \

  --slice 400M \

  --min-digits 2 \

  --pause \

  --fs-root $SOURCEDIR
Let’s look at each of these parameters:
- –verbose does what you expect
- –create selects the operation mode (like tar -c) and gives the archive basename
- –on-fly-isolate says to write an isolated catalog as well, right while making the archive. You can always create an isolated catalog later (which is fast, since it only needs to read the last bits of the last slice) but it’s more convenient to do it now, so we do. We give the base name for the isolated catalog also.
- –slice 400M says to split the archive, and create slices 400MB each.
- –min-digits 2 pertains to naming files. Without it, dar would create files named bak1.dar.1, bak1.dar.2, bak1.dar.10, etc. dar works fine with this, but it can be annoying in ls. This is just convenience for humans.
- –pause tells dar to pause after writing each slice. This would let us swap drives, burn discs, etc. I do this for demonstration purposes only; it isn’t strictly necessary in this situation. For a more powerful option, dar also supports –execute, which can run commands after each slice.
- –fs-root gives the path to actually back up.
This same command could have been written with short options as:
$ dar -v -c $DRIVE/bak1 -@ $CATDIR/bak1 -s 400M -9 2 -p -R $SOURCEDIR
What does it look like while running? Here’s an excerpt:
...

Adding file to archive: /acrypt/no-backup/jgoerzen/testdata/[redacted]

Finished writing to file 1, ready to continue ?  [return = YES | Esc = NO]

...

Writing down archive contents...

Closing the escape layer...

Writing down the first archive terminator...

Writing down archive trailer...

Writing down the second archive terminator...

Closing archive low layer...

Archive is closed.
--------------------------------------------
581 inode(s) saved
including 0 hard link(s) treated
0 inode(s) changed at the moment of the backup and could not be saved properly
0 byte(s) have been wasted in the archive to resave changing files
0 inode(s) with only metadata changed
0 inode(s) not saved (no inode/file change)
0 inode(s) failed to be saved (filesystem error)
0 inode(s) ignored (excluded by filters)
0 inode(s) recorded as deleted from reference backup
--------------------------------------------
Total number of inode(s) considered: 581
--------------------------------------------
EA saved for 0 inode(s)
FSA saved for 581 inode(s)
--------------------------------------------
Making room in memory (releasing memory used by archive of reference)...
Now performing on-fly isolation...
...
That was easy! Let’s look at the contents of the backup directory:
$ ls -lh $DRIVE

total 3.7G

-rw-r--r-- 1 jgoerzen jgoerzen 400M Jun 16 19:27 bak1.01.dar

-rw-r--r-- 1 jgoerzen jgoerzen 400M Jun 16 19:27 bak1.02.dar

-rw-r--r-- 1 jgoerzen jgoerzen 400M Jun 16 19:27 bak1.03.dar

-rw-r--r-- 1 jgoerzen jgoerzen 400M Jun 16 19:27 bak1.04.dar

-rw-r--r-- 1 jgoerzen jgoerzen 400M Jun 16 19:28 bak1.05.dar

-rw-r--r-- 1 jgoerzen jgoerzen 400M Jun 16 19:28 bak1.06.dar

-rw-r--r-- 1 jgoerzen jgoerzen 400M Jun 16 19:28 bak1.07.dar

-rw-r--r-- 1 jgoerzen jgoerzen 400M Jun 16 19:28 bak1.08.dar

-rw-r--r-- 1 jgoerzen jgoerzen 400M Jun 16 19:29 bak1.09.dar

-rw-r--r-- 1 jgoerzen jgoerzen 156M Jun 16 19:33 bak1.10.dar
And the isolated catalog:
$ ls -lh $CATDIR

total 37K

-rw-r--r-- 1 jgoerzen jgoerzen 35K Jun 16 19:33 bak1.1.dar
The isolated catalog is stored compressed automatically.
Well this was easy. With one command, we archived the entire data set, split into 400MB chunks, and wrote out the catalog data.
Walkthrough: Inspecting the saved archive
Can dar tell us which slice contains a given file? Sure:
$ dar --list $DRIVE/bak1 --list-format=slicing | less

Slice(s)|[Data ][D][ EA  ][FSA][Compr][S]|Permission| Filemane

--------+--------------------------------+----------+-----------------------------

...

1        [Saved][ ]       [-L-][   0%][X] -rwxr--r-- [redacted]

1-2      [Saved][ ]       [-L-][   0%][X] -rwxr--r-- [redacted]

2        [Saved][ ]       [-L-][   0%][X] -rwxr--r-- [redacted]

...
This illustrates the transition from slice 1 to slice 2. The first file was stored entirely in slice 1; the second stored partially in slice 1 and partially in slice 2, and third solely in slice 2. We can get other kinds of information as well.
$ dar --list $DRIVE/bak1 | less

[Data ][D][ EA  ][FSA][Compr][S]| Permission | User  | Group | Size    |          Date                 |    filename

--------------------------------+------------+-------+-------+---------+-------------------------------+------------

[Saved][ ]       [-L-][   0%][X]  -rwxr--r--   jgoerzen jgoerzen        24 Mio  Mon Mar  5 07:58:09 2018        [redacted]

[Saved][ ]       [-L-][   0%][X]  -rwxr--r--   jgoerzen jgoerzen        16 Mio  Mon Mar  5 07:58:09 2018        [redacted]

[Saved][ ]       [-L-][   0%][X]  -rwxr--r--   jgoerzen jgoerzen        22 Mio  Mon Mar  5 07:58:09 2018        [redacted]
These are the same files I was looking at before. Here we see they are 24MB, 16MB, and 22MB in size, and some additional metadata. Even more is available in the XML list format.
Walkthrough: updates
As with git-annex, I’ve made some changes in the source directory: moved a file, added another, and deleted one. Let’s create an incremental backup now:
$ dar \

  --verbose \

  --create $DRIVE/bak2 \

  --on-fly-isolate $CATDIR/bak2 \

  --ref $CATDIR/bak1 \

  --slice 400M \

  --min-digits 2 \

  --pause \

  --fs-root $SOURCEDIR
This command is very similar to the earlier one. Instead of writing an archive and catalog named bak1, we write one named bak2. What’s new here is --ref $CATDIR/bak1. That says, make an incremental based on an archive of reference. All that is needed from that archive of reference is the detached catalog. --ref $DRIVE/bak1 would have worked equally well here.
Here’s what I did to the $SOURCEDIR:
- Renamed a file to file01-unchanged
- Deleted a file
- Copied /bin/cp to a file named cp
Let’s see if dar’s command output matches this:
...

Adding file to archive: /acrypt/no-backup/jgoerzen/testdata/file01-unchanged

Saving Filesystem Specific Attributes for /acrypt/no-backup/jgoerzen/testdata/file01-unchanged

Adding file to archive: /acrypt/no-backup/jgoerzen/testdata/cp

Saving Filesystem Specific Attributes for /acrypt/no-backup/jgoerzen/testdata/cp

Adding folder to archive: [redacted]

Saving Filesystem Specific Attributes for [redacted]

Adding reference to files that have been destroyed since reference backup...

...

 --------------------------------------------

 3 inode(s) saved

   including 0 hard link(s) treated

 0 inode(s) changed at the moment of the backup and could not be saved properly

 0 byte(s) have been wasted in the archive to resave changing files

 0 inode(s) with only metadata changed

 578 inode(s) not saved (no inode/file change)

 0 inode(s) failed to be saved (filesystem error)

 0 inode(s) ignored (excluded by filters)

 2 inode(s) recorded as deleted from reference backup

 --------------------------------------------

 Total number of inode(s) considered: 583

 --------------------------------------------

 EA saved for 0 inode(s)

 FSA saved for 3 inode(s)

 --------------------------------------------

...
Yes, it does. The rename is recorded as a deletion and an addition, since dar doesn’t directly track renames. So the rename plus the deletion account for the two deletions. The rename plus the addition of cp count as 2 of the 3 inodes saved; the third is the modified directory from which files were deleted and moved out.
Let’s see the files that were created:
$ ls -lh $DRIVE/bak2*

-rw-r--r-- 1 jgoerzen jgoerzen 18M Jun 16 19:52 /acrypt/no-backup/jgoerzen/dar-testing/drive/bak2.01.dar

$ ls -lh $CATDIR/bak2*

-rw-r--r-- 1 jgoerzen jgoerzen 22K Jun 16 19:52 /acrypt/no-backup/jgoerzen/dar-testing/cat/bak2.1.dar
What does –list look like now?
Slice(s)|[Data ][D][ EA  ][FSA][Compr][S]|Permission| Filemane

--------+--------------------------------+----------+-----------------------------

         [     ][ ]       [---][-----][X] -rwxr--r-- [redacted]

1        [Saved][ ]       [-L-][   0%][X] -rwxr--r-- file01-unchanged

...

         [--- REMOVED ENTRY ----][redacted]

         [--- REMOVED ENTRY ----][redacted]
Here I show an example of:
- A file that was not changed from the initial backup. Its presence was simply noted, but because we’re doing an incremental, the data wasn’t saved.
- A file that is saved in this incremental, on slice 1.
- The two deleted files
Walkthrough: dar_manager
As we’ve seen above, the two archives (or their detached catalog) give us a complete picture of what files were present at the time of the creation of each archive, and what files were stored in a given archive. We can certainly continue working in that way. We can also use dar_manager to build a comprehensive database of these archives, to be able to find what media is necessary to restore each given file. Or, with dar_manager’s –when parameter, we can restore files as of a particular date.
Let’s try it out. First, we create our database:
$ dar_manager --create $DARDB

$ dar_manager --base $DARDB --add $DRIVE/bak1

Auto detecting min-digits to be 2

$ dar_manager --base $DARDB --add $DRIVE/bak2

Auto detecting min-digits to be 2
Here we created the database, and added our two catalogs to it. (Again, we could have as easily used $CATDIR/bak1; either the archive or its isolated catalog will work here.) It’s important to add the catalogs in order.
Let’s do some quick experimentation with dar_manager:
$ dar_manager -v --base $DARDB --list

Decompressing and loading database to memory...
dar path :
dar options :
database version : 6
compression used : gzip
compression level: 9
archive # | path | basename
------------+--------------+---------------
1 /acrypt/no-backup/jgoerzen/dar-testing/drive bak1
2 /acrypt/no-backup/jgoerzen/dar-testing/drive bak2
$ dar_manager --base $DARDB --stat
archive # | most recent/total data | most recent/total EA
--------------+-------------------------+-----------------------
1 580/581 0/0
2 3/3 0/0
The –list option shows the correlation between dar_manager archive number (1, 2) with filenames (bak1, bak2). It is coincidence here that 1/bak1 and 2/bak2 correlate; that’s not necessarily the case. Most dar_manager commands operate on archive number, while dar commands operate on archive path/basename.
Now let’s see just what files are saved in archive #2, the incremental:
$ dar_manager --base $DARDB --used 2

[ Saved ][       ]  [redacted]

[ Saved ][       ]  file01-unchanged

[ Saved ][       ]  cp
Now we can also where a file is stored. Here’s one that was saved in the full backup and unmodified in the incremental:
$ dar_manager --base $DARDB --file [redacted]

        1       Fri Jun 16 19:15:12 2023  saved                                 absent

        2       Fri Jun 16 19:15:12 2023  present                               absent
(The absent at the end refers to extended attributes that the file didn’t have)
Similarly, for files that were added or removed, they’ll be listed only at the appropriate place.
Walkthrough: Restoration
I’m not going to repeat the author’s full restoration with dar page, but here are some quick examples.
A simple way of doing everything is using incrementals for the whole series. To do that, you’d have bak1 be full, bak2 based on bak1, bak3 based on bak2, bak4 based on bak3, etc. To restore from such a series, you have two options:
- Use dar to simply extract each archive in order. It will handle deletions, renames, etc. along the way.
- Use dar_manager with the backup database to do manage the process. It may be somewhat more efficient, as it won’t bother to restore files that will later be modified or deleted.
If you get fancy — for instance, bak2 is based on bak1, bak3 on bak2, bak4 on bak1 — then you would want to use dar_manager to ensure a consistent restore is completed. Either way, the process is nearly identical. Also, I figure, to make things easy, you can save a copy of the entire set of isolated catalogs before you finalize each disc/drive. They’re so small, and this would let someone with just the most recent disc build a dar_manager database without having to go through all the other discs.
Anyhow, let’s do a restore using just dar. I’ll make a $RESTOREDIR and do it that way.
$ dar \

  --verbose \

  --extract $DRIVE/bak1 \

  --fs-root $RESTOREDIR \

  --no-warn \

  --execute "echo Ready for slice %n.  Press Enter; read foo"
This –execute lets us see how dar works; this is an illustration of the power it has (above –pause); it’s a snippet interpreted by /bin/sh with %n being one of the dar placeholders. If memory serves, it’s not strictly necessary, as dar will prompt you for slices it needs if they’re not mounted. Anyhow, you’ll see it first reading the last slice, which contains the catalog, then reading from the beginning.
Here we go:
Auto detecting min-digits to be 2

Opening archive bak1 ...

Opening the archive using the multi-slice abstraction layer...

Ready for slice 10. Press Enter

...

Loading catalogue into memory...

Locating archive contents...

Reading archive contents...

File ownership will not be restored du to the lack of privilege, you can disable this message by asking not to restore file ownership [return = YES | Esc = NO]

Continuing...

Restoring file's data: [redacted]

Restoring file's FSA: [redacted]

Ready for slice 1. Press Enter

...

Ready for slice 2. Press Enter

...

 --------------------------------------------

 581 inode(s) restored

    including 0 hard link(s)

 0 inode(s) not restored (not saved in archive)

 0 inode(s) not restored (overwriting policy decision)

 0 inode(s) ignored (excluded by filters)

 0 inode(s) failed to restore (filesystem error)

 0 inode(s) deleted

 --------------------------------------------

 Total number of inode(s) considered: 581

 --------------------------------------------

 EA restored for 0 inode(s)

 FSA restored for 0 inode(s)

 --------------------------------------------
The warning is because I’m not doing the extraction as root, which limits dar’s ability to fully restore ownership data.
OK, now the incremental:
$ dar \

  --verbose \

  --extract $DRIVE/bak2 \

  --fs-root $RESTOREDIR \

  --no-warn \

  --execute "echo Ready for slice %n.  Press Enter; read foo"

...

Ready for slice 1. Press Enter

...

Restoring file's data: /acrypt/no-backup/jgoerzen/dar-testing/restore/file01-unchanged

Restoring file's FSA: /acrypt/no-backup/jgoerzen/dar-testing/restore/file01-unchanged

Restoring file's data: /acrypt/no-backup/jgoerzen/dar-testing/restore/cp

Restoring file's FSA: /acrypt/no-backup/jgoerzen/dar-testing/restore/cp

Restoring file's data: /acrypt/no-backup/jgoerzen/dar-testing/restore/[redacted directory]

Removing file (reason is file recorded as removed in archive): [redacted file]

Removing file (reason is file recorded as removed in archive): [redacted file]
This all looks right! Now how about we compare the restore to the original source directory?
$ diff -durN $SOURCEDIR $RESTOREDIR
No changes – perfect.
We could instead do this restore via a single dar_manager command, though annoyingly, we’d have to pass all top-level files/directories to dar_manager –restore. But still, it’s one command, and basically automates and optimizes the dar restores shown above.
Conclusions
Dar makes it extremely easy to just Do The Right Thing when making archives. One command makes a backup. It saves things in simple files. You can make an isolated catalog if you want, and it too is saved in a simple file. You can query what is in the files and where. You can restore from all or part of the files. You can simply play the backups forward, in order, to achieve a full and consistent restore. Or you can load data about them into dar_manager for an optimized restore.
A bit of scripting will be necessary to make incrementals; finding the most recent backup or catalog. If backup files are named with care — for instance, by date — then this should be a pretty easy task.
I haven’t touched on resiliency yet. dar comes with tools for recovering archives that have had portions corrupted or lost. It can also rebuild the catalog if it is corrupted or lost. It adds “tape marks” (or “escape sequences”) to the archive along with the data stream. So every entry in the catalog is actually stored in the archive twice: once alongside the file data, and once at the end in the collected catalog. This allows dar to scan a corrupted file for the tape marks and reconstruct whatever is still intact, even if the catalog is lost. dar also integrates with tools like sha256sum and par2 to simplify archive integrity testing and restoration.
This balances against the need to use a tool (dar, optionally with a GUI frontend) to restore files. I’ll discuss that more in the next post.
Using git-annex for Data Archiving 15 Jun 2023 8:59 PM (2 years ago)
In my recent post about data archiving to removable media, I laid out the difference between backing up and archiving, and also said I’d evaluate git-annex and dar. This post evaluates git-annex. The next will look at dar, and then I’ll make a comparison post.
What is git-annex?
git-annex is a fantastic and versatile program that does… well, it’s one of those things that can do so much that it’s a bit hard to describe. Its homepage says:
git-annex allows managing large files with git, without storing the file contents in git. It can sync, backup, and archive your data, offline and online. Checksums and encryption keep your data safe and secure. Bring the power and distributed nature of git to bear on your large files with git-annex.
I think the particularly interesting features of git-annex aren’t actually included in that list. Among the features of git-annex that make it shine for this purpose, its location tracking is key. git-annex can know exactly which device has which file at which version at all times. Combined with its preferred content settings, this lets you very easily say things like:
- “I want exactly 1 copy of every file to exist within the set #1 of backup drives. Here’s a drive in that set; copy to it whatever needs to be copied to satisfy that requirement.”
- “Now I have another set of backup drives. Periodically I will swap sets offsite. Copy whatever is needed to this drive in the second set, making sure that there is 1 copy of every file within this set as well, regardless of what’s in the first set.”
- “Here’s a directory I want to use to track the status of everything else. I don’t want any copies at all here.”
git-annex can be set to allow a configurable amount of free space to remain on a device, and it will fill it up with whatever copies are necessary up until it hits that limit. Very convenient!
git-annex will store files in a folder structure that mirrors the origin folder structure, in plain files just as they were. This maximizes the ability for a future person to access the content, since it is all viewable without any special tool at all. Of course, for things like optical media, git-annex will essentially be creating what amounts to incrementals. To obtain a consistent copy of the original tree, you would still need to use git-annex to process (export) the archives.
git-annex challenges
In my prior post, I related some challenges with git-annex. The biggest of them – quite poor performance of the directory special remote when dealing with many files – has been resolved by Joey, git-annex’s author! That dramatically improves the git-annex use scenario here! The fixing commit is in the source tree but not yet in a release.
git-annex no doubt may still have performance challenges with repositories in the 100,000+-range, but in that order of magnitude it now looks usable. I’m not sure about 1,000,000-file repositories (I haven’t tested); there is a page about scalability.
A few other more minor challenges remain:
- git-annex doesn’t really preserve POSIX attributes; for instance, permissions, symlink destinations, and timestamps are all not preserved. Of these, timestamps are the most important for my particular use case.
- If your data set to archive contains Git repositories itself, these will not be included.
I worked around the timestamp issue by using the mtree-netbsd package in Debian. mtree writes out a summary of files and metadata in a tree, and can restore them. To save:
mtree -c -R nlink,uid,gid,mode -p /PATH/TO/REPO -X <(echo './.git') > /tmp/spec
And, after restoration, the timestamps can be applied with:
mtree -t -U -e < /tmp/spec
Walkthrough: initial setup
To use git-annex in this way, we have to do some setup. My general approach is this:
- There is a source of data that lives outside git-annex. I'll call this $SOURCEDIR.
- I'm going to name the directories holding my data $REPONAME.
- There will be a "coordination" git-annex repo. It will hold metadata only, and no data. This will let us track where things live. I'll call it $METAREPO.
- There will be drives. For this example, I'll call their mountpoints $DRIVE01 and $DRIVE02. For easy demonstration purposes, I used a ZFS dataset with a refquota set (to observe the size handling), but I could have as easily used a LVM volume, btrfs dataset, loopback filesystem, or USB drive. For optical discs, this would be a staging area or a UDF filesystem.
Let's get started! I've set all these shell variables appropriately for this example, and REPONAME to "testdata". We'll begin by setting up the metadata-only tracking repo.
$ REPONAME=testdata

$ mkdir "$METAREPO"

$ cd "$METAREPO"

$ git init

$ git config annex.thin true
There is a sort of complicated topic of how git-annex stores files in a repo, which varies depending on whether the data for the file is present in a given repo, and whether the file is locked or unlocked. Basically, the options I use here cause git-annex to mostly use hard links instead of symlinks or pointer files, for maximum compatibility with non-POSIX filesystems such as NTFS and UDF, which might be used on these devices. thin is part of that.
Let's continue:
$ git annex init 'local hub'

init local hub ok

(recording state in git...)

$ git annex wanted . "include=* and exclude=$REPONAME/*"

wanted . ok

(recording state in git...)
In a bit, we are going to import the source data under the directory named $REPONAME (here, testdata). The wanted command says: in this repository (represented by the bare dot), the files we want are matched by the rule that says eveyrthing except what's under $REPONAME. In other words, we don't want to make an unnecessary copy here.
Because I expect to use an mtree file as documented above, and it is not under $REPONAME/, it will be included. Let's just add it and tweak some things.
$ touch mtree

$ git annex add mtree

add mtree

ok

(recording state in git...)

$ git annex sync

git-annex sync will change default behavior to operate on --content in a future version of git-annex. Recommend you explicitly use --no-content (or -g) to prepare for that change. (Or you can configure annex.synccontent)

commit

[main (root-commit) 6044742] git-annex in local hub

 1 file changed, 1 insertion(+)

 create mode 120000 mtree

ok

$ ls -l

total 9

lrwxrwxrwx 1 jgoerzen jgoerzen 178 Jun 15 22:31 mtree -> .git/annex/objects/pX/ZJ/...
OK! We've added a file, and it got transformed into a symlink. That's the thing I said we were going to avoid, so:
 git annex adjust --unlock-present

adjust

Switched to branch 'adjusted/main(unlockpresent)'

ok

$ ls -l

total 1

-rw-r--r-- 2 jgoerzen jgoerzen 0 Jun 15 22:31 mtree
You'll notice it transformed into a hard link (nlinks=2) file. Great! Now let's import the source data. For that, we'll use the directory special remote.
$ git annex initremote source type=directory  directory=$SOURCEDIR importtree=yes \

   encryption=none

initremote source ok

(recording state in git...)

$ git annex enableremote source directory=$SOURCEDIR

enableremote source ok

(recording state in git...)

$ git config remote.source.annex-readonly true

$ git config annex.securehashesonly true

$ git config annex.genmetadata true

$ git config annex.diskreserve 100M

$ git config remote.source.annex-tracking-branch main:$REPONAME
OK, so here we created a new remote named "source". We enabled it, and set some configuration. Most notably, that last line causes files from "source" to be imported under $REPONAME/ as we wanted earlier. Now we're ready to scan the source.
$ git annex sync
At this point, you'll see git-annex computing a hash for every file in the source directory.
I can verify with du that my metadata-only repo only uses 14MB of disk space, while my source is around 4GB.
Now we can see what git-annex thinks about file locations:
$ git-annex whereis | less

whereis mtree (1 copy)

        8aed01c5-da30-46c0-8357-1e8a94f67ed6 -- local hub [here]

ok

whereis testdata/[redacted] (0 copies)

  The following untrusted locations may also have copies:

        9e48387e-b096-400a-8555-a3caf5b70a64 -- [source]

failed

... many more lines ...
So remember we said we wanted mtree, but nothing under testdata, under this repo? That's exactly what we got. git-annex knows that the files under testdata can be found under the "source" special remote, but aren't in any git-annex repo -- yet. Now we'll start adding them.
Walkthrough: removable drives
I've set up two 500MB filesystems to represent removable drives. We'll see how git-annex works with them.
$ cd $DRIVE01

$ df -h .

Filesystem                     Size  Used Avail Use% Mounted on

acrypt/no-backup/annexdrive01  500M  1.0M  499M   1% /acrypt/no-backup/annexdrive01

$ git clone $METAREPO

Cloning into 'testdata'...

done.

$ cd $REPONAME

$ git config annex.thin true

$ git annex init "test drive #1"

$ git annex adjust --hide-missing --unlock

adjust

Switched to branch 'adjusted/main(hidemissing-unlocked)'

ok

$ git annex sync
OK, that's the initial setup. Now let's enable the source remote and configure it the same way we did before:
$ git annex enableremote source directory=$SOURCEDIR

enableremote source ok

(recording state in git...)

$ git config remote.source.annex-readonly true

$ git config remote.source.annex-tracking-branch main:$REPONAME

$ git config annex.securehashesonly true

$ git config annex.genmetadata true

$ git config annex.diskreserve 100M
Now, we'll add the drive to a group called "driveset01" and configure what we want on it:
$ git annex group . driveset01

$ git annex wanted . '(not copies=driveset01:1)'
What this does is say: first of all, this drive is in a group named driveset01. Then, this drive wants any files for which there isn't already at least one copy in driveset01.
Now let's load up some files!
$ git annex sync --content
As the messages fly by from here, you'll see it mentioning that it got mtree, and then various files from "source" -- until, that is, the filesystem had less than 100MB free, at which point it complained of no space for the rest. Exactly like we wanted!
Now, we need to teach $METAREPO about $DRIVE01.
$ cd $METAREPO

$ git remote add drive01 $DRIVE01/$REPONAME

$ git annex sync drive01

git-annex sync will change default behavior to operate on --content in a future version of git-annex. Recommend you explicitly use --no-content (or -g) to prepare for that change. (Or you can configure annex.synccontent)

commit

On branch adjusted/main(unlockpresent)

nothing to commit, working tree clean

ok

merge synced/main (Merging into main...)

Updating d1d9e53..817befc

Fast-forward

(Merging into adjusted branch...)

Updating 7ccc20b..861aa60

Fast-forward

ok

pull drive01

remote: Enumerating objects: 214, done.

remote: Counting objects: 100% (214/214), done.

remote: Compressing objects: 100% (95/95), done.

remote: Total 110 (delta 6), reused 0 (delta 0), pack-reused 0

Receiving objects: 100% (110/110), 13.01 KiB | 1.44 MiB/s, done.

Resolving deltas: 100% (6/6), completed with 6 local objects.

From /acrypt/no-backup/annexdrive01/testdata

 * [new branch]      adjusted/main(hidemissing-unlocked) -> drive01/adjusted/main(hidemissing-unlocked)

 * [new branch]      adjusted/main(unlockpresent)        -> drive01/adjusted/main(unlockpresent)

 * [new branch]      git-annex                           -> drive01/git-annex

 * [new branch]      main                                -> drive01/main

 * [new branch]      synced/main                         -> drive01/synced/main

ok
OK! This step is important, because drive01 and drive02 (which we'll set up shortly) won't necessarily be able to reach each other directly, due to not being plugged in simultaneously. Our $METAREPO, however, will know all about where every file is, so that the "wanted" settings can be correctly resolved. Let's see what things look like now:
$ git annex whereis | less

whereis mtree (2 copies)

        8aed01c5-da30-46c0-8357-1e8a94f67ed6 -- local hub [here]

        b46fc85c-c68e-4093-a66e-19dc99a7d5e7 -- test drive #1 [drive01]

ok

whereis testdata/[redacted] (1 copy)

        b46fc85c-c68e-4093-a66e-19dc99a7d5e7 -- test drive #1 [drive01]
The following untrusted locations may also have copies:
9e48387e-b096-400a-8555-a3caf5b70a64 -- [source]
ok
If I scroll down a bit, I'll see the files past the 400MB mark that didn't make it onto drive01. Let's add another example drive!
Walkthrough: Adding a second drive
The steps for $DRIVE02 are the same as we did before, just with drive02 instead of drive01, so I'll omit listing it all a second time. Now look at this excerpt from whereis:
whereis testdata/[redacted] (1 copy)

        b46fc85c-c68e-4093-a66e-19dc99a7d5e7 -- test drive #1 [drive01]
The following untrusted locations may also have copies:
9e48387e-b096-400a-8555-a3caf5b70a64 -- [source]
ok
whereis testdata/[redacted] (1 copy)
c4540343-e3b5-4148-af46-3f612adda506 -- test drive #2 [drive02]
The following untrusted locations may also have copies:
9e48387e-b096-400a-8555-a3caf5b70a64 -- [source]
ok
Look at that! Some files on drive01, some on drive02, some neither place. Perfect!
Walkthrough: Updates
So I've made some changes in the source directory: moved a file, added another, and deleted one. All of these were copied to drive01 above. How do we handle this?
First, we update the metadata repo:
$ cd $METAREPO

$ git annex sync

$ git annex dropunused all
OK, this has scanned $SOURCEDIR and noted changes. Let's see what whereis says:
$ git annex whereis | less

...

whereis testdata/cp (0 copies)

  The following untrusted locations may also have copies:

        9e48387e-b096-400a-8555-a3caf5b70a64 -- [source]

failed

whereis testdata/file01-unchanged (1 copy)

        b46fc85c-c68e-4093-a66e-19dc99a7d5e7 -- test drive #1 [drive01]
The following untrusted locations may also have copies:
9e48387e-b096-400a-8555-a3caf5b70a64 -- [source]
ok
So this looks right. The file I added was a copy of /bin/cp. I moved another file to one named file01-unchanged. Notice that it realized this was a rename and that the data still exists on drive01.
Well, let's update drive01.
$ cd $DRIVE01/$REPONAME

$ git annex sync --content
Looking at the testdata/ directory now, I see that file01-unchanged has been renamed, the deleted file is gone, but cp isn't yet here -- probably due to space issues; as it's new, it's undefined whether it or some other file would fill up free space. Let's work along a few more commands.
$ git annex get --auto

$ git annex drop --auto

$ git annex dropunused all
And now, let's make sure metarepo is updated with its state.
$ cd $METAREPO

$ git annex sync
We could do the same for drive02. This is how we would proceed with every update.
Walkthrough: Restoration
Now, we have bare files at reasonable locations in drive01 and drive02. But, to generate a consistent restore, we need to be able to actually do an export. Otherwise, we may have files with old names, duplicate files, etc. Let's assume that we lost our source and metadata repos and have to restore from scratch. We'll make a new $RESTOREDIR. We'll begin with drive01 since we used it most recently.
$ mv $METAREPO $METAREPO.disabled

$ mv $SOURCEDIR $SOURCEDIR.disabled

$ git clone $DRIVE01/$REPONAME $RESTOREDIR

$ cd $RESTOREDIR

$ git config annex.thin true

$ git annex init "restore"

$ git annex adjust --hide-missing --unlock
Now, we need to connect the drive01 and pull the files from it.
$ git remote add drive01 $DRIVE01/$REPONAME

$ git annex sync --content
Now, repeat with drive02:
$ git remote add drive02 $DRIVE02/$REPONAME

$ git annex sync --content
Now we've got all our content back! Here's what whereis looks like:
whereis testdata/file01-unchanged (3 copies)

        3d663d0f-1a69-4943-8eb1-f4fe22dc4349 -- restore [here]

        9e48387e-b096-400a-8555-a3caf5b70a64 -- source

        b46fc85c-c68e-4093-a66e-19dc99a7d5e7 -- test drive #1 [origin]

ok

...
I was a little surprised that drive01 didn't seem to know what was on drive02. Perhaps that could have been remedied by adding more remotes there? I'm not entirely sure; I'd thought would have been able to do that automatically.
Conclusions
I think I have demonstrated two things:
First, git-annex is indeed an extremely powerful tool. I have only scratched the surface here. The location tracking is a neat feature, and being able to just access the data as plain files if all else fails is nice for future users.
Secondly, it is also a complex tool and difficult to get right for this purpose (I think much easier for some other purposes). For someone that doesn't live and breathe git-annex, it can be hard to get right. In fact, I'm not entirely sure I got it right here. Why didn't drive02 know what files were on drive01 and vice-versa? I don't know, and that reflects some kind of misunderstanding on my part about how metadata is synced; perhaps more care needs to be taken in restore, or done in a different order, than I proposed. I initially tried to do a restore by using git annex export to a directory special remote with exporttree=yes, but I couldn't ever get it to actually do anything, and I don't know why.
These two cut against each other. On the one hand, the raw accessibility of the data to someone with no computer skills is unmatched. On the other hand, I'm not certain I have the skill to always prepare the discs properly, or to do a proper consistent restore.
Recommendations for Tools for Backing Up and Archiving to Removable Media 29 May 2023 8:57 AM (2 years ago)
I have several TB worth of family photos, videos, and other data. This needs to be backed up — and archived.
Backups and archives are often thought of as similar. And indeed, they may be done with the same tools at the same time. But the goals differ somewhat:
Backups are designed to recover from a disaster that you can fairly rapidly detect.
Archives are designed to survive for many years, protecting against disaster not only impacting the original equipment but also the original person that created them.
Reflecting on this, it implies that while a nice ZFS snapshot-based scheme that supports twice-hourly backups may be fantastic for that purpose, if you think about things like family members being able to access it if you are incapacitated, or accessibility in a few decades’ time, it becomes much less appealing for archives. ZFS doesn’t have the wide software support that NTFS, FAT, UDF, ISO-9660, etc. do.
This post isn’t about the pros and cons of the different storage media, nor is it about the pros and cons of cloud storage for archiving; these conversations can readily be found elsewhere. Let’s assume, for the point of conversation, that we are considering BD-R optical discs as well as external HDDs, both of which are too small to hold the entire backup set.
What would you use for archiving in these circumstances?
Establishing goals
The goals I have are:
- Archives can be restored using Linux or Windows (even though I don’t use Windows, this requirement will ensure the broadest compatibility in the future)
- The archival system must be able to accommodate periodic updates consisting of new files, deleted files, moved files, and modified files, without requiring a rewrite of the entire archive dataset
- Archives can ideally be mounted on any common OS and the component files directly copied off
- Redundancy must be possible. In the worst case, one could manually copy one drive/disc to another. Ideally, the archiving system would automatically track making n copies of data.
- While a full restore may be a goal, simply finding one file or one directory may also be a goal. Ideally, an archiving system would be able to quickly tell me which discs/drives contain a given file.
- Ideally, preserves as much POSIX metadata as possible (hard links, symlinks, modification date, permissions, etc). However, for the archiving case, this is less important than for the backup case, with the possible exception of modification date.
- Must be easy enough to do, and sufficiently automatable, to allow frequent updates without error-prone or time-consuming manual hassle
I would welcome your ideas for what to use. Below, I’ll highlight different approaches I’ve looked into and how they stack up.
Basic copies of directories
The initial approach might be one of simply copying directories across. This would work well if the data set to be archived is smaller than the archival media. In that case, you could just burn or rsync a new copy with every update and be done. Unfortunately, this is much less convenient with data of the size I’m dealing with. rsync is unavailable in that case. With some datasets, you could manually design some rsyncs to store individual directories on individual devices, but that gets unwieldy fast and isn’t scalable.
You could use something like my datapacker program to split the data across multiple discs/drives efficiently. However, updates will be a problem; you’d have to re-burn the entire set to get a consistent copy, or rely on external tools like mtree to reflect deletions. Not very convenient in any case.
So I won’t be using this.
tar or zip
While you can split tar and zip files across multiple media, they have a lot of issues. GNU tar’s incremental mode is clunky and buggy; zip is even worse. tar files can’t be read randomly, making it extremely time-consuming to extract just certain files out of a tar file.
The only thing going for these formats (and especially zip) is the wide compatibility for restoration.
dar
Here we start to get into the more interesting tools. Dar is, in my opinion, one of the best Linux tools that few people know about. Since I first wrote about dar in 2008, it’s added some interesting new features; among them, binary deltas and cloud storage support. So, dar has quite a few interesting features that I make use of in other ways, and could also be quite helpful here:
- Dar can both read and write files sequentially (streaming, like tar), or with random-access (quick seek to extract a subset without having to read the entire archive)
- Dar can apply compression to individual files, rather than to the archive as a whole, faciliting both random access and resilience (corruption in one file doesn’t invalidate all subsequent files). Dar also supports numerous compression algorithms including gzip, bzip2, xz, lzo, etc., and can omit compressing already-compressed files.
- The end of each dar file contains a central directory (dar calls this a catalog). The catalog contains everything necessary to extract individual files from the archive quickly, as well as everything necessary to make a future incremental archive based on this one. Additionally, dar can make and work with “isolated catalogs” — a file containing the catalog only, without data.
- Dar can split the archive into multiple pieces called slices. This can best be done with fixed-size slices (–slice and –first-slice options), which let the catalog regord the slice number and preserves random access capabilities. With the –execute option, dar can easily wait for a given slice to be burned, etc.
- Dar normally stores an entire new copy of a modified file, but can optionally store an rdiff binary delta instead. This has the potential to be far smaller (think of a case of modifying metadata for a photo, for instance).
Additionally, dar comes with a dar_manager program. dar_manager makes a database out of dar catalogs (or archives). This can then be used to identify the precise archive containing a particular version of a particular file.
All this combines to make a useful system for archiving. Isolated catalogs are tiny, and it would be easy enough to include the isolated catalogs for the entire set of archives that came before (or even the dar_manager database file) with each new incremental archive. This would make restoration of a particular subset easy.
The main thing to address with dar is that you do need dar to extract the archive. Every dar release comes with source code and a win64 build. dar also supports building a statically-linked Linux binary. It would therefore be easy to include win64 binary, Linux binary, and source with every archive run. dar is also a part of multiple Linux and BSD distributions, which are archived around the Internet. I think this provides a reasonable future-proofing to make sure dar archives will still be readable in the future.
The other challenge is user ability. While dar is highly portable, it is fundamentally a CLI tool and will require CLI abilities on the part of users. I suspect, though, that I could write up a few pages of instructions to include and make that a reasonably easy process. Not everyone can use a CLI, but I would expect a person that could follow those instructions could be readily-enough found.
One other benefit of dar is that it could easily be used with tapes. The LTO series is liked by various hobbyists, though it could pose formidable obstacles to non-hobbyists trying to aceess data in future decades. Additionally, since the archive is a big file, it lends itself to working with par2 to provide redundancy for certain amounts of data corruption.
git-annex
git-annex is an interesting program that is designed to facilitate managing large sets of data and moving it between repositories. git-annex has particular support for offline archive drives and tracks which drives contain which files.
The idea would be to store the data to be archived in a git-annex repository. Then git-annex commands could generate filesystem trees on the external drives (or trees to br burned to read-only media).
In a post about using git-annex for blu-ray backups, an earlier thread about DVD-Rs was mentioned.
This has a few interesting properties. For one, with due care, the files can be stored on archival media as regular files. There are some different options for how to generate the archives; some of them would place the entire git-annex metadata on each drive/disc. With that arrangement, one could access the individual files without git-annex. With git-annex, one could reconstruct the final (or any intermediate) state of the archive appropriately, handling deltions, renames, etc. You would also easily be able to know where copies of your files are.
The practice is somewhat more challenging. Hundreds of thousands of files — what I would consider a medium-sized archive — can pose some challenges, running into hours-long execution if used in conjunction with the directory special remote (but only minutes-long with a standard git-annex repo).
Ruling out the directory special remote, I had thought I could maybe just work with my files in git-annex directly. However, I ran into some challenges with that approach as well. I am uncomfortable with git-annex mucking about with hard links in my source data. While it does try to preserve timestamps in the source data, these are lost on the clones. I wrote up my best effort to work around all this.
In a forum post, the author of git-annex comments that “I don’t think that CDs/DVDs are a particularly good fit for git-annex, but it seems a couple of users have gotten something working.” The page he references is Managing a large number of files archived on many pieces of read-only medium. Some of that discussion is a bit dated (for instance, the directory special remote has the importtree feature that implements what was being asked for there), but has some interesting tips.
git-annex supplies win64 binaries, and git-annex is included with many distributions as well. So it should be nearly as accessible as dar in the future. Since git-annex would be required to restore a consistent recovery image, similar caveats as with dar apply; CLI experience would be needed, along with some written instructions.
Bacula and BareOS
Although primarily tape-based archivers, these do also also nominally support drives and optical media. However, they are much more tailored as backup tools, especially with the ability to pull from multiple machines. They require a database and extensive configuration, making them a poor fit for both the creation and future extractability of this project.
Conclusions
I’m going to spend some more time with dar and git-annex, testing them out, and hope to write some future posts about my experiences.
Martha the Pilot 3 May 2023 4:18 AM (2 years ago)
Martha, now 5, can’t remember a time when she didn’t fly periodically. She’s come along in our airplane in short flights to a nearby restaurant and long ones to Michigan and South Dakota. All this time, she’s been riding in the back seat next to Laura.
Martha has been talking excitedly about riding up front next to me. She wants to “be my co-pilot”. I promised to give her an airplane wing pin when she did — one I got from a pilot of a commercial flight when I was a kid. Of course, safety was first, so I wanted to be sure she was old enough to fly there without being a distraction.
Last weekend, the moment finally arrived. She was so excited! She brought along her “Claire bear” aviator, one that I bought for her at an airport a little while back. She buckled in two of her dolls in the back seat.

And then up we went!

Martha was so proud when we landed! We went to Stearman Field, just a short 10-minute flight away, and parked the plane right in front of the restaurant.

We flew back, and Martha thought we should get a photo of her standing on the wing by the door. Great idea!

She was happily jabbering about the flight all the way home. She told us several times about the pin she got, watching out the window, watching all the screens in the airplane, and also that she didn’t get sick at all despite some turbulence.
And, she says, “Now just you and I can go flying!”
Yes, that’s something I’m looking forward to!
Easily Accessing All Your Stuff with a Zero-Trust Mesh VPN 13 Apr 2023 6:47 PM (2 years ago)
Probably everyone is familiar with a regular VPN. The traditional use case is to connect to a corporate or home network from a remote location, and access services as if you were there.
But these days, the notion of “corporate network” and “home network” are less based around physical location. For instance, a company may have no particular office at all, may have a number of offices plus a number of people working remotely, and so forth. A home network might have, say, a PVR and file server, while highly portable devices such as laptops, tablets, and phones may want to talk to each other regardless of location. For instance, a family member might be traveling with a laptop, another at a coffee shop, and those two devices might want to communicate, in addition to talking to the devices at home.
And, in both scenarios, there might be questions about giving limited access to friends. Perhaps you’d like to give a friend access to part of your file server, or as a company, you might have contractors working on a limited project.
Pretty soon you wind up with a mess of VPNs, forwarded ports, and tricks to make it all work. With the increasing prevalence of CGNAT, a lot of times you can’t even open a port to the public Internet. Each application or device probably has its own gateway just to make it visible on the Internet, some of which you pay for.
Then you add on the question of: should you really trust your LAN anyhow? With possibilities of guests using it, rogue access points, etc., the answer is probably “no”.
We can move the responsibility for dealing with NAT, fluctuating IPs, encryption, and authentication, from the application layer further down into the network stack. We then arrive at a much simpler picture for all.
So this page is fundamentally about making the network work, simply and effectively.
How do we make the Internet work in these scenarios?
We’re going to combine three concepts:
- A VPN, providing fully encrypted and authenticated communication and stable IPs
- Mesh Networking, in which devices automatically discover optimal paths to reach each other
- Zero-trust networking, in which we do not need to trust anything about the underlying LAN, because all our traffic uses the secure systems in points 1 and 2.
By combining these concepts, we arrive at some nice results:
- You can
ssh hostname, where hostname is one of your machines (server, laptop, whatever), and as long ashostnameis up, you can reach it, wherever it is, wherever you are.- Combined with mosh, these sessions will be durable even across moving to other host networks.
- You could just as well use telnet, because the underlying network should be secure.
- You don’t have to mess with encryption keys, certs, etc., for every internal-only service. Since IPs are now trustworthy, that’s all you need. hosts.allow could make a comeback!
- You have a way of transiting out of extremely restrictive networks. Every tool discussed here has a way of falling back on routing things via a broker (relay) on TCP port 443 if all else fails.
There might sometimes be tradeoffs. For instance:
- On LANs faster than 1Gbps, performance may degrade due to encryption and encapsulation overhead. However, these tools should let hosts discover the locality of each other and not send traffic over the Internet if the devices are local.
- With some of these tools, hosts local to each other (on the same LAN) may be unable to find each other if they can’t reach the control plane over the Internet (Internet is down or provider is down)
Some other features that some of the tools provide include:
- Easy sharing of limited access with friends/guests
- Taking care of everything you need, including SSL certs, for exposing a certain on-net service to the public Internet
- Optional routing of your outbound Internet traffic via an exit node on your network. Useful, for instance, if your local network is blocking tons of stuff.
Let’s dive in.
Types of Mesh VPNs
I’ll go over several types of meshes in this article:
-
Fully decentralized with automatic hop routing
This model has no special central control plane. Nodes discover each other in various ways, and establish routes to each other. These routes can be direct connections over the Internet, or via other nodes. This approach offers the greatest resilience. Examples I’ll cover include Yggdrasil and tinc.
-
Automatic peer-to-peer with centralized control
In this model, nodes, by default, communicate by establishing direct links between them. A regular node never carries traffic on behalf of other nodes. Special-purpose relays are used to handle cases in which NAT traversal is impossible. This approach tends to offer simple setup. Examples I’ll cover include Tailscale, Zerotier, Nebula, and Netmaker.
-
Roll your own and hybrid approaches
This is a “grab bag” of other ideas; for instance, running Yggdrasil over Tailscale.
Terminology
For the sake of consistency, I’m going to use common language to discuss things that have different terms in different ecosystems:
- Every tool discussed here has a way of dealing with NAT traversal. It may assist with establishing direct connections (eg, STUN), and if that fails, it may simply relay traffic between nodes. I’ll call such a relay a “broker”. This may or may not be the same system that is a control plane for a tool.
- All of these systems operate over lower layers that are unencrypted. Those lower layers may be a LAN (wired or wireless, which may or may not have Internet access), or the public Internet (IPv4 and/or IPv6). I’m going to call the unencrypted lower layer, whatever it is, the “clearnet”.
Evaluation Criteria
Here are the things I want to see from a solution:
- Secure, with all communications end-to-end encrypted and authenticated, and prevention of traffic from untrusted devices.
- Flexible, adapting to changes in network topology quickly and automatically.
- Resilient, without single points of failure, and with devices local to each other able to communicate even if cut off from the Internet or other parts of the network.
- Private, minimizing leakage of information or metadata about me and my systems
- Able to traverse CGNAT without having to use a broker whenever possible
- A lesser requirement for me, but still a nice to have, is the ability to include others via something like Internet publishing or inviting guests.
- Fully or nearly fully Open Source
- Free or very cheap for personal use
- Wide operating system support, including headless Linux on x86_64 and ARM.
Fully Decentralized VPNs with Automatic Hop Routing
Two systems fit this description: Yggdrasil and Tinc. Let’s dive in.
Yggdrasil
I’ll start with Yggdrasil because I’ve written so much about it already. It featured in prior posts such as:
- Make the Internet Yours Again With an Instant Mesh Network, which described the tyranny of IP rigidity and using Yggdrasil as a global mesh overlay.
- Using Yggdrasil As an Automatic Mesh Fabric to Connect All Your Docker Containers, VMs, and Servers is, in a significant sense, a more specific implementation of the ideas contained here; it’s a private Yggdrasil mesh providing the communications layer for dispersed Docker containers.
- Recovering Our Lost Free Will Online: Tools and Techniques That Are Available Now features Yggdrasil.
Yggdrasil can be a private mesh VPN, or something more
Yggdrasil can be a private mesh VPN, just like the other tools covered here. It’s unique, however, in that a key goal of the project is to also make it useful as a planet-scale global mesh network. As such, Yggdrasil is a testbed of new ideas in distributed routing designed to scale up to massive sizes and all sorts of connection conditions. As of 2023-04-10, the main global Yggdrasil mesh has over 5000 nodes in it. You can choose whether or not to participate.
Every node in a Yggdrasil mesh has a public/private keypair. Each node then has an IPv6 address (in a private address space) derived from its public key. Using these IPv6 addresses, you can communicate right away.
Yggdrasil differs from most of the other tools here in that it does not necessarily seek to establish a direct link on the clearnet between, say, host A and host G for them to communicate. It will prefer such a direct link if it exists, but it is perfectly happy if it doesn’t.
The reason is that every Yggdrasil node is also a router in the Yggdrasil mesh. Let’s sit with that concept for a moment. Consider:
- If you have a bunch of machines on your LAN, but only one of them can peer over the clearnet, that’s fine; all the other machines will discover this route to the world and use it when necessary.
- All you need to run a broker is just a regular node with a public IP address. If you are participating in the global mesh, you can use one (or more) of the free public peers for this purpose.
- It is not necessary for every node to know about the clearnet IP address of every other node (improving privacy). In fact, it’s not even necessary for every node to know about the existence of all the other nodes, so long as it can find a route to a given node when it’s asked to.
- Yggdrasil can find one or more routes between nodes, and it can use this knowledge of multiple routes to aggressively optimize for varying network conditions, including combinations of, say, downloads and low-latency ssh sessions.
Behind the scenes, Yggdrasil calculates optimal routes between nodes as necessary, using a mesh-wide DHT for initial contact and then deriving more optimal paths. (You can also read more details about the routing algorithm.)
One final way that Yggdrasil is different from most of the other tools is that there is no separate control server. No node is “special”, in charge, the sole keeper of metadata, or anything like that. The entire system is completely distributed and auto-assembling.
Meeting neighbors
There are two ways that Yggdrasil knows about peers:
- By broadcast discovery on the local LAN
- By listening on a specific port (or being told to connect to a specific host/port)
Sometimes this might lead to multiple ways to connect to a node; Yggdrasil prefers the connection auto-discovered by broadcast first, then the lowest-latency of the defined path. In other words, when your laptops are in the same room as each other on your local LAN, your packets will flow directly between them without traversing the Internet.
Unique uses
Yggdrasil is uniquely suited to network-challenged situations. As an example, in a post-disaster situation, Internet access may be unavailable or flaky, yet there may be many local devices – perhaps ones that had never known of each other before – that could share information. Yggdrasil meets this situation perfectly. The combination of broadcast auto-detection, distributed routing, and so forth, basically means that if there is any physical path between two nodes, Yggdrasil will find and enable it.
Ad-hoc wifi is rarely used because it is a real pain. Yggdrasil actually makes it useful! Its broadcast discovery doesn’t require any IP address provisioned on the interface at all (it just uses the IPv6 link-local address), so you don’t need to figure out a DHCP server or some such. And, Yggdrasil will tend to perform routing along the contours of the RF path. So you could have a laptop in the middle of a long distance relaying communications from people farther out, because it could see both. Or even a chain of such things.
Yggdrasil: Security and Privacy
Yggdrasil’s mesh is aggressively greedy. It will peer with any node it can find (unless told otherwise) and will find a route to anywhere it can. There are two main ways to make sure you keep unauthorized traffic out: by restricting who can talk to your mesh, and by firewalling the Yggdrasil interface. Both can be used, and they can be used simultaneously.
I’ll discuss firewalling more at the end of this article. Basically, you’ll almost certainly want to do this if you participate in the public mesh, because doing so is akin to having a globally-routable public IP address direct to your device.
If you want to restrict who can talk to your mesh, you just disable the broadcast feature on all your nodes (empty MulticastInterfaces section in the config), and avoid telling any of your nodes to connect to a public peer. You can set a list of authorized public keys that can connect to your nodes’ listening interfaces, which you’ll probably want to do. You will probably want to either open up some inbound ports (if you can) or set up a node with a known clearnet IP on a place like a $5/mo VPS to help with NAT traversal (again, setting AllowedPublicKeys as appropriate). Yggdrasil doesn’t allow filtering multicast clients by public key, only by network interface, so that’s why we disable broadcast discovery. You can easily enough teach Yggdrasil about static internal LAN IPs of your nodes and have things work that way. (Or, set up an internal “gateway” node or two, that the clients just connect to when they’re local). But fundamentally, you need to put a bit more thought into this with Yggdrasil than with the other tools here, which are closed-only.
Compared to some of the other tools here, Yggdrasil is better about information leakage; nodes only know details, such as clearnet IPs, of directly-connected peers. You can obtain the list of directly-connected peers of any known node in the mesh – but that list is the public keys of the directly-connected peers, not the clearnet IPs.
Some of the other tools contain a limited integrated firewall of sorts (with limited ACLs and such). Yggdrasil does not, but is fully compatible with on-host firewalls. I recommend these anyway even with many other tools.
Yggdrasil: Connectivity and NAT traversal
Compared to the other tools, Yggdrasil is an interesting mix. It provides a fully functional mesh and facilitates connectivity in situations in which no other tool can. Yet its NAT traversal, while it exists and does work, results in using a broker under some of the more challenging CGNAT situations more often than some of the other tools, which can impede performance.
Yggdrasil’s underlying protocol is TCP-based. Before you run away screaming that it must be slow and unreliable like OpenVPN over TCP – it’s not, and it is even surprisingly good around bufferbloat. I’ve found its performance to be on par with the other tools here, and it works as well as I’d expect even on flaky 4G links.
Overall, the NAT traversal story is mixed. On the one hand, you can run a node that listens on port 443 – and Yggdrasil can even make it speak TLS (even though that’s unnecessary from a security standpoint), so you can likely get out of most restrictive firewalls you will ever encounter. If you join the public mesh, know that plenty of public peers do listen on port 443 (and other well-known ports like 53, plus random high-numbered ones).
If you connect your system to multiple public peers, there is a chance – though a very small one – that some public transit traffic might be routed via it. In practice, public peers hopefully are already peered with each other, preventing this from happening (you can verify this with yggdrasilctl debug_remotegetpeers key=ABC...). I have never experienced a problem with this. Also, since latency is a factor in routing for Yggdrasil, it is highly unlikely that random connections we use are going to be competitive with datacenter peers.
Yggdrasil: Sharing with friends
If you’re open to participating in the public mesh, this is one of the easiest things of all. Have your friend install Yggdrasil, point them to a public peer, give them your Yggdrasil IP, and that’s it. (Well, presumably you also open up your firewall – you did follow my advice to set one up, right?)
If your friend is visiting at your location, they can just hop on your wifi, install Yggdrasil, and it will automatically discover a route to you. Yggdrasil even has a zero-config mode for ephemeral nodes such as certain Docker containers.
Yggdrasil doesn’t directly support publishing to the clearnet, but it is certainly possible to proxy (or even NAT) to/from the clearnet, and people do.
Yggdrasil: DNS
There is no particular extra DNS in Yggdrasil. You can, of course, run a DNS server within Yggdrasil, just as you can anywhere else. Personally I just add relevant hosts to /etc/hosts and leave it at that, but it’s up to you.
Yggdrasil: Source code, pricing, and portability
Yggdrasil is fully open source (LGPLv3 plus additional permissions in an exception) and highly portable. It is written in Go, and has prebuilt binaries for all major platforms (including a Debian package which I made).
There is no charge for anything with Yggdrasil. Listed public peers are free and run by volunteers. You can run your own peers if you like; they can be public and unlisted, public and listed (just submit a PR to get it listed), or private (accepting connections only from certain nodes’ keys). A “peer” in this case is just a node with a known clearnet IP address.
Yggdrasil encourages use in other projects. For instance, NNCP integrates a Yggdrasil node for easy communication with other NNCP nodes.
Yggdrasil conclusions
Yggdrasil is tops in reliability (having no single point of failure) and flexibility. It will maintain opportunistic connections between peers even if the Internet is down. The unique added feature of being able to be part of a global mesh is a nice one. The tradeoffs include being more prone to need to use a broker in restrictive CGNAT environments. Some other tools have clients that override the OS DNS resolver to also provide resolution of hostnames of member nodes; Yggdrasil doesn’t, though you can certainly run your own DNS infrastructure over Yggdrasil (or, for that matter, let public DNS servers provide Yggdrasil answers if you wish).
There is also a need to pay more attention to firewalling or maintaining separation from the public mesh. However, as I explain below, many other options have potential impacts if the control plane, or your account for it, are compromised, meaning you ought to firewall those, too. Still, it may be a more immediate concern with Yggdrasil.
Although Yggdrasil is listed as experimental, I have been using it for over a year and have found it to be rock-solid. They did change how mesh IPs were calculated when moving from 0.3 to 0.4, causing a global renumbering, so just be aware that this is a possibility while it is experimental.
tinc
tinc is the oldest tool on this list; version 1.0 came out in 2003! You can think of tinc as something akin to “an older Yggdrasil without the public option.”
I will be discussing tinc 1.0.36, the latest stable version, which came out in 2019. The development branch, 1.1, has been going since 2011 and had its latest release in 2021. The last commit to the Github repo was in June 2022.
Tinc is the only tool here to support both tun and tap style interfaces. I go into the difference more in the Zerotier review below. Tinc actually provides a better tap implementation than Zerotier, with various sane options for broadcasts, but I still think the call for an Ethernet, as opposed to IP, VPN is small.
To configure tinc, you generate a per-host configuration and then distribute it to every tinc node. It contains a host’s public key. Therefore, adding a host to the mesh means distributing its key everywhere; de-authorizing it means removing its key everywhere. This makes it rather unwieldy.
tinc can do LAN broadcast discovery and mesh routing, but generally speaking you must manually teach it where to connect initially. Somewhat confusingly, the examples all mention listing a public address for a node. This doesn’t make sense for a laptop, and I suspect you’d just omit it. I think that address is used for something akin to a Yggdrasil peer with a clearnet IP.
Unlike all of the other tools described here, tinc has no tool to inspect the running state of the mesh.
Some of the properties of tinc made it clear I was unlikely to adopt it, so this review wasn’t as thorough as that of Yggdrasil.
tinc: Security and Privacy
As mentioned above, every host in the tinc mesh is authenticated based on its public key. However, to be more precise, this key is validated only at the point it connects to its next hop peer. (To be sure, this is also the same as how the list of allowed pubkeys works in Yggdrasil.) Since IPs in tinc are not derived from their key, and any host can assign itself whatever mesh IP it likes, this implies that a compromised host could impersonate another.
It is unclear whether packets are end-to-end encrypted when using a tinc node as a router. The fact that they can be routed at the kernel level by the tun interface implies that they may not be.
tinc: Connectivity and NAT traversal
I was unable to find much information about NAT traversal in tinc, other than that it does support it. tinc can run over UDP or TCP and auto-detects which to use, preferring UDP.
tinc: Sharing with friends
tinc has no special support for this, and the difficulty of configuration makes it unlikely you’d do this with tinc.
tinc: Source code, pricing, and portability
tinc is fully open source (GPLv2). It is written in C and generally portable. It supports some very old operating systems. Mobile support is iffy.
tinc does not seem to be very actively maintained.
tinc conclusions
I haven’t mentioned performance in my other reviews (see the section at the end of this post). But, it is so poor as to only run about 300Mbps on my 2.5Gbps network. That’s 1/3 the speed of Yggdrasil or Tailscale. Combine that with the unwieldiness of adding hosts and some uncertainties in security, and I’m not going to be using tinc.
Automatic Peer-to-Peer Mesh VPNs with centralized control
These tend to be the options that are frequently discussed. Let’s talk about the options.
Tailscale
Tailscale is a popular choice in this type of VPN. To use Tailscale, you first sign up on tailscale.com. Then, you install the tailscale client on each machine. On first run, it prints a URL for you to click on to authorize the client to your mesh (“tailnet”). Tailscale assigns a mesh IP to each system. The Tailscale client lets the Tailscale control plane gather IP information about each node, including all detectable public and private clearnet IPs.
When you attempt to contact a node via Tailscale, the client will fetch the known contact information from the control plane and attempt to establish a link. If it can contact over the local LAN, it will (it doesn’t have broadcast autodetection like Yggdrasil; the information must come from the control plane). Otherwise, it will try various NAT traversal options. If all else fails, it will use a broker to relay traffic; Tailscale calls a broker a DERP relay server. Unlike Yggdrasil, a Tailscale node never relays traffic for another; all connections are either direct P2P or via a broker.
Tailscale, like several others, is based around Wireguard; though wireguard-go rather than the in-kernel Wireguard.
Tailscale has a number of somewhat unique features in this space:
- Funnel, which lets you expose ports on your system to the public Internet via the VPN.
- Exit nodes, which automate the process of routing your public Internet traffic over some other node in the network. This is possible with every tool mentioned here, but Tailscale makes switching it on or off a couple of quick commands away.
- Node sharing, which lets you share a subset of your network with guests
- A fantastic set of documentation, easily the best of the bunch.
Funnel, in particular, is interesting. With a couple of “tailscale serve”-style commands, you can expose a directory tree (or a development webserver) to the world. Tailscale gives you a public hostname, obtains a cert for it, and proxies inbound traffic to you. This is subject to some unspecified bandwidth limits, and you can only choose from three public ports, so it’s not really a production solution – but as a quick and easy way to demonstrate something cool to a friend, it’s a neat feature.
Tailscale: Security and Privacy
With Tailscale, as with the other tools in this category, one of the main threats to consider is the control plane. What are the consequences of a compromise of Tailscale’s control plane, or of the credentials you use to access it?
Let’s begin with the credentials used to access it. Tailscale operates no identity system itself, instead relying on third parties. For individuals, this means Google, Github, or Microsoft accounts; Okta and other SAML and similar identity providers are also supported, but this runs into complexity and expense that most individuals aren’t wanting to take on. Unfortunately, all three of those types of accounts often have saved auth tokens in a browser. Personally I would rather have a separate, very secure, login.
If a person does compromise your account or the Tailscale servers themselves, they can’t directly eavesdrop on your traffic because it is end-to-end encrypted. However, assuming an attacker obtains access to your account, they could:
- Tamper with your Tailscale ACLs, permitting new actions
- Add new nodes to the network
- Forcibly remove nodes from the network
- Enable or disable optional features
Of note is that they cannot just commandeer an existing IP. I would say the riskiest possibility here is that could add new nodes to the mesh. Because they could also tamper with your ACLs, they could then proceed to attempt to access all your internal services. They could even turn on service collection and have Tailscale tell them what and where all the services are.
Therefore, as with other tools, I recommend a local firewall on each machine with Tailscale. More on that below.
Tailscale has a new alpha feature called tailnet lock which helps with this problem. It requires existing nodes in the mesh to sign a request for a new node to join. Although this doesn’t address ACL tampering and some of the other things, it does represent a significant help with the most significant concern. However, tailnet lock is in alpha, only available on the Enterprise plan, and has a waitlist, so I have been unable to test it.
Any Tailscale node can request the IP addresses belonging to any other Tailscale node. The Tailscale control plane captures, and exposes to you, this information about every node in your network: the OS hostname, IP addresses and port numbers, operating system, creation date, last seen timestamp, and NAT traversal parameters. You can optionally enable service data capture as well, which sends data about open ports on each node to the control plane.
Tailscale likes to highlight their key expiry and rotation feature. By default, all keys expire after 180 days, and traffic to and from the expired node will be interrupted until they are renewed (basically, you re-login with your provider and do a renew operation). Unfortunately, the only mention I can see of warning of impeding expiration is in the Windows client, and even there you need to edit a registry key to get the warning more than the default 24 hours in advance. In short, it seems likely to cut off communications when it’s most important. You can disable key expiry on a per-node basis in the admin console web interface, and I mostly do, due to not wanting to lose connectivity at an inopportune time.
Tailscale: Connectivity and NAT traversal
When thinking about reliability, the primary consideration here is being able to reach the Tailscale control plane. While it is possible in limited circumstances to reach nodes without the Tailscale control plane, it is “a fairly brittle setup” and notably will not survive a client restart. So if you use Tailscale to reach other nodes on your LAN, that won’t work unless your Internet is up and the control plane is reachable.
Assuming your Internet is up and Tailscale’s infrastructure is up, there is little to be concerned with. Your own comfort level with cloud providers and your Internet should guide you here.
Tailscale wrote a fantastic article about NAT traversal and they, predictably, do very well with it. Tailscale prefers UDP but falls back to TCP if needed. Broker (DERP) servers step in as a last resort, and Tailscale clients automatically select the best ones. I’m not aware of anything that is more successful with NAT traversal than Tailscale. This maximizes the situations in which a direct P2P connection can be used without a broker.
I have found Tailscale to be a bit slow to notice changes in network topography compared to Yggdrasil, and sometimes needs a kick in the form of restarting the client process to re-establish communications after a network change. However, it’s possible (maybe even probable) that if I’d waited a bit longer, it would have sorted this all out.
Tailscale: Sharing with friends
I touched on the funnel feature earlier. The sharing feature lets you give an invite to an outsider. By default, a person accepting a share can make only outgoing connections to the network they’re invited to, and cannot receive incoming connections from that network – this makes sense. When sharing an exit node, you get a checkbox that lets you share access to the exit node as well. Of course, the person accepting the share needs to install the Tailnet client. The combination of funnel and sharing make Tailscale the best for ad-hoc sharing.
Tailscale: DNS
Tailscale’s DNS is called MagicDNS. It runs as a layer atop your standard DNS – taking over /etc/resolv.conf on Linux – and provides resolution of mesh hostnames and some other features. This is a concept that is pretty slick.
It also is a bit flaky on Linux; dueling programs want to write to /etc/resolv.conf. I can’t really say this is entirely Tailscale’s fault; they document the problem and some workarounds.
I would love to be able to add custom records to this service; for instance, to override the public IP for a service to use the in-mesh IP. Unfortunately, that’s not yet possible. However, MagicDNS can query existing nameservers for certain domains in a split DNS setup.
Tailscale: Source code, pricing, and portability
Tailscale is almost fully open source and the client is highly portable. The client is open source (BSD 3-clause) on open source platforms, and closed source on closed source platforms. The DERP servers are open source. The coordination server is closed source, although there is an open source coordination server called Headscale (also BSD 3-clause) made available with Tailscale’s blessing and informal support. It supports most, but not all, features in the Tailscale coordination server.
Tailscale’s pricing (which does not apply when using Headscale) provides a free plan for 1 user with up to 20 devices. A Personal Pro plan expands that to 100 devices for $48 per year - not a bad deal at $4/mo. A “Community on Github” plan also exists, and then there are more business-oriented plans as well. See the pricing page for details.
As a small note, I appreciated Tailscale’s install script. It properly added Tailscale’s apt key in a way that it can only be used to authenticate the Tailscale repo, rather than as a systemwide authenticator. This is a nice touch and speaks well of their developers.
Tailscale conclusions
Tailscale is tops in sharing and has a broad feature set and excellent documentation. Like other solutions with a centralized control plane, device communications can stop working if the control plane is unreachable, and the threat model of the control plane should be carefully considered.
Zerotier
Zerotier is a close competitor to Tailscale, and is similar to it in a lot of ways. So rather than duplicate all of the Tailscale information here, I’m mainly going to describe how it differs from Tailscale.
The primary difference between the two is that Zerotier emulates an Ethernet network via a Linux tap interface, while Tailscale emulates a TCP/IP network via a Linux tun interface.
However, Zerotier has a number of things that make it be a somewhat imperfect Ethernet emulator. For one, it has a problem with broadcast amplification; the machine sending the broadcast sends it to all the other nodes that should receive it (up to a set maximum). I wouldn’t want to have a lot of programs broadcasting on a slow link. While in theory this could let you run Netware or DECNet across Zerotier, I’m not really convinced there’s much call for that these days, and Zerotier is clearly IP-focused as it allocates IP addresses and such anyhow. Zerotier provides special support for emulated ARP (IPv4) and NDP (IPv6). While you could theoretically run Zerotier as a bridge, this eliminates the zero trust principle, and Tailscale supports subnet routers, which provide much of the same feature set anyhow.
A somewhat obscure feature, but possibly useful, is Zerotier’s built-in support for multipath WAN for the public interface. This actually lets you do a somewhat basic kind of channel bonding for WAN.
Zerotier: Security and Privacy
The picture here is similar to Tailscale, with the difference that you can create a Zerotier-local account rather than relying on cloud authentication. I was unable to find as much detail about Zerotier as I could about Tailscale - notably I couldn’t find anything about how “sticky” an IP address is. However, the configuration screen lets me delete a node and assign additional arbitrary IPs within a subnet to other nodes, so I think the assumption here is that if your Zerotier account (or the Zerotier control plane) is compromised, an attacker could remove a legit device, add a malicious one, and assign the previous IP of the legit device to the malicious one. I’m not sure how to mitigate against that risk, as firewalling specific IPs is ineffective if an attacker can simply take them over. Zerotier also lacks anything akin to Tailnet Lock.
For this reason, I didn’t proceed much further in my Zerotier evaluation.
Zerotier: Connectivity and NAT traversal
Like Tailscale, Zerotier has NAT traversal with STUN. However, it looks like it’s more limited than Tailscale’s, and in particular is incompatible with double NAT that is often seen these days. Zerotier operates brokers (“root servers”) that can do relaying, including TCP relaying. So you should be able to connect even from hostile networks, but you are less likely to form a P2P connection than with Tailscale.
Zerotier: Sharing with friends
I was unable to find any special features relating to this in the Zerotier documentation. Therefore, it would be at the same level as Yggdrasil: possible, maybe even not too difficult, but without any specific help.
Zerotier: DNS
Unlike Tailscale, Zerotier does not support automatically adding DNS entries for your hosts. Therefore, your options are approximately the same as Yggdrasil, though with the added option of pushing configuration pointing to your own non-Zerotier DNS servers to the client.
Zerotier: Source code, pricing, and portability
The client ZeroTier One is available on Github under a custom “business source license” which prevents you from using it in certain settings. This license would preclude it being included in Debian. Their library, libzt, is available under the same license. The pricing page mentions a community edition for self hosting, but the documentation is sparse and it was difficult to understand what its feature set really is.
The free plan lets you have 1 user with up to 25 devices. Paid plans are also available.
Zerotier conclusions
Frankly I don’t see much reason to use Zerotier. The “virtual Ethernet” model seems to be a weird hybrid that doesn’t bring much value. I’m concerned about the implications of a compromise of a user account or the control plane, and it lacks a lot of Tailscale features (MagicDNS and sharing). The only thing it may offer in particular is multipath WAN, but that’s esoteric enough – and also solvable at other layers – that it doesn’t seem all that compelling to me. Add to that the strange license and, to me anyhow, I don’t see much reason to bother with it.
Netmaker
Netmaker is one of the projects that is making noise these days. Netmaker is the only one here that is a wrapper around in-kernel Wireguard, which can make a performance difference when talking to peers on a 1Gbps or faster link. Also, unlike other tools, it has an ingress gateway feature that lets people that don’t have the Netmaker client, but do have Wireguard, participate in the VPN. I believe I also saw a reference somewhere to nodes as routers as with Yggdrasil, but I’m failing to dig it up now.
The project is in a bit of an early state; you can sign up for an “upcoming closed beta” with a SaaS host, but really you are generally pointed to self-hosting using the code in the github repo. There are community and enterprise editions, but it’s not clear how to actually choose. The server has a bunch of components: binary, CoreDNS, database, and web server. It also requires elevated privileges on the host, in addition to a container engine. Contrast that to the single binary that some others provide.
It looks like releases are frequent, but sometimes break things, and have a somewhat more laborious upgrade processes than most.
I don’t want to spend a lot of time managing my mesh. So because of the heavy needs of the server, the upgrades being labor-intensive, it taking over iptables and such on the server, I didn’t proceed with a more in-depth evaluation of Netmaker. It has a lot of promise, but for me, it doesn’t seem to be in a state that will meet my needs yet.
Nebula
Nebula is an interesting mesh project that originated within Slack, seems to still be primarily sponsored by Slack, but is also being developed by Defined Networking (though their product looks early right now). Unlike the other tools in this section, Nebula doesn’t have a web interface at all. Defined Networking looks likely to provide something of a SaaS service, but for now, you will need to run a broker (“lighthouse”) yourself; perhaps on a $5/mo VPS.
Due to the poor firewall traversal properties, I didn’t do a full evaluation of Nebula, but it still has a very interesting design.
Nebula: Security and Privacy
Since Nebula lacks a traditional control plane, the root of trust in Nebula is a CA (certificate authority). The documentation gives this example of setting it up:
./nebula-cert sign -name "lighthouse1" -ip "192.168.100.1/24"
./nebula-cert sign -name "laptop" -ip "192.168.100.2/24" -groups "laptop,home,ssh"
./nebula-cert sign -name "server1" -ip "192.168.100.9/24" -groups "servers"
./nebula-cert sign -name "host3" -ip "192.168.100.10/24"
So the cert contains your IP, hostname, and group allocation. Each host in the mesh gets your CA certificate, and the per-host cert and key generated from each of these steps.
This leads to a really nice security model. Your CA is the gatekeeper to what is trusted in your mesh. You can even have it airgapped or something to make it exceptionally difficult to breach the perimeter.
Nebula contains an integrated firewall. Because the ability to keep out unwanted nodes is so strong, I would say this may be the one mesh VPN you might consider using without bothering with an additional on-host firewall.
You can define static mappings from a Nebula mesh IP to a clearnet IP. I haven’t found information on this, but theoretically if NAT traversal isn’t required, these static mappings may allow Nebula nodes to reach each other even if Internet is down. I don’t know if this is truly the case, however.
Nebula: Connectivity and NAT traversal
This is a weak point of Nebula. Nebula sends all traffic over a single UDP port; there is no provision for using TCP. This is an issue at certain hotel and other public networks which open only TCP egress ports 80 and 443.
I couldn’t find a lot of detail on what Nebula’s NAT traversal is capable of, but according to a certain Github issue, this has been a sore spot for years and isn’t as capable as Tailscale.
You can designate nodes in Nebula as brokers (relays). The concept is the same as Yggdrasil, but it’s less versatile. You have to manually designate what relay to use. It’s unclear to me what happens if different nodes designate different relays. Keep in mind that this always happens over a UDP port.
Nebula: Sharing with friends
There is no particular support here.
Nebula: DNS
Nebula has experimental DNS support. In contrast with Tailscale, which has an internal DNS server on every node, Nebula only runs a DNS server on a lighthouse. This means that it can’t forward requests to a DNS server that’s upstream for your laptop’s particular current location. Actually, Nebula’s DNS server doesn’t forward at all. It also doesn’t resolve its own name.
The Nebula documentation makes reference to using multiple lighthouses, which you may want to do for DNS redundancy or performance, but it’s unclear to me if this would make each lighthouse form a complete picture of the network.
Nebula: Source code, pricing, and portability
Nebula is fully open source (MIT). It consists of a single Go binary and configuration. It is fairly portable.
Nebula conclusions
I am attracted to Nebula’s unique security model. I would probably be more seriously considering it if not for the lack of support for TCP and poor general NAT traversal properties. Its datacenter connectivity heritage does show through.
Roll your own and hybrid
Here is a grab bag of ideas:
Running Yggdrasil over Tailscale
One possibility would be to use Tailscale for its superior NAT traversal, then allow Yggdrasil to run over it. (You will need a firewall to prevent Tailscale from trying to run over Yggdrasil at the same time!) This creates a closed network with all the benefits of Yggdrasil, yet getting the NAT traversal from Tailscale.
Drawbacks might be the overhead of the double encryption and double encapsulation. A good Yggdrasil peer may wind up being faster than this anyhow.
Public VPN provider for NAT traversal
A public VPN provider such as Mullvad will often offer incoming port forwarding and nodes in many cities. This could be an attractive way to solve a bunch of NAT traversal problems: just use one of those services to get you an incoming port, and run whatever you like over that.
Be aware that a number of public VPN clients have a “kill switch” to prevent any traffic from egressing without using the VPN; see, for instance, Mullvad’s. You’ll need to disable this if you are running a mesh atop it.
Other
Combining with local firewalls
For most of these tools, I recommend using a local firewal in conjunction with them. I have been using firehol and find it to be quite nice. This means you don’t have to trust the mesh, the control plane, or whatever. The catch is that you do need your mesh VPN to provide strong association between IP address and node. Most, but not all, do.
Performance
I tested some of these for performance using iperf3 on a 2.5Gbps LAN. Here are the results. All speeds are in Mbps.
| Tool | iperf3 (default) | iperf3 -P 10 | iperf3 -R |
|---|---|---|---|
| Direct (no VPN) | 2406 | 2406 | 2764 |
| Wireguard (kernel) | 1515 | 1566 | 2027 |
| Yggdrasil | 892 | 1126 | 1105 |
| Tailscale | 950 | 1034 | 1085 |
| Tinc | 296 | 300 | 277 |
You can see that Wireguard was significantly faster than the other options. Tailscale and Yggdrasil were roughly comparable, and Tinc was terrible.
IP collisions
When you are communicating over a network such as these, you need to trust that the IP address you are communicating with belongs to the system you think it does. This protects against two malicious actor scenarios:
- Someone compromises one machine on your mesh and reconfigures it to impersonate a more important one
- Someone connects an unauthorized system to the mesh, taking over a trusted IP, and uses the privileges of the trusted IP to access resources
To summarize the state of play as highlighted in the reviews above:
- Yggdrasil derives IPv6 addresses from a public key
- tinc allows any node to set any IP
- Tailscale IPs aren’t user-assignable, but the assignment algorithm is unknown
- Zerotier allows any IP to be allocated to any node at the control plane
- I don’t know what Netmaker does
- Nebula IPs are baked into the cert and signed by the CA, but I haven’t verified the enforcement algorithm
So this discussion really only applies to Yggdrasil and Tailscale. tinc and Zerotier lack detailed IP security, while Nebula expects IP allocations to be handled outside of the tool and baked into the certs (therefore enforcing rigidity at that level).
So the question for Yggdrasil and Tailscale is: how easy is it to commandeer a trusted IP?
Yggdrasil has a brief discussion of this. In short, Yggdrasil offers you both a dedicated IP and a rarely-used /64 prefix which you can delegate to other machines on your LAN. Obviously by taking the dedicated IP, a lot more bits are available for the hash of the node’s public key, making “collisions technically impractical, if not outright impossible.” However, if you use the /64 prefix, a collision may be more possible. Yggdrasil’s hashing algorithm includes some optimizations to make this more difficult. Yggdrasil includes a genkeys tool that uses more CPU cycles to generate keys that are maximally difficult to collide with.
Tailscale doesn’t document their IP assignment algorithm, but I think it is safe to say that the larger subnet you use, the better. If you try to use a /24 for your mesh, it is certainly conceivable that an attacker could remove your trusted node, then just manually add the 240 or so machines it would take to get that IP reassigned. It might be a good idea to use a purely IPv6 mesh with Tailscale to minimize this problem as well.
So, I think the risk is low in the default configurations of both Yggdrasil and Tailscale (certainly lower than with tinc or Zerotier). You can drive the risk even lower with both.
Final thoughts
For my own purposes, I suspect I will remain with Yggdrasil in some fashion. Maybe I will just take the small performance hit that using a relay node implies. Or perhaps I will get clever and use an incoming VPN port forward or go over Tailscale.
Tailscale was the other option that seemed most interesting. However, living in a region with Internet that goes down more often than I’d like, I would like to just be able to send as much traffic over a mesh as possible, trusting that if the LAN is up, the mesh is up.
I have one thing that really benefits from performance in excess of Yggdrasil or Tailscale: NFS. That’s between two machines that never leave my LAN, so I will probably just set up a direct Wireguard link between them. Heck of a lot easier than trying to do Kerberos!
Finally, I wrote this intending to be useful. I dealt with a lot of complexity and under-documentation, so it’s possible I got something wrong somewhere. Please let me know if you find any errors.
This blog post is a copy of a page on my website. That page may be periodically updated.
Using Yggdrasil As an Automatic Mesh Fabric to Connect All Your Docker Containers, VMs, and Servers 1 Feb 2023 7:18 PM (2 years ago)
Update 2023-04: The version of this page on my public website has some important updates, including how to use broadcast detection in Docker, Yggdrasil zero-config for ephemeral containers, and more. See it for the most current information.
Sometimes you might want to run Docker containers on more than one host. Maybe you want to run some at one hosting facility, some at another, and so forth.
Maybe you’d like run VMs at various places, and let them talk to Docker containers and bare metal servers wherever they are.
And maybe you’d like to be able to easily migrate any of these from one provider to another.
There are all sorts of very complicated ways to set all this stuff up. But there’s also a simple one: Yggdrasil.
My blog post Make the Internet Yours Again With an Instant Mesh Network explains some of the possibilities of Yggdrasil in general terms. Here I want to show you how to use Yggdrasil to solve some of these issues more specifically. Because Yggdrasil is always Encrypted, some of the security lifting is done for us.
Background
Often in Docker, we connect multiple containers to a single network that runs on a given host. That much is easy. Once you start talking about containers on multiple hosts, then you start adding layers and layers of complexity. Once you start talking multiple providers, maybe multiple continents, then the complexity can increase. And, if you want to integrate everything from bare metal servers to VMs into this – well, there are ways, but they’re not easy.
I’m a believer in the KISS principle. Let’s not make things complex when we don’t have to.
Enter Yggdrasil
As I’ve explained before, Yggdrasil can automatically form a global mesh network. This is pretty cool! As most people use it, they join it to the main Yggdrasil network. But Yggdrasil can be run entirely privately as well. You can run your own private mesh, and that’s what we’ll talk about here.
All we have to do is run Yggdrasil inside each container, VM, server, or whatever. We handle some basics of connectivity, and bam! Everything is host- and location-agnostic.
Setup in Docker
The installation of Yggdrasil on a regular system is pretty straightforward. Docker is a bit more complicated for several reasons:
- It blocks IPv6 inside containers by default
- The default set of permissions doesn’t permit you to set up tunnels inside a container
- It doesn’t typically pass multicast (broadcast) packets
Normally, Yggdrasil could auto-discover peers on a LAN interface. However, aside from some esoteric Docker networking approaches, Docker doesn’t permit that. So my approach is going to be setting up one or more Yggdrasil “router” containers on a given Docker host. All the other containers talk directly to the “router” container and it’s all good.
Basic installation
In my Dockerfile, I have something like this:
FROM jgoerzen/debian-base-security:bullseye
RUN echo "deb http://deb.debian.org/debian bullseye-backports main" >> /etc/apt/sources.list && \
    apt-get --allow-releaseinfo-change update && \
    apt-get -y --no-install-recommends -t bullseye-backports install yggdrasil
...
COPY yggdrasil.conf /etc/yggdrasil/
RUN set -x; \
    chown root:yggdrasil /etc/yggdrasil/yggdrasil.conf && \
    chmod 0750 /etc/yggdrasil/yggdrasil.conf && \
    systemctl enable yggdrasil
The magic parameters to docker run to make Yggdrasil work are:
--cap-add=NET_ADMIN --sysctl net.ipv6.conf.all.disable_ipv6=0 --device=/dev/net/tun:/dev/net/tun
This example uses my docker-debian-base images, so if you use them as well, you’ll also need to add their parameters.
Note that it is NOT necessary to use --privileged. In fact, due to the network namespaces in use in Docker, this command does not let the container modify the host’s networking (unless you use --net=host, which I do not recommend).
The --sysctl parameter was the result of a lot of banging my head against the wall. Apparently Docker tries to disable IPv6 in the container by default. Annoying.
Configuration of the router container(s)
The idea is that the router node (or more than one, if you want redundancy) will be the only ones to have an open incoming port. Although the normal Yggdrasil case of directly detecting peers in a broadcast domain is more convenient and more robust, this can work pretty well too.
You can, of course, generate a template yggdrasil.conf with yggdrasil -genconf like usual. Some things to note for this one:
- You’ll want to change
Listento something likeListen: ["tls://[::]:12345"]where 12345 is the port number you’ll be listening on. - You’ll want to disable the
MulticastInterfacesentirely by just setting it to[]since it doesn’t work anyway. - If you expose the port to the Internet, you’ll certainly want to firewall it to only authorized peers. Setting
AllowedPublicKeysis another useful step. - If you have more than one router container on a host, each of them will both
Listenand act as a client to the others. See below.
Configuration of the non-router nodes
Again, you can start with a simple configuration. Some notes here:
- You’ll want to set
Peersto something likePeers: ["tls://routernode:12345"]whererouternodeis the Docker hostname of the router container, and 12345 is its port number as defined above. If you have more than one local router container, you can simply list them all here. Yggdrasil will then fail over nicely if any one of them go down. Listenshould be empty.- As above,
MulticastInterfacesshould be empty.
Using the interfaces
At this point, you should be able to ping6 between your containers. If you have multiple hosts running Docker, you can simply set up the router nodes on each to connect to each other. Now you have direct, secure, container-to-container communication that is host-agnostic! You can also set up Yggdrasil on a bare metal server or VM using standard procedures and everything will just talk nicely!
Security notes
Yggdrasil’s mesh is aggressively greedy. It will peer with any node it can find (unless told otherwise) and will find a route to anywhere it can. There are two main ways to make sure your internal comms stay private: by restricting who can talk to your mesh, and by firewalling the Yggdrasil interface. Both can be used, and they can be used simultaneously.
By disabling multicast discovery, you eliminate the chance for random machines on the LAN to join the mesh. By making sure that you firewall off (outside of Yggdrasil) who can connect to a Yggdrasil node with a listening port, you can authorize only your own machines. And, by setting AllowedPublicKeys on the nodes with listening ports, you can authenticate the Yggdrasil peers. Note that part of the benefit of the Yggdrasil mesh is normally that you don’t have to propagate a configuration change to every participatory node – that’s a nice thing in general!
You can also run a firewall inside your container (I like firehol for this purpose) and aggressively firewall the IPs that are allowed to connect via the Yggdrasil interface. I like to set a stable interface name like ygg0 in yggdrasil.conf, and then it becomes pretty easy to firewall the services. The Docker parameters that allow Yggdrasil to run are also sufficient to run firehol.
Naming Yggdrasil peers
You probably don’t want to hard-code Yggdrasil IPs all over the place. There are a few solutions:
- You could run an internal DNS service
- You can do a bit of scripting around Docker’s
--add-hostcommand to add things to /etc/hosts
Other hints & conclusion
Here are some other helpful use cases:
- If you are migrating between hosts, you could leave your reverse proxy up at both hosts, both pointing to the target containers over Yggdrasil. The targets will be automatically found from both sides of the migration while you wait for DNS caches to update and such.
- This can make services integrate with local networks a lot more painlessly than they might otherwise.
This is just an idea. The point of Yggdrasil is expanding our ideas of what we can do with a network, so here’s one such expansion. Have fun!
Note: This post also has a permanent home on my webiste, where it may be periodically updated.
Music Playing: Both Whole-House and Mobile 9 Dec 2022 3:28 PM (2 years ago)
It’s been nearly 8 years since I last made choices about music playing. At the time, I picked Logitech Media Server (LMS, aka Slimserver and Squeezebox server) for whole-house audio and Ampache with the DSub Android app.
It’s time to revisit that approach. Here are the things I’m looking for:
- Whole-house audio: a single control point for all the speakers in the house, which are all connected to some form of Linux (Raspberry Pi or x86). The speakers should be reasonably in sync with each other, and the control point should be able to adjust volume on them centrally. I should be able to play albums, playlists, etc. on them, and skip tracks or seek within a track.
- The ability to stream to an Android mobile device, ideally with downloading capabilities for offline use.
- If multiple solutions are used, playlist syncing between them.
- Ideally, bookmark support to resume playing a long track where it was left off.
- Ideally, podcast support.
The current setup
Here are the current components:
- Logitech Media Server, which serves the music library for whole-house synchronized audio
- Squeezelite is the LMS client running on my Raspberry Pi and x86 systems
- Squeezer is a nice Android client for LMS to control playback, adjust volume, etc. It doesn’t do any playback on the Android device, of course.
- Ampache provides the server for streaming clients, both browser-based and mobile
- DSub (F-Droid, Play Store) is a nice Android client for Ampache providing streaming and offline playback
LMS makes an excellent whole-house audio system. I can pull up the webpage (or use an Android app like Squeezer) to browse my music library, queue things up to play, and so forth. I can also create playlists, which it saves as m3u files.
This whole setup is boringly reliable. It just works, year in, year out.
The main problem with this is that LMS has no real streaming/offline mobile support. It is also a rather dated system, with a painful UI for playlist management, and in general doesn’t feel very modern. (It’s written largely in Perl also!)
So, I paired with it is Ampache. As a streaming player, Ampache is fantastic; I can access it from a web browser, and it will transcode my FLAC files to the quality I’ve set in my user prefs. The DSub app for Android is fantastic and remembers my last-play locations and such.
The problem is that Ampache doesn’t write its playlists back to m3u format, so I can’t use them with LMS. I have to therefore maintain all the playlists in LMS, and it has a smallish limit on the number of tracks per playlist. Ampache also doesn’t auto-update from LMS playlists, so I have to delete and recreate the playlists catalog periodically to get updates into Ampache. Not fun.
The new experiment
I’m trying out a new system based on these components:
- Jellyfin is a media player. It supports not just music, but also video (in fact, the emphasis is more on video). Notably it supports controlling various devices. Its normal frontend is a web browser; Jellyfin’s server won’t output audio to a device itself.
- Mopidy is a media player with a web interface that does output audio to a local device. In normal use, it displays an interface to your music, letting you select, queue up, etc.
- Mopidy-Jellyfin (docs) is a plugin for Mopidy that enables two things: 1) Browsing the Jellyfin library within Mopidy, and 2) controlling Mopidy from within Jellyfin. Mode 1 barely works, but mode 2 works perfectly. Within Jellyfin, I can “cast to Mopidy” and queue up things, seek, skip tracks, etc.
- Snapcast is a generic solution to take audio from some sort of source and distribute it throughout the house, syncing each device (and with better syncing than LMS, too!). The source can be just about anything, and the docs include an example of how to set it up with Mopidy.
- Mopidy has selectable web interfaces, and the Mopidy-Muse interface has the added benefit of having integrated Snapcast control. (Mopidy-Iris does as well, though it wasn’t documented there.) Within it, I can adjust volume on devices, mute devices, etc. I could also use the Snapcast web interface for this purpose.
- The default Jellyfin Android app lets me stream media to the mobile device, as well as control the Mopidy player.
- Finamp (F-Droid, Play Store) is a very nice Android Jellyfin music playing client, which notably supports downloads for offline playing, a feature the stock app lacks.
- The Snapcast Android app (F-Droid, Play Store) isn’t strictly necessary, since the Snapcast web app is so simple to use. But it provides near-instant control of speakers and volumes.
This looks a lot more complicated than what I had before, but in reality it only has one additional layer. Since Snapcast is a general audio syncing tool, and Jellyfin doesn’t itself output audio, Mopidy and its extensions is the “glue”.
There’s a lot to like about this setup. There is one single canonical source for music and playlists. Jellyfin can do a lot more besides music, and its mobile app gives me video access also. The setup, in general, works pretty well.
There are a few minor glitches, but nothing huge. For instance, Jellyfin fails to clear the play queue on the mopidy side.
But there is one problem, though: when playing a playlist, it is played out of order. Jellyfin itself has the same issue internally, so I’m unsure where the bug lies.
Rejected option: Jellyfin with jellycli
This could be a nice option; instead of mopidy with a plugin, just run jellycli in headless mode as a more “native” client. It also has the playlist ordering bug, and in addition, fails to play a couple of my albums which Mopidy-Jellyfin handles fine. But, if those bugs were addressed, it has a ton of promise as a simpler glue between Jellyfin and Snapcast than Mopidy.
Rejected option: Mopidy-Subidy Plugin with Ampache
Mopidy has a Subsonic plugin, and Ampache implements the Subsonic API. This would theoretically let me use a Mopidy client to play things on the whole-house system, coming from the same Ampache system.
Although I did get this connected with some trial and error (legacy auth on, API version 1.13.0), it was extremely slow. Loading the list of playlists took minutes, the list of albums and artists many seconds. It didn’t cache any answers either, so it was unusably slow.
Rejected option: Ampache localplay with mpd
Ampache has a feature called localplay which allows it to control a mpd server. I tested this out with mpd and snapcast. It works, but is highly limited. Basically, it causes Ampache to send a playlist — a literal list of URLs — to the mpd server. Unfortunately, seeking within a track is impossible from within the Ampache interface.
I will note that once a person is using mpd, snapcast makes a much easier whole-house solution than the streaming option I was trying to get working 8 years ago.
Building an Asynchronous, Internet-Optional Instant Messaging System 8 Dec 2022 12:12 PM (2 years ago)
I loaded up this title with buzzwords. The basic idea is that IM systems shouldn’t have to only use the Internet. Why not let them be carried across LoRa radios, USB sticks, local Wifi networks, and yes, the Internet? I’ll first discuss how, and then why.
How do set it up
I’ve talked about most of the pieces here already:
- Delta Chat, which is an IM app that uses mail servers (SMTP and IMAP) as transport, and OpenPGP encryption for security.
- One of the items I highlighted in Tools for Communicating Offline and in Difficult Circumstances, such as:
- NNCP, which I have talked about a lot. NNCP can run atop a network, over USB drives (sneakernet) (even airgapped), and over many other transports.
- Syncthing, which can form an ad-hoc mesh.
- Filespooler, which handles remote command execution, and can use a transport such as Syncthing or NNCP to get messages to their destination.
- Yggdrasil, which forms an auto-mesh network over things like ad-hoc wifi. It’s not asynchronous itself, but its properties may be used to build an asyncrhonous email network – email itself can be asynchronous across any carrier. Others such as Tor could also be used.
- And various other physical carriers such as LoRa and XBee SX radios.
- Email servers. For instance, there are existing instructions for running Postfix or Exim over NNCP. These can be easily adapted to run across something like Filespooler instead. These can be run locally on a laptop, or, with a tool such as Termux, on Android.
So, putting this together:
- All Delta Chat needs is access to a SMTP and IMAP server. This server could easily reside on localhost.
- Existing email servers support transport of email using non-IP transports, including batch transports that can easily store it in files.
- These batches can be easily carried by NNCP, Syncthing, Filespooler, etc. Or, if the connectivity is good enough, via traditional networking using Yggdrasil.
- Side note: Both NNCP and email servers support various routing arrangements, and can easily use intermediary routing nodes. Syncthing can also mesh. NNCP supports asynchronous multicast, letting your messages opportunistically find the best way to their destination.
OK, so why would you do it?
You might be thinking, “doesn’t asynchronous mean slow?” Well, not necessarily. Asynchronous means “reliability is more important than speed”; that is, slow (even to the point of weeks) is acceptable, but not required. NNCP and Syncthing, for instance, can easily deliver within a couple of seconds.
But let’s step back a bit. Let’s say you’re hiking in the wilderness in an area with no connectivity. You get back to your group at a campsite at the end of the day, and have taken some photos of the forest and sent them to some friends. Some of those friends are at the campsite; when you get within signal range, they get your messages right away. Some of those friends are in another country. So one person from your group drives into town and sits at a coffee shop for a few minutes, connected to their wifi. All the messages from everyone in the group go out, all the messages from outside the group come in. Then they go back to camp and the devices exchange messages.
Pretty slick, eh?
Note: this article also has a more permanent home on my website, where it may be periodically updated.
Flying Joy 28 Nov 2022 7:04 AM (2 years ago)
Wisdom from my 5-year-old: When flying in a small plane, it is important to give your dolls a headset and let them see out the window, too!
Moments like this make me smile at being a pilot dad.

A week ago, I also got to give 8 children and one adult their first ever ride in any kind of airplane, through EAA’s Young Eagles program. I got to hear several say, “Oh wow! It’s SO beautiful!” “Look at all the little houses!”
And my favorite: “How can I be a pilot?”
Dead USB Drives Are Fine: Building a Reliable Sneakernet 1 Sep 2022 5:43 PM (3 years ago)
“OK,” you’re probably thinking. “John, you talk a lot about things like Gopher and personal radios, and now you want to talk about building a reliable network out of… USB drives?”
Well, yes. In fact, I’ve already done it.
What is sneakernet?
Normally, “sneakernet” is a sort of tongue-in-cheek reference to using disconnected storage to transport data or messages. By “disconnect storage” I mean anything like CD-ROMs, hard drives, SD cards, USB drives, and so forth. There are times when loading up 12TB on a device and driving it across town is just faster and easier than using the Internet for the same. And, sometimes you need to get data to places that have no Internet at all.
Another reason for sneakernet is security. For instance, if your backup system is online, and your systems being backed up are online, then it could become possible for an attacker to destroy both your primary copy of data and your backups. Or, you might use a dedicated computer with no network connection to do GnuPG (GPG) signing.
What about “reliable” sneakernet, then?
TCP is often considered a “reliable” protocol. That means that the sending side is generally able to tell if its message was properly received. As with most reliable protocols, we have these components:
- After transmitting a piece of data, the sender retains it.
- After receiving a piece of data, the receiver sends an acknowledgment (ACK) back to the sender.
- Upon receiving the acknowledgment, the sender removes its buffered copy of the data.
- If no acknowledgment is received at the sender, it retransmits the data, in case it gets lost in transit.
- It reorders any packets that arrive out of order, so that the recipient’s data stream is ordered correctly.
Now, a lot of the things I just mentioned for sneakernet are legendarily unreliable. USB drives fail, CD-ROMs get scratched, hard drives get banged up. Think about putting these things in a bicycle bag or airline luggage. Some of them are going to fail.
You might think, “well, I’ll just copy files to a USB drive instead of move them, and once I get them onto the destination machine, I’ll delete them from the source.” Congratulations! You are a human retransmit algorithm! We should be able to automate this!
And we can.
Enter NNCP
NNCP is one of those things that almost defies explanation. It is a toolkit for building asynchronous networks. It can use as a carrier: a pipe, TCP network connection, a mounted filesystem (specifically intended for cases like this), and much more. It also supports multi-hop asynchronous routing and asynchronous meshing, but these are beyond the scope of this particular article.
NNCP’s transports that involve live communication between two hops already had all the hallmarks of being reliable; there was a positive ACK and retransmit. As of version 8.7.0, NNCP’s ACKs themselves can also be asynchronous – meaning that every NNCP transport can now be reliable.
Yes, that’s right. Your ACKs can flow over tapes and USB drives if you want them to.
I use this for archiving and backups.
If you aren’t already familiar with NNCP, you might take a look at my NNCP page. I also have a lot of blog posts about NNCP.
Those pages describe the basics of NNCP: the “packet” (the unit of transmission in NNCP, which can be tiny or many TB), the end-to-end encryption, and so forth. The new command we will now be interested in is nncp-ack.
The Basic Idea
Here are the basic steps to processing this stuff with NNCP:
- First, we use
nncp-xfer -rxto process incoming packets from the USB (or other media) device. This moves them into the NNCP inbound queue, deleting them from the media device, and verifies the packet integrity. - We use
nncp-ack -node $NODEto create ACK packets responding to the packets we just loaded into the rx queue. It writes a list of generated ACKs onto fd 4, which we save off for later use. - We run
nncp-toss -seento process the incoming queue. The use of-seencauses NNCP to remember the hashes of packets seen before, so a duplicate of an already-seen packet will not be processed twice. This command also processes incoming ACKs for packets we’ve sent out previously; if they pass verification, the relevant packets are removed from the local machine’s tx queue. - Now, we use
nncp-xfer -keep -tx -mkdir -node $NODEto send outgoing packets to a given node by writing them to a given directory on the media device.-keepcauses them to remain in the outgoing queue. - Finally, we use the list of generated ACK packets saved off in step 2 above. That list is passed to
nncp-rm -node $NODE -pkt < $FILEto remove those specific packets from the outbound queue. The reason is that there will never be an ACK of ACK packet (that would create an infinite loop), so if we don’t delete them in this manner, they would hang around forever.
You can see these steps follow the same basic outline on upstream’s nncp-ack page.
One thing to keep in mind: if anything else is running nncp-toss, there is a chance of a race condition between steps 1 and 2 (if nncp-toss gets to it first, it might not get an ack generated). This would sort itself out eventually, presumably, as the sender would retransmit and it would be ACKed later.
Further ideas
NNCP guarantees the integrity of packets, but not ordering between packets; if you need that, you might look into my Filespooler program. It is designed to work with NNCP and can provide ordered processing.
An example script
Here is a script you might try for this sort of thing. It may have more logic than you need – really, you just need the steps above – but hopefully it is clear.
#!/bin/bash

set -eo pipefail

MEDIABASE="/media/$USER"

# The local node name
NODENAME="`hostname`"

# All nodes.  NODENAME should be in this list.
ALLNODES="node1 node2 node3"

RUNNNCP=""
# If you need to sudo, use something like RUNNNCP="sudo -Hu nncp"
NNCPPATH="/usr/local/nncp/bin"

ACKPATH="`mktemp -d`"

# Process incoming packets.
#
# Parameters: $1 - the path to scan.  Must contain a directory
# named "nncp".
procrxpath () {
    while [ -n "$1" ]; do
        BASEPATH="$1/nncp"
        shift
        if ! [ -d "$BASEPATH" ]; then
            echo "$BASEPATH doesn't exist; skipping"
            continue
        fi

        echo " *** Incoming: processing $BASEPATH"
        TMPDIR="`mktemp -d`"

        # This rsync and the one below can help with
        # certain permission issues from weird foreign
        # media.  You could just eliminate it and
        # always use $BASEPATH instead of $TMPDIR below.
        rsync -rt "$BASEPATH/" "$TMPDIR/"

        # You may need these next two lines if using sudo as above.
        # chgrp -R nncp "$TMPDIR"
        # chmod -R g+rwX "$TMPDIR"
        echo "     Running nncp-xfer -rx"
        $RUNNNCP $NNCPPATH/nncp-xfer -progress -rx "$TMPDIR"

        for NODE in $ALLNODES; do
                if [ "$NODE" != "$NODENAME" ]; then
                        echo "     Running nncp-ack for $NODE"

                        # Now, we generate ACK packets for each node we will
                        # process.  nncp-ack writes a list of the created
                        # ACK packets to fd 4.  We'll use them later.
                        # If using sudo, add -C 5 after $RUNNNCP.
                        $RUNNNCP $NNCPPATH/nncp-ack -progress -node "$NODE" \
                           4>> "$ACKPATH/$NODE"
                fi
        done

        rsync --delete -rt "$TMPDIR/" "$BASEPATH/"
        rm -fr "$TMPDIR"
    done
}


proctxpath () {
    while [ -n "$1" ]; do
        BASEPATH="$1/nncp"
        shift
        if ! [ -d "$BASEPATH" ]; then
            echo "$BASEPATH doesn't exist; skipping"
            continue
        fi

        echo " *** Outgoing: processing $BASEPATH"
        TMPDIR="`mktemp -d`"
        rsync -rt "$BASEPATH/" "$TMPDIR/"
        # You may need these two lines if using sudo:
        # chgrp -R nncp "$TMPDIR"
        # chmod -R g+rwX "$TMPDIR"

        for DESTHOST in $ALLNODES; do
            if [ "$DESTHOST" = "$NODENAME" ]; then
                continue
            fi

            # Copy outgoing packets to this node, but keep them in the outgoing
            # queue with -keep.
            $RUNNNCP $NNCPPATH/nncp-xfer -keep -tx -mkdir -node "$DESTHOST" -progress "$TMPDIR"

            # Here is the key: that list of ACK packets we made above - now we delete them.
            # There will never be an ACK for an ACK, so they'd keep sending forever
            # if we didn't do this.
            if [ -f "$ACKPATH/$DESTHOST" ]; then
                echo "nncp-rm for node $DESTHOST"
                $RUNNNCP $NNCPPATH/nncp-rm -debug -node "$DESTHOST" -pkt < "$ACKPATH/$DESTHOST"
            fi

        done

        rsync --delete -rt "$TMPDIR/" "$BASEPATH/"
        rm -rf "$TMPDIR"

        # We only want to write stuff once.
        return 0
    done
}

procrxpath "$MEDIABASE"/*

echo " *** Initial tossing..."

# We make sure to use -seen to rule out duplicates.
$RUNNNCP $NNCPPATH/nncp-toss -progress -seen

proctxpath "$MEDIABASE"/*

echo "You can unmount devices now."

echo "Done."
This post is also available on my webiste, where it may be periodically updated.
The PC & Internet Revolution in Rural America 29 Aug 2022 5:22 PM (3 years ago)
Inspired by several others (such as Alex Schroeder’s post and Szczeżuja’s prompt), as well as a desire to get this down for my kids, I figure it’s time to write a bit about living through the PC and Internet revolution where I did: outside a tiny town in rural Kansas. And, as I’ve been back in that same area for the past 15 years, I reflect some on the challenges that continue to play out.
Although the stories from the others were primarily about getting online, I want to start by setting some background. Those of you that didn’t grow up in the same era as I did probably never realized that a typical business PC setup might cost $10,000 in today’s dollars, for instance. So let me start with the background.
Nothing was easy
This story begins in the 1980s. Somewhere around my Kindergarten year of school, around 1985, my parents bought a TRS-80 Color Computer 2 (aka CoCo II). It had 64K of RAM and used a TV for display and sound.
This got you the computer. It didn’t get you any disk drive or anything, no joysticks (required by a number of games). So whenever the system powered down, or it hung and you had to power cycle it – a frequent event – you’d lose whatever you were doing and would have to re-enter the program, literally by typing it in.
The floppy drive for the CoCo II cost more than the computer, and it was quite common for people to buy the computer first and then the floppy drive later when they’d saved up the money for that.
I particularly want to mention that computers then didn’t come with a modem. What would be like buying a laptop or a tablet without wifi today. A modem, which I’ll talk about in a bit, was another expensive accessory. To cobble together a system in the 80s that was capable of talking to others – with persistent storage (floppy, or hard drive), screen, keyboard, and modem – would be quite expensive. Adjusted for inflation, if you’re talking a PC-style device (a clone of the IBM PC that ran DOS), this would easily be more expensive than the Macbook Pros of today.
Few people back in the 80s had a computer at home. And the portion of those that had even the capability to get online in a meaningful way was even smaller.
Eventually my parents bought a PC clone with 640K RAM and dual floppy drives. This was primarily used for my mom’s work, but I did my best to take it over whenever possible. It ran DOS and, despite its monochrome screen, was generally a more capable machine than the CoCo II. For instance, it supported lowercase. (I’m not even kidding; the CoCo II pretty much didn’t.) A while later, they purchased a 32MB hard drive for it – what luxury!
Just getting a machine to work wasn’t easy. Say you’d bought a PC, and then bought a hard drive, and a modem. You didn’t just plug in the hard drive and it would work. You would have to fight it every step of the way. The BIOS and DOS partition tables of the day used a cylinder/head/sector method of addressing the drive, and various parts of that those addresses had too few bits to work with the “big” drives of the day above 20MB. So you would have to lie to the BIOS and fdisk in various ways, and sort of work out how to do it for each drive. For each peripheral – serial port, sound card (in later years), etc., you’d have to set jumpers for DMA and IRQs, hoping not to conflict with anything already in the system. Perhaps you can now start to see why USB and PCI were so welcomed.
Sharing and finding resources
Despite the two computers in our home, it wasn’t as if software written on one machine just ran on another. A lot of software for PC clones assumed a CGA color display. The monochrome HGC in our PC wasn’t particularly compatible. You could find a TSR program to emulate the CGA on the HGC, but it wasn’t particularly stable, and there’s only so much you can do when a program that assumes color displays on a monitor that can only show black, dark amber, or light amber.
So I’d periodically get to use other computers – most commonly at an office in the evening when it wasn’t being used.
There were some local computer clubs that my dad took me to periodically. Software was swapped back then; disks copied, shareware exchanged, and so forth. For me, at least, there was no “online” to download software from, and selling software over the Internet wasn’t a thing at all.
Three Different Worlds
There were sort of three different worlds of computing experience in the 80s:
- Home users. Initially using a wide variety of software from Apple, Commodore, Tandy/RadioShack, etc., but eventually coming to be mostly dominated by IBM PC clones
- Small and mid-sized business users. Some of them had larger minicomputers or small mainframes, but most that I had contact with by the early 90s were standardized on DOS-based PCs. More advanced ones had a network running Netware, most commonly. Networking hardware and software was generally too expensive for home users to use in the early days.
- Universities and large institutions. These are the places that had the mainframes, the earliest implementations of TCP/IP, the earliest users of UUCP, and so forth.
The difference between the home computing experience and the large institution experience were vast. Not only in terms of dollars – the large institution hardware could easily cost anywhere from tens of thousands to millions of dollars – but also in terms of sheer resources required (large rooms, enormous power circuits, support staff, etc). Nothing was in common between them; not operating systems, not software, not experience. I was never much aware of the third category until the differences started to collapse in the mid-90s, and even then I only was exposed to it once the collapse was well underway.
You might say to me, “Well, Google certainly isn’t running what I’m running at home!” And, yes of course, it’s different. But fundamentally, most large datacenters are running on x86_64 hardware, with Linux as the operating system, and a TCP/IP network. It’s a different scale, obviously, but at a fundamental level, the hardware and operating system stack are pretty similar to what you can readily run at home. Back in the 80s and 90s, this wasn’t the case. TCP/IP wasn’t even available for DOS or Windows until much later, and when it was, it was a clunky beast that was difficult.
One of the things Kevin Driscoll highlights in his book called Modem World – see my short post about it – is that the history of the Internet we usually receive is focused on case 3: the large institutions. In reality, the Internet was and is literally a network of networks. Gateways to and from Internet existed from all three kinds of users for years, and while TCP/IP ultimately won the battle of the internetworking protocol, the other two streams of users also shaped the Internet as we now know it. Like many, I had no access to the large institution networks, but as I’ve been reflecting on my experiences, I’ve found a new appreciation for the way that those of us that grew up with primarily home PCs shaped the evolution of today’s online world also.
An Era of Scarcity
I should take a moment to comment about the cost of software back then. A newspaper article from 1985 comments that WordPerfect, then the most powerful word processing program, sold for $495 (or $219 if you could score a mail order discount). That’s $1360/$600 in 2022 money. Other popular software, such as Lotus 1-2-3, was up there as well. If you were to buy a new PC clone in the mid to late 80s, it would often cost $2000 in 1980s dollars. Now add a printer – a low-end dot matrix for $300 or a laser for $1500 or even more. A modem: another $300. So the basic system would be $3600, or $9900 in 2022 dollars. If you wanted a nice printer, you’re now pushing well over $10,000 in 2022 dollars.
You start to see one barrier here, and also why things like shareware and piracy – if it was indeed even recognized as such – were common in those days.
So you can see, from a home computer setup (TRS-80, Commodore C64, Apple ][, etc) to a business-class PC setup was an order of magnitude increase in cost. From there to the high-end minis/mainframes was another order of magnitude (at least!) increase. Eventually there was price pressure on the higher end and things all got better, which is probably why the non-DOS PCs lasted until the early 90s.
Increasing Capabilities
My first exposure to computers in school was in the 4th grade, when I would have been about 9. There was a single Apple ][ machine in that room. I primarily remember playing Oregon Trail on it. The next year, the school added a computer lab. Remember, this is a small rural area, so each graduating class might have about 25 people in it; this lab was shared by everyone in the K-8 building. It was full of some flavor of IBM PS/2 machines running DOS and Netware. There was a dedicated computer teacher too, though I think she was a regular teacher that was given somewhat minimal training on computers. We were going to learn typing that year, but I did so well on the very first typing program that we soon worked out that I could do programming instead. I started going to school early – these machines were far more powerful than the XT at home – and worked on programming projects there.
Eventually my parents bought me a Gateway 486SX/25 with a VGA monitor and hard drive. Wow! This was a whole different world. It may have come with Windows 3.0 or 3.1 on it, but I mainly remember running OS/2 on that machine. More on that below.
Programming
That CoCo II came with a BASIC interpreter in ROM. It came with a large manual, which served as a BASIC tutorial as well. The BASIC interpreter was also the shell, so literally you could not use the computer without at least a bit of BASIC.
Once I had access to a DOS machine, it also had a basic interpreter: GW-BASIC. There was a fair bit of software written in BASIC at the time, but most of the more advanced software wasn’t. I wondered how these .EXE and .COM programs were written. I could find vague references to DEBUG.EXE, assemblers, and such. But it wasn’t until I got a copy of Turbo Pascal that I was able to do that sort of thing myself. Eventually I got Borland C++ and taught myself C as well. A few years later, I wanted to try writing GUI programs for Windows, and bought Watcom C++ – much cheaper than the competition, and it could target Windows, DOS (and I think even OS/2).
Notice that, aside from BASIC, none of this was free, and none of it was bundled. You couldn’t just download a C compiler, or Python interpreter, or whatnot back then. You had to pay for the ability to write any kind of serious code on the computer you already owned.
The Microsoft Domination
Microsoft came to dominate the PC landscape, and then even the computing landscape as a whole. IBM very quickly lost control over the hardware side of PCs as Compaq and others made clones, but Microsoft has managed – in varying degrees even to this day – to keep a stranglehold on the software, and especially the operating system, side. Yes, there was occasional talk of things like DR-DOS, but by and large the dominant platform came to be the PC, and if you had a PC, you ran DOS (and later Windows) from Microsoft.
For awhile, it looked like IBM was going to challenge Microsoft on the operating system front; they had OS/2, and when I switched to it sometime around the version 2.1 era in 1993, it was unquestionably more advanced technically than the consumer-grade Windows from Microsoft at the time. It had Internet support baked in, could run most DOS and Windows programs, and had introduced a replacement for the by-then terrible FAT filesystem: HPFS, in 1988. Microsoft wouldn’t introduce a better filesystem for its consumer operating systems until Windows XP in 2001, 13 years later. But more on that story later.
Free Software, Shareware, and Commercial Software
I’ve covered the high cost of software already. Obviously $500 software wasn’t going to sell in the home market. So what did we have?
Mainly, these things:
- Public domain software. It was free to use, and if implemented in BASIC, probably had source code with it too.
- Shareware
- Commercial software (some of it from small publishers was a lot cheaper than $500)
Let’s talk about shareware. The idea with shareware was that a company would release a useful program, sometimes limited. You were encouraged to “register”, or pay for, it if you liked it and used it. And, regardless of whether you registered it or not, were told “please copy!” Sometimes shareware was fully functional, and registering it got you nothing more than printed manuals and an easy conscience (guilt trips for not registering weren’t necessarily very subtle). Sometimes unregistered shareware would have a “nag screen” – a delay of a few seconds while they told you to register. Sometimes they’d be limited in some way; you’d get more features if you registered. With games, it was popular to have a trilogy, and release the first episode – inevitably ending with a cliffhanger – as shareware, and the subsequent episodes would require registration. In any event, a lot of software people used in the 80s and 90s was shareware. Also pirated commercial software, though in the earlier days of computing, I think some people didn’t even know the difference.
Notice what’s missing: Free Software / FLOSS in the Richard Stallman sense of the word. Stallman lived in the big institution world – after all, he worked at MIT – and what he was doing with the Free Software Foundation and GNU project beginning in 1983 never really filtered into the DOS/Windows world at the time. I had no awareness of it even existing until into the 90s, when I first started getting some hints of it as a port of gcc became available for OS/2. The Internet was what really brought this home, but I’m getting ahead of myself.
I want to say again: FLOSS never really entered the DOS and Windows 3.x ecosystems. You’d see it make a few inroads here and there in later versions of Windows, and moreso now that Microsoft has been sort of forced to accept it, but still, reflect on its legacy. What is the software market like in Windows compared to Linux, even today?
Now it is, finally, time to talk about connectivity!
Getting On-Line
What does it even mean to get on line? Certainly not connecting to a wifi access point. The answer is, unsurprisingly, complex. But for everyone except the large institutional users, it begins with a telephone.
The telephone system
By the 80s, there was one communication network that already reached into nearly every home in America: the phone system. Virtually every household (note I don’t say every person) was uniquely identified by a 10-digit phone number. You could, at least in theory, call up virtually any other phone in the country and be connected in less than a minute.
But I’ve got to talk about cost. The way things worked in the USA, you paid a monthly fee for a phone line. Included in that monthly fee was unlimited “local” calling. What is a local call? That was an extremely complex question. Generally it meant, roughly, calling within your city. But of course, as you deal with things like suburbs and cities growing into each other (eg, the Dallas-Ft. Worth metroplex), things got complicated fast. But let’s just say for simplicity you could call others in your city.
What about calling people not in your city? That was “long distance”, and you paid – often hugely – by the minute for it. Long distance rates were difficult to figure out, but were generally most expensive during business hours and cheapest at night or on weekends. Prices eventually started to come down when competition was introduced for long distance carriers, but even then you often were stuck with a single carrier for long distance calls outside your city but within your state. Anyhow, let’s just leave it at this: local calls were virtually free, and long distance calls were extremely expensive.
Getting a modem
I remember getting a modem that ran at either 1200bps or 2400bps. Either way, quite slow; you could often read even plain text faster than the modem could display it. But what was a modem?
A modem hooked up to a computer with a serial cable, and to the phone system. By the time I got one, modems could automatically dial and answer. You would send a command like ATDT5551212 and it would dial 555-1212. Modems had speakers, because often things wouldn’t work right, and the telephone system was oriented around speech, so you could hear what was happening. You’d hear it wait for dial tone, then dial, then – hopefully – the remote end would ring, a modem there would answer, you’d hear the screeching of a handshake, and eventually your terminal would say CONNECT 2400. Now your computer was bridged to the other; anything going out your serial port was encoded as sound by your modem and decoded at the other end, and vice-versa.
But what, exactly, was “the other end?”
It might have been another person at their computer. Turn on local echo, and you can see what they did. Maybe you’d send files to each other. But in my case, the answer was different: PC Magazine.
PC Magazine and CompuServe
Starting around 1986 (so I would have been about 6 years old), I got to read PC Magazine. My dad would bring copies that were being discarded at his office home for me to read, and I think eventually bought me a subscription directly. This was not just a standard magazine; it ran something like 350-400 pages an issue, and came out every other week. This thing was a monster. It had reviews of hardware and software, descriptions of upcoming technologies, pages and pages of ads (that often had some degree of being informative to them). And they had sections on programming. Many issues would talk about BASIC or Pascal programming, and there’d be a utility in most issues. What do I mean by a “utility in most issues”? Did they include a floppy disk with software?
No, of course not. There was a literal program listing printed in the magazine. If you wanted the utility, you had to type it in. And a lot of them were written in assembler, so you had to have an assembler. An assembler, of course, was not free and I didn’t have one. Or maybe they wrote it in Microsoft C, and I had Borland C, and (of course) they weren’t compatible. Sometimes they would list the program sort of in binary: line after line of a BASIC program, with lines like “64, 193, 253, 0, 53, 0, 87” that you would type in for hours, hopefully correctly. Running the BASIC program would, if you got it correct, emit a .COM file that you could then run. They did have a rudimentary checksum system built in, but it wasn’t even a CRC, so something like swapping two numbers you’d never notice except when the program would mysteriously hang.
Eventually they teamed up with CompuServe to offer a limited slice of CompuServe for the purpose of downloading PC Magazine utilities. This was called PC MagNet. I am foggy on the details, but I believe that for a time you could connect to the limited PC MagNet part of CompuServe “for free” (after the cost of the long-distance call, that is) rather than paying for CompuServe itself (because, OF COURSE, that also charged you per the minute.) So in the early days, I would get special permission from my parents to place a long distance call, and after some nerve-wracking minutes in which we were aware every minute was racking up charges, I could navigate the menus, download what I wanted, and log off immediately.
I still, incidentally, mourn what PC Magazine became. As with computing generally, it followed the mass market. It lost its deep technical chops, cut its programming columns, stopped talking about things like how SCSI worked, and so forth. By the time it stopped printing in 2009, it was no longer a square-bound 400-page beheamoth, but rather looked more like a copy of Newsweek, but with less depth.
Continuing with CompuServe
CompuServe was a much larger service than just PC MagNet. Eventually, our family got a subscription. It was still an expensive and scarce resource; I’d call it only after hours when the long-distance rates were cheapest. Everyone had a numerical username separated by commas; mine was 71510,1421. CompuServe had forums, and files. Eventually I would use TapCIS to queue up things I wanted to do offline, to minimize phone usage online.
CompuServe eventually added a gateway to the Internet. For the sum of somewhere around $1 a message, you could send or receive an email from someone with an Internet email address! I remember the thrill of one time, as a kid of probably 11 years, sending a message to one of the editors of PC Magazine and getting a kind, if brief, reply back!
But inevitably I had…
The Godzilla Phone Bill
Yes, one month I became lax in tracking my time online. I ran up my parents’ phone bill. I don’t remember how high, but I remember it was hundreds of dollars, a hefty sum at the time. As I watched Jason Scott’s BBS Documentary, I realized how common an experience this was. I think this was the end of CompuServe for me for awhile.
Toll-Free Numbers
I lived near a town with a population of 500. Not even IN town, but near town. The calling area included another town with a population of maybe 1500, so all told, there were maybe 2000 people total I could talk to with a local call – though far fewer numbers, because remember, telephones were allocated by the household. There was, as far as I know, zero modems that were a local call (aside from one that belonged to a friend I met in around 1992). So basically everything was long-distance.
But there was a special feature of the telephone network: toll-free numbers. Normally when calling long-distance, you, the caller, paid the bill. But with a toll-free number, beginning with 1-800, the recipient paid the bill. These numbers almost inevitably belonged to corporations that wanted to make it easy for people to call. Sales and ordering lines, for instance. Some of these companies started to set up modems on toll-free numbers. There were few of these, but they existed, so of course I had to try them!
One of them was a company called PennyWise that sold office supplies. They had a toll-free line you could call with a modem to order stuff. Yes, online ordering before the web! I loved office supplies. And, because I lived far from a big city, if the local K-Mart didn’t have it, I probably couldn’t get it. Of course, the interface was entirely text, but you could search for products and place orders with the modem. I had loads of fun exploring the system, and actually ordered things from them – and probably actually saved money doing so. With the first order they shipped a monster full-color catalog. That thing must have been 500 pages, like the Sears catalogs of the day. Every item had a part number, which streamlined ordering through the modem.
Inbound FAXes
By the 90s, a number of modems became able to send and receive FAXes as well. For those that don’t know, a FAX machine was essentially a special modem. It would scan a page and digitally transmit it over the phone system, where it would – at least in the early days – be printed out in real time (because the machines didn’t have the memory to store an entire page as an image). Eventually, PC modems integrated FAX capabilities.
There still wasn’t anything useful I could do locally, but there were ways I could get other companies to FAX something to me. I remember two of them.
One was for US Robotics. They had an “on demand” FAX system. You’d call up a toll-free number, which was an automated IVR system. You could navigate through it and select various documents of interest to you: spec sheets and the like. You’d key in your FAX number, hang up, and US Robotics would call YOU and FAX you the documents you wanted. Yes! I was talking to a computer (of a sorts) at no cost to me!
The New York Times also ran a service for awhile called TimesFax. Every day, they would FAX out a page or two of summaries of the day’s top stories. This was pretty cool in an era in which I had no other way to access anything from the New York Times. I managed to sign up for TimesFax – I have no idea how, anymore – and for awhile I would get a daily FAX of their top stories. When my family got its first laser printer, I could them even print these FAXes complete with the gothic New York Times masthead. Wow! (OK, so technically I could print it on a dot-matrix printer also, but graphics on a 9-pin dot matrix is a kind of pain that is a whole other article.)
My own phone line
Remember how I discussed that phone lines were allocated per household? This was a problem for a lot of reasons:
- Anybody that tried to call my family while I was using my modem would get a busy signal (unable to complete the call)
- If anybody in the house picked up the phone while I was using it, that would degrade the quality of the ongoing call and either mess up or disconnect the call in progress. In many cases, that could cancel a file transfer (which wasn’t necessarily easy or possible to resume), prompting howls of annoyance from me.
- Generally we all had to work around each other
So eventually I found various small jobs and used the money I made to pay for my own phone line and my own long distance costs. Eventually I upgraded to a 28.8Kbps US Robotics Courier modem even! Yes, you heard it right: I got a job and a bank account so I could have a phone line and a faster modem. Uh, isn’t that why every teenager gets a job?
Now my local friend and I could call each other freely – at least on my end (I can’t remember if he had his own phone line too). We could exchange files using HS/Link, which had the added benefit of allowing split-screen chat even while a file transfer is in progress. I’m sure we spent hours chatting to each other keyboard-to-keyboard while sharing files with each other.
Technology in Schools
By this point in the story, we’re in the late 80s and early 90s. I’m still using PC-style OSs at home; OS/2 in the later years of this period, DOS or maybe a bit of Windows in the earlier years. I mentioned that they let me work on programming at school starting in 5th grade. It was soon apparent that I knew more about computers than anybody on staff, and I started getting pulled out of class to help teachers or administrators with vexing school problems. This continued until I graduated from high school, incidentally – often to my enjoyment, and the annoyance of one particular teacher who, I must say, I was fine with annoying in this way.
That’s not to say that there was institutional support for what I was doing. It was, after all, a small school. Larger schools might have introduced BASIC or maybe Logo in high school. But I had already taught myself BASIC, Pascal, and C by the time I was somewhere around 12 years old. So I wouldn’t have had any use for that anyhow.
There were programming contests occasionally held in the area. Schools would send teams. My school didn’t really “send” anybody, but I went as an individual. One of them was run by a local college but for jr. high or high school students. Years later, I met one of the professors that ran it. He remembered me, and that day, better than I remembered him. The programming contest had problems one could solve in BASIC or Logo. I knew nothing about what to expect going into it, but I had lugged my computer and screen along, and asked him, “Can I write my solutions in C?” He was, apparently, stunned, but said sure, go for it. I took first place that day, leading to some rather confused teams from much larger schools.
The Netware network that the school had was, as these generally were, itself isolated. There was no link to the Internet or anything like it. Several schools across three local counties eventually invested in a fiber-optic network linking them together. This built a larger, but still closed, network. Its primary purpose was to allow students to be exposed to a wider variety of classes at high schools. Participating schools had an “ITV room”, outfitted with cameras and mics. So students at any school could take classes offered over ITV at other schools. For instance, only my school taught German classes, so people at any of those participating schools could take German. It was an early “Zoom room.” But alongside the TV signal, there was enough bandwidth to run some Netware frames. By about 1995 or so, this let one of the schools purchase some CD-ROM software that was made available on a file server and could be accessed by any participating school. Nice! But Netware was mainly about file and printer sharing; there wasn’t even a facility like email, at least not on our deployment.
BBSs
My last hop before the Internet was the BBS. A BBS was a computer program, usually ran by a hobbyist like me, on a computer with a modem connected. Callers would call it up, and they’d interact with the BBS. Most BBSs had discussion groups like forums and file areas. Some also had games. I, of course, continued to have that most vexing of problems: they were all long-distance.
There were some ways to help with that, chiefly QWK and BlueWave. These, somewhat like TapCIS in the CompuServe days, let me download new message posts for reading offline, and queue up my own messages to send later. QWK and BlueWave didn’t help with file downloading, though.
BBSs get networked
BBSs were an interesting thing. You’d call up one, and inevitably somewhere in the file area would be a BBS list. Download the BBS list and you’ve suddenly got a list of phone numbers to try calling. All of them were long distance, of course. You’d try calling them at random and have a success rate of maybe 20%. The other 80% would be defunct; you might get the dreaded “this number is no longer in service” or the even more dreaded angry human answering the phone (and of course a modem can’t talk to a human, so they’d just get silence for probably the nth time that week). The phone company cared nothing about BBSs and recycled their numbers just as fast as any others.
To talk to various people, or participate in certain discussion groups, you’d have to call specific BBSs. That’s annoying enough in the general case, but even more so for someone paying long distance for it all, because it takes a few minutes to establish a connection to a BBS: handshaking, logging in, menu navigation, etc.
But BBSs started talking to each other. The earliest successful such effort was FidoNet, and for the duration of the BBS era, it remained by far the largest. FidoNet was analogous to the UUCP that the institutional users had, but ran on the much cheaper PC hardware. Basically, BBSs that participated in FidoNet would relay email, forum posts, and files between themselves overnight. Eventually, as with UUCP, by hopping through this network, messages could reach around the globe, and forums could have worldwide participation – asynchronously, long before they could link to each other directly via the Internet. It was almost entirely volunteer-run.
Running my own BBS
At age 13, I eventually chose to set up my own BBS. It ran on my single phone line, so of course when I was dialing up something else, nobody could dial up me. Not that this was a huge problem; in my town of 500, I probably had a good 1 or 2 regular callers in the beginning.
In the PC era, there was a big difference between a server and a client. Server-class software was expensive and rare. Maybe in later years you had an email client, but an email server would be completely unavailable to you as a home user. But with a BBS, I could effectively run a server. I even ran serial lines in our house so that the BBS could be connected from other rooms! Since I was running OS/2, the BBS didn’t tie up the computer; I could continue using it for other things.
FidoNet had an Internet email gateway. This one, unlike CompuServe’s, was free. Once I had a BBS on FidoNet, you could reach me from the Internet using the FidoNet address. This didn’t support attachments, but then email of the day didn’t really, either.
Various others outside Kansas ran FidoNet distribution points. I believe one of them was mgmtsys; my memory is quite vague, but I think they offered a direct gateway and I would call them to pick up Internet mail via FidoNet protocols, but I’m not at all certain of this.
Pros and Cons of the Non-Microsoft World
As mentioned, Microsoft was and is the dominant operating system vendor for PCs. But I left that world in 1993, and here, nearly 30 years later, have never really returned. I got an operating system with more technical capabilities than the DOS and Windows of the day, but the tradeoff was a much smaller software ecosystem. OS/2 could run DOS programs, but it ran OS/2 programs a lot better. So if I were to run a BBS, I wanted one that had a native OS/2 version – limiting me to a small fraction of available BBS server software. On the other hand, as a fully 32-bit operating system, there started to be OS/2 ports of certain software with a Unix heritage; most notably for me at the time, gcc. At some point, I eventually came across the RMS essays and started to be hooked.
Internet: The Hunt Begins
I certainly was aware that the Internet was out there and interesting. But the first problem was: how the heck do I get connected to the Internet?
Learning Link and Gopher
ISPs weren’t really a thing; the first one in my area (though still a long-distance call) started in, I think, 1994. One service that one of my teachers got me hooked up with was Learning Link. Learning Link was a nationwide collaboration of PBS stations and schools, designed to build on the educational mission of PBS. The nearest Learning Link station was more than a 3-hour drive away… but critically, they had a toll-free access number, and my teacher convinced them to let me use it. I connected via a terminal program and a modem, like with most other things. I don’t remember much about it, but I do remember a very important thing it had: Gopher. That was my first experience with Gopher.
Learning Link was hosted by a Unix derivative (Xenix), but it didn’t exactly give everyone a shell. I seem to recall it didn’t have open FTP access either. The Gopher client had FTP access at some point; I don’t recall for sure if it did then. If it did, then when a Gopher server referred to an FTP server, I could get to it. (I am unclear at this point if I could key in an arbitrary FTP location, or knew how, at that time.) I also had email access there, but I don’t recall exactly how; probably Pine. If that’s correct, that would have dated my Learning Link access as no earlier than 1992.
I think my access time to Learning Link was limited. And, since the only way to get out on the Internet from there was Gopher and Pine, I was somewhat limited in terms of technology as well. I believe that telnet services, for instance, weren’t available to me.
Computer labs
There was one place that tended to have Internet access: colleges and universities. In 7th grade, I participated in a program that resulted in me being invited to visit Duke University, and in 8th grade, I participated in National History Day, resulting in a trip to visit the University of Maryland. I probably sought out computer labs at both of those. My most distinct memory was finding my way into a computer lab at one of those universities, and it was full of NeXT workstations. I had never seen or used NeXT before, and had no idea how to operate it. I had brought a box of floppy disks, unaware that the DOS disks probably weren’t compatible with NeXT.
Closer to home, a small college had a computer lab that I could also visit. I would go there in summer or when it wasn’t used with my stack of floppies. I remember downloading disk images of FLOSS operating systems: FreeBSD, Slackware, or Debian, at the time. The hash marks from the DOS-based FTP client would creep across the screen as the 1.44MB disk images would slowly download. telnet was also available on those machines, so I could telnet to things like public-access Archie servers and libraries – though not Gopher. Still, FTP and telnet access opened up a lot, and I learned quite a bit in those years.
Continuing the Journey
At some point, I got a copy of the Whole Internet User’s Guide and Catalog, published in 1994. I still have it. If it hadn’t already figured it out by then, I certainly became aware from it that Unix was the dominant operating system on the Internet. The examples in Whole Internet covered FTP, telnet, gopher – all assuming the user somehow got to a Unix prompt. The web was introduced about 300 pages in; clearly viewed as something that wasn’t page 1 material. And it covered the command-line www client before introducing the graphical Mosaic. Even then, though, the book highlighted Mosaic’s utility as a front-end for Gopher and FTP, and even the ability to launch telnet sessions by clicking on links. But having a copy of the book didn’t equate to having any way to run Mosaic. The machines in the computer lab I mentioned above all ran DOS and were incapable of running a graphical browser. I had no SLIP or PPP (both ways to run Internet traffic over a modem) connectivity at home. In short, the Web was something for the large institutional users at the time.
CD-ROMs
As CD-ROMs came out, with their huge (for the day) 650MB capacity, various companies started collecting software that could be downloaded on the Internet and selling it on CD-ROM. The two most popular ones were Walnut Creek CD-ROM and Infomagic. One could buy extensive Shareware and gaming collections, and then even entire Linux and BSD distributions. Although not exactly an Internet service per se, it was a way of bringing what may ordinarily only be accessible to institutional users into the home computer realm.
Free Software Jumps In
As I mentioned, by the mid 90s, I had come across RMS’s writings about free software – most probably his 1992 essay Why Software Should Be Free. (Please note, this is not a commentary on the more recently-revealed issues surrounding RMS, but rather his writings and work as I encountered them in the 90s.) The notion of a Free operating system – not just in cost but in openness – was incredibly appealing. Not only could I tinker with it to a much greater extent due to having source for everything, but it included so much software that I’d otherwise have to pay for. Compilers! Interpreters! Editors! Terminal emulators! And, especially, server software of all sorts. There’d be no way I could afford or run Netware, but with a Free Unixy operating system, I could do all that. My interest was obviously piqued. Add to that the fact that I could actually participate and contribute – I was about to become hooked on something that I’ve stayed hooked on for decades.
But then the question was: which Free operating system? Eventually I chose FreeBSD to begin with; that would have been sometime in 1995. I don’t recall the exact reasons for that. I remember downloading Slackware install floppies, and probably the fact that Debian wasn’t yet at 1.0 scared me off for a time. FreeBSD’s fantastic Handbook – far better than anything I could find for Linux at the time – was no doubt also a factor.
The de Raadt Factor
Why not NetBSD or OpenBSD? The short answer is Theo de Raadt. Somewhere in this time, when I was somewhere between 14 and 16 years old, I asked some questions comparing NetBSD to the other two free BSDs. This was on a NetBSD mailing list, but for some reason Theo saw it and got a flame war going, which CC’d me. Now keep in mind that even if NetBSD had a web presence at the time, it would have been minimal, and I would have – not all that unusually for the time – had no way to access it. I was certainly not aware of the, shall we say, acrimony between Theo and NetBSD. While I had certainly seen an online flamewar before, this took on a different and more disturbing tone; months later, Theo randomly emailed me under the subject “SLIME” saying that I was, well, “SLIME”. I seem to recall periodic emails from him thereafter reminding me that he hates me and that he had blocked me. (Disclaimer: I have poor email archives from this period, so the full details are lost to me, but I believe I am accurately conveying these events from over 25 years ago)
This was a surprise, and an unpleasant one. I was trying to learn, and while it is possible I didn’t understand some aspect or other of netiquette (or Theo’s personal hatred of NetBSD) at the time, still that is not a reason to flame a 16-year-old (though he would have had no way to know my age). This didn’t leave any kind of scar, but did leave a lasting impression; to this day, I am particularly concerned with how FLOSS projects handle poisonous people. Debian, for instance, has come a long way in this over the years, and even Linus Torvalds has turned over a new leaf. I don’t know if Theo has.
In any case, I didn’t use NetBSD then. I did try it periodically in the years since, but never found it compelling enough to justify a large switch from Debian. I never tried OpenBSD for various reasons, but one of them was that I didn’t want to join a community that tolerates behavior such as Theo’s from its leader.
Moving to FreeBSD
Moving from OS/2 to FreeBSD was final. That is, I didn’t have enough hard drive space to keep both. I also didn’t have the backup capacity to back up OS/2 completely. My BBS, which ran Virtual BBS (and at some point also AdeptXBBS) was deleted and reincarnated in a different form. My BBS was a member of both FidoNet and VirtualNet; the latter was specific to VBBS, and had to be dropped. I believe I may have also had to drop the FidoNet link for a time. This was the biggest change of computing in my life to that point. The earlier experiences hadn’t literally destroyed what came before. OS/2 could still run my DOS programs. Its command shell was quite DOS-like. It ran Windows programs. I was going to throw all that away and leap into the unknown.
I wish I had saved a copy of my BBS; I would love to see the messages I exchanged back then, or see its menu screens again. I have little memory of what it looked like. But other than that, I have no regrets. Pursuing Free, Unixy operating systems brought me a lot of enjoyment and a good career.
That’s not to say it was easy. All the problems of not being in the Microsoft ecosystem were magnified under FreeBSD and Linux. In a day before EDID, monitor timings had to be calculated manually – and you risked destroying your monitor if you got them wrong. Word processing and spreadsheet software was pretty much not there for FreeBSD or Linux at the time; I was therefore forced to learn LaTeX and actually appreciated that. Software like PageMaker or CorelDraw was certainly nowhere to be found for those free operating systems either. But I got a ton of new capabilities.
I mentioned the BBS didn’t shut down, and indeed it didn’t. I ran what was surely a supremely unique oddity: a free, dialin Unix shell server in the middle of a small town in Kansas. I’m sure I provided things such as pine for email and some help text and maybe even printouts for how to use it. The set of callers slowly grew over the time period, in fact.
And then I got UUCP.
Enter UUCP
Even throughout all this, there was no local Internet provider and things were still long distance. I had Internet Email access via assorted strange routes, but they were all… strange. And, I wanted access to Usenet. In 1995, it happened.
The local ISP I mentioned offered UUCP access. Though I couldn’t afford the dialup shell (or later, SLIP/PPP) that they offered due to long-distance costs, UUCP’s very efficient batched processes looked doable. I believe I established that link when I was 15, so in 1995.
I worked to register my domain, complete.org, as well. At the time, the process was a bit lengthy and involved downloading a text file form, filling it out in a precise way, sending it to InterNIC, and probably mailing them a check. Well I did that, and in September of 1995, complete.org became mine. I set up sendmail on my local system, as well as INN to handle the limited Usenet newsfeed I requested from the ISP. I even ran Majordomo to host some mailing lists, including some that were surprisingly high-traffic for a few-times-a-day long-distance modem UUCP link!
The modem client programs for FreeBSD were somewhat less advanced than for OS/2, but I believe I wound up using Minicom or Seyon to continue to dial out to BBSs and, I believe, continue to use Learning Link. So all the while I was setting up my local BBS, I continued to have access to the text Internet, consisting of chiefly Gopher for me.
Switching to Debian
I switched to Debian sometime in 1995 or 1996, and have been using Debian as my primary OS ever since. I continued to offer shell access, but added the WorldVU Atlantis menuing BBS system. This provided a return of a more BBS-like interface (by default; shell was still an uption) as well as some BBS door games such as LoRD and TradeWars 2002, running under DOS emulation.
I also continued to run INN, and ran ifgate to allow FidoNet echomail to be presented into INN Usenet-like newsgroups, and netmail to be gated to Unix email. This worked pretty well. The BBS continued to grow in these days, peaking at about two dozen total user accounts, and maybe a dozen regular users.
Dial-up access availability
I believe it was in 1996 that dial up PPP access finally became available in my small town. What a thrill! FINALLY! I could now FTP, use Gopher, telnet, and the web all from home. Of course, it was at modem speeds, but still.
(Strangely, I have a memory of accessing the Web using WebExplorer from OS/2. I don’t know exactly why; it’s possible that by this time, I had upgraded to a 486 DX2/66 and was able to reinstall OS/2 on the old 25MHz 486, or maybe something was wrong with the timeline from my memories from 25 years ago above. Or perhaps I made the occasional long-distance call somewhere before I ditched OS/2.)
Gopher sites still existed at this point, and I could access them using Netscape Navigator – which likely became my standard Gopher client at that point. I don’t recall using UMN text-mode gopher client locally at that time, though it’s certainly possible I did.
The city
Starting when I was 15, I took computer science classes at Wichita State University. The first one was a class in the summer of 1995 on C++. I remember being worried about being good enough for it – I was, after all, just after my HS freshman year and had never taken the prerequisite C class. I loved it and got an A! By 1996, I was taking more classes.
In 1996 or 1997 I stayed in Wichita during the day due to having more than one class. So, what would I do then but… enjoy the computer lab? The CS dept. had two of them: one that had NCD X terminals connected to a pair of SunOS servers, and another one running Windows. I spent most of the time in the Unix lab with the NCDs; I’d use Netscape or pine, write code, enjoy the University’s fast Internet connection, and so forth.
In 1997 I had graduated high school and that summer I moved to Wichita to attend college. As was so often the case, I shut down the BBS at that time. It would be 5 years until I again dealt with Internet at home in a rural community.
By the time I moved to my apartment in Wichita, I had stopped using OS/2 entirely. I have no memory of ever having OS/2 there. Along the way, I had bought a Pentium 166, and then the most expensive piece of computing equipment I have ever owned: a DEC Alpha, which, of course, ran Linux.
ISDN
I must have used dialup PPP for a time, but I eventually got a job working for the ISP I had used for UUCP, and then PPP. While there, I got a 128Kbps ISDN line installed in my apartment, and they gave me a discount on the service for it. That was around 3x the speed of a modem, and crucially was always on and gave me a public IP. No longer did I have to use UUCP; now I got to host my own things! By at least 1998, I was running a web server on www.complete.org, and I had an FTP server going as well.
Even Bigger Cities
In 1999 I moved to Dallas, and there got my first broadband connection: an ADSL link at, I think, 1.5Mbps! Now that was something! But it had some reliability problems. I eventually put together a server and had it hosted at an acquantaince’s place who had SDSL in his apartment. Within a couple of years, I had switched to various kinds of proper hosting for it, but that is a whole other article.
In Indianapolis, I got a cable modem for the first time, with even tighter speeds but prohibitions on running “servers” on it. Yuck.
Challenges
Being non-Microsoft continued to have challenges. Until the advent of Firefox, a web browser was one of the biggest. While Netscape supported Linux on i386, it didn’t support Linux on Alpha. I hobbled along with various attempts at emulators, old versions of Mosaic, and so forth. And, until StarOffice was open-sourced as Open Office, reading Microsoft file formats was also a challenge, though WordPerfect was briefly available for Linux.
Over the years, I have become used to the Linux ecosystem. Perhaps I use Gimp instead of Photoshop and digikam instead of – well, whatever somebody would use on Windows. But I get ZFS, and containers, and so much that isn’t available there.
Yes, I know Apple never went away and is a thing, but for most of the time period I discuss in this article, at least after the rise of DOS, it was niche compared to the PC market.
Back to Kansas
In 2002, I moved back to Kansas, to a rural home near a different small town in the county next to where I grew up. Over there, it was back to dialup at home, but I had faster access at work. I didn’t much care for this, and thus began a 20+-year effort to get broadband in the country. At first, I got a wireless link, which worked well enough in the winter, but had serious problems in the summer when the trees leafed out. Eventually DSL became available locally – highly unreliable, but still, it was something. Then I moved back to the community I grew up in, a few miles from where I grew up. Again I got DSL – a bit better. But after some years, being at the end of the run of DSL meant I had poor speeds and reliability problems. I eventually switched to various wireless ISPs, which continues to the present day; while people in cities can get Gbps service, I can get, at best, about 50Mbps. Long-distance fees are gone, but the speed disparity remains.
Concluding Reflections
I am glad I grew up where I did; the strong community has a lot of advantages I don’t have room to discuss here. In a number of very real senses, having no local services made things a lot more difficult than they otherwise would have been. However, perhaps I could say that I also learned a lot through the need to come up with inventive solutions to those challenges. To this day, I think a lot about computing in remote environments: partially because I live in one, and partially because I enjoy visiting places that are remote enough that they have no Internet, phone, or cell service whatsoever. I have written articles like Tools for Communicating Offline and in Difficult Circumstances based on my own personal experience. I instinctively think about making protocols robust in the face of various kinds of connectivity failures because I experience various kinds of connectivity failures myself.
(Almost) Everything Lives On
In 2002, Gopher turned 10 years old. It had probably been about 9 or 10 years since I had first used Gopher, which was the first way I got on live Internet from my house. It was hard to believe. By that point, I had an always-on Internet link at home and at work. I had my Alpha, and probably also at least PCMCIA Ethernet for a laptop (many laptops had modems by the 90s also). Despite its popularity in the early 90s, less than 10 years after it came on the scene and started to unify the Internet, it was mostly forgotten.
And it was at that moment that I decided to try to resurrect it. The University of Minnesota finally released it under an Open Source license. I wrote the first new gopher server in years, pygopherd, and introduced gopher to Debian. Gopher lives on; there are now quite a few Gopher clients and servers out there, newly started post-2002. The Gemini protocol can be thought of as something akin to Gopher 2.0, and it too has a small but blossoming ecosystem.
Archie, the old FTP search tool, is dead though. Same for WAIS and a number of the other pre-web search tools. But still, even FTP lives on today.
And BBSs? Well, they didn’t go away either. Jason Scott’s fabulous BBS documentary looks back at the history of the BBS, while Back to the BBS from last year talks about the modern BBS scene. FidoNet somehow is still alive and kicking. UUCP still has its place and has inspired a whole string of successors. Some, like NNCP, are clearly direct descendents of UUCP. Filespooler lives in that ecosystem, and you can even see UUCP concepts in projects as far afield as Syncthing and Meshtastic. Usenet still exists, and you can now run Usenet over NNCP just as I ran Usenet over UUCP back in the day (which you can still do as well). Telnet, of course, has been largely supplanted by ssh, but the concept is more popular now than ever, as Linux has made ssh be available on everything from Raspberry Pi to Android.
And I still run a Gopher server, looking pretty much like it did in 2002.
This post also has a permanent home on my website, where it may be periodically updated.
The Joy of Easy Personal Radio: FRS, GMRS, and Motorola DLR/DTR 15 Aug 2022 6:02 AM (3 years ago)
Most of us carry cell phones with us almost everywhere we go. So much so that we often forget not just the usefulness, but even the joy, of having our own radios. For instance:
-
When traveling to national parks or other wilderness areas, family and friends can keep in touch even where there is no cell coverage.
-
It is a lot faster to just push a button and start talking than it is to unlock a phone, open the phone app, select a person, wait for the call to connect, wait for the other person to answer, etc. “I’m heading back.” “OK.” Boom, 5 seconds, done. A phone user wouldn’t have even dialed in that time.
-
A whole group of people can be on the same channel.
-
You can often buy a radio for less than the monthly cost of a cell plan.
From my own experience, as a person and a family that enjoys visiting wilderness areas, having radio communication is great. I have also heard from others that they’re also very useful on cruise ships (I’ve never been on one so I can’t attest to that).
There is also a sheer satisfaction in not needing anybody else’s infrastructure, not paying any sort of monthly fee, and setting up the radios ourselves.
How these services fit in
This article is primarily about handheld radios that can be used by anybody. I laid out some of their advantages above. Before continuing, I should point out some of the other services you may consider:
-
Cell phones, obviously. Due to the impressive infrastructure you pay for each month (many towers in high locations), in areas of cell coverage, you have this ability to connect to so many other phones around the world. With radios like discussed here, your range will likely a few miles.
-
Amateur Radio has often been a decade or more ahead of what you see in these easy personal radio devices. You can unquestionably get amateur radio devices with many more features and better performance. However, generally speaking, each person that transmits on an amateur radio band must be licensed. Getting an amateur radio license isn’t difficult, but it does involve passing a test and some time studying for the exam. So it isn’t something you can count on random friends or family members being able to do. That said, I have resources on Getting Started With Amateur Radio and it’s not as hard as you might think! There are also a lot of reasons to use amateur radio if you want to go down that path.
-
Satellite messengers such as the Garmin Inreach or Zoleo can send SMS-like messages across anywhere in the globe with a clear view of the sky. They also often have SOS features. While these are useful safety equipment, it can take many minutes for a message to be sent and received – it’s not like an interactive SMS conversation – and there are places where local radios will have better signal. Notably, satellite messengers are almost useless indoors and can have trouble in areas without a clear view of the sky, such as dense forests, valleys, etc.
-
My earlier Roundup of secure messengers with off-the-grid capabilities (distributed/mesh messengers) highlighted a number of other options as well, for text-only communication. For instance:
-
For very short-range service, Briar can form a mesh over Bluetooth from cell phones – or over Tor, if Internet access is available.
-
Dedicated short message services Mesh Networks like Meshtastic or Beartooth have no voice capability, but share GPS locations and short text messages over their own local mesh. Generally they need to pair to a cell phone (even if that phone has no cell service) for most functionality.
-
-
Yggdrasil can do something similar over ad-hoc Wifi, but it is a lower-level protocol and you’d need some sort of messaging to run atop it.
This article is primarily about the USA, though these concepts, if not the specific implementation, apply many other areas as well.
The landscape of easy personal radios
The oldest personal radio service in the US is Citizens Band (CB). Because it uses a lower frequency band than others, handheld radios are larger, heavier, and less efficient. It is mostly used in vehicles or other installations where size isn’t an issue.
The FRS/GMRS services mostly share a set of frequencies. The Family Radio Service is unlicensed (you don’t have to get a license to use it) and radios are plentiful and cheap. When you get a “blister pack” or little radios for maybe $50 for a pair or less, they’re probably FRS. FRS was expanded by the FCC in 2017, and now most FRS channels can run up to 2 watts of power (with channels 8-14 still limited to 0.5W). FRS radios are pretty much always handheld.
GMRS runs on mostly the same frequencies as FRS. GMRS lets you run up to 5W on some channels, up to 50W on others, and operate repeaters. GMRS also permits limited occasional digital data bursts; three manufacturers currently use this to exchange GPS data or text messages. To use GMRS, you must purchase a GMRS license; it costs $35 for a person and their immediate family and is good for 10 years. No exam is required. GMRS radios can transmit on FRS frequencies using the GMRS authorization.
The extra power of GMRS gets you extra distance. While only the best handheld GMRS radios can put out 5W of power, some mobile (car) or home radios can put out the full 50W, and use more capable exterior antennas too.
There is also the MURS band, which offers very few channels and also very few devices. It is not in wide use, probably for good reason.
Finally, some radios use some other unlicensed bands. The Motorola DTR and DLR series I will talk about operate in the 900MHz ISM band. Regulations there limit them to a maximum power of 1W, but as you will see, due to some other optimizations, their range is often quite similar to a 5W GMRS handheld.
All of these radios share something in common: your radio can either transmit, or receive, but not both simultaneously. They all have a PTT (push-to-talk) button that you push and hold while you are transmitting, and at all other times, they act as receivers.
You’ll learn that “doubling” is a thing – where 2 or more people attempt to transmit at the same time. To listeners, the result is often garbled. To the transmitters, they may not even be aware they did it – since, after all, they were transmitting. Usually it will be clear pretty quickly as people don’t get responses or responses say it was garbled. Only the digital Motorola DLR/DTR series detects and prevents this situation.
FRS and GMRS radios
As mentioned, the FRS/GMRS radios are generally the most popular, and quite inexpensive. Those that can emit 2W will have pretty decent range; 5W even better (assuming a decent antenna), though the 5W ones will require a GMRS license. For the most part, there isn’t much that differentiates one FRS radio from another, or (with a few more exceptions) one GMRS handheld from another. Do not believe the manufacturers claims of “50 mile range” or whatever; more on range below.
FRS and GMRS radios use FM. GMRS radios are permitted to use a wider bandwidth than FRS radios, but in general, FRS and GMRS users can communicate with each other from any brand of radio to any other brand of radio, assuming they are using basic voice services.
Some FRS and GMRS radios can receive the NOAA weather radio. That’s nice for wilderness use. Nicer ones can monitor it for alert tones, even when you’re tuned to a different channel. The very nicest on this – as far as I know, only the Garmin Rino series – will receive and process SAME codes to only trigger alerts for your specific location.
GMRS (but not FRS) also permits 1-second digital data bursts at periodic intervals. There are now three radio series that take advantage of this: the Garmin Rino, the Motorola T800, and BTech GMRS-PRO. Garmin’s radios are among the priciest of GMRS handhelds out there; the top-of-the-line Rino will set you back $650. The cheapest is $350, but does not contain a replaceable battery, which should be an instant rejection of a device like this. So, for $550, you can get the middle-of-the-road Rino. It features a sophisticated GPS system with Garmin trail maps and such, plus a 5W GMRS radio with GPS data sharing and a very limited (13-character) text messaging system. It does have a Bluetooth link to a cell phone, which can provide a link to trail maps and the like, and limited functionality for the radio. The Rino is also large and heavy (due to its large map-capable screen). Many consider it to be somewhat dated technology; for instance, other ways to have offline maps now exist (such as my Garmin Fenix 6 Pro, which has those maps on a watch!). It is bulky enough to likely be left at home in many situations.
The Motorola T800 doesn’t have much to talk about compared to the other two.
Both of those platforms are a number of years old. The newest entrant in this space, from budget radio maker Baofeng, is the BTech GMRS-PRO, which came out just a couple of weeks ago. Its screen, though lacking built-in maps, does still have a GPS digital link similar to Garmin’s, and can show you a heading and distance to other GMRS-PRO users. It too is a 5W unit, and has a ton of advanced features that are rare in GMRS: ability to pair a Bluetooth headset to it directly (though the Garmin Rino supports Bluetooth, it doesn’t support this), ability to use the phone app as a speaker/mic for the radio, longer text messages than the Garmin Rino, etc. The GMRS-PRO sold out within a few days of its announcement, and I am presently waiting for mine to arrive to review. At $140 and with a more modern radio implementation, for people that don’t need the trail maps and the like, it makes a compelling alternative to Garmin for outdoor use.
Garmin documents when GPS beacons are sent out: generally, when you begin a transmission, or when another radio asks for your position. I couldn’t find similar documentation from Motorola or BTech, but I believe FCC regulations mean that the picture would be similar with them. In other words, none of these devices is continuously, automatically, transmitting position updates. However, you can request a position update from another radio.
It should be noted that, while voice communication is compatible across FRS/GMRS, data communication is not. Garmin, Motorola, and BTech all have different data protocols that are incompatible with radios from other manufacturers.
FRS/GMRS radios often advertise “privacy codes.” These do nothing to protect your privacy; see more under the privacy section below.
Motorola DLR and DTR series
Although they can be used for similar purposes, and I do, these radios are unique from the others in this article in several ways:
- Their sales and marketing is targeted at businesses rather than consumers
- They use digital encoding of audio, rather than analog FM or AM
- They use FHSS (Frequency-Hopping Spread Spectrum) rather than a set frequency
- They operate on the 900MHz ISM band, rather than a 460MHz UHF band (or a lower band yet for MURS and CB)
- The DLR series is quite small, smaller than many GMRS radios.
I don’t have space to go into a lot of radio theory in this article, but I’ll briefly expand on some of this.
First, FHSS. A FHSS radio hops from frequency to frequency many times per second, following some preset hopping algorithm that is part of the radio. Although it complicates the radio design, it has some advantages; it tends to allow more users to share a band, and if one particular frequency has a conflict with something else, it will be for a brief fraction of a second and may not even be noticeable.
Digital encoding generally increases the quality of the audio, and keeps the quality high even in degraded signal conditions where analog radios would experience static or a quieter voice. However, you also lose that sort of audible feedback that your signal is getting weak. When you get too far away, the digital signal “drops off a cliff”. Often, either you have a crystal-clear signal or you have no signal at all.
Motorola’s radios leverage these features to build a unique radio. Not only can you talk to a group, but you can select a particular person to talk to with a private conversation, and so forth. DTR radios can send text messages to each other (but only preset canned ones, not arbitrary ones). “Channels” are more like configurations; they can include various arbitrary groupings of radios. Deconfliction with other users is established via “hopsets” rather than frequencies; that is, the algorithm that it uses to hop from frequency to frequency. There is a 4-digit PIN in the DLR radios, and newer DTR radios, that makes privacy very easy to set up and maintain.
As far as I am aware, no scanner can monitor DLR/DTR signals. Though they technically aren’t encrypted, cracking a DLR/DTR conversation would require cracking Motorola’s firmware, and the chances of this happening in your geographical proximity seem vanishingly small.
I will write more below on comparing the range of these to GMRS radios, but in a nutshell, it compares well, despite the fact that the 900MHz band restrictions allow Motorola only 1W of power output with these radios.
There are three current lines of Motorola DLR/DTR radios:
- The Motorola DLR1020 and DLR1060 radios. These have no screen; the 1020 has two “channels” (configurations) while the 1060 supports 6. They are small and compact and great pocketable “just work” radios.
- The Motorola DTR600 and DTR700 radios. These are larger, with a larger antenna (that should theoretically provide greater range) and have a small color screen. They support more channels and more features (eg, short messages, etc).
- The Motorola Curve (aka DLR110). Compared to the DLR1060, it adds limited WiFi capabilities that are primarily useful in certain business environments. See this thread for more. These features are unlikely to be useful in the environments we’re talking about here.
These radios are fairly expensive new, but DLRs can be readily found at around $60 on eBay. (DTRs for about $250) They are quite rugged. Be aware when purchasing that some radios sold on eBay may not include a correct battery and charger. (Not necessarily a problem; Motorola batteries are easy to find online, and as with any used battery, the life of a used one may not be great.) For more advanced configuration, the Motorola CPS cable works with both radios (plugs into the charging cradle) and is used with the programming software to configure them in more detail.
The older Motorola DTR650, DTR550, and older radios are compatible with the newer DLR and DTR series, if you program the newer ones carefully. The older ones don’t support PINs and have a less friendly way of providing privacy, but they do work also. However, for most, I think the newer ones will be friendlier; but if you find a deal on the older ones, hey, why not?
This thread on the MyGMRS forums has tons of useful information on the DLR/DTR radios. Check it out for a lot more detail.
One interesting feature of these radios is that they are aware if there are conflicting users on the channel, and even if anybody is hearing your transmission. If your transmission is not being heard by at least one radio, you will get an audible (and visual, on the DTR) indication that your transmission failed.
One thing that pleasantly surprised me is just how tiny the Motorola DLR is. The whole thing with antenna is like a small candy bar, and thinner. My phone is slightly taller, much wider, and only a little thinner than the Motorola DLR. Seriously, it’s more pocketable than most smartphones. The DTR is of a size more commonly associated with radios, though still on the smaller side. Some of the most low-power FRS radios might get down to that size, but to get equivolent range, you need a 5W GMRS unit, which will be much bulkier.
Being targeted at business users, the DLR/DTR don’t include NOAA weather radio or GPS.
Power
These radios tend to be powered by:
- NiMH rechargable battery packs
- AA/AAA batteries
- Lithium Ion batteries
Most of the cheap FRS/GMRS radios have a NiMH rechargable battery pack and a terrible charge controller that will tend to overcharge, and thus prematurely destroy, the NiMH packs. This has long ago happened in my GMRS radios, and now I use Eneloop NiMH AAs in them (charged separately by a proper charger).
The BTech, Garmin, and Motorola DLR/DTR radios all use Li-Ion batteries. These have the advantage of being more efficient batteries, though you can’t necessarily just swap in AAs in a pinch. Pay attention to your charging options; if you are backpacking, for instance, you may want something that can charge from solar-powered USB or battery banks. The Motorola DLR/DTR radios need to sit in a charging cradle, but the cradle is powered by a Micro USB cable. The BTech GMRS-PRO is charged via USB-C. I don’t know about the Garmin Rino or others.
Garmin offers an optional AA battery pack for the Rino. BTech doesn’t (yet) for the GMRS-PRO, but they do for some other models, and have stated accessories for the GMRS-PRO are coming. I don’t have information about the T800. This is not an option for the DLR/DTR.
Meshtastic
I’ll briefly mention Meshtastic. It uses a low-power LoRa system. It can’t handle voice transmissions; only data. On its own, it can transmit and receive automatic GPS updates from other Meshtastic devices, which you can view on its small screen. It forms a mesh, so each node can relay messages for others. It is also the only unit in this roundup that uses true encryption, and its battery lasts about a week – more than the “a solid day” you can expect out of the best of the others here.
When paired with a cell phone, Meshtastic can also send and receive short text messages.
Meshtastic uses much less power than even the cheapest of the FRS radios discussed here. It can still achieve respectable range because it uses LoRa, which can trade bandwidth for power or range. It can take it a second or two to transmit a 50-character text message. Still, the GMRS or Motorola radios discussed here will have more than double the point-to-point range of a Meshtastic device. And, if you intend to take advantage of the text messaging features, keep in mind that you must now take two electronic devices with you and maintain a charge for them both.
Privacy
The privacy picture on these is interesting.
Cell phone privacy
Cell phones are difficult for individuals to eavesdrop, but a sophisticated adversary probably could: or an unsophisticated adversary with any manner of malware. Privacy on modern smartphones is a huge area of trouble, and it is safe to say that data brokers and many apps probably know at least your location and contact list, if not also the content of your messages. Though end-to-end encrypted apps such as Signal can certainly help. See Tools for Communicating Offline and in Difficult Circumstances for more details.
GMRS privacy
GMRS radios are unencrypted and public. Anyone in range with another GMRS radio, or a scanner, can listen to your conversations – even if you have a privacy code set. The privacy code does not actually protect your privacy; rather, it keeps your radio from playing conversations from others using the same channel, for your convenience.
However, note the “in range” limitation. An eavesdropper would generally need to be within a few miles of you.
Motorola DLR/DTR privacy
As touched on above, while these also aren’t encrypted, as far as I am aware, no tools exist to eavesdrop on DLR/DTR conversations. Change the PIN away from the default 0000, ideally to something that doesn’t end in 0 (to pick a different hopset) and you have pretty decent privacy right there.
“Decent” doesn’t mean perfect; it is certainly possible that sophisticated adversaries or state agencies could decode DLR/DTR traffic, since it is unencrypted. As a practical matter, though, the lack of consumer equipment that can decode this makes it be, as I say, “pretty decent”.
Meshtastic
Meshtastic uses strong AES encryption. But as messaging features require a paired phone, the privacy implications of a phone also apply here.
Range
I tested my best 5W GMRS radios, as well as a Motorola DTR600 talking to a DLR1060. (I also tried two DLR1060s talking to each other; there was no change in rnage.) I took a radio with me in the car, and had another sitting on my table indoors. Those of you familiar with radios will probably recognize that being in a car and being indoors both attenuate (reduce the strength of) the signal significantly. I drove around in a part of Kansas with gentle rolling hills.
Both the GMRS and the DLR/DTR had a range of about 2-3 miles. There were times when each was able to pull out a signal when the other was not. The DLR/DTR series was significantly better while the vehicle was in motion. In weaker signal conditions, the GMRS radios were susceptible to significant “picket fencing” (static caused by variation in the signal strength when passing things like trees), to the point of being inaudible or losing the signal entirely. The DLR/DTR remained perfectly clear there. I was able to find some spots where, while parked, the GMRS radios had a weak but audible signal but the DLR/DTR had none. However, in all those cases, the distance to GMRS dropping out as well was small. Basically, no radios penetrate the ground, and the valleys were a problem for them all.
Differences may play out in other ways in other environments as well: for instance, dense urban environments, heavy woods, indoor buildings, etc.
GMRS radios can be used with repeaters, or have a rooftop antenna mounted on a car, both of which could significantly extend range – and both of which are rare.
The DLR/DTR series are said to be exceptionally good at indoor environments; Motorola rates them for penetrating 20 floors, for instance. Reports on MyGMRS forums state that they are able to cover an entire cruise ship, while the metal and concrete in them poses a big problem for GMRS radios. Different outdoor landscapes may favor one or the other also.
Some of the cheapest FRS radios max out at about 0.5W or even less. This is probably only a little better than yelling distance in many cases. A lot of manufacturers obscure transmit power and use outlandish claims of range instead; don’t believe those. Find the power output. A 2W FRS transmitter will be more credible range-wise, and the 5W GMRS transmitter as I tested better yet. Note that even GMRS radios are restricted to 0.5W on channels 8-14.
The Motorola DLR/DTR radio gets about the same range with 1W as a GMRS radio does with 5W. The lower power output allows the DLR to be much smaller and lighter than a 5W GMRS radio for similar performance.
Overall conclusions
Of course, what you use may depend on your needs. I’d generally say:
- For basic use, the high quality, good range, reasonable used price, and very small size of the Motorola DLR would make it a good all-arounder. Give one to each person (or kid) for use at the mall or amusement park, take them with you to concerts and festivals, etc.
- Between vehicles, the Motorola DLR/DTR have a clear range advantage over the GMRS radios for vehicles in motion, though the GPS features of the more advanced GMRS radios may be more useful here.
- For wilderness hiking and the like, GMRS radios that have GPS, maps, and NOAA weather radio reception may prove compelling and worth the extra bulk. More flexible power options may also be useful.
- Low-end FRS radios can be found very cheap; around $20-$30 new for the lowest end, though their low power output and questionable charging circuits may limit their utility where it really counts.
- If you just can’t move away from cell phones, try the Zoleo app, which can provide some radio-like features.
- A satellite communicator is still good backup safety gear for the wilderness.
Postscript: A final plug for amateur radio
My 10-year-old Kenwood TH-D71A already had features none of these others have. For instance, its support for APRS and ability to act as a digipeater for APRS means that TH-D71As can form an automatic mesh between them, each one repeating new GPS positions or text messages to the others. Traditional APRS doesn’t perform well in weak signal situations; however, more modern digital systems like D-Star and DMR also support APRS over more modern codecs and provide all sorts of other advantages as well (though not FHSS).
My conclusions above assume a person is not going to go the amateur radio route for whatever reason. If you can get those in your group to get their license – the technician is all you need – a whole world of excellent options opens to you.
Appendix: The Trisquare eXRS
Prior to 2012, a small company named Trisquare made a FHSS radio they called the eXRS that operated on the 900MHz band like Motorola’s DLR/DTR does. Trisquare aimed at consumers and their radios were cheaper than the Motorola DLR/DTR. However, that is where the similarities end.
Trisquare had an analog voice transmission, even though it used FHSS. Also, there is a problem that can arise with FHSS systems: synchronization. The receiver must hop frequencies in exactly the same order at exactly the same time as the sender. Motorola has clearly done a lot of engineering around this, and I have never encountered a synchronization problem in my DLR/DTR testing, not even once. eXRS, on the other hand, had frequent synchronization problems, which manifested themselves in weak signal conditions and sometimes with doubling. When it would happen, everyone would have to be quiet for a minute or two to give all the radios a chance to timeout and reset to the start of the hop sequence. In addition, the eXRS hardware wasn’t great, and was susceptible to hardware failure.
There are some that still view eXRS as a legendary device and hoard them. You can still find them used on eBay. When eXRS came out in 2007, it was indeed nice technology for the day, ahead of its time in some ways. I used and loved the eXRS radios back then; powerful GMRS wasn’t all that common. But compared to today’s technology, eXRS has inferior range to both GMRS and Motorola DLR/DTR (from my recollection, about a third to half of what I get with today’s GMRS and DLR/DTR), is prone to finicky synchronization issues when signals are weak, and isn’t made very robustly. I therefore don’t recommend the eBay eXRS units.
Don’t assume that the eXRS weaknesses extend to Motorola DLR/DTR. The DLR/DTR radios are done well and don’t suffer from the same problems.
Note: This article has a long-term home on my website, where it may be updated from time to time.
I Finally Found a Solid Debian Tablet: The Surface Go 2 22 Jun 2022 3:46 PM (3 years ago)
I have been looking for a good tablet for Debian for… well, years. I want thin, light, portable, excellent battery life, and a servicable keyboard.
For a while, I tried a Lenovo Chromebook Duet. It meets the hardware requirements, well sort of. The problem is with performance and the OS. I can run Debian inside the ChromeOS Linux environment. That works, actually pretty well. But it is slow. Terribly, terribly, terribly slow. Emacs takes minutes to launch. apt-gets also do. It has barely enough RAM to keep its Chrome foundation happy, let alone a Linux environment also. But basically it is too slow to be servicable. Not just that, but I ran into assorted issues with having it tied to a Google account – particularly being unable to login unless I had Internet access after an update. That and my growing concern over Google’s privacy practices led me sort of write it off.
I have a wonderful System76 Lemur Pro that I’m very happy with. Plenty of RAM, a good compromise size between portability and screen size at 14.1″, and so forth. But a 10″ goes-anywhere it’s not.
I spent quite a lot of time looking at thin-and-light convertible laptops of various configurations. Many of them were quite expensive, not as small as I wanted, or had dubious Linux support. To my surprise, I wound up buying a Surface Go 2 from the Microsoft store, along with the Type Cover. They had a pretty good deal on it since the Surface Go 3 is out; the highest-processor model of the Go 2 is roughly similar to the Go 3 in terms of performance.
There is an excellent linux-surface project out there that provides very good support for most Surface devices, including the Go 2 and 3.
I put Debian on it. I had a fair bit of hassle with EFI, and wound up putting rEFInd on it, which mostly solved those problems. (I did keep a Windows partition, and if it comes up for some reason, the easiest way to get it back to Debian is to use the Windows settings tool to reboot into advanced mode, and then select the appropriate EFI entry to boot from there.)
Researching on-screen keyboards, it seemed like Gnome had the most mature. So I wound up with Gnome (my other systems are using KDE with tiling, but I figured I’d try Gnome on it.) Almost everything worked without additional tweaking, the one exception being the cameras. The cameras on the Surfaces are a known point of trouble and I didn’t bother to go to all the effort to get them working.
With 8GB of RAM, I didn’t put ZFS on it like I do on other systems. Performance is quite satisfactory, including for Rust development. Battery life runs about 10 hours with light use; less when running a lot of cargo builds, of course.
The 1920×1280 screen is nice at 10.5″. Gnome with Wayland does a decent job of adjusting to this hi-res configuration.
I took this as my only computer for a trip from the USA to Germany. It was a little small at times; though that was to be expected. It let me take a nicely small bag as a carryon, and being light, it was pleasant to carry around in airports. It served its purpose quite well.
One downside is that it can’t be powered by a phone charger like my Chromebook Duet can. However, I found a nice slim 65W Anker charger that could charge it and phones simultaneously that did the job well enough (I left the Microsoft charger with the proprietary connector at home).
The Surface Go 2 maxes out at a 128GB SSD. That feels a bit constraining, especially since I kept Windows around. However, it also has a micro SD slot, so you can put LUKS and ext4 on that and use it as another filesystem. I popped a micro SD I had lying around into there and that felt a lot better storage-wise. I could also completely zap Windows, but that would leave no way to get firmware updates and I didn’t really want to do that. Still, I don’t use Windows and that could be an option also.
All in all, I’m pretty pleased with it. Around $600 for a fully-functional Debian tablet, with a keyboard is pretty nice.
I had been hoping for months that the Pinetab would come back into stock, because I’d much rather support a Linux hardware vendor, but for now I think the Surface Go series is the most solid option for a Linux tablet.
Lessons of Social Media from BBSs 20 Jun 2022 5:52 PM (3 years ago)
In the recent article The Internet Origin Story You Know Is Wrong, I was somewhat surprised to see the argument that BBSs are a part of the Internet origin story that is often omitted. Surprised because I was there for BBSs, and even ran one, and didn’t really consider them part of the Internet story myself. I even recently enjoyed a great BBS documentary and still didn’t think of the connection on this way.
But I think the argument is a compelling one.
In truth, the histories of Arpanet and BBS networks were interwoven—socially and materially—as ideas, technologies, and people flowed between them. The history of the internet could be a thrilling tale inclusive of many thousands of networks, big and small, urban and rural, commercial and voluntary. Instead, it is repeatedly reduced to the story of the singular Arpanet.
Kevin Driscoll goes on to highlight the social aspects of the “modem world”, how BBSs and online services like AOL and CompuServe were ways for people to connect. And yet, AOL members couldn’t easily converse with CompuServe members, and vice-versa. Sound familiar?
Today’s social media ecosystem functions more like the modem world of the late 1980s and early 1990s than like the open social web of the early 21st century. It is an archipelago of proprietary platforms, imperfectly connected at their borders. Any gateways that do exist are subject to change at a moment’s notice. Worse, users have little recourse, the platforms shirk accountability, and states are hesitant to intervene.
Yes, it does. As he adds, “People aren’t the problem. The problem is the platforms.”
A thought-provoking article, and I think I’ll need to buy the book it’s excerpted from!
Pipe Issue Likely a Kernel Bug 20 Jun 2022 8:31 AM (3 years ago)
Saturday, I wrote in Pipes, deadlocks, and strace annoyingly fixing them about an issue where a certain pipeline seems to have a deadlock. I described tracing it into kernel code. Indeed, it appears to be kernel bug 212295, which has had a patch for over a year that has never been merged.
After continuing to dig into the issue, I eventually reported it as a bug in ZFS. One of the ZFS people connected this to an older issue my searching hadn’t uncovered.
rincebrain summarized:
I believe, if I understand the bug correctly, it only triggers if you F_SETPIPE_SZ when the writer has put nonzero but not a full unit’s worth in yet, which is why the world isn’t on fire screaming about this – you need to either have a very slow but nonzero or otherwise very strange write pattern to hit it, which is why it doesn’t come up in, say, the CI or most of my testbeds, but my poor little SPARC (440 MHz, 1c1t) and Raspberry Pis were not so fortunate.
You might recall in Saturday’s post that I explained that Filespooler reads a few bytes from the gpg/zstdcat pipeline before spawning and connecting it to zfs receive. I think this is the critical piece of the puzzle; it makes it much more likely to encounter the kernel bug. zfs receive is calls F_SETPIPE_SZ when it starts. Let’s look at how this could be triggered:
In the pre-Filespooler days, the gpg|zstdcat|zfs pipeline was all being set up at once. There would be no data sent to zfs receive until gpg had initialized and begun to decrypt the data, and then zstdcat had begun to decompress it. Those things almost certainly took longer than zfs receive’s initialization, meaning that usually F_SETPIPE_SZ would have been invoked before any data entered the pipe.
After switching to Filespooler, the particular situation here has Filespooler reading somewhere around 100 bytes from the gpg|zstdcat part of the pipeline before ever invoking zfs receive. zstdcat generally emits more than 100 bytes at a time. Therefore, when Filespooler invokes zfs receive and hooks the pipeline up to it, it has a very high chance of there already being data in the pipeline when zfs receive uses F_SETPIPE_SZ. This means that the chances of encountering the conditions that trigger the particular kernel bug are also elevated.
ZFS is integrating a patch to no longer use F_SETPIPE_SZ in zfs receive. I have applied that on my local end to see what happens, and hopefully in a day or two will know for sure if it resolves things.
In the meantime, I hope you enjoyed this little exploration. It resulted in a new bug report to Rust as well as digging up an existing kernel bug. And, interestingly, no bugs in filespooler. Sometimes the thing that changed isn’t the source of the bug!
Pipes, deadlocks, and strace annoyingly fixing them 18 Jun 2022 7:46 PM (3 years ago)
This is a complex tale I will attempt to make simple(ish). I’ve (re)learned more than I cared to about the details of pipes, signals, and certain system calls – and the solution is still elusive.
For some time now, I have been using NNCP to back up my files. These backups are sent to my backup system, which effectively does this to process them (each ZFS send is piped to a shell script that winds up running this):
gpg -q -d | zstdcat -T0 | zfs receive -u -o readonly=on "$STORE/$DEST"
This processes tens of thousands of zfs sends per week. Recently, having written Filespooler, I switched to sending the backups using Filespooler over NNCP. Now fspl (the Filespooler executable) opens the file for each stream and then connects it to what amounts to this pipeline:
bash -c 'gpg -q -d 2>/dev/null | zstdcat -T0' | zfs receive -u -o readonly=on "$STORE/$DEST"
Actually, to be more precise, it spins up the bash part of it, reads a few bytes from it, and then connects it to the zfs receive.
And this works well — almost always. In something like 1/1000 of the cases, it deadlocks, and I still don’t know why. But I can talk about the journey of trying to figure it out (and maybe some of you will have some ideas).
Filespooler is written in Rust, and uses Rust’s Command system. Effectively what happens is this:
- The fspl process has a File handle, which after forking but before invoking bash, it dup2’s to stdin.
- The connection between bash and zfs receive is a standard Unix pipe.
I cannot get the problem to duplicate when I run the entire thing under strace -f. So I am left trying to peek at it from the outside. What happens if I try to attach to each component with strace -p?
- bash is blocking in wait4(), which is expected.
- gpg is blocking in write().
- If I attach to zstdcat with strace -p, then all of a sudden the deadlock is cleared and everything resumes and completes normally.
- Attaching to zfs receive with strace -p causes no output at all from strace for a few seconds, then zfs just writes “cannot receive incremental stream: incomplete stream” and exits with error code 1.
So the plot thickens! Why would connecting to zstdcat and zfs receive cause them to actually change behavior? strace works by using the ptrace system call, and ptrace in a number of cases requires sending SIGSTOP to a process. In a complicated set of circumstances, a system call may return EINTR when a SIGSTOP is received, with the idea that the system call should be retried. I can’t see, from either zstdcat or zfs, if this is happening, though.
So I thought, “how about having Filespooler manually copy data from bash to zfs receive in a read/write loop instead of having them connected directly via a pipe?” That is, there would be two pipes going there: one where Filespooler reads from the bash command, and one where it writes to zfs. If nothing else, I could instrument it with debugging.
And so I did, and I found that when it deadlocked, it was deadlocking on write — but with no discernible pattern as to where or when. So I went back to directly connected.
In analyzing straces, I found a Rust bug which I reported in which it is failing to close the read end of a pipe in the parent post-fork. However, having implemented a workaround for this, it doesn’t prevent the deadlock so this is orthogonal to the issue at hand.
Among the two strange things here are things returning to normal when I attach strace to zstdcat, and things crashing when I attach strace to zfs. I decided to investigate the latter.
It turns out that the ZFS code that is reading from stdin during zfs receive is in the kernel module, not userland. Here is the part that is triggering the “imcomplete stream” error:
                int err = zfs_file_read(fp, (char *)buf + done,
                    len - done, &resid);
                if (resid == len - done) {
                        /*
                         * Note: ECKSUM or ZFS_ERR_STREAM_TRUNCATED indicates
                         * that the receive was interrupted and can
                         * potentially be resumed.
                         */
                        err = SET_ERROR(ZFS_ERR_STREAM_TRUNCATED);
                }
resid is an output parameter with the number of bytes remaining from a short read, so in this case, if the read produced zero bytes, then it sets that error. What’s zfs_file_read then?
It boils down to a thin wrapper around kernel_read(). This winds up calling __kernel_read(), which calls read_iter on the pipe, which is pipe_read(). That’s where I don’t have the knowledge to get into the weeds right now.
So it seems likely to me that the problem has something to do with zfs receive. But, what, and why does it only not work in this one very specific situation, and only so rarely? And why does attaching strace to zstdcat make it all work again? I’m indeed puzzled!
Update 2022-06-20: See the followup post which identifies this as likely a kernel bug and explains why this particular use of Filespooler made it easier to trigger.
Really Enjoyed Jason Scott’s BBS Documentary 13 Jun 2022 4:13 PM (3 years ago)
Like many young programmers of my age, before I could use the Internet, there were BBSs. I eventually ran one, though in my small town there were few callers.
Some time back, I downloaded a copy of Jason Scott’s BBS Documentary. You might know Jason Scott from textfiles.com and his work at the Internet Archive.
The documentary was released in 2005 and spans 8 episodes on 3 DVDs. I’d watched parts of it before, but recently watched the whole series.
It’s really well done, and it’s not just about the technology. Yes, that figures in, but it’s about the people. At times, it was nostalgic to see people talking about things I clearly remembered. Often, I saw long-forgotten pioneers interviewed. And sometimes, such as with the ANSI art scene, I learned a lot about something I was aware of but never really got into back then.
BBSs and the ARPANet (predecessor to the Internet) grew up alongside each other. One was funded by governments and universities; the other, by hobbyists working with inexpensive equipment, sometimes of their own design.
You can download the DVD images (with tons of extras) or watch just the episodes on Youtube following the links on the author’s website.
The thing about BBSs is that they never actually died. Now I’m looking forward to watching the Back to the BBS documentary series about modern BBSs as well.
Visiting Germany: Reflections on Schloss Charlottenburg 4 Jun 2022 5:47 PM (3 years ago)
200 years ago, my ancestors migrated from Prussia to Ukraine. They left for many reasons, many of which boiled down to their strong pacifism in the midst of a highly militarized country.
Last week, my wife, the boys, and I walked through the favorite palace of Friedrich Wilhelm III, the king of Prussia who was responsible for forcing my ancestors out – Charlottenburg Palace in Berlin.
Photos can’t possibly convey the enormity and the riches of this place, even after being attacked during multiple wars (and used by Napoleon for a time).
My ancestors would never have been able to get into to this place. We, on the other hand, walked right through the king’s bedroom, audience room, and chapel. The chapel, incidentally, mixing church and state; a fine pipe organ along with a statue of an eagle holding the Prussian crown.
I could pause and enjoy the beauty of the place; the oval rooms overlooking the acres of sculpted gardens outside and carefully tree-lined streets leading to the palace, the artwork no doubt worth many millions, the gold and silver place settings, the rare tapestries. And I could also reflect on the problems with such great wealth and power, and the many lives lost and refugees created by the wars the Prussian kings started.
(First of several reflections on our wonderful recent trip to Germany with the boys)


Fast, Ordered Unixy Queues over NNCP and Syncthing with Filespooler 29 May 2022 2:39 PM (3 years ago)
It seems that lately I’ve written several shell implementations of a simple queue that enforces ordered execution of jobs that may arrive out of order. After writing this for the nth time in bash, I decided it was time to do it properly. But first, a word on the why of it all.
Why did I bother?
My needs arose primarily from handling Backups over Asynchronous Communication methods – in this case, NNCP. When backups contain incrementals that are unpacked on the destination, they must be applied in the correct order.
In some cases, like ZFS, the receiving side will detect an out-of-order backup file and exit with an error. In those cases, processing in random order is acceptable but can be slow if, say, hundreds or thousands of hourly backups have stacked up over a period of time. The same goes for using gitsync-nncp to synchronize git repositories. In both cases, a best effort based on creation date is sufficient to produce a significant performance improvement.
With other cases, such as tar or dar backups, the receiving cannot detect out of order incrementals. In those situations, the incrementals absolutely must be applied with strict ordering. There are many other situations that arise with these needs also. Filespooler is the answer to these.
Existing Work
Before writing my own program, I of course looked at what was out there already. I looked at celeary, gearman, nq, rq, cctools work queue, ts/tsp (task spooler), filequeue, dramatiq, GNU parallel, and so forth.
Unfortunately, none of these met my needs at all. They all tended to have properties like:
- An extremely complicated client/server system that was incompatible with piping data over existing asynchronous tools
- A large bias to processing of small web requests, resulting in terrible inefficiency or outright incompatibility with jobs in the TB range
- An inability to enforce strict ordering of jobs, especially if they arrive in a different order from how they were queued
Many also lacked some nice-to-haves that I implemented for Filespooler:
- Support for the encryption and cryptographic authentication of jobs, including metadata
- First-class support for arbitrary compressors
- Ability to use both stream transports (pipes) and filesystem-like transports (eg, rclone mount, S3, Syncthing, or Dropbox)
Introducing Filespooler
Filespooler is a tool in the Unix tradition: that is, do one thing well, and integrate nicely with other tools using the fundamental Unix building blocks of files and pipes. Filespooler itself doesn’t provide transport for jobs, but instead is designed to cooperate extremely easily with transports that can be written to as a filesystem or piped to – which is to say, almost anything of interest.
Filespooler is written in Rust and has an extensive Filespooler Reference as well as many tutorials on its homepage. To give you a few examples, here are some links:
- Using Filespooler over Syncthing (and the most comprehensive tutorial)
- Using Filespooler over NNCP
- Compressing Filespooler Jobs
- Encrypting Filespooler Jobs with GPG or Age
- Guidelines for Writing To Filespooler Queues Without Using Filespooler
Basics of How it Works
Filespooler is intentionally simple:
- The sender maintains a sequence file that includes a number for the next job packet to be created.
- The receiver also maintains a sequence file that includes a number for the next job to be processed.
fspl preparecreates a Filespooler job packet and emits it to stdout. It includes a small header (<100 bytes in most cases) that includes the sequence number, creation timestamp, and some other useful metadata.- You get to transport this job packet to the receiver in any of many simple ways, which may or may not involve Filespooler’s assistance.
- On the receiver, Filespooler (when running in the default strict ordering mode) will simply look at the sequence file and process jobs in incremental order until it runs out of jobs to process.
The name of job files on-disk matches a pattern for identification, but the content of them is not significant; only the header matters.
You can send job data in three ways:
- By piping it to
fspl prepare - By setting certain environment variables when calling
fspl prepare - By passing additional command-line arguments to
fspl prepare, which can optionally be passed to the processing command at the receiver.
Data piped in is added to the job “payload”, while environment variables and command-line parameters are encoded in the header.
Basic usage
Here I will excerpt part of the Using Filespooler over Syncthing tutorial; consult it for further detail. As a bit of background, Syncthing is a FLOSS decentralized directory synchronization tool akin to Dropbox (but with a much richer feature set in many ways).
Preparation
First, on the receiver, you create the queue (passing the directory name to -q):
sender$ fspl queue-init -q ~/sync/b64queue
Now, we can send a job like this:
sender$ echo Hi | fspl prepare -s ~/b64seq -i - | fspl queue-write -q ~/sync/b64queue
Let’s break that down:
- First, we pipe “Hi” to
fspl prepare. fspl preparetakes two parameters:-s seqfilegives the path to a sequence file used on the sender side. This file has a simple number in it that increments a unique counter for every generated job file. It is matched with thenextseqfile within the queue to make sure that the receiver processes jobs in the correct order. It MUST be separate from the file that is in the queue and should NOT be placed within the queue. There is no need to sync this file, and it would be ideal to not sync it.- The
-ioption tellsfspl prepareto read a file for the packet payload.-i -tells it to read stdin for this purpose. So, the payload will consist of three bytes: “Hi\n” (that is, including the terminating newline thatechowrote)
- Now,
fspl preparewrites the packet to its stdout. We pipe that intofspl queue-write:fspl queue-writereads stdin and writes it to a file in the queue directory in a safe manner. The file will ultimately match thefspl-*.fsplpattern and have a random string in the middle.
At this point, wait a few seconds (or however long it takes) for the queue files to be synced over to the recipient.
On the receiver, we can see if any jobs have arrived yet:
receiver$ fspl queue-ls -q ~/sync/b64queue
ID                   creation timestamp          filename
1                    2022-05-16T20:29:32-05:00   fspl-7b85df4e-4df9-448d-9437-5a24b92904a4.fspl
Let’s say we’d like some information about the job. Try this:
receiver$ $ fspl queue-info -q ~/sync/b64queue -j 1
FSPL_SEQ=1
FSPL_CTIME_SECS=1652940172
FSPL_CTIME_NANOS=94106744
FSPL_CTIME_RFC3339_UTC=2022-05-17T01:29:32Z
FSPL_CTIME_RFC3339_LOCAL=2022-05-16T20:29:32-05:00
FSPL_JOB_FILENAME=fspl-7b85df4e-4df9-448d-9437-5a24b92904a4.fspl
FSPL_JOB_QUEUEDIR=/home/jgoerzen/sync/b64queue
FSPL_JOB_FULLPATH=/home/jgoerzen/sync/b64queue/jobs/fspl-7b85df4e-4df9-448d-9437-5a24b92904a4.fspl
This information is intentionally emitted in a format convenient for parsing.
Now let’s run the job!
receiver$ fspl queue-process -q ~/sync/b64queue --allow-job-params base64
SGkK
There are two new parameters here:
--allow-job-paramssays that the sender is trusted to supply additional parameters for the command we will be running.base64is the name of the command that we will run for every job. It will:- Have environment variables set as we just saw in
queue-info - Have the text we previously prepared – “Hi\n” – piped to it
- Have environment variables set as we just saw in
By default, fspl queue-process doesn’t do anything special with the output; see Handling Filespooler Command Output for details on other options. So, the base64-encoded version of our string is “SGkK”. We successfully sent a packet using Syncthing as a transport mechanism!
At this point, if you do a fspl queue-ls again, you’ll see the queue is empty. By default, fspl queue-process deletes jobs that have been successfully processed.
For more
See the Filespooler homepage.
This blog post is also available as a permanent, periodically-updated page.
Tools for Communicating Offline and in Difficult Circumstances 2 Mar 2022 5:49 PM (3 years ago)
Note: this post is also available on my website, where it will be updated periodically.
When things are difficult – maybe there’s been a disaster, or an invasion (this page is being written in 2022 just after Russia invaded Ukraine), or maybe you’re just backpacking off the grid – there are tools that can help you keep in touch, or move your data around. This page aims to survey some of them, roughly in order from easiest to more complex.
Simple radios
Handheld radios shouldn’t be forgotten. They are cheap, small, and easy to operate. Their range isn’t huge – maybe a couple of miles in rural areas, much less in cities – but they can be a useful place to start. They tend to have no actual encryption features (the “privacy” features really aren’t.) In the USA, options are FRS/GMRS and CB.
Syncthing
With Syncthing, you can share files among your devices or with your friends. Syncthing essentially builds a private mesh for file sharing. Devices will auto-discover each other when on the same LAN or Wifi network, and opportunistically sync.
I wrote more about offline uses of Syncthing, and its use with NNCP, in my blog post A simple, delay-tolerant, offline-capable mesh network with Syncthing (+ optional NNCP). Yes, it is a form of a Mesh Network!
Homepage: https://syncthing.net/
Briar
Briar is an instant messaging service based around Android. It’s IM with a twist: it can use a mesh of Bluetooh devices. Or, if Internet is available, Tor. It has even been extended to support the use of SD cards and USB sticks to carry your messages.
Like some others here, it can relay messages for third parties as well.
Homepage: https://briarproject.org/
Manyverse and Scuttlebutt
Manyverse is a client for Scuttlebutt, which is a sort of asynchronous, offline-friendly social network. You can use it to keep in touch with your family and friends, and it supports syncing over Bluetooth and Wifi even in the absence of Internet.
Homepages: https://www.manyver.se/ and https://scuttlebutt.nz/
Yggdrasil
Yggdrasil is a self-healing, fully end-to-end Encrypted Mesh Network. It can work among local devices or on the global Internet. It has network services that can egress onto things like Tor, I2P, and the public Internet. Yggdrasil makes a perfect companion to ad-hoc wifi as it has auto peer discovery on the local network.
I talked about it in more detail in my blog post Make the Internet Yours Again With an Instant Mesh Network.
Homepage: https://yggdrasil-network.github.io/
Ad-Hoc Wifi
Few people know about the ad-hoc wifi mode. Ad-hoc wifi lets devices in range talk to each other without an access point. You just all set your devices to the same network name and password and there you go. However, there often isn’t DHCP, so IP configuration can be a bit of a challenge. Yggdrasil helps here.
NNCP
Moving now to more advanced tools, NNCP lets you assemble a network of peers that can use Asynchronous Communication over sneakernet, USB drives, radios, CD-Rs, Internet, tor, NNCP over Yggdrasil, Syncthing, Dropbox, S3, you name it . NNCP supports multi-hop file transfer and remote execution. It is fully end-to-end encrypted. Think of it as the offline version of ssh.
Homepage: https://nncp.mirrors.quux.org/
Meshtastic
Meshtastic uses long-range, low-power LoRa radios to build a long-distance, encrypted, instant messaging system that is a Mesh Network. It requires specialized hardware, about $30, but will tend to get much better range than simple radios, and with very little power.
Homepages: https://meshtastic.org/ and https://meshtastic.letstalkthis.com/
Portable Satellite Communicators
You can get portable satellite communicators that can send SMS from anywhere on earth with a clear view of the sky. The Garmin InReach mini and Zoleo are two credible options. Subscriptions range from about $10 to $40 per month depending on usage. They also have global SOS features.
Telephone Lines
If you have a phone line and a modem, UUCP can get through just about anything. It’s an older protocol that lacks modern security, but will deal with slow and noisy serial lines well. XBee SX radios also have a serial mode that can work well with UUCP.
Additional Suggestions
It is probably useful to have a Linux live USB stick with whatever software you want to use handy. Debian can be installed from the live environment, or you could use a security-focused distribution such as Tails or Qubes.
References
This page originated in my Mastodon thread and incorporates some suggestions I received there.
It also formed a post on my blog.