Quick Fix Kunai 3 Gamepad Right Controller Problems 27 Jul 1:35 AM (2 months ago)
I know it’s pretty annoying when the Kunai 3 Gamepad right controller stops working. Lots of people run into this same issue, so you’re not alone here. Usually, it’s just a simple connection glitch or outdated firmware. The good news is, troubleshooting your gamepad isn’t hard at all.
I’ll walk you through a quick, easy fix for your Kunai 3 controller that works well on Android and Windows devices. If you want a complete guide for similar problems, check out this article on what to do when your controller is not working.
Why It’s Important to Fix Kunai 3 Gamepad Right Controller Problems
The Kunai 3 gamepad is made for comfort and accuracy. So, if the right controller is not working, your whole gaming session can get messed up. Here’s the thing—I’ve seen a lot of gamers face controller detection errors or connection issues that hurt their gaming performance.
- Controller Not Detected: Your device fails to recognize the controller.
- Unresponsive Inputs: Buttons or joystick not responding during gameplay.
- Weird Movements: Random movements or unexpected inputs on screen.
- Connection Drops: Battery or wireless connection cutting out suddenly.
Before assuming something is seriously broken, always check if there’s a firmware update available. Also, if you’re using third-party tools like Panda Gamepad Pro, be sure to address known Android 12 controller compatibility issues first — see this detailed Panda Gamepad Pro fix guide. It’s a good idea to check if your Kunai 3 is still under warranty, just in case the problem is a hardware fault.
Fixing these problems quickly means you get back to smooth, fun gaming sooner rather than later.
Common Reasons Your Kunai 3 Right Controller Might Stop Working
Figuring out why your controller stops working helps you pick the right fix quickly. Here are the main reasons your Kunai 3 gamepad might be giving you trouble:
- Firmware Update Failure – Sometimes an interrupted update or corrupted firmware causes the Kunai 3 Gamepad issue. Your controller can stop responding properly because of this.
- Hardware Defect – Physical damage from drops or bumps, or even manufacturing issues, can make your controller act strange or stop working completely.
- Software Conflict – Incompatible games, outdated drivers, or wrong OS settings can trigger a software conflict, causing connection problems or errors.
- Bluetooth Interference – Other devices using Bluetooth nearby might mess up your controller’s connection, leading to detection or input issues.
Usually, checking your device compatibility or updating software first is the quickest fix. Let’s dive into troubleshooting your controller next.
Check if Your Device Detects the Right Controller
First, check Kunai controller detection to quickly find what’s causing the issue. Here’s exactly how you can do that:
- Charge Controller Fully – Press the power button to see if the battery is charged. If it’s low, charge it with your Kunai charger.
- Power On & Pair Controller – Hold the pairing button to connect via Bluetooth pairing or Wi-Fi Direct connection.
- Check Settings – Go to your device Settings → Right Controller Version. If you see a version number, it’s detected properly.
- Turn Off Nearby Devices – Turn off other paired devices to avoid connection problems.
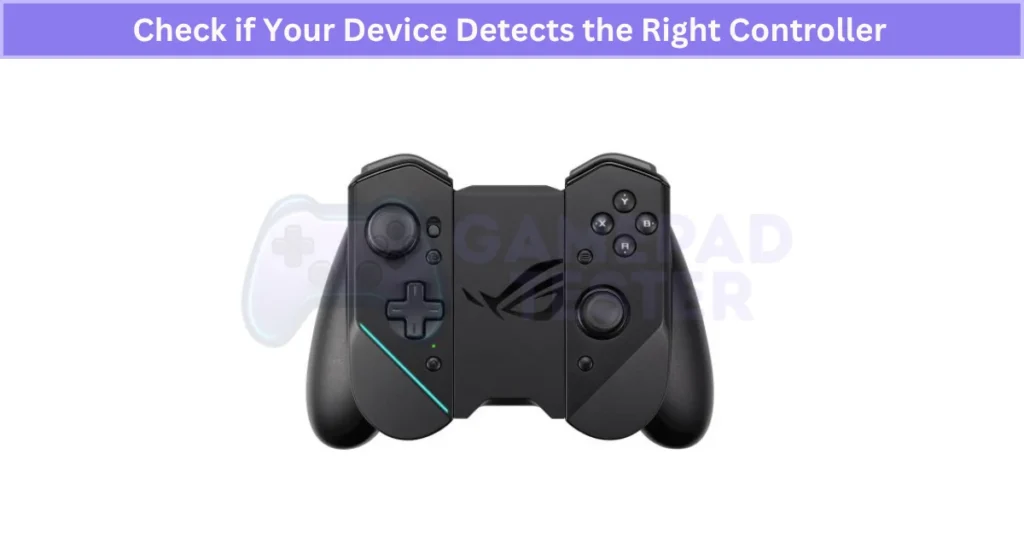
If the controller is still not detected, restart your device before moving to the next Kunai 3 troubleshooting step.
Update or Reinstall Firmware to Solve Right Controller Problems
Bugs in the firmware can mess things up. If you’re also noticing haptic feedback issues on other controllers, this vibration troubleshooting guide for DualShock 4 might offer extra insight. Here’s exactly how to do a Kunai 3 firmware update safely.
- Connect Your Controller – Pair your right controller using Bluetooth or Wi-Fi Direct first.
- Stable Power Connection – Attach your controller to the Kunai charger with a USB-C cable for steady power.
- Open Kunai 3 Gamepad App – Make sure your Kunai 3 Gamepad app is updated to the latest version before starting.
- Follow On-Screen Steps – Go through the app’s easy instructions to update or reinstall firmware. Important: Don’t unplug your controller during the update or you might brick it.
- Restart and Test – Once done, restart your device and test the right controller.
After you update Kunai firmware via USB-C correctly, your controller should work normally again.
Reset Your Right Controller Back to Factory Settings
If nothing else worked, a quick reset can help fix controller issues by clearing settings and fixing software glitches. Resetting your Kunai 3 controller is easy—just follow these steps:
- Turn Off Controller – Hold the power button for about 3 seconds until the controller shuts off.
- Find Reset Button – Look near the USB-C port for a small hole—that’s the reset button.
- Press and Hold – Use a paperclip or toothpick and press the reset button for 5 seconds.
- Turn Controller On – After resetting, press the power button again to turn your controller back on.
- Reconnect Controller – Use Bluetooth reconnect or Wi-Fi Direct to pair it again with your device.
- Test Controller – Check buttons and sticks to make sure everything’s working normally. If any buttons still feel unresponsive, even after a reset, it might help to look into common button issues in DualShock 4 controllers for comparison.
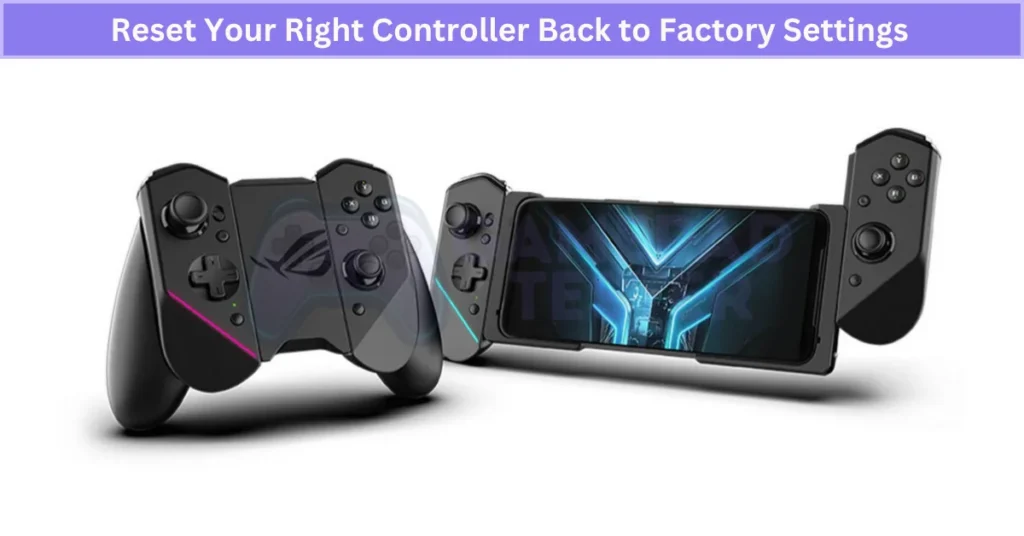
Remember, a factory reset is your last step to fix controller issues before considering repairs. If you have customized settings, I’d suggest backing them up in the Kunai app first. After resetting, your Kunai 3 should function like new again.
Contact ASUS Support or Find a Nearby Service Center
If none of these solutions fixed your Kunai 3 controller issue, it’s probably time to contact ASUS support or visit an ASUS service center. Here’s how you get quick Kunai 3 controller help:
- Check Warranty Status – Before anything else, confirm if your controller is still under warranty.
- ASUS Support – Visit the official ASUS website or use the Kunai 3 Gamepad app to get online help.
- Scan QR Code – Use the Kunai app to scan the QR code on your controller for fast support links.
- ASUS Repair Service – Find your nearest ASUS service center on their official site or through the app.
Make sure to have your purchase receipt or product serial number ready to speed things up. Even if quick fixes don’t work, ASUS support can still get your controller working again.
Things to Check Before Troubleshooting
Quick Kunai 3 Pre-Checks to Save Time
Doing a quick Kunai 3 pre-check saves you from extra troubleshooting steps later. Here’s what to check first:
- Controller Charging – Make sure your controller is fully charged.
- Bluetooth Connection Settings – Double-check your Bluetooth settings or wired connection.
- Inspect Connector Pins – Quickly inspect connector pins for any dirt or damage. If dirty, gently clean them with a microfiber cloth and isopropyl alcohol.
Use the original USB-C cable to keep your wired connection stable and reliable.
Make Sure Your Kunai 3 Controller Has Enough Charge
Your Kunai controller needs enough power to work well. A low charge can cause random disconnects or slow responses. Here’s how you check quickly:
- Charge using the Kunai charger or a good-quality USB-C cable (about 2 hours for a full charge).
- Check the LED battery status:
- Red: Low battery
- Blue: Currently charging
- Green: Fully charged
Don’t leave your controller charging overnight—this avoids battery wear. Also, check your charging cable regularly for damage.
Verify Bluetooth or Wired Settings Before Troubleshooting
Connection issues often come from incorrect settings. So here’s how you quickly verify Bluetooth or wired setups:
- Bluetooth: Turn on Bluetooth on your device, and make sure your Kunai appears under “paired devices” on Android.
- Wired (OTG mode): Use the original USB-C cable, and enable OTG wired mode on your device settings.
- Restart: If things aren’t connecting easily, restart your device. If that doesn’t help, you might be dealing with a broader pairing problem — like this DualShock 4 not connecting issue that many gamers face.
Sometimes just restarting fixes connection issues faster than detailed troubleshooting.
Clean Your Kunai 3 Connector Pins for Better Connectivity
Cleaning your Kunai 3 connector pins regularly helps maintain a stable connection and prevents pairing issues. Dust and dirt buildup on the pins can block signals or cause charging problems. Luckily, cleaning is easy if you’re careful. Here’s what you should know:
How Dust Affects Your Kunai 3 Connector Performance
Dust and dirt are common reasons for connection problems with your Kunai 3. Here’s why:
- Dust blocks electrical contact on the pins.
- It leads to weak signals or no connection at all— and sometimes, debris can even cause stick drift issues like those seen on DualShock 4.
- Dirty controller connectors may cause charging or syncing issues.
Also, if you live somewhere humid, dust buildup can cause corrosion, making connection issues worse over time.
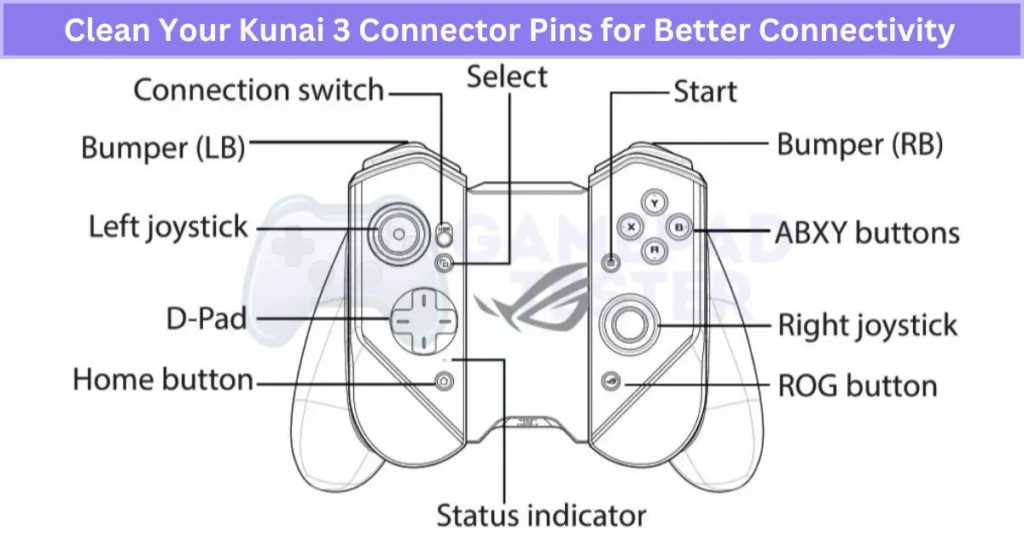
How to Clean Kunai 3 Pins Without Causing Damage
Cleaning your gaming controller safely is important—pins are delicate. Follow these steps carefully:
- Power off your controller completely before cleaning.
- Get a microfiber cloth and moisten it lightly with 90% isopropyl alcohol (never soak it).
- Gently wipe the pins. Avoid using sharp objects or metal tools—they can damage pins permanently.
- Let the pins dry completely (a few minutes is enough) before reconnecting or powering up again.
After cleaning, your Kunai 3 should connect easily again. And if you’re troubleshooting specific input failures, this guide on fixing PS4 controller touchpad issues may help pinpoint the problem further.
Real User Fixes & Community-Backed Solutions
I found a Reddit thread where an Asus ROG Phone 3 user shared several issues with their Kunai 3 controllers: the left controller’s RGB light wouldn’t turn on, the controllers wouldn’t connect via USB mode in the bumper case (only Bluetooth), and the controllers wouldn’t charge while in the bumper.
Community members suggested checking and cleaning the connectors, as corrosion could cause USB connectivity and charging problems. Some noted that the TwinView Dock 3 might lack battery pass-through, causing charging issues in bumper mode.
Others also reported odd behavior like loss of audio when using controllers on PC, showing how controller problems can extend beyond buttons. The general advice was to clean the contacts carefully and, if problems persist, consider an RMA or replacement since physical damage inside the Kunai is less likely without drops.
Final Verdict
If your Kunai 3 right controller isn’t working, don’t panic—most issues are easy to solve. Common causes include outdated firmware, low battery, or dirty connector pins. Start with the basics: fully charge the controller, check Bluetooth or wired settings, and clean the pins. If that doesn’t help, updating or reinstalling the firmware usually works.
A quick factory reset often resolves software glitches, but if none of these steps work, contact ASUS support for a professional solution. With these simple steps, you can fix Kunai 3 Gamepad right controller problems and get back to smooth, lag-free gaming without stress.
FAQ’s
How to connect kunai gamepad 3?
To connect your Kunai Gamepad 3, press and hold the Home button for 3 to 5 seconds. When the status indicator blinks blue, the controller enters pairing mode. Then, turn on Bluetooth on your ROG Phone and search for nearby devices. Select your gamepad to complete pairing.
How to update kunai gamepad 3?
To update your Kunai Gamepad 3, open the Kunai 3 Gamepad app on your device. Use the app to manage settings and start the firmware update or reinstallation process. Follow the on-screen instructions and wait for the update to finish before using your controller.


Finding the Best Gamepad for Xiaomi Device 27 Jul 1:21 AM (2 months ago)
I’ve noticed that playing games on a touchscreen can be pretty limiting. It’s hard to get good control, and your fingers block the screen sometimes. Using a gamepad for your Xiaomi phone makes gaming easier and more fun.
But here’s the thing: not all game controllers work well with Xiaomi phones. Some don’t connect easily via Bluetooth, others have short battery life, or don’t support Xiaomi’s MIUI features like Game Turbo mode. Picking the best gamepad for Xiaomi phone means finding one that fits these needs.
In this guide, I’ll share tips on what to look for in an Android game controller, how to set it up with your Xiaomi, and some top Bluetooth controllers for Xiaomi users. Whether you play PUBG, COD Mobile, or use emulators, having the right mobile gaming accessory makes a big difference.
Plus, I’ll point out controllers with official “Made for Android” certification to help you pick reliable gear. Before you buy, check out these gamepad controller tips to make the right choice.
Check Compatibility Before Buying a Gamepad for Xiaomi
Compatibility is key when picking a gamepad for your Xiaomi phone. If it doesn’t work well with your phone’s system, gaming will feel laggy or broken.
- Check Android Version: Make sure your Xiaomi phone runs Android 8.0 or higher. Many controllers need this to work.
- Verify Fit: Check if the controller fits your phone, especially if you use a case. Size matters for comfort.
- Choose Certified Controllers: Look for Razer Kishi for Xiaomi, Gamesir models, or Xiaomi Gamepad Elite Edition. These support MIUI’s Game Turbo feature for better gaming performance. For iPhone users looking for MFi-certified options, our Best iOS Gamepad Controller list can help too.
You can also check official compatibility charts or Xiaomi forums to see which controllers other users recommend.
Choose the Right Connection Type for Gaming Performance
How your gamepad connects to your Xiaomi device changes how well it plays. Here’s a quick look at the options:
Bluetooth
- Pros: Wireless and easy to set up.
- Cons: Can have delays, interference, and drains battery faster.
USB-C
- Pros: Lower delay and you can charge your phone while playing.
- Cons: Needs a cable and may not work with all devices.
Wi-Fi
- Pros: Best for cloud gaming with the lowest delay. Some advanced controllers like the 2.4G Wireless Controller or Wi-Fi-ready devices give smoother results.
- Cons: More expensive, tricky to set up, and not always compatible.
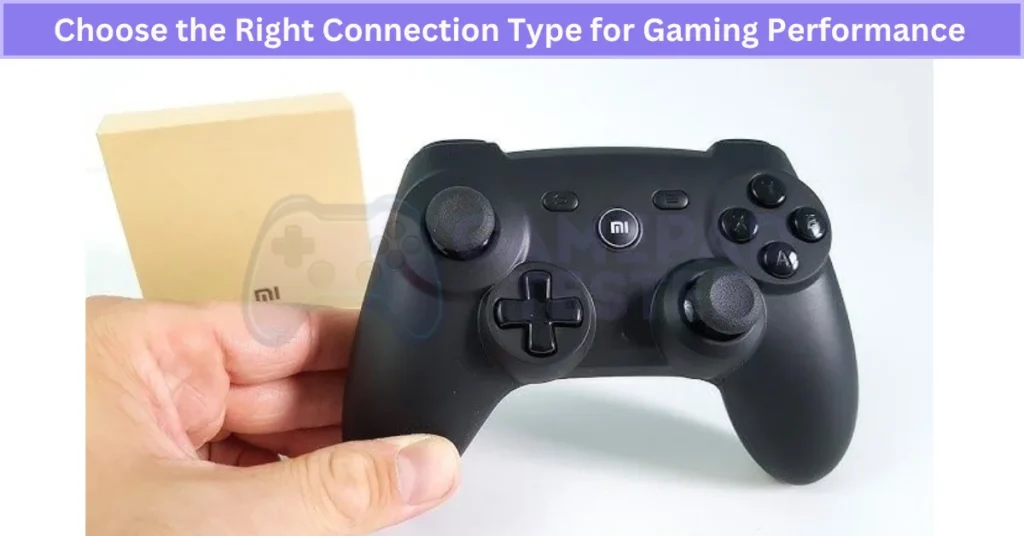
For the best play, I’d say USB-C or Wi-Fi connections work better than Bluetooth. Controllers like Razer Kishi V2, SteelSeries Stratus Duo, and Xbox Core Controller use these connections to keep lag low.
Essential Features for the Best Gaming Experience
I’ve seen how basic gamepads can work fine, but having extra features really changes the game. These features make playing smoother, more fun, and less tiring, especially for long sessions on your Xiaomi phone.
Programmable Buttons
Some gamepads let you map buttons how you want. It’s super handy when games need quick combos or tricky moves. For example, the 8BitDo Bluetooth Gamepad Pro 2 lets you set up buttons your way, so you don’t have to stretch your fingers awkwardly.
Rumble Vibration
Rumble vibration gives real feedback when something happens in the game, like shooting or getting hit. It makes the experience feel alive. Gamesir X3 has great rumble vibration, which works well with many Android games.
Cooling Fan
Long gaming can heat up your phone and controller. A built-in cooling fan helps keep things cool, so nothing slows down. The Razer Raiju Mobile includes this, making it good for marathon gaming.
Phone Mount
Having a phone mount on the controller keeps your screen steady and at a comfy angle. It stops your hands from cramping and makes it easier to see the action clearly.
Pro tip: Some advanced controllers, such as the Ipega Bluetooth Controller, use Hall Effect joysticks. These prevent stick drift and last longer than regular ones. Also, Turbo Mode can help if you play fighting games and need fast repeated presses without tiring your fingers.
Choosing a gamepad with these features means better control and a more enjoyable gaming time on your Xiaomi device.
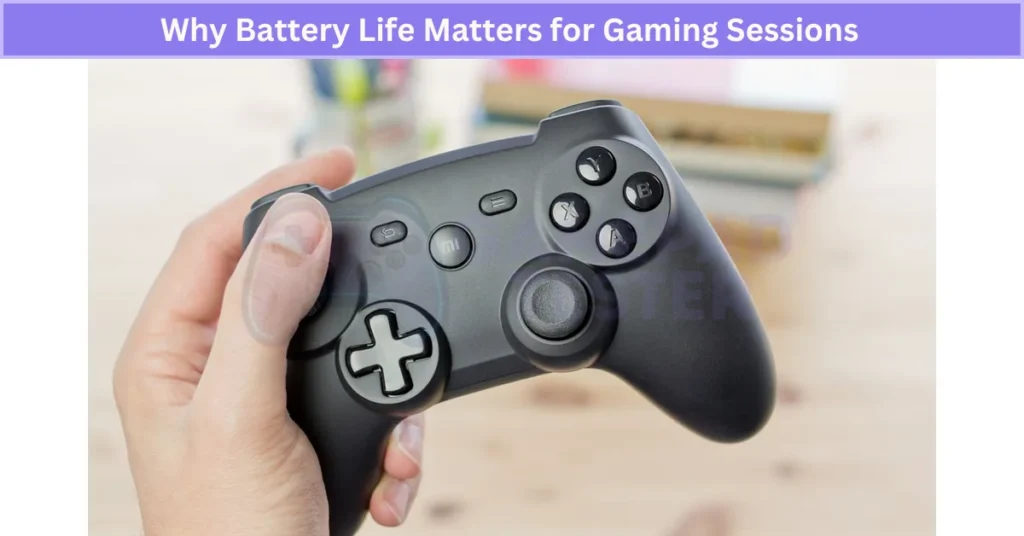
Why Battery Life Matters for Gaming Sessions
Long gaming sessions need a gamepad that won’t die quickly. Having good battery life means less interruptions and more fun.
- Battery life usually ranges from 8 to 40 hours depending on the controller.
- Look for USB-C charging since it’s faster and easier to use.
- Some gamepads like the HD-151X Wireless Gamepad Controller have removable batteries or docking stations for extra playtime.
- Pass-through charging lets you play while the controller charges—super handy!
- LED lights or app indicators show battery status so you’re never caught off guard.
Controllers with fast-charging support help cut down downtime. For Xiaomi users, checking these battery life features makes a big difference in mobile gaming comfort.
How Latency Affects Your Game Performance
Latency means the delay between your button press and what happens on screen. In fast games like shooters or racing, even small lag can cost you.
- Bluetooth is easy to use but can add some input lag. Newer Bluetooth 5.0 helps reduce this compared to older versions.
- USB-C wired connection cuts lag to almost zero. It’s best for serious gaming on Xiaomi phones, especially FPS and racing games using OTG mode.
- Wi-Fi works great for cloud gaming since it offers low latency if your internet is strong.
To cut down lag, turn on Xiaomi’s Game Turbo mode and close any apps running in the background. This helps your controller response time and makes the game feel smoother.
If you want the lowest input lag, go wired. But if you prefer wireless, look for Bluetooth 5.0 controllers for better speed.
Setting Up and Using Your Gamepad on Android: Complete Guide
Setting up your gamepad right after buying it helps avoid problems and makes gaming smooth on your Xiaomi phone. Here’s a step-by-step guide to get you started, from pairing to testing.
Installation
Bluetooth
Turn on Bluetooth on both your Xiaomi phone and the gamepad. Scan for available devices, select your controller, and confirm pairing. Keep your controller’s firmware updated before the first connection for better performance.
Enabling OTG Support for Wired Controllers
For wired controllers, your Xiaomi phone needs OTG support to recognize the device. You can check this in settings or use an OTG tester app. Enabling OTG ensures your wired USB-C controller works properly.
USB-C
Plug your gamepad into your phone’s USB-C port. If prompted, allow data transfer to let the phone communicate with the controller. USB-C connection reduces input lag and can support pass-through charging.
Wi-Fi
Some controllers connect over Wi-Fi or use Direct/Miracast. Connect your phone to the controller’s Wi-Fi network or use the official app for setup. This method suits cloud gaming controllers or certain premium models.
Configuration
Button Mapping
Use your controller’s app or your game’s settings to customize button layouts. For devices with more manual setup, guides like the iPhone with VGamepad App article can give similar mapping tips. This lets you set buttons where they feel easiest to reach.
Sensitivity
Adjust joystick and trigger sensitivity for faster or more precise movements. You can usually do this through the controller’s app or in-game settings.
Vibration
Turn rumble vibration on or off depending on how much feedback you want. Vibration adds realism but can drain battery faster. You’ll find more examples of this tactile feedback on models reviewed in our Joystick Controllers guide.
Optimization
Display Brightness
Set your screen brightness to a level that’s comfortable and saves battery. Avoid keeping it too high during long sessions.
Sound Volume
Balance game sounds and notifications. You can also use sound enhancer apps for better audio.
Battery Saver Mode
Disable battery saver during gaming or add exceptions for your games to avoid slowdowns.
Reducing Input Lag in Bluetooth Mode
Keep your phone and controller close. Turn off other nearby Bluetooth devices to avoid interference. Use Xiaomi’s Game Turbo mode to reduce latency. For extra stability, enable Developer Options and disable Bluetooth A2DP offload.
Testing the Controller
Using Built-in Android Gamepad Tester
Some Xiaomi phones have a gamepad tester in Developer Options. It shows which buttons and sticks respond when you press or move them.
Third-Party Apps for Calibration
Use apps like Gamepad Tester from the Play Store to recalibrate joysticks and check input lag. It’s good to do this after updating your controller’s firmware.
Real User Fixes & Community-Backed Solutions
I found a Reddit discussion about a new Redmi game controller recently released in China for around $70. What caught attention was its support for vertical mode gaming on Android phones—a feature many emulators could benefit from—and a possible space for a cooling fan.
While the design is praised for innovation and portability, users debated the circular D-pad, with some preferring classic cross styles from Nintendo or PlayStation, while others liked the new approach for easier diagonal inputs. A few concerns were raised about having to charge both controller halves separately and potential battery imbalance between the two sides. Overall, the controller seems promising but awaits a global release.
Final Verdict
If you’re serious about mobile gaming, using the right gamepad for Xiaomi phones can completely change the experience. It gives you better control, smoother performance, and less screen clutter compared to touch controls. Whether you prefer a wired connection for zero latency or a Bluetooth option for portability, the right choice depends on how you play.
Look for features like long battery life, comfortable design, and compatibility with MIUI’s Game Turbo mode. With a well-matched gamepad for Xiaomi, your device feels more like a console, making games like PUBG, COD Mobile, and emulators far more enjoyable.
How to Connect Mocute Gamepad Controller to Android Device 27 Jul 12:58 AM (2 months ago)
I love using my Mocute gamepad when I play games on my phone. It works well with Android and makes gaming feel easy. The best part? It’s wireless, so no messy cables.
The Mocute controller has Bluetooth 3.0. That means it connects fast and with no big delay. This is perfect for games that need quick moves. It also has a phone clip, so I can keep my phone in place while playing. Plus, the battery lasts up to 40 hours. I don’t worry about charging it all the time.
Here’s how I connect my Mocute gamepad to Android:
- Enable Bluetooth: Turn on Bluetooth on your phone.
- Activate Pairing Mode: Press and hold the power button on the Mocute until the light starts blinking.
- Select Device: Find “Mocute” in your phone’s Bluetooth list and tap to pair.
- Confirm Connection: Wait for it to say “Connected.” That’s it!
Now I can play my favorite Android games and emulators with no lag. This wireless gamepad is perfect for racing, shooting, and action games. I use it all the time because the setup is quick, and the connection stays strong. Want to get the most out of your controller? Check out these gamepad controller tips.
How to Connect Mocute Gamepad Controller to Android: Step-by-Step
The Mocute gamepad controller is a wireless Bluetooth 3.0 controller made for Android gamers. I use it when I want to turn my phone into a real gaming console. It works with most Android phones and makes playing games like PUBG and COD Mobile much easier.
Key Features
- Bluetooth 3.0 Connection: Fast pairing and low input lag.
- Works with Top Games: PUBG, Call of Duty Mobile, and popular emulators. If you’re into wireless alternatives, the 8BitDo Bluetooth Gamepad is another great pick with excellent compatibility.
- Built-in Battery: Up to 40 hours of play on a single charge.
- Phone Clip Included: Keeps your phone steady while you play.
- Ergonomic Design: Comfortable to hold for long gaming sessions.
You can buy it easily on Amazon or the official Mocute site. I like that it’s affordable and feels solid in my hands.
To connect, just turn on Bluetooth on your phone, hold the power button on the controller, and tap “Mocute” in the Bluetooth list. Once it says connected, you’re ready to game with your wireless game controller.
Pre-Pairing Checks for Your Mocute Controller
Before I pair my Mocute gamepad, I always do a quick check. This saves time and avoids connection problems later.
Things to Check:
- Charge the controller fully – The LED turns green when it’s done. I never leave it plugged in too long to avoid battery issues.
- Use the original charging cable – It gives the best and most stable performance.
- Power on the gamepad – Press the power button. A blue LED means it’s on standby.
- Check pairing mode – The blue light should flash. If not, hold the button until it does.
- Avoid overcharging – It keeps the battery healthy for long use.

Full charging usually takes about 2 hours. I like doing this before gaming so I get the best battery life and smooth Bluetooth controller setup.
How to Charge Your Mocute Controller Before Pairing
I always make sure my Mocute controller is fully charged before pairing. A good charge means longer play and fewer connection issues.
Steps to Charge and Check Battery:
- Use a USB cable that fits the micro-USB port on the gamepad.
- Plug into a wall charger, PC, or power bank (use a 5V/1A adapter for safe charging).
- Watch the LED battery indicator:
- Red = Low battery
- Blue = Charging
- Green = Fully charged
- Charging takes about 2 hours.
- Don’t overcharge or let the battery drain fully. It helps the gamepad last longer. If you prefer plug-and-play options, the 2.4G Wireless Controller might suit your needs better.
I like checking the LED before every session so my Mocute is ready for smooth gaming.
How to Remove Old Pairings to Fix Mocute Controller Bluetooth Issues
Old Bluetooth connections can stop your Mocute controller from pairing right.
Steps to Clear Old Pairings:
- Open Bluetooth Settings on your Android phone.
- Find Paired Devices list.
- Tap on old controllers or devices you don’t use and choose Forget or Remove.
- Turn Bluetooth off and back on again to refresh.
- For better results, restart your phone after clearing old pairings.
- If problems continue, try clearing the Bluetooth cache in your phone’s settings.
Doing this helps your Mocute controller connect smoothly every time.
How to Check if Your Android Device Works with the Mocute Controller
It’s important to check your phone’s Android version before pairing the Mocute controller. Some older versions might not connect well.
How to Check Android Version and Bluetooth:
- Go to Settings on your phone.
- Tap About Phone or System.
- Find Software Info or Android Version.
- Make sure your Android version is 6.0 or higher.
- Also, check if your device supports Bluetooth 3.0 or 4.0—this is needed for a good connection.
- If your Android is older, try to update your OS before pairing.
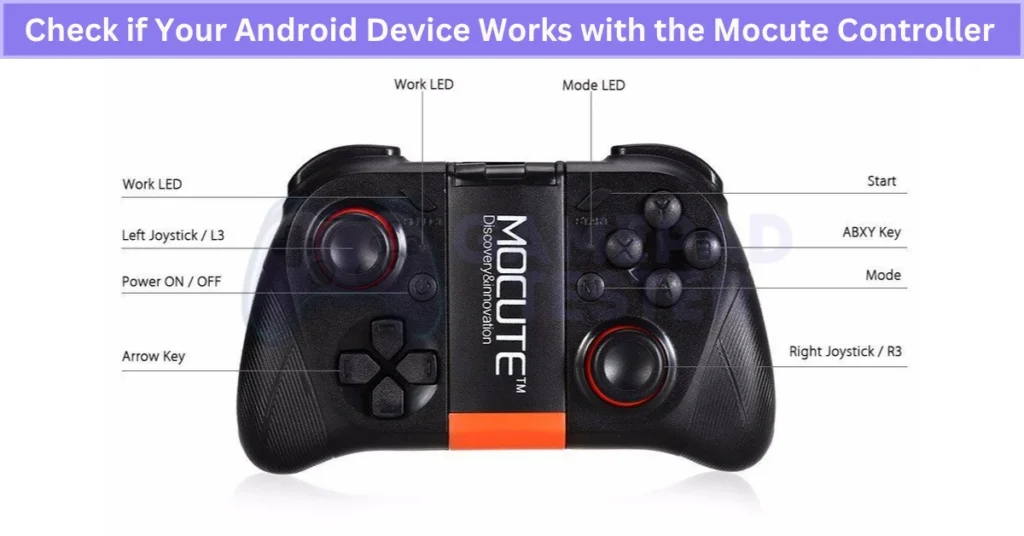
Some custom Android versions or ROMs may cause Bluetooth problems, so it’s good to keep your system updated.
Step1: Preparing your Mocute gamepad controller
How to Charge Your Mocute Gamepad Controller
I use a USB cable that fits the Mocute controller’s micro-USB port to charge it. It’s easy and works with many power sources.
Here’s how I charge it:
- Connect the USB cable to a power source like a wall charger, PC, or power bank.
- Plug the micro-USB end into the Mocute controller.
- Watch the LED light for battery status:
- Red means the battery is low.
- Blue shows it’s charging.
- Green means the controller is fully charged.
- Flashing light means it’s on standby or in use.
I always charge mine until the green light appears. It’s best to use a stable power source, like a wall charger, for faster and safer charging than random USB ports. Also, avoid overcharging or letting the battery drain completely to keep it healthy.
Charging usually takes about 2 hours to fill the battery fully.
How to Turn On Your Mocute Gamepad Controller
To turn on your Mocute gamepad controller, press and hold the power button with the circle symbol on the front for a few seconds. You’ll hear a beep, and the LED light will show the status.
Here’s what the LED colors mean:
- Blue (steady) means the controller is powered on and in standby mode.
- Flashing Blue means it’s in pairing mode, ready to connect to your device.
- Flashing Red & Blue means the controller is connected to a device.
To turn the controller off, press and hold the power button again until you hear a beep and the LED turns off.
I always make sure to turn on the controller before pairing. Turning it off when I’m done saves battery. Knowing what the LED lights mean helps me quickly check the power and connection status without needing any extra tools. If you’re not using a physical controller, try using your Android Phone As A Gamepad instead.
Step 2: Pairing Your Mocute Gamepad Controller With Your Android Device
How to Enable Bluetooth on Your Android Device for Mocute Gamepad
Turning on Bluetooth is the first step to connect your Mocute gamepad controller to your Android phone. Without Bluetooth, the controller can’t pair or work properly.
Here’s how I turn on Bluetooth on Android:
- Swipe down from the top of the screen to open the Quick Settings panel.
- Tap the Bluetooth icon to turn it on or off.
- If you can’t find it there, go to Settings > Bluetooth and toggle it on.
Keep in mind, the menu looks a bit different depending on your phone model and Android version.
To make your phone easy to find by the Mocute controller, open Bluetooth settings, and make sure your device is discoverable. You can also change your device’s name to something unique—this helps when many Bluetooth devices are nearby so you don’t get confused.
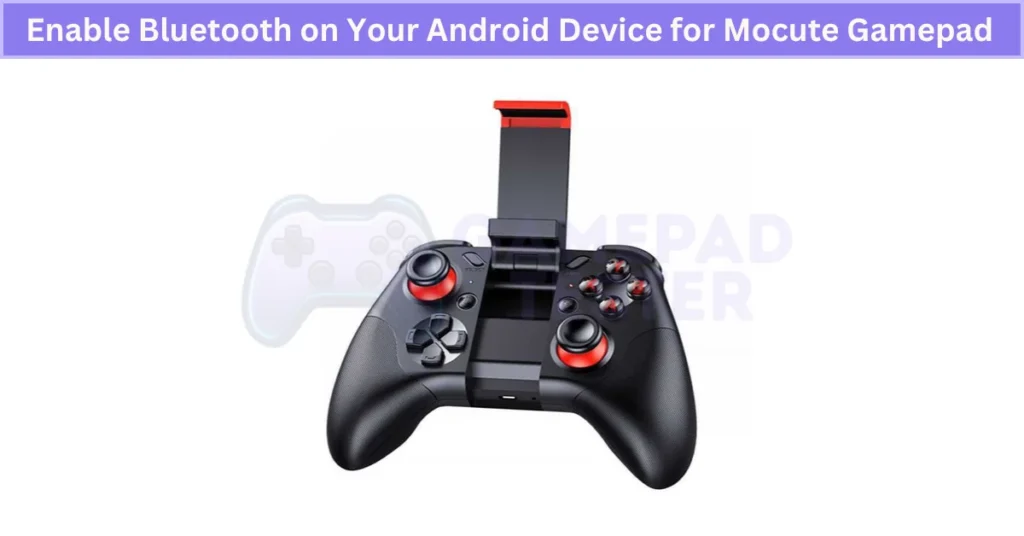
When pairing, stay close to the controller (within a few feet) to keep the connection strong and avoid interruptions.
This simple setup step makes pairing your Mocute gamepad with Android smooth and fast.
How to Search for Your Mocute Gamepad Controller on Android
To connect your Mocute gamepad, you first need to scan for nearby Bluetooth devices on your Android phone. This helps your phone find the controller so you can pair them.
Here’s how I do it:
- Open the Bluetooth settings on your Android device.
- Tap the Scan or Refresh button to start searching for devices nearby. The exact button may look different depending on your phone model or Android version.
- Make sure your Mocute controller is turned on and in pairing mode (blue light flashing).
- Look for device names that say “Mocute” or something like “Mocute-050” or “Mocute-054.” These are common model names.
If you don’t see your controller at first, keep scanning. Sometimes interference or device delays mean it takes a few tries to show up.
Also, keep your controller close to your phone during this process to keep the connection strong.
Doing this helps you find Mocute gamepad Android devices quickly and start playing without issues.
How to Connect Your Mocute Gamepad Controller to an Android Device
When I connect my Mocute gamepad, I first select it from the list of Bluetooth devices on my Android phone and confirm the pairing. This step makes sure the controller and phone talk to each other.
Here’s the easy way to do it:
- Go to Bluetooth settings on your Android device.
- Find and tap the name that says “Mocute” or something similar.
- If asked, confirm the pairing by tapping Accept or entering a code (this depends on your Android version).
To know if it’s connected, watch the controller’s LED:
- Flashing Red & Blue means a stable connection.
- Flashing Blue shows an unstable connection.
- Flashing Red means it’s disconnected.
- Solid Blue means pairing is in progress.
Also, keep an eye on the Bluetooth icon on your phone for status updates.
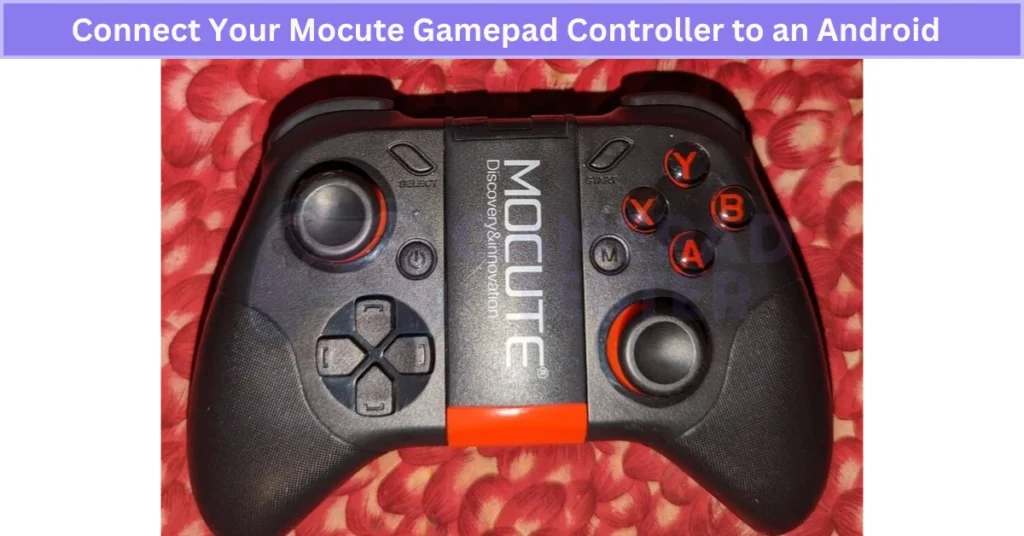
I always pair the controller before playing. When I’m done, I turn off Bluetooth or power off the controller to disconnect it properly.
Watching the LED and Bluetooth icon helps me catch any connection issues fast so I don’t face lag during my games.
Step 3: Using Your Mocute Gamepad Controller With Your Android Device
How to Attach Your Phone to the Mocute Gamepad Controller Clip
The Mocute gamepad comes with a clip that fits most phone sizes securely. I like how easy it is to adjust, so my phone stays safe while I play.
Here’s how I attach my phone:
- Use the spring mechanism to widen or narrow the clip until it fits your phone snugly.
- Place your phone carefully in the clip and make sure the clips or straps hold it firmly.
- You can rotate or tilt the clip up to 180° to find the best viewing angle that feels comfortable for your eyes.
When setting it up, I think about screen glare and the lighting around me to avoid eye strain during long gaming sessions. If you’re an Apple user, check out the best iPad Gamepad Controller options for a similar experience.
Make sure your phone is stable and won’t slip out while you’re playing fast-paced games. A well-adjusted clip makes gaming more fun and comfortable.
How to Configure Your Mocute Gamepad Controller for Different Games and Apps
I like to customize my Mocute gamepad settings to get the best gameplay for each game or app. Changing the controls and sensitivity makes playing easier and more fun.
Here’s how I access the settings on the controller:
- Press and hold the mode button (the star symbol near the power button) for a few seconds to open the mode menu.
- Use the joysticks, buttons, triggers, or D-pad to navigate the menu on your screen.
The Mocute controller has different modes:
- Game mode – For most games using the controller.
- Keyboard mode – Makes the controller act like a keyboard, useful for some apps.
- Mouse mode – Lets you control the cursor with the gamepad.
Some games and apps allow deeper customization using official Mocute controller apps or plugins. These can be downloaded from the official website or via QR codes in the user manual. The instructions vary depending on the app or game. For iPhone users, the Best iOS Gamepad Controller options offer top performance without manual setup.
With these tools, you can:
- Change button mapping to match your play style.
- Adjust sensitivity for smoother control.
- Turn vibration on or off for feedback.
I create game-specific profiles in the customization apps so I can switch settings quickly depending on the game I play. This makes gaming more comfortable and improves my performance.
Optimizing Your Gaming Experience With the Mocute Gamepad and Android Device
I found that tweaking both my Android phone and Mocute gamepad settings makes my gaming way better. Small changes can improve how smooth and fun the gameplay feels.
Adjusting Android Device Settings:
- Display Brightness: I use the quick settings or the display menu to set the brightness. Sometimes, I turn on adaptive brightness so it adjusts by itself depending on the light around me.
- Sound Volume: I adjust the volume slider for clear game sounds. If my phone has a sound enhancer or equalizer, I turn it on for richer audio.
- Battery Saver Mode: This helps my phone last longer, but it might slow down performance. If I want longer playtime, I enable battery saver but switch it off for competitive games.
- Gaming/Performance Mode: Many newer phones have this option to boost speed and network connection. Turning this on helps reduce input lag and improve frame rates, which works great with the Mocute controller.
Using Mocute Controller Features:
- The Mocute gamepad has special modes like Turbo Mode, Multimedia Mode, and Screenshot Mode. These activate with specific buttons or switches on the controller.
- I always check the user manual to find exactly how to turn these modes on or off, since the button layout can differ by model.
Closing Tips:
Adjust your phone and controller settings depending on the game type, lighting, and your personal comfort. For example, I lower brightness in dark rooms to reduce eye strain. Turning on Turbo Mode during fast-action games helps me react quicker.
Small tweaks on both your Mocute gamepad and Android device really add up to a better, smoother gaming experience. You can also check out the Benefits Of Using Gamepad Controllers to understand why gamepads improve control and comfort.
How to Use Turbo Mode on the Mocute Gamepad Controller
Turbo mode lets your controller press a button repeatedly without you having to tap it fast. This is great for games that need rapid fire or quick repeated actions.
To turn it on:
- Press and hold the Turbo (T) button.
- While holding it, press the button you want to turbo-charge.
To turn it off:
- Press and hold the Turbo (T) button again.
- Then press the same button to stop turbo mode.
I like using turbo mode because it helps reduce finger fatigue, especially in fast-paced shooting or action games. It keeps me comfortable during long gaming sessions.
How to Use Multimedia Mode on the Mocute Gamepad Controller
Multimedia mode lets you control your phone’s media like music and videos right from the Mocute controller. It’s handy when you don’t want to leave your game to adjust volume or skip tracks.
To turn on multimedia mode, press and hold the Home (house) button for a few seconds until you hear a beep. This activates the media controls.
To turn it off, just press and hold the Home button again until you hear the beep.
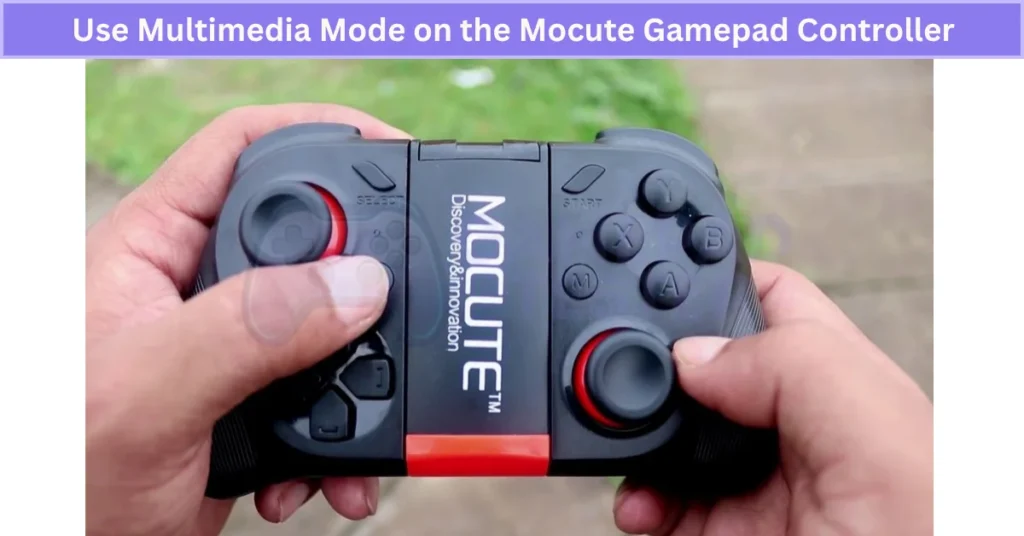
While in multimedia mode, you can play or pause, skip to the next or previous track, and adjust the volume up or down easily.
I use this mode a lot to quickly change music without pausing my game.
How to Use Screenshot Mode on the Mocute Gamepad Controller
Screenshot mode lets you take pictures of your game screen quickly without using your phone’s buttons. It’s great for saving cool moments while playing.
To turn on screenshot mode, press and hold the Select (line symbol) button for a few seconds until you hear a beep. This means the mode is active.
To turn it off, press and hold the Select button again until you hear the beep.
I use this feature all the time because it saves me from fumbling with my phone while gaming. It makes capturing moments faster and easier.
Real User Fixes & Community-Backed Solutions
I found a Reddit thread where a user asked how to set up their Mocute 060 game controller for different games without losing their custom control settings. The community explained that the controller has multiple Bluetooth modes—one with default non-remappable keys and another that allows remapping via the Mocute app. Some suggested using specific button combos (like right pad plus power) to switch modes, and others recommended checking the manual or using emulator-specific key mapping features since the controller itself doesn’t save per-game profiles.
I came across a Reddit post where a user had trouble charging their Mocute 050 controller—the red charging light never turned off even after 4 to 6 hours. The community suggested that the likely cause is a dead or faulty battery, especially since the controller is several years old and might have been unused for a long time. Some recommended trying a reset via the small hole on the controller, but if that doesn’t work, replacing the battery or returning the controller would be the best option. If you’re curious about how other controllers work, explore different Joystick Controllers for more insights.
Final Verdict
The Mocute gamepad is a great choice for mobile gamers who want a smooth, wireless experience. It’s easy to use, affordable, and works perfectly for games like PUBG, COD Mobile, and popular emulators. The setup is simple—just charge it, turn on Bluetooth, and follow the steps for How to Connect Mocute Gamepad Controller to Android Device, and you’ll be gaming in minutes.
For the best performance, always keep the controller charged, remove old Bluetooth pairings, and tweak sensitivity settings for different games. Features like turbo mode and multimedia controls make it even more versatile. With these tips, your Mocute controller will give you console-like control for all your favorite Android games.
FAQ’s
How to connect MOCUTE controller to android?
To connect your MOCUTE controller to Android, first turn on the controller. Next, enable Bluetooth on your Android device. Then, search for nearby devices and select the MOCUTE controller from the list. Once paired, you’re ready to start gaming.
How do you reset a MOCUTE controller?
To reset your MOCUTE controller, press the R key to power it off. Avoid pressing the reset while charging or holding the power button at the same time.
How to pair mocute 050?
To pair your MOCUTE 050 controller, first turn it on. You’ll see the work LED start flashing, showing it’s in Bluetooth pairing mode. On your Android device, look for the device name like “MOCUTE-050-XXX” in the Bluetooth list. Tap to connect, and the LED will turn off once pairing is successful.
How to Use the HD-151X Wireless Gamepad Controller 27 Jul 12:37 AM (2 months ago)
The HD-151X wireless gamepad is one of those controllers that just works well. I’ve used it on my PC, PS3, and even my Android TV box without a problem. People like it because it’s simple to set up and supports a bunch of devices right out of the box.
It comes with solid features. You get 2.4GHz wireless connectivity for a stable link, which means less lag compared to Bluetooth controllers. The dual vibration motors feel nice in games. Turbo mode is handy for shooters, and those multimedia keys make it easy to control music or video. The built-in rechargeable battery lasts long enough for hours of play.
If you’re wondering how to use the HD-151X controller, this HD-151X wireless gamepad manual will cover all the steps. From charging to pairing and customizing, you’ll get it all.
Follow this HD-151X compatibility guide, and you can easily set up your HD-151X wireless joystick for the best gaming experience. Want more expert advice? Check out these controller tips to get the most out of your gamepad.
Overview of the HD-151X Wireless Gamepad Controller
The HD-151X is a multi-device wireless gamepad made for gamers who want smooth control without messy wires. It works well on PC, PS3, Android TV boxes, and even smart TVs, so you can play on almost any screen you have.
This HD-151X wireless gamepad controller uses a 2.4GHz wireless connection with a USB receiver. That means lower latency and a stronger signal compared to standard Bluetooth. It feels more stable, which is great when every second counts in a game. The controller also has dual vibration motors for feedback and a turbo function that makes rapid-fire shooting easy.
The design is ergonomic, so your hands don’t hurt after long sessions. Plus, the rechargeable battery keeps you going without replacing batteries all the time.
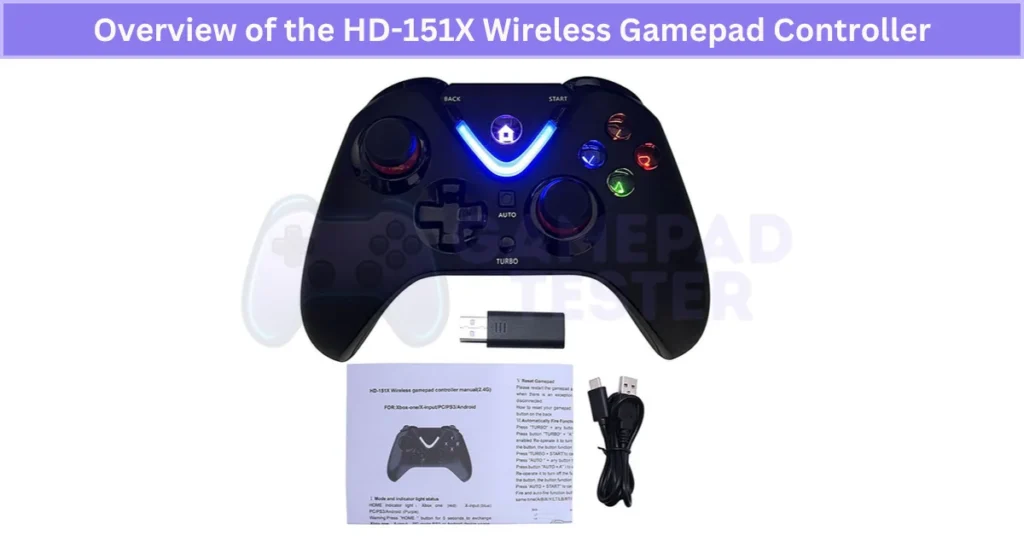
For its price, this wireless controller for PC and Android TV is a solid pick. It’s simple, reliable, and works well across platforms.
Step 1: Charging the HD-151X Wireless Gamepad Controller
Before using it, make sure to charge the HD-151X wireless controller fully. This helps with battery calibration and makes it last longer.
Here’s how to do it:
- Plug the charging cable into the controller and connect it to a USB power source like a PC or a wall adapter.
- Check that the cable fits properly in the port.
- Look for the indicator light. It turns red when charging and usually goes off or green when done.
One quick tip: don’t play while it’s charging. Waiting for a full charge is better for wireless controller battery care and gives you a longer play session later.
These HD-151X gamepad charging instructions are simple, but they make a big difference in performance.
How to Charge the HD-151X Controller Using a USB Cable
Charging with a USB cable is the easiest and safest way to power up your HD-151X controller. It keeps the process simple and avoids issues that come with low-quality chargers.
Here’s how to do it:
- Use a micro-USB to standard USB cable.
- Plug the micro-USB end into the controller.
- Connect the standard USB end to a power source like a PC, wall adapter, or power bank.
Pay attention to the HD-151X LED charging indicators:
- Red: Battery is low
- Blue: Charging in progress
- Green: Fully charged
- Flashing: Controller is on or in standby
To keep your controller in good shape, avoid overcharging or undercharging. A full charge before unplugging helps the battery last longer. Also, use a stable power source. Charging from a proper wall adapter or the official charger is safer than random USB ports, which can send uneven voltage and harm the battery.
This HD-151X battery charging guide will keep your controller ready for long gaming sessions without problems.
How to Charge the HD-151X Controller Using a Power Adapter
You can also charge the HD-151X with a power adapter instead of using a PC USB port. This method is fast and easy, but you need the right specs to avoid damage. Always use an adapter with 5V DC output and at least 500mA. Anything higher can harm the battery or controller circuits.
Here’s the simple process:
- Insert the DC connector into the charging port on the back of the controller.
- Plug the adapter into a wall outlet.
- Watch the LED indicators on the HD-151X gamepad:
- Red = Low battery
- Blue = Charging
- Green = Fully charged
For best battery life, charge until the green light shows and then unplug. Don’t overcharge or let the battery go completely dead often—it shortens lifespan.
This HD-151X DC charging guide helps you keep your controller safe and ready for gaming.
Common Charging Issues and How to Fix Them
Charging problems happen, but most are simple to solve. Here are the most common HD-151X charging problems and how I fix them:
- Not Charging – First, check the USB cable. If it’s worn out or loose, swap it with another one. Using the official cable or a certified one works best. If you’re troubleshooting another device, this also applies to the Mocute Gamepad Controller. Also, try a different adapter or USB port.
- Slow Charging – This usually means the adapter is weak. Go for a 5V/1A or higher-rated adapter. If that doesn’t help, clean the charging port with a soft brush. Dust can block the connection.
- Battery Not Holding Charge – If your wireless controller still won’t stay charged after a full cycle, the battery may be old. At this point, I’d replace the battery or contact support.
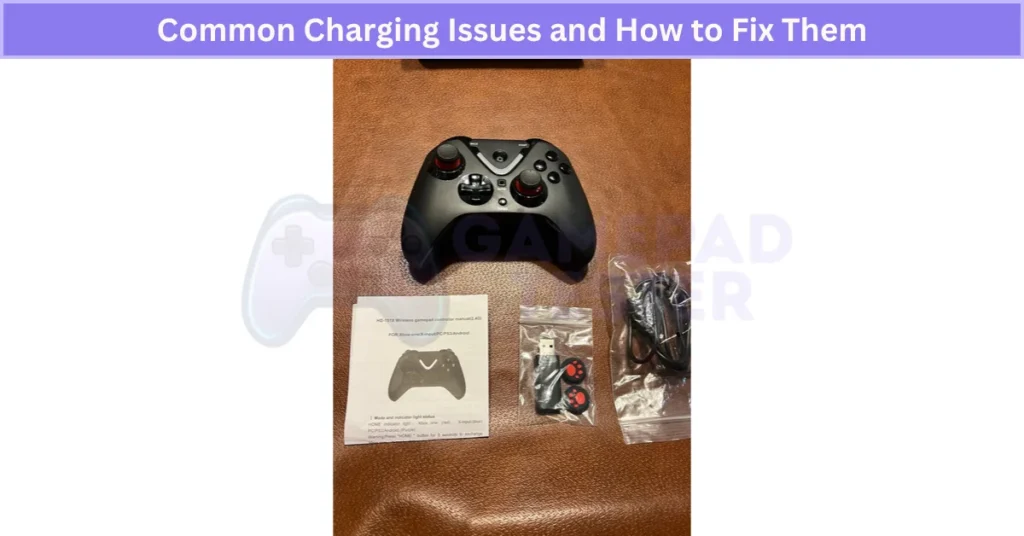
One last tip: keep the charging port clean and dry, and avoid cheap cables. Official or certified cables reduce charging issues and keep your gamepad’s battery healthy for longer.
Step 2: Connecting the HD-151X Wireless Gamepad to Different Devices
The HD-151X is super flexible. You can connect the HD-151X wireless gamepad using a 2.4GHz USB receiver or Bluetooth. The USB dongle is the best choice for zero-lag gaming, while Bluetooth works well for devices without USB ports.
How to Connect the HD-151X Wireless Gamepad to a PC
Connecting your HD-151X to a PC is simple and reliable because it uses a 2.4GHz USB receiver instead of Bluetooth. This method gives minimal input lag, which is perfect for fast-paced PC gaming.
Steps to Connect:
- Plug the included USB receiver into an open USB port on your PC.
- Make sure the receiver is in an open spot for a strong signal.
- Turn on the controller and press the Home button. This starts the pairing process.
LED Indicator Guide:
- Solid Blue: Pairing in progress
- Flashing Red: Not connected
- Flashing Blue: Connected but weak signal
- Flashing Red & Blue: Connected and stable
Once the LED shows a stable connection, you’re ready to game.
Tip: Turn off the controller or remove the USB receiver when not in use. It saves battery and prevents signal conflicts with other devices.
This quick HD-151X PC setup guide makes sure your controller pairs right every time for a smooth experience.
How to Connect the HD-151X Controller to a PS3 Console
Connecting the HD-151X to a PS3 is easy, but you need to switch the USB receiver to PS3 mode first. This step ensures the buttons map correctly and helps reduce input lag compared to using PC mode.
Steps to Connect:
- Find the small mode button on the side of the USB receiver. Press it to switch from PC to PS3 mode.
- Plug the receiver into any available USB port on your PS3.
- Make sure the antenna faces an open space for a strong signal.
- Turn on the controller and press the Home button. The pairing process will start.
LED Indicator Guide:
- Solid Blue: Pairing in progress
- Flashing Red: Not connected
- Flashing Blue: Weak signal
- Flashing Red & Blue: Connected and stable
After it connects, you’re ready to play.
Tip: Turn off the controller or remove the USB receiver after gaming. This prevents battery drain and avoids conflicts with other devices.
This HD-151X PS3 pairing guide makes setup quick and smooth.
How to Connect the HD-151X Controller to an Android TV Box or Smart TV
You can connect the HD-151X controller to an Android TV Box or Smart TV in two ways: USB receiver or Bluetooth. The USB option is best for stable and low-lag gaming, while Bluetooth works well when your TV doesn’t have a free USB port.
Option 1 – USB Receiver
- Plug the 2.4GHz USB receiver into the TV’s USB port.
- Turn on the controller and press the Home button to start pairing.
- Wait for the LED to flash and then stabilize.
Option 2 – Bluetooth Pairing
- Go to Settings → Bluetooth → Pair New Device on your TV.
- Turn on the controller and hold Home + Start to enter pairing mode.
- Select HD-151X from the device list.
For the best gaming experience, I always use the USB receiver because it gives a stronger signal and less input lag than Bluetooth. But if your Smart TV doesn’t have a USB port, Bluetooth is a good backup option.
This simple HD-151X Smart TV gamepad setup works for most Android-based TVs.
Troubleshooting Pairing Issues with the HD-151X Controller
Pairing problems happen, but most HD-151X controller pairing issues are easy to fix if you follow a few steps.
- Controller not detected – Make sure the USB receiver is in the correct mode (PC, PS3, or Android). Switching modes solves this most of the time.
- Bluetooth pairing fails – Restart both the controller and your device. Then try pairing again. Clearing old pairings from your device can also help.
- Interference problems – Keep the controller close to the device and remove obstacles or other wireless gadgets that might cause signal issues.
- Low battery – If the battery is weak, pairing might fail. Charge the controller fully before trying again.
If nothing works, reset the controller and check for firmware updates. Updating the firmware often fixes pairing bugs and improves wireless stability.
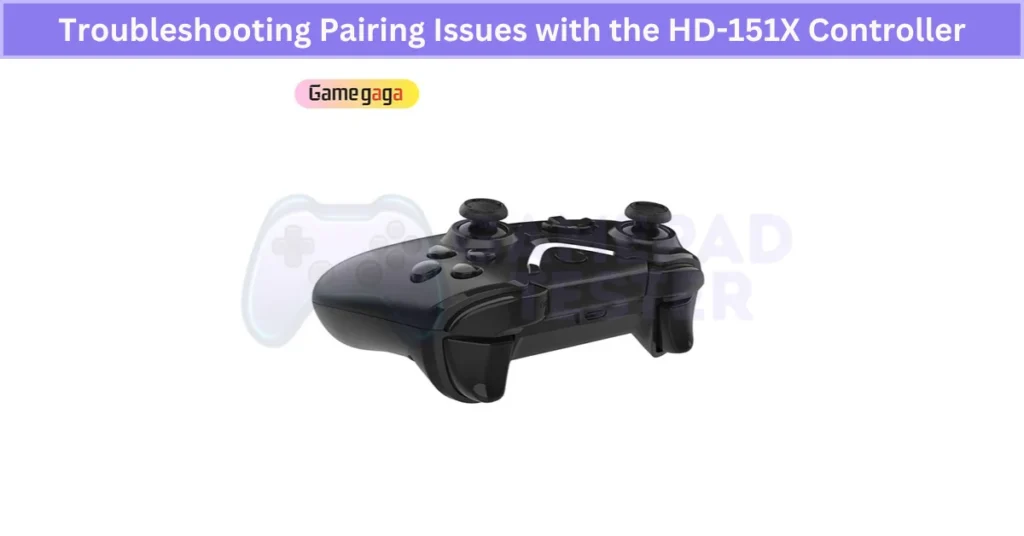
These simple steps usually solve most wireless gamepad connection problems and help you fix HD-151X Bluetooth pairing without stress.
How to Connect the HD-151X Controller to Android Smartphones and Tablets
The HD-151X works with Android phones and tablets through Bluetooth or the USB receiver (with OTG support). Both options are simple, but using the USB receiver offers lower latency for better gaming performance.
Bluetooth Connection
- Turn on Bluetooth on your Android device. If you want more mobile-friendly options, try using your Android Phone As A Gamepad.
- Switch on the controller and hold Home + Start to enter pairing mode.
- On your device, scan for new devices and select HD-151X from the list.
- Wait for the LED to stop flashing, which means it’s connected.
USB Receiver Connection (OTG Required)
- Plug the USB receiver into your phone or tablet using an OTG adapter.
- Turn on the controller—it should pair automatically.
Tips: Keep the controller close to your device during pairing. Make sure your phone supports USB OTG before using the receiver. If you want the best response time, go with the OTG method since it’s more stable than Bluetooth.
This makes HD-151X Bluetooth pairing on Android or USB setup quick and easy.
Connect HD-151X to Android TV or Smart TV via USB Receiver
Using the 2.4GHz USB receiver gives a stable link and almost zero input lag, which is perfect for fast gaming on big screens.
Steps to Connect:
- Press the small button on the USB receiver to switch it to Android mode.
- Plug the receiver into any USB port on your Android TV box or Smart TV.
- Keep the antenna in an open spot for a stronger signal.
- Turn on the controller and press the Home button to start pairing.
Tip: Disconnect the receiver when you’re done. It saves power and stops interference with other wireless devices.
This HD-151X USB connection for Android TV method beats Bluetooth when you want lag-free performance.
Connect HD-151X to Android TV or Smart TV via Bluetooth
Bluetooth pairing is the best option when your TV doesn’t have a free USB port. It’s easy and quick, but keep in mind that USB mode still offers less input lag for games that need fast reactions.
Steps to Pair:
- On your Android TV or Smart TV, go to Settings → Bluetooth → Pair New Device.
- Turn on the HD-151X controller and press Home + Start to enter pairing mode.
- On your TV, select HD-151X from the list of available devices.
LED Indicators:
- Solid Blue: Pairing in progress
- Flashing Red & Blue: Connected and stable
- Flashing Blue: Connected but weak signal
- Flashing Red: Pairing failed or disconnected
Tips for Best Performance:
- Keep the controller within 10 meters of your TV.
- Disconnect Bluetooth after gaming to save battery.
This simple HD-151X Bluetooth connection setup works for most Android TVs and Smart TVs without a USB option.
How to Connect the HD-151X Controller to Nintendo Switch (If Supported)
Nintendo Switch compatibility with the HD-151X depends on your controller’s model and firmware. Make sure your controller firmware is up to date before pairing.
Bluetooth Pairing Method
- On your Switch, go to System Settings → Controllers and Sensors → Bluetooth Devices.
- Turn on the HD-151X and hold Home + Start to enter pairing mode.
- Select HD-151X from the device list when it appears.
USB Receiver Method (If Supported)
- Plug the USB receiver into the Switch dock’s USB port.
- Turn on the controller and press Home to sync.
Nintendo Switch’s Bluetooth stack can be a bit picky, so the USB receiver is usually more reliable for seamless gameplay and less input lag.
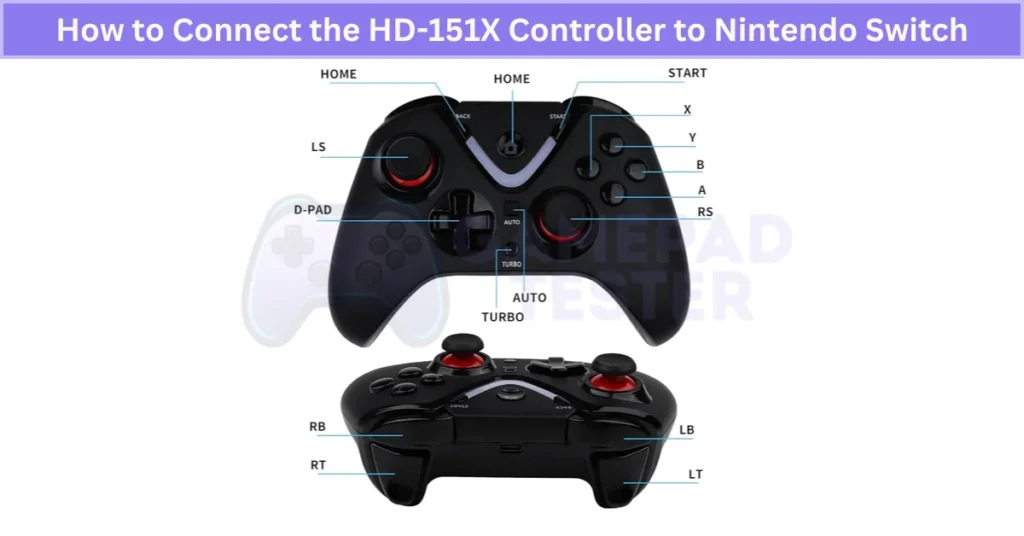
Always keep your controller firmware updated for the best Nintendo Switch wireless controller setup experience.
How to Connect the HD-151X Controller to iPhone and iPad
The HD-151X works with iOS devices through Bluetooth or the USB receiver using an OTG adapter. Both methods are simple, but if you want the lowest input lag, the USB option is better.
Bluetooth Pairing Method
- On your iPhone or iPad, turn on Bluetooth in Settings. You can also explore other iPad Gamepad Controller options if you’re comparing compatibility.
- Power on the HD-151X and hold Home + Start until the LED flashes.
- On your device, scan for new devices and select HD-151X to connect.
USB Receiver Method (Lower Latency)
- Use a Lightning or USB-C OTG adapter.
- Plug the HD-151X USB receiver into the adapter, then connect it to your iPhone/iPad.
- Turn on the controller, and it should sync automatically.
Using the USB receiver with an OTG adapter is ideal for competitive gameplay since it cuts input lag compared to Bluetooth. Always keep the controller within 10 meters for a strong signal.
This simple HD-151X iPad controller setup makes gaming on iOS smooth and reliable.
How to Reconnect the HD-151X Controller After Disconnection
Disconnections happen, but getting your HD-151X back online is quick. Here’s how I usually fix it:
- Turn the controller off, then power it back on.
- If you’re using a USB receiver, just press the Home button to reconnect.
- For Bluetooth, check that your device’s Bluetooth is on and within range. Then reselect HD-151X from the paired devices list.
- If it still won’t connect, restart your phone, console, or TV.
Extra Tip: Keep your controller fully charged and avoid interference from Wi-Fi routers or other wireless gadgets. If disconnects keep happening, it might be time for a firmware update, which often fixes stability issues.
This quick HD-151X Bluetooth reconnect guide makes sure you’re back to gaming without stress.
Step 3: Configure the HD-151X Wireless Gamepad for Games and Apps
Setting up the controller the right way makes a big difference in how smooth your games feel. The HD-151X lets you tweak settings for better control and comfort.
Mode Switching
- X-Input Mode: Best for most modern PC games.
- D-Input Mode: Works well for older titles and emulators.
Switch between modes using the small Mode button on the controller or as shown in the manual.
Sensitivity Adjustment
Use the +/- keys or in-game settings to adjust joystick sensitivity. Lower sensitivity gives better accuracy for shooters, while higher sensitivity is great for racing games.
Vibration Settings
Turn vibration on or off depending on the game. It adds realism but can drain battery faster.
Turbo Function
Assign turbo to buttons you press a lot in shooters or fighting games. This feature reduces finger strain during long sessions.
You can also use multimedia keys for play/pause or volume when gaming on Smart TVs or Android devices.
Tip: Save your favorite configuration before starting a game. A quick setup ensures the best performance every time.
How to Switch Between Modes on the HD-151X Controller
The HD-151X supports multiple modes for a reason—each one helps with compatibility across different platforms and apps. Picking the right mode ensures smooth button mapping and avoids weird input errors in games.
Available Modes and What They Do
- X-Input Mode – Works best for modern PC games that recognize Xbox-style controllers.
- D-Input Mode – Good for Android devices, emulators, and older PC titles. This is also the default mode for some units like the Ipega Bluetooth Controller.
- Mouse Mode – Handy for navigating Smart TV menus or apps that don’t support full gamepad control.
How to Switch Modes
Usually, hold the Home button and press a specific key combo, like:
- Home + X → X-Input
- Home + Y → D-Input
- Home + Start → Mouse Mode
(Some button combos vary, so check your HD-151X user manual for exact details.)
Which Mode Should You Use?
- X-Input for PC gaming
- D-Input for Android and classic games (also used by controllers like the Best iOS Gamepad Controller)
- Mouse Mode for UI navigation on TVs
Tip: The mode you pick affects vibration, turbo, and multimedia controls. Use the right one for the smoothest gaming experience.
How to Adjust Sensitivity and Vibration on the HD-151X Controller
You can fine-tune the HD-151X controller for better control and comfort by adjusting sensitivity and vibration. These settings can be changed either through the controller’s built-in options or inside most games and apps.
Ways to Adjust Sensitivity and Vibration
- On the Controller: Some HD-151X models let you tweak joystick sensitivity using button combos or the manual’s function keys.
- In-Game Settings: Most games have sliders for aim or movement sensitivity and vibration strength.
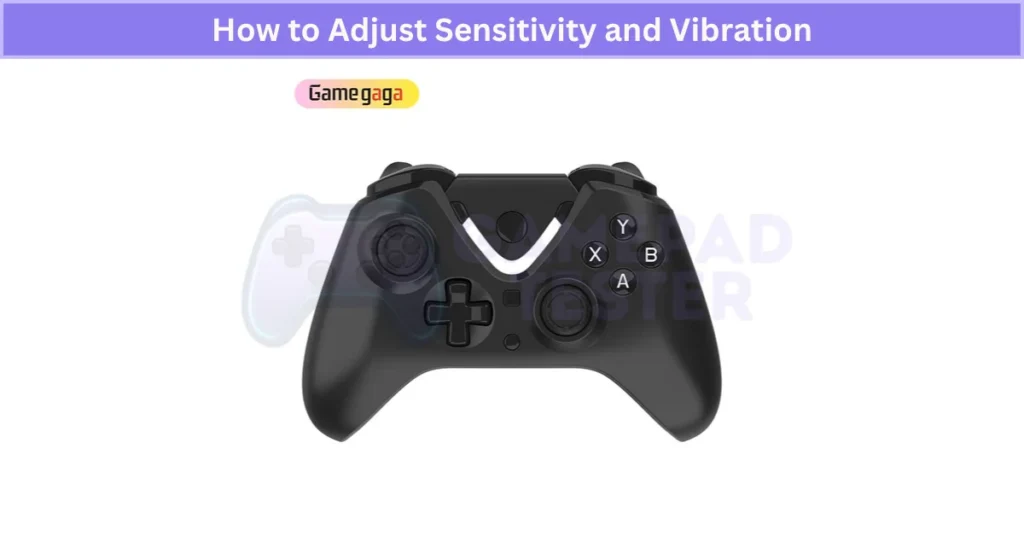
Finding the Right Balance
- For shooters, a higher sensitivity setting allows faster aim movement and quick reactions.
- For racing games, lower sensitivity gives smoother steering.
- Vibration intensity can be raised for action titles or lowered for puzzle games to avoid distraction.
Pro Tip
Proper sensitivity adjustment reduces strain on your thumbs during long sessions, while optimized vibration adds immersion without fatigue. Take a few minutes to experiment—these small tweaks can make gameplay more precise and comfortable.
This quick HD-151X vibration settings and sensitivity guide helps you get the best feel for every game.
How to Use Turbo and Multimedia Functions on the HD-151X Controller
The turbo and multimedia functions on the HD-151X make gaming smoother and media control easier. Here’s how they work and when to use them.
Turbo Function
Turbo mode allows a button to auto-repeat when held, perfect for games needing rapid-fire actions.
- Activate Turbo: Hold the Turbo (T) button and press the button you want to assign (e.g., A or B).
- Deactivate Turbo: Hold Turbo again and press the same button to turn it off.
Pros:
- Great for shooters or fighting games.
- Reduces finger fatigue during long sessions.
Cons:
- Can drain the battery faster.
- May cause slight wear on frequently assigned buttons.
Multimedia Function
This feature turns your controller into a media remote for streaming apps.
- Activate: Hold the Home (house) button until you hear a beep.
- Controls:
- Play/Pause: A button
- Next/Previous Track: D-pad Left/Right
- Volume Up/Down: D-pad Up/Down
- Deactivate: Hold the Home button again until the beep.
Pros:
- Lets you manage music or videos without leaving the game.
Cons:
- Can cause button conflicts during gameplay if left on.
How to Map Buttons on the HD-151X Controller for Custom Controls
Custom button mapping makes gaming easier and more comfortable. It lets you set up controls the way you like or make them more accessible if you have special needs.
Steps to Remap Buttons
- Open the controller settings in your game or use a compatible app for Android/PC.
- Find the button mapping or customization option.
- Select the button you want to change and assign it to a new function.
- Save your configuration and test the controls in-game to make sure everything works as expected.
Why Use Custom Mapping?
It speeds up actions and helps you adapt to games with awkward default layouts. Controllers like the 8BitDo Bluetooth Gamepad also support custom mapping, especially on PC. For players with disabilities or unique preferences, it can make the game much easier to play.
Tip: Create multiple profiles for different games—like one for shooters and another for racing.
This HD-151X button mapping guide makes customizing controls simple, giving you a smoother and more personalized gaming experience.
How to Configure the HD-151X Controller for Emulator Games
Emulator games often need special settings to work well with a wireless controller. The HD-151X makes this easy if you follow the right steps.
Steps for Emulator Setup
- Switch the controller to D-Input mode. Most emulators recognize this mode better than X-Input. You can also check out how Joystick Controllers behave with classic games.
- Open your emulator’s controller settings and start button mapping. Match each function (like A, B, Start, etc.) to your preferred HD-151X buttons.
- Test the controls in a game. Adjust sensitivity for the analog sticks and fine-tune vibration settings if the emulator supports them.
Extra Tip
Many emulators let you enable advanced features like turbo mode and vibration. Setting these up can make retro games feel smoother and more fun.
For best results, check the emulator’s documentation because some have unique controller requirements.
This quick HD-151X emulator game setup guide ensures your controller works perfectly for old-school and modern emulated titles.
How to Enable or Disable Vibration Mode on the HD-151X Controller
Vibration mode makes games feel more real, but it can drain the battery faster. Luckily, the HD-151X lets you turn it on or off anytime.
Steps to Toggle Vibration
- Find the vibration control button on the controller (check your manual if unsure).
- Press and hold this button for about 3 seconds.
- Watch for a quick LED flash or feel a short vibration as confirmation.
When vibration is on, you’ll feel feedback during gameplay. If it’s off, the controller will stay silent even in action scenes.
Why Disable Vibration?
Turning it off during long sessions can save a lot of battery life. It also helps if you prefer a quieter gaming experience or want smoother performance on older devices.
This easy HD-151X vibration setting guide helps you switch modes quickly for better control and longer playtime.
How to Reset the HD-151X Controller Settings to Default
Sometimes the controller acts up—buttons stop working right, or it won’t connect. A quick reset usually fixes this by clearing any corrupted settings.
Steps to Reset the Controller
- Find the reset button on the back of the HD-151X (it’s a small hole).
- Use a paperclip or pin to press and hold the button for about 5 seconds.
- Release the button and turn the controller back on.
- Re-pair it with your device using the usual pairing steps.
Important: Resetting removes all custom button mappings, vibration settings, and profiles. You’ll need to configure everything again.
A full reset often fixes software bugs and improves connectivity when nothing else works. Think of it as a fresh start for your controller.
This simple reset HD-151X controller guide helps restore default settings in seconds.
How to Update Firmware on the HD-151X Controller for Improved Performance
Firmware updates do more than fix bugs—they improve controller performance, add new features, and ensure smooth compatibility with the latest games and OS updates.
Steps to Update Firmware
- Visit the manufacturer’s official support page or download their update tool/app on PC or mobile.
- Connect your HD-151X controller to your PC (or phone) using the USB cable. Make sure the connection is stable.
- Launch the update tool and check for the latest firmware version.
- Click Update and wait until the process completes. Avoid disconnecting the controller during this step.
- Restart the controller after the update.
Tip: Updating your firmware regularly helps prevent connectivity issues, improves input response, and ensures full support for new titles. Skipping updates may cause glitches, especially after major system updates on your device.
This HD-151X firmware update guide keeps your wireless gamepad running at its best for every game.
Common Configuration Problems with the HD-151X Controller and How to Fix Them
Configuration issues can make gameplay frustrating, but most problems with the HD-151X are easy to fix.
Common Issues & Quick Fixes
- Wrong Mode Selected – If your controller isn’t responding, check the mode. Switch between X-Input, D-Input, or Mouse mode depending on your device and game.
- Button Mapping Errors – If controls feel wrong, remap buttons in your game settings or use a configuration app. If nothing works, do a quick reset and set it up again.
- Sensitivity Problems – Joysticks moving too fast or slow? Adjust sensitivity inside the game or controller settings for smoother control.
- Turbo Function Not Working – Make sure turbo is properly activated (Turbo + Button). If it still fails, turn off conflicting features like multimedia mode.
Tip: Update firmware regularly to prevent glitches. For rare problems, check online forums or the official FAQ—they often have fixes shared by other users.
This guide makes solving HD-151X configuration problems simple, so you can get back to gaming fast.
Final Verdict
The HD-151X wireless gamepad is a solid, multi-platform controller that’s easy to set up and packed with useful features like 2.4GHz connectivity, turbo mode, and long battery life. Whether you’re gaming on PC, PS3, Android, or even iOS, this controller delivers smooth performance with minimal lag, especially when using the USB receiver.
To get the best experience, always charge it properly, pick the right mode (X-Input, D-Input, or Mouse), and keep the firmware updated. If issues pop up—like pairing failures or button mapping errors—most can be fixed with a quick reset or remapping. With proper care and setup, the HD-151X remains a reliable and budget-friendly choice for gamers who want versatility and comfort.
How to Fix Panda Gamepad Pro PS4 Controller Issues on Android 12 26 Jul 11:54 PM (2 months ago)
Panda Gamepad Pro helps gamers map buttons for smooth control in mobile games. It’s one of the most popular tools for playing with a PS4 controller on Android.
After the Android 12 update, many users noticed big problems. The app sometimes crashes. Touch controls stop working. And the PS4 controller won’t connect like before. Google made background limits stricter in Android 12. That’s a big reason Panda Gamepad Pro fails to run properly.
The good news? These issues are common, and you can fix them without rooting your phone in most cases.
I’ve seen three main fixes work for gamers: turning off certain accessibility settings, resetting your PS4 controller, and reinstalling Panda Gamepad Pro with the right permissions. These steps usually solve the Panda Gamepad Pro not working on Android 12 issue.
Follow the steps in the next sections, and you’ll fix PS4 controller Android 12 problems fast. If you’ve faced the Panda Gamepad Pro PS4 controller connection issue, these tips should get you back in the game. Need more solutions? Check out this full guide on what to do if your controller is not working.
Solution 1: Disable Accessibility Features to Fix Panda Gamepad Pro
Android 12 added stronger security rules. These rules sometimes block overlay apps like Panda Gamepad Pro when accessibility services are active. That’s why your PS4 controller may not work, or the screen mapping doesn’t respond.
Accessibility controls include tools like Voice Access, Switch Access, and screen magnification. They help people with special needs, but they can conflict with gaming apps—especially if features like the PS4 touchpad not responding properly are also being affected by overlapping input issues.
Here’s how to disable them:
- Open Settings on your phone.
- Go to Accessibility.
- Turn off all features like Voice Access, Switch Access, and Magnification.
- Restart Panda Gamepad Pro.
- Connect your PS4 controller and test the buttons.
Connect your PS4 controller and test the buttons. Users report this method often fixes the Panda Gamepad Pro not working on Android 12 problem. It’s safe because you can turn these settings back on anytime. Disabling them just makes the app run without restrictions—and if you’re also facing no audio output while using a DualShock 4 on PC, there’s a separate fix for that too.
Solution 2: Reset Your PS4 Controller to Fix Connection Issues
Resetting it clears old Bluetooth profiles and cached data. This often fixes the Panda Gamepad Pro PS4 connection problem on Android 12, especially when your DualShock 4 won’t sync to console despite being detected.
Here’s what to do:
- Turn off your PS4 controller. Hold the PS button until the light goes off.
- Look near the L2 button on the back. You’ll see a tiny reset hole.
- Take a paper clip or pin and press the button inside for 5 seconds.
- Turn the controller back on by pressing the PS button.
- Open Panda Gamepad Pro and reconnect the controller.
This reset removes pairing glitches and Bluetooth sync errors. It’s also the official PlayStation troubleshooting method, so it’s safe. Many users say this step alone fixes the PS4 controller not working on Android.

Solution 3: Reinstall Panda Gamepad Pro or Contact Developer Support
If Panda Gamepad Pro still doesn’t work, the app might have corrupted files or cache issues after the Android 12 update. Reinstalling often fixes these problems.
Here’s how to do it:
- Open Settings → Apps → Panda Gamepad Pro.
- Tap Uninstall and confirm.
- Go to Google Play Store or the original source and reinstall the app.
If that doesn’t work, it might be a deeper compatibility issue—especially if you’re experiencing DualShock 4 button failure in addition to mapping errors. Contacting the developer is the next step:
- Open Panda Gamepad Pro on Google Play.
- Scroll to the Developer section.
- Tap Contact Developer (email or official website).
This method is useful because developers often release beta patches before full updates. By reaching out, you can get early fixes for Android 12 problems and ensure you’re using the latest version. Many users have reported success with this approach when standard fixes didn’t work.
Solution 4: Enable USB Debugging Mode for Proper Permissions
Android 12 made background process limits stricter, which affects apps like Panda Gamepad Pro. Enabling USB Debugging gives the app the system-level access it needs to map your PS4 controller correctly. It also prevents permission-related crashes and unexpected behaviors—especially those resembling PS4 controller input drift or ghost movements caused by faulty mapping.
Here’s how to do it:
- Open Settings → About Phone.
- Tap Build Number 7 times to enable Developer Options.
- Go back to Settings → Developer Options.
- Scroll down and turn USB Debugging ON.
Once enabled, restart Panda Gamepad Pro and connect your PS4 controller again. This small change often fixes issues caused by Android 12 permission restrictions and makes sure the app can work without interruptions.
Solution 5: Grant All Required Permissions to Panda Gamepad Pro
Android 12 has stricter privacy rules. After updates, it often removes app permissions. When this happens, Panda Gamepad Pro can’t map controls or use overlays, which causes crashes and connection errors.
Here’s how to fix it:
- Go to Settings → Apps → Panda Gamepad Pro → Permissions.
- Enable these:
- Overlay permission (draw over other apps)
- Accessibility permission
- USB debugging access
- Restart Panda Gamepad Pro.
- Reconnect your PS4 controller and test.
Granting these permissions manually bypasses Android 12 privacy blocks. It ensures the app runs in the background without losing access. Many gamers say this simple step solves most Panda Gamepad Pro overlay and mapping issues.
Solution 6: Update PS4 Controller Firmware and Panda Gamepad Pro App
Outdated firmware or old app versions can break compatibility after Android 12 updates. Controller updates often improve Bluetooth protocols, which helps reduce pairing errors with newer Android systems.
Here’s what to do:
- Update PS4 Controller Firmware:
- Connect your controller to a PS4 console and install the latest system update.
- Or use DS4Windows on a PC to update the controller firmware.
- Update Panda Gamepad Pro App:
- Open Google Play Store.
- Search Panda Gamepad Pro and tap Update.
Keeping both updated ensures smooth connectivity, fewer crashes, and better performance on Android 12. Many users report that this simple step fixes Panda Gamepad Pro compatibility issues quickly.
Why Panda Gamepad Pro PS4 Controller Stops Working on Android 12
Android 12 brought big system changes that affect apps like Panda Gamepad Pro. These changes focus on privacy and security, but they break some gaming tools.
Here’s why problems happen:
- Stricter Privacy Rules: Android 12 resets app permissions after updates, causing Panda Gamepad Pro to lose overlay and background input access.
- Accessibility Restrictions: Google limits how accessibility and overlay services run, which often stops Panda from mapping buttons.
- Bluetooth and USB Permission Changes: Pairing your PS4 controller requires renewed permissions since old cached profiles no longer work—something that often shows up as a PS4 controller not pairing properly, even when Bluetooth appears enabled.
- App Compatibility: Panda Gamepad Pro may not support new Android APIs right away, causing errors until updates arrive.
- Background Execution Limits: Google now restricts background processes, hitting input-mapping tools hard unless you re-enable permissions or turn on USB debugging.
These issues cause PS4 controller problems on Android 12—like lost mapping, app crashes, and failed connections.
Real User Fixes & Community-Backed Solutions
I came across a Reddit thread where a user had issues with Panda Gamepad Pro on a Redmi Note 7 running MIUI 12. The app kept asking to enable floating widgets even though all permissions were granted. The top solution was surprisingly simple: enable “Display over other apps” in the settings. Once that permission was turned on, the app worked perfectly.
Other users reported similar problems, especially on MIUI and Samsung devices, and additional fixes included disabling battery optimization, turning off accessibility controls, and ensuring no other overlay apps (like Game Booster) were active. If those steps fail, some suggested restarting the device or switching to alternative apps like Mantis Gamepad Pro.
I found another Reddit thread where a user struggled to get Panda Gamepad Pro working on Android 12, as button mapping failed even with a new Gamesir X2 controller. The solution shared by the community was to use Mantis Gamepad Pro, which still works on Android 12. Another user mentioned a workaround for Panda: enable its overlay while mapping, then disable it to play, or run the ADB command adb shell settings put global block_untrusted_touches 0 to restore functionality. Many confirmed Mantis as the easiest fix for Android 12 compatibility issues.
Final Verdict
Panda Gamepad Pro still works on Android 12, but stricter security rules and permission changes make setup trickier. Most issues—like failed button mapping or PS4 controller connection errors—come down to missing permissions, accessibility conflicts, or outdated firmware. The good news? You don’t need root to fix it.
Start with simple steps: disable accessibility features, reset your PS4 controller, and grant Panda all required permissions. If that fails, reinstall the app, enable USB debugging, and update both Panda and your controller firmware. In rare cases, switching to an alternative like Mantis Gamepad Pro may be the easiest long-term fix. Follow these tips, and you’ll get your controller working on Android 12 without the hassle.
FAQ’s
How to set up Panda Gamepad Pro?
To activate Panda Gamepad Pro, you need a quick setup on your PC or Mac. First, download the right activation tool: ActivatorWin.zip for Windows or ActivatorMac.zip for Mac. Extract the ZIP file to any folder.
Next, connect your phone to the computer using a USB cable. For Windows, double-click Activate.bat. For Mac, open Activate.command. This process activates Panda Gamepad Pro so you can start mapping buttons without root.
How to Pick the Best iOS Gamepad Controller for Your iPhone 26 Jul 11:46 PM (2 months ago)
I’ve played games on my iPhone for years, and trust me, using a good controller changes everything. Touch screens work, but they miss that real feel. A gamepad gives you physical buttons, joysticks, and triggers. It makes gaming smoother and more fun.
An iOS gamepad is a controller that works with your iPhone. Most connect through Bluetooth or a Lightning port. Some newer ones also use USB-C.
Here’s the thing: not all controllers work the same. The best iOS gamepad controller gives you better grip, less lag, and full control. If you’re looking for the best iOS gaming controllers, focus on models that are MFi certified, since they guarantee smooth gameplay without random disconnects. Plus, if it’s Apple-certified (MFi), you won’t fight random disconnects. That matters a lot in games like Call of Duty or Genshin Impact.
So how do you choose the right controller for iPhone? Look for comfort, good battery life, and features like extra buttons or a headphone jack. If you want expert advice, check out these gamepad controller tips to make sure you pick the perfect one. Stick around—I’ll share the top picks and even a quick comparison to help you decide.
Best iOS Gamepad Controller for 2025
I’ve played iPhone games for years, and let me tell you—touch controls can’t keep up anymore. Mobile gaming now has big titles like Call of Duty Mobile and Genshin Impact. These games feel close to console quality. But without a controller? It’s just not the same.
Adding a good controller makes a huge difference. You get real buttons, joysticks, and triggers. That means better aim, smoother moves, and way more fun. Honestly, it feels like holding a mini console in your hands.
The best controllers for iPhone 2025 take gaming to the next level. Most use Bluetooth, and if they’re Apple-certified (MFi), you’ll avoid lag and random disconnects. That’s a big win for fast-paced games where every second counts.
Below, I’ll share the top gaming controllers for iPhone this year. These are my go-to picks for comfort, solid build, and easy setup. Whether you need the best iPhone controller for casual play or the best game controller for iPhone for competitive gaming, this list has something for everyone. Perfect if you want the best iPhone gaming accessories without wasting time on cheap options.
Razer Kishi V2
The Razer Kishi V2 for iPhone is a favorite for serious gamers. I like it because it connects through the Lightning port, which means zero Bluetooth lag. That matters a lot when you’re playing fast games like Call of Duty Mobile or Genshin Impact. The controls feel responsive, almost like a console.
It has an extendable bridge that fits most iPhones. The design feels solid and comfy for long sessions. There’s also pass-through charging, so you can keep playing without worrying about your battery. But heads-up: charging speed is slower than normal.
Here’s what stands out for me:
 Fits most iPhones with ease
- Direct Lightning connection = zero latency
- Pass-through charging for longer play
 No headphone jack support
- Price is on the higher side
- Slow pass-through charging speed
If you want the best wired iOS game controller for smooth, stable play without Bluetooth drops, this is the one. It’s perfect for gamers who want console-like control on an iPhone without any lag.
Backbone One (2025 Model)
The Backbone One controller for iPhone is one of my top picks for gamers who want a premium feel. It connects directly through the Lightning port, so you get zero lag—perfect for games that need quick moves. The telescoping design snaps onto most iPhones easily, and it feels strong without being bulky.
One thing I like is the headphone jack, which is rare on iOS controllers. There’s also a special PlayStation edition that copies the DualSense layout, making it the best iOS controller for PlayStation Remote Play. Plus, the Backbone app is a big bonus. It lets you record gameplay and quickly access streaming platforms, which is awesome if you share clips online.
Here’s what you should know:
- Compact and easy to carry
- Fits most iPhones securely
- Has a headphone jack
- PlayStation-themed version available
- Costs more than some other options
- Won’t fit thicker phone cases
- Pass-through charging feels slow
If you love streaming or want a stylish controller for smooth gaming, this one works great. I’d say it’s perfect for PlayStation fans who want Remote Play on their iPhone without Bluetooth issues.
8BitDo Pro 2
The 8BitDo Pro 2 iPhone controller is my go-to pick when someone asks for a good budget option. It looks like an old-school controller but packs modern features. If you love retro gaming, this one hits the sweet spot without breaking the bank. You can also check out the 8BitDo Bluetooth Gamepad for other cross-platform options in a similar retro style.
It uses Bluetooth, so setup is quick, but that also means you might notice a little lag compared to wired options. Still, for casual play, it’s solid. You can create multiple custom profiles through 8BitDo software, which is handy if you switch between FPS and retro games often. Motion control support is another plus, especially if you also use a Nintendo Switch.
Here’s what I like and what’s not so great:
- Low price point, great for budget gamers
- Retro design with a comfortable grip
- Custom profiles for different game types
- Bluetooth only, so slight latency
- No on-device button remap
- iPhone support needs the latest firmware update
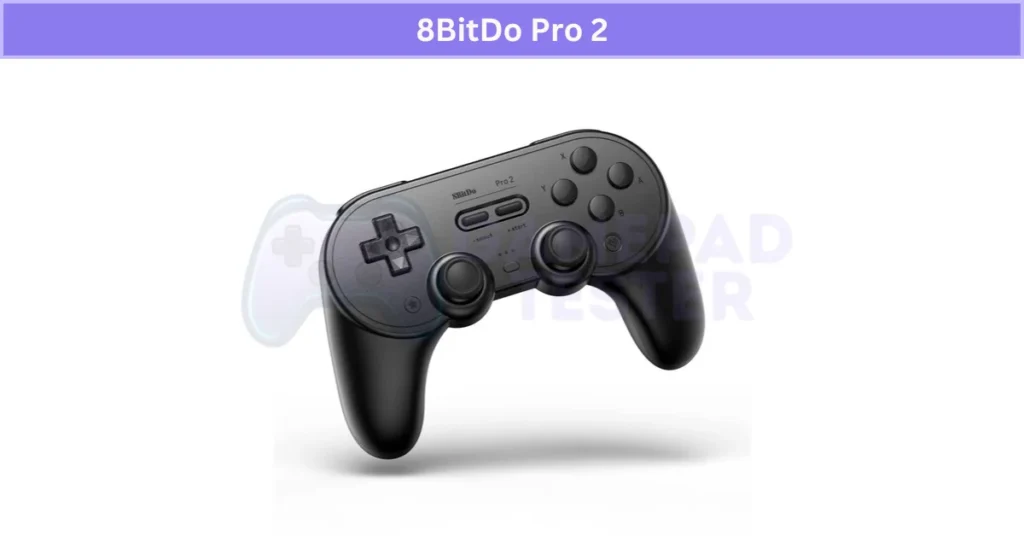
If you want an affordable iOS gaming controller with a nostalgic feel and solid versatility, this is the one. Just remember, Bluetooth means a bit of lag, so if you play competitive shooters, it may not be your best bet.
PowerA MOGA XP5-i Plus Bluetooth Controller
The PowerA MOGA XP5-i Plus iPhone controller is perfect if you like the feel of a full-size gamepad. It feels like holding an Xbox controller, so if you’re used to console gaming, this one feels right at home.
It connects via Bluetooth and comes with a strong, adjustable mount that keeps your iPhone steady. One feature I love is the built-in 3,000mAh power bank. It charges your phone while you play, which is a lifesaver on long trips. The button layout feels familiar, and you also get extra programmable buttons on the back for custom moves in your favorite games.
Here’s the breakdown:
- Super comfortable design for long sessions
- Secure phone mount that won’t slip
- Built-in power bank for charging on the go
- Bulkier than most iPhone controllers
- No wired option for zero-lag play
If you want the best iOS controller with power bank and comfort is your top priority, this is a great choice. It’s not the most portable option, but for gamers who like marathon sessions without worrying about battery, it’s worth it. If you’re open to exploring alternate wireless options, the 2.4G Wireless Controller is a lightweight choice with solid connectivity.
Rotor Riot
The Rotor Riot wired iPhone controller is a solid choice if you hate Bluetooth lag. It plugs straight into your iPhone with a built-in Lightning cable, so setup is instant and there’s zero latency. That’s a big deal when you’re playing competitive games where every move counts. Wired also means no signal drops, making it super reliable for long sessions.
This controller comes with a removable mount and an adjustable clamp to keep your phone secure. The design feels like an Xbox controller, with large grips for comfort and even extra fire buttons on the joysticks for quick actions. Pass-through charging is supported, so you can keep playing while your iPhone charges.
Here’s the quick rundown:
- Built-in Lightning cable = no lag
- Pass-through charging support
- Strong and secure phone mount
- Bulkier than wireless controllers
- Mount can feel top-heavy at times
- Cable isn’t detachable
If you want the best wired controller for iOS gaming without worrying about Bluetooth issues, Rotor Riot is a smart pick. It’s perfect for gamers who want a simple, stable setup with zero interference.
SteelSeries Nimbus+
The SteelSeries Nimbus Plus iPhone controller is one of my favorites for battery life and Apple compatibility. If you play on more than just your iPhone, this is a smart pick. It works with iPhone, iPad, Mac, and even Apple TV. For Apple Arcade fans, it’s almost a no-brainer.
The biggest win here is the 50-hour battery life. That’s huge. You can game for days without recharging. It’s also MFi certified, which means you won’t run into weird connection problems. The design feels light and comfy, with a familiar ABXY button layout.
Here’s the quick breakdown:
- 50-hour battery life for long play
- Full MFi certification for Apple devices
- Comfortable and lightweight build
- No rumble support
- Mount feels a bit weak for heavy phones
If you want the best controller for Apple ecosystem that works across all your Apple devices and doesn’t need constant charging, Nimbus+ is hard to beat. Plus, its long battery life makes it one of the most future-proof controllers for iOS gaming.
Xbox Elite Wireless Controller Series 2 Core
The Xbox Elite Series 2 Core is a top pick if you want a high-end controller that works on both Xbox and iOS. It’s built for serious gamers who want pro-level control and cross-platform play.
What makes it special? First, it’s fully compatible with Xbox consoles, iPhone, iPad, Mac, and Apple TV. If you use Xbox Game Pass or cloud gaming on iOS, this controller is a perfect match. It has adjustable joystick tension and swappable D-pads, so you can fine-tune how it feels. The rubberized grips make long gaming sessions way more comfortable, and the built-in rechargeable battery means no wasting money on disposables.
Here’s the breakdown:
- Amazing ergonomics with premium feel
- Adjustable joysticks and interchangeable D-pad
- Works across Xbox and all Apple devices
- Very expensive compared to other options
- Doesn’t include a phone mount
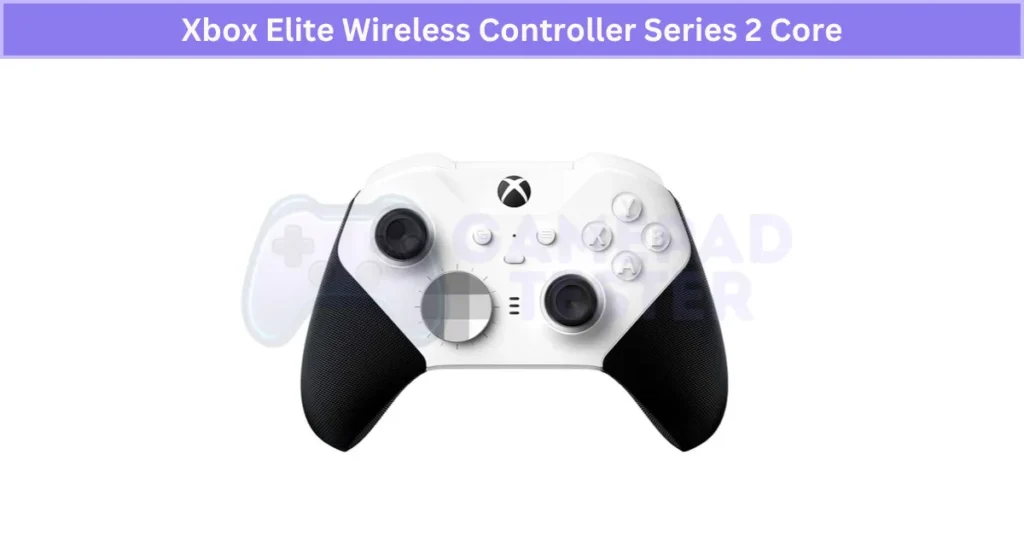
If you’re a hardcore gamer who plays on Xbox and iOS, this is the best premium game controller for iPhone you can get. It’s pricey, but the level of customization and comfort makes it worth it. Plus, if you’re into Xbox Game Pass streaming on iPhone, this one is a no-brainer.
PlayStation DualSense Wireless Controller
The PlayStation DualSense controller for iPhone is all about style and immersive gameplay. If you love the PS5 design, this is the sleekest option out there. The two-tone look feels futuristic, and you can pick from multiple colors to match your vibe.
What makes it stand out? The adaptive triggers and haptic feedback bring console-level immersion to iOS gaming. You actually feel tension in the triggers and subtle vibrations that match the game’s action. Add a built-in mic and textured grips, and it’s perfect for long sessions without hand fatigue.
Here’s the quick breakdown:
- Beautiful, modern design
- Haptic feedback for an immersive feel
- Built-in microphone for quick chat
- No built-in iPhone mount
- Battery life is shorter than some rivals
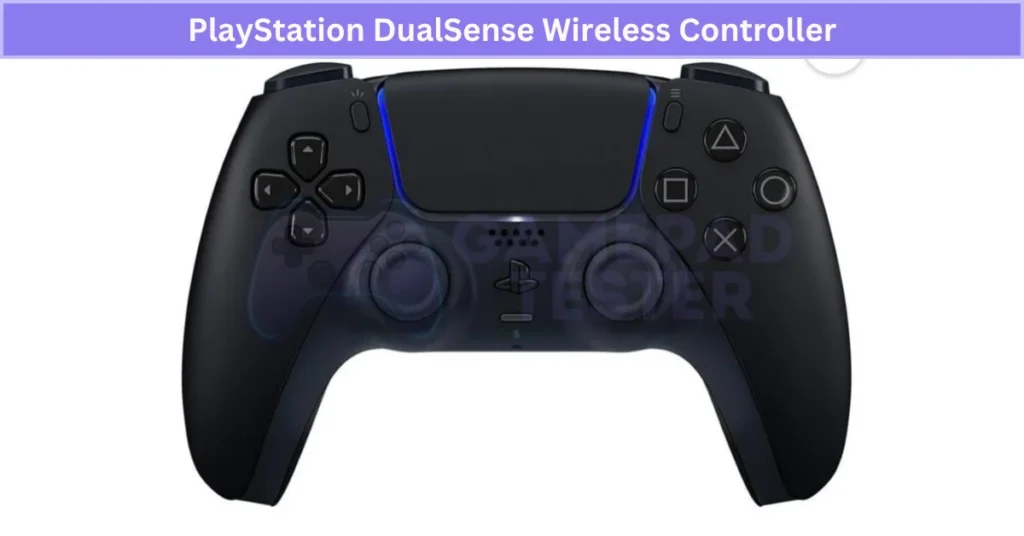
If you want the best iOS controller with haptic feedback, DualSense is a solid choice. It brings the full PlayStation vibe to mobile gaming and gives you console-like realism that most controllers can’t match. Perfect for anyone who loves PlayStation but wants to game on iPhone too.
GameSir G8 Galileo
The GameSir G8 Galileo iOS controller is built for gamers who want high-end features in a mobile gamepad. Its biggest strength? Hall Effect sticks, which give you a drift-free experience. That means no annoying stick drift over time, and it makes the controller last much longer than standard analog sticks.
You also get dual connectivity. Plug it in with USB-C for ultra-low latency or switch to Bluetooth when you want wireless freedom. I like the ergonomic design—it feels solid in hand, and the triggers respond fast for precise control in shooters or racing games. It works with iOS and other platforms, so you can use it for more than just iPhone gaming.
Here’s the quick breakdown:
- Hall Effect sticks = no drift and longer life
- Wired and wireless modes for flexibility
- Comfortable, pro-level build
- Bulkier than most portable options
- Firmware updates may be needed for full iOS support
If you want the best Hall Effect stick controller for iPhone with wired and wireless options, this one’s a smart buy. It’s a great long-term investment for serious gamers who want durability, precision, and versatility.
Backbone One PlayStation Edition (USB-C Version)
The Backbone One PlayStation Edition for iPhone is a dream pick for PlayStation fans. If you want the closest thing to a portable PS5 experience, this controller nails it. The design copies the DualSense style, so everything feels familiar right away.
It connects through USB-C, giving you zero-lag performance—no Bluetooth delay here. Pass-through charging keeps your phone powered during long sessions, which is a must for Remote Play. It’s optimized for streaming services like PS Remote Play, Xbox Cloud Gaming, and even GeForce Now, making it a solid future-proof choice for cross-platform players.
Here’s what stands out:
- Official PlayStation branding and button layout
- USB-C connection for ultra-low latency
- Comfortable grip for handheld gaming
- Higher price than most options
- No headphone jack
If you want the best iOS controller for Remote Play, this is it. The PlayStation layout mobile gamepad delivers console-level comfort, quick response, and easy streaming. For serious PlayStation fans, it’s worth every dollar.
Comparison Table of the Best iOS Game Controllers
Here’s a quick look at the iOS game controller comparison. This table highlights price, connection type, key features, and who each controller is best for. If you’re short on time, use this as a quick guide to find the best iPhone gaming controller for your setup without reading everything in detail.
| Controller Name | Price Range | Connection | Key Feature | Battery Life | Best For |
|---|---|---|---|---|---|
| Razer Kishi V2 | $99–$119 | Wired (Lightning) | Zero-latency wired gaming | N/A | Gamers who hate Bluetooth lag |
| Backbone One (2025 Model) | $99–$100 | Wired (Lightning) | Headphone jack + Backbone app | N/A | Streamers and PS Remote Play fans |
| Backbone One PS Edition (USB-C) | $99–$100 | Wired (USB-C) | PlayStation layout, low latency | N/A | PlayStation fans using Remote Play |
| GameSir G8 Galileo | $70–$90 | Wired + Wireless | Hall Effect sticks (no drift) | 10–12 hrs | Pro gamers needing durability |
| 8BitDo Pro 2 | $50 | Wireless (Bluetooth) | Retro design + custom profiles | 20 hrs | Budget gamers and retro lovers |
| SteelSeries Nimbus+ | $70 | Wireless (Bluetooth) | MFi certified + 50 hr battery | 50 hrs | Apple Arcade + multi-device gamers |
| PowerA MOGA XP5-i Plus | $80 | Wireless (Bluetooth) | Built-in 3,000mAh power bank | 12 hrs | Long sessions and travel gaming |
| Rotor Riot | $23–$25 | Wired (Lightning) | Pass-through charging | N/A | Budget wired option with no lag |
| Xbox Elite Series 2 Core | $110–$130 | Wireless (Bluetooth) | Customizable joysticks & grips | 40 hrs | Premium cross-platform gamers |
| PlayStation DualSense | $69–$70 | Wireless (Bluetooth) | Haptic feedback + adaptive triggers | 12 hrs | PS fans wanting console-like immersion |
This quick comparison of gamepads for iOS makes it easy to pick based on what matters most: latency, comfort, features, or price. From budget-friendly options to premium builds, the chart highlights the best iPhone game controllers that deliver real console-like gameplay.
Types of iPhone Gaming Controllers Explained
Not all iPhone controller types are the same. The one you pick changes how you play. Some are built for quick travel gaming, while others feel like a real console controller. Choosing the best type of game controller for iPhone depends on what matters most: portability, comfort, or low latency.
There are two main distinctions you should know—Clip-On vs Standalone controllers and Wired vs Wireless iOS controllers. Each has its pros and cons. Clip-On models are small and great for gaming on the move, while Standalone controllers give you that full-console experience. Wired connections kill lag, but wireless offers more freedom.
If you want portability, go Clip-On. If you want zero delay and a stable connection, go wired. Your choice really depends on whether you value travel-friendly designs, multi-device use, or competitive play with no lag. Many of these are iPhone supported controllers, so you don’t have to worry about compatibility with newer iOS updates.
Clip-On vs Standalone iPhone Controllers: Which to Choose?
Clip-On controllers attach straight to your iPhone. They turn your phone into a mini handheld console. These are great if you like gaming on the go or playing cloud games like Xbox Game Pass. They’re light, compact, and easy to carry. But they usually fit only certain phone sizes, so check before buying.
Standalone controllers are the opposite. They don’t clip on—they’re separate, like Xbox or PS controllers. These give you big grips, full-size buttons, and better comfort for long sessions. They feel more like console gaming. If you prefer a more classic arcade experience, Joystick Controllers offer an entirely different feel worth exploring. But they’re less portable and need a stand or something to hold your phone.
So which should you choose? If you care about portable game controllers for iPhone, go Clip-On. If you want the comfort of a standalone iOS gaming controller, pick that instead.
How to Connect a Game Controller to iPhone
Connecting a controller to your iPhone is pretty simple. Apple supports many options, including Bluetooth controllers and wired controllers for iPhone. If your device runs iOS 14 or later, you’re good to go. Always check Apple’s official list of MFi-certified controllers for the smoothest experience—this avoids random disconnects and lag.
You can pair wirelessly through Bluetooth or plug in with USB-C or Lightning for zero delay. Below, I’ll show you both methods so you can start gaming right away.
How to Pair a Controller to iPhone Using Bluetooth
Here’s the easiest way to pair a Bluetooth controller with iPhone:
- Open Settings → Bluetooth: On your iPhone.
- Turn On Controller: Put it in pairing mode.
- For DualSense: Hold PS + Share buttons.
- For Xbox: Press the Pair button on top.
- For Backbone or Razer: Check the pairing switch.
- Connect: Find the controller under Other Devices and tap to connect.
Once paired, your controller works with supported iOS games. Stay close to your phone to reduce lag—Bluetooth isn’t as fast as wired. Alternatively, if you don’t have a physical controller, try using the iPhone with VGamepad App to turn your phone into a virtual gamepad. Updating to the latest iOS helps with newer controllers like DualSense and Xbox Series X pads.
How to Connect a Controller to iPhone with USB-C or Lightning
If you want zero-latency gameplay, wired is the way to go. Use the correct cable: USB-C for the newest iPhones or Lightning for older models. Plug the controller directly into your iPhone, and you’re ready—no pairing needed.
This is ideal for competitive games where lag can ruin the experience. Controllers like the Razer Kishi V2 or Backbone One work this way. Bonus: Most wired models support pass-through charging, so your phone won’t die mid-game.
What to Look for in an iOS Gamepad Controller
Check Compatibility Before Buying an iOS Game Controller
Compatibility is the first thing to check before buying an iPhone controller. Not every controller works with every iPhone or iOS version. Always make sure the controller supports your device and the games you plan to play.
Look for MFi certified controllers for iPhone. Apple’s “Made for iPhone” certification ensures smooth pairing and low-latency performance. The Ipega Bluetooth Controller is a great example of a third-party controller that balances compatibility with affordability. If you want extra value, pick a model that works on iPad, Mac, or Apple TV for multi-device gaming.
Apple even keeps an official list of compatible controllers for Apple devices, so check that before hitting “Buy.” It’s the safest way to avoid surprises later.
Why Design Matters When Choosing an iOS Game Controller
Design can make or break your gaming experience. A controller should feel good in your hands, or you’ll end up tired after just a few rounds.
Look for an ergonomic iPhone gaming controller that matches your hand size and grip style. Buttons and joysticks should sit where your fingers naturally land, so you don’t stretch or strain. Weight also matters—a balanced controller feels better for long play sessions. Models with textured grips or anti-slip coatings add extra comfort and keep your hands steady during intense games.
If you travel a lot, consider a portable gamepad for iOS with a foldable or adjustable design. It saves space without sacrificing performance.
Battery Life: Why It Matters for iOS Game Controllers
Battery life decides how long you can play without interruptions. A controller with long battery life means fewer charging breaks and more gaming. For heavy players, this matters a lot.
Look for models that offer pass-through charging so you can power your iPhone while gaming. Fast-charging support is another plus when you’re in a hurry. Controllers with clear battery indicators or alerts help you avoid sudden disconnections mid-match. Most premium options use lithium-polymer batteries, which last longer and handle more charge cycles than older types.
Before you buy, always check the estimated battery hours. It’s the easiest way to avoid frustration during long gaming sessions.
Why MFi Certification Matters for iPhone Controllers
MFi stands for Made for iPhone, iPad, and iPod. When you pick an MFi certified iPhone controller, you’re getting Apple-approved hardware that guarantees smooth compatibility and quality. These controllers pair without issues, reduce lag, and work across all supported games.
Apple updates MFi guidelines often, so certified controllers usually stay compatible with future iOS versions. That makes them the safest long-term choice if you want a reliable gaming experience.
Controllers with Audio Jack for iPhone Gamers
An iPhone controller with a headphone jack is a game changer, especially since most iPhones don’t have one anymore. It’s perfect for private gaming and avoids Bluetooth audio lag.
Wired audio through the controller gives better sound sync, which matters in fast-action games like shooters. Not all controllers include this feature, so check before buying. The HD-151X Wireless Gamepad Controller is one model that offers audio support with minimal lag.
LED Lights and Indicators on iOS Game Controllers
LED lights gamepad for iPhone isn’t just about looks. These lights show pairing status, battery level, and even game modes. Some premium controllers let you customize colors for a personal touch.
It’s a small detail, but for gamers who like style, LED indicators make a big difference.
Vibration and Haptic Feedback for Immersive Gaming
An iOS controller with vibration adds realism to every game. Basic models just buzz, but advanced ones—like the DualSense—offer haptic feedback and adaptive triggers. These simulate textures and tension, making mobile gaming feel closer to console play.
If you want the most immersive experience, choose a controller with strong haptics, not just standard vibration.
Real User Fixes & Community-Backed Solutions
I found a Reddit thread where someone asked for the best controller for an iPhone 15 Plus that could fit with a case and a popsocket attached. The community agreed this is a tough requirement because most popular controllers, like the Backbone One or Razer Kishi V2, don’t support bulky setups. Some suggested alternatives like using a MagSafe popsocket you can remove while gaming, or opting for a clip-on solution with Bluetooth controllers such as 8BitDo Pro 2 or Nimbus, which don’t require the phone to slide in.
You can also try the Gamepad for Xiaomi if you want a compact controller that works well with Android and iOS. A few also mentioned Gamesir options like the G8 Galileo or X4 Aileron, but overall, if the popsocket stays on, your only choices are third-party clip mounts and Bluetooth controllers.
Final Verdict
If you love mobile gaming, the right iOS controller makes all the difference. A good gamepad brings real buttons, zero-lag performance, and a console-like feel that touch controls can’t match. The best choice depends on your needs—go for wired options like Razer Kishi or Backbone for competitive play, or pick wireless controllers like SteelSeries Nimbus+ for comfort and flexibility.
Before buying, check for MFi certification, compatibility, and features like pass-through charging or haptic feedback. Whether you want portability, pro-level precision, or multi-device use, there’s a controller that fits your style. Invest in a quality gamepad now, and your iPhone gaming will feel next-level.
FAQ’s
What is the best mobile game controller for iPhone?
Here are my top picks if you’re looking for the best mobile game controller for iPhone this year:
GameSir G8 Galileo – Best for pro gamers who want Hall Effect sticks and zero drift
Razer Kishi V3 Pro – Best wired choice with ultra-low latency
Scuf Nomad – Most customizable option with premium feel
Backbone One – Best for PlayStation Remote Play and cloud streaming
Asus ROG Tessen – Most advanced folding design for portability
SteelSeries Stratus+ – Best for long battery life and multi-device gaming
GameSir X3 – Great for cooling during long sessions
What controller can I use for iOS?
iOS works with wireless Xbox controllers, PlayStation controllers, and other Bluetooth game controllers, supporting devices like iPhone, iPad, Mac, Apple TV, and Apple Vision Pro.
What is the best alternative to backbone?
Check out Razer Kishi, a universal controller that works on both Android and iOS with low-latency wired play—perfect for game streaming. Another solid option is hem by Fab, known for its sleek design and wide mobile phone support.
Can I connect a gamepad to my iPhone?
Yes, you can connect a gamepad to iPhone using Bluetooth connection or a wired link through Lightning or USB-C connectors. Some compatible game controllers even let you customize buttons and add a second controller for multiplayer.
How to play iOS games with a controller?
You can play iOS games with a controller by pairing it via Bluetooth in your iPhone settings. Just note, not all games offer game support for controllers, so check compatibility first.
Can I use a PS4 controller on my iPhone?
Yes, you can use a PS4 controller on iPhone by pairing the DualShock 4 through Bluetooth in iOS settings, as long as your device runs iOS 13 or later.
DualShock 4 Buttons Not Working or Sticking? Here’s How to Fix 26 Jul 11:15 PM (2 months ago)
Ever had your DualShock 4 Buttons Not Working or feel sticky? Yeah, it happens a lot. Most times, it’s not a big deal. These buttons get stuck because of dirt, dust, or even old snack crumbs. Sometimes the conductive pads wear out too, which makes the buttons unresponsive.
The good news? You can usually fix unresponsive PS4 controller buttons with a quick clean or by checking inside for debris. A little care goes a long way. Clean the surface, check for dirt inside, and replace worn pads if needed. Do it early, and your controller will last much longer.
If your controller is not working at all, check out this detailed guide on how to fix a controller that’s not working.
Quick Fix Checklist For DualShock 4 Buttons Not Working
Sometimes, a simple check can save you from taking the controller apart. These quick PS4 controller fixes often solve minor button issues fast.
- Restart Devices: Reboot your PS4 and DualShock 4 controller.
- Inspect Buttons: Check for any loose or damaged buttons.
- Clean the Surface: Wipe the controller with a clean, dry cloth.
- Charge the Battery: Make sure the controller is fully charged.
- Test Buttons: After cleaning, verify that all buttons respond correctly.
Do these first. Most times, this checklist before cleaning DualShock 4 buttons works without any deep teardown.
Common Reasons DS4 Buttons Aren’t Working Or Sticking With Solutions
Dust and Dirt Causing Stuck or Unresponsive Buttons
Dirt in PS4 controller buttons is one of the most common reasons they stop working. Tiny dust particles slide into the gaps and make the buttons stick. If you game in a dusty room or leave your controller out, this happens even faster.
Here’s how I clean PS4 controller buttons safely. I start with a soft brush to remove loose dirt. Then I use compressed air to blow out anything hiding in the grooves. For stubborn grime, I dip a cotton swab in a little rubbing alcohol and wipe gently around the edges. Don’t push too hard—you could damage the pad.
I’ve noticed that cleaning after long gaming sessions keeps my controller feeling new and prevents sticky DualShock 4 buttons from coming back.
Fixing Button Issues Caused by Spilled Liquid
Spilled liquid on a PS4 controller can turn a smooth button press into a sticky mess. Drinks like soda or coffee seep inside and cause more than just stickiness—they can lead to rust, short circuits, or even dead circuits if ignored.
Here’s how I fix sticky DualShock 4 buttons after a spill. First, I power off the controller right away and take it apart carefully. I blot out any visible moisture using a soft, dry cloth. Then, I clean the affected spots with isopropyl alcohol instead of water because it dries fast and helps prevent corrosion. After that, I leave all the parts to air-dry completely—at least 24 hours—before putting it back together.
Water damage PS4 controller repair takes patience, but doing this early often saves the buttons and avoids bigger problems later.
Common Mistakes to Avoid When Cleaning a PS4 Controller
Cleaning sounds easy, but doing it wrong can ruin your controller. I’ve seen people rush and end up with bigger problems. Here are mistakes I always avoid.
First, never leave any moisture inside. If you don’t dry it completely, the controller can short circuit. Second, don’t press too hard while scrubbing. That pressure can damage the buttons or the circuit under them. Third, avoid leaving water in tiny grooves—it causes sticky spots and future malfunctions.
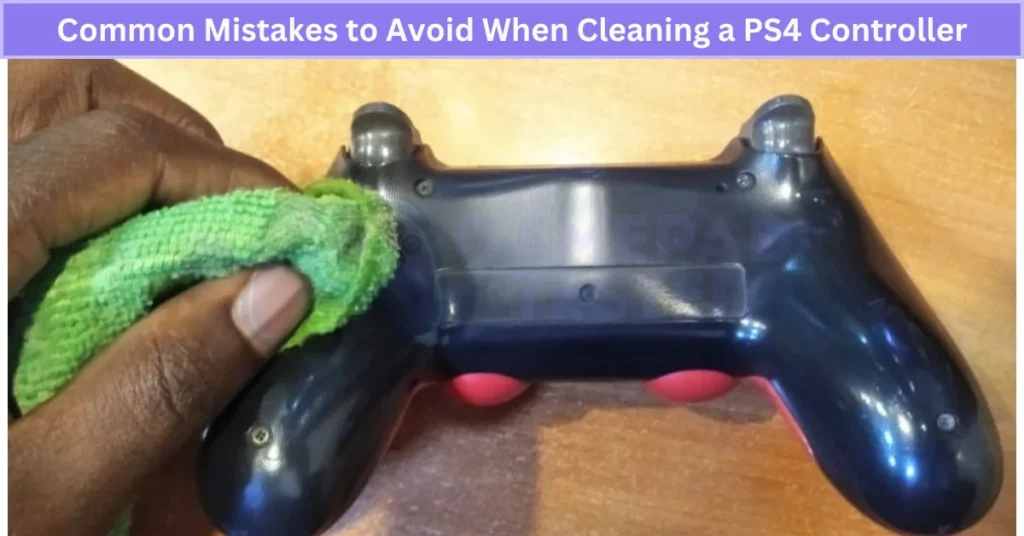
I also use a lint-free cloth instead of tissues because fibers can stick inside and block movement. Take your time, clean PS4 controller safely, and stay gentle. Rushing can also mess up internal wiring, causing unexpected issues like no sound on PC when using DualShock 4.
Short Circuit Issues Causing Button Malfunctions
A short circuit in a PS4 controller can stop buttons from working or make them act weird. It happens when electricity flows where it shouldn’t, often due to moisture or broken wiring. I’ve seen this after spills or when someone tried a DIY fix and damaged the board.
Moisture damage in a DualShock 4 is the biggest trigger. When water seeps in, it creates paths that fry circuits. Damaged wires inside can do the same. The bad part? A short circuit can ruin the entire board and mess up button response for good.
Here’s my advice: keep the controller dry and never use it when wet. If you suspect a short, don’t try random fixes—you could make it worse. In most cases, get a pro to handle it. Fix PS4 controller button malfunctions early, or you’ll end up buying a new one.
Fixing Major Software Issues with a Factory Reset
Sometimes button problems aren’t from dirt—they come from software glitches. When firmware gets corrupted after an update, your controller might stop responding or fail to pair. A factory reset PS4 controller clears that bad data and restores default settings. This fix usually solves stubborn software issues better than anything else.
Here’s what I do:
Soft Reset (Re-pair the Controller)
- Put the controller in pairing mode by holding Share + PS buttons until the light bar flashes.
- Connect it to the PS4 using a USB cable and re-register the device.
- In PS4 Settings → Devices → Bluetooth Devices, forget the old connection and pair it again.
Hard Reset DualShock 4
- Turn off the PS4 completely.
- Flip the controller and use a paperclip to press the tiny reset button inside the hole for 5 seconds.
- Reconnect the controller via USB and test the buttons.
Doing this clears corrupt pairing info and resets the controller firmware. If you’ve tried everything else and buttons still fail—especially if your PS4 DualShock 4 is not connecting at all—this step often brings it back to life. I’ve done it a few times, and it works almost every time.
Fixing Stuck Buttons Caused by Physical Damage
Physical damage can make PS4 controller buttons stick or stop working completely. Drops or heavy pressure often crack the plastic or warp the button base, which messes with smooth movement.
Here’s what I do first: check each button for cracks or strange resistance. If a button feels stiff or makes a crunching sound, that usually means something inside broke. I also inspect both thumbsticks to make sure they move smoothly and aren’t grinding.
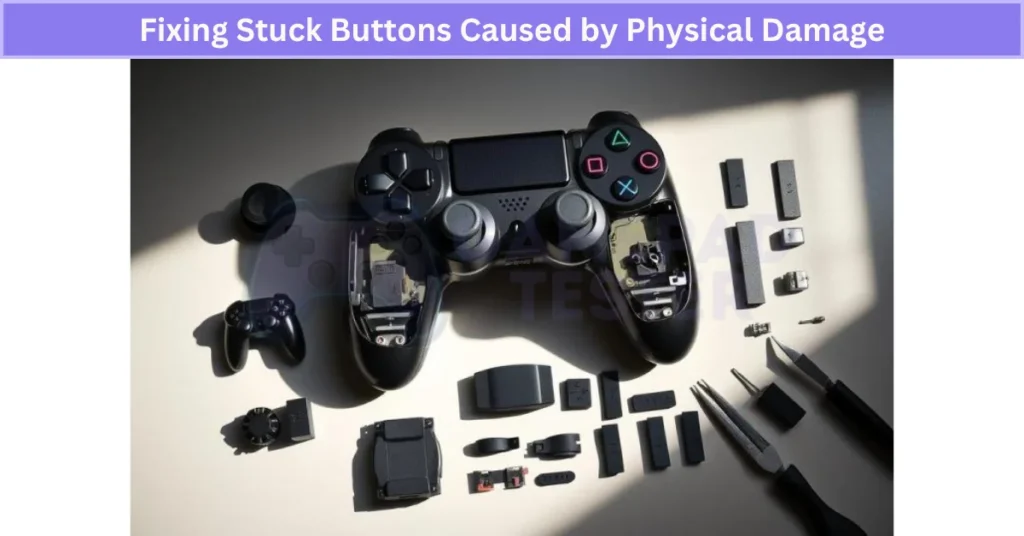
If you find broken plastic or worn parts, cleaning won’t help. The only real fix is to replace the damaged buttons or thumbstick components. That’s the safest way to repair PS4 controller thumbsticks and fix broken DualShock 4 buttons for good.
Dead Battery Causing Button Issues
A dead or weak battery in a DualShock 4 can make buttons stop responding or feel sluggish. It’s not always obvious—sometimes the battery shows a full charge but can’t deliver steady power. If your DualShock 4 battery does not hold a charge, it’s a strong reason why button response becomes inconsistent.
Here’s how I check it. I plug the controller into the PS4 with a USB cable. If the buttons work fine when wired, the battery is likely the problem. Over time, these batteries degrade and lose capacity even if they look charged.
If the issue keeps coming back, replace the PS4 controller battery. It’s a simple fix that restores smooth button performance and keeps the controller running like new.
Internal Debris Causing Stuck or Unresponsive Buttons
If cleaning the outside doesn’t fix it, the problem might be inside. Internal debris in DualShock 4 buttons is common after spills or long gaming sessions. Sugary residue from drinks or trapped dirt can jam the button mechanism completely.
Here’s how I handle it. I carefully open the controller using a repair guide. Then, I remove the affected buttons and clean them with a cotton swab dipped in isopropyl alcohol instead of water. It dries faster and helps prevent corrosion on the circuits. For heavy gunk, mild soap and water work—but only for the plastic parts.
After everything dries, I reassemble the controller. If the buttons still stick—especially on right-side controls—you might want to check related hardware issues like Kunai 3 right controller problems. Sometimes, part replacement is the only long-term fix.
Sticky Residue from Snacks or Drinks
Snacks and drinks damage controller buttons more than most people think. Sugary residue from soda or oily chips seeps into the gaps and hardens over time, making buttons stick. It also attracts dust, which makes the problem even worse later—especially around sensitive areas like the PS4 controller touchpad not working due to grime buildup.
Here’s how I clean sticky PS4 controller buttons. First, I wipe the surface with a soft cloth slightly dampened with water. If the gunk is stubborn, I switch to isopropyl alcohol and a cotton swab—it dries fast and is safe for electronics.
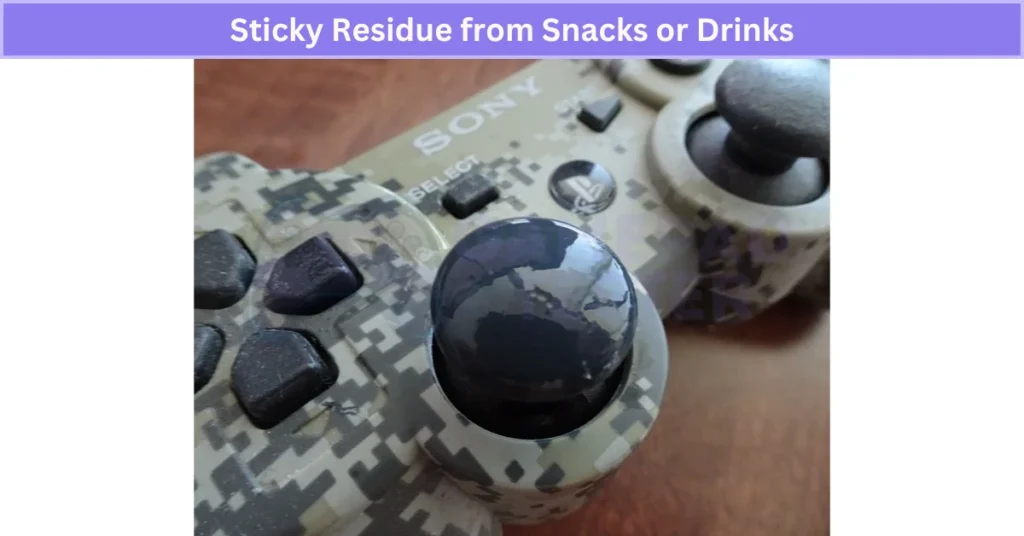
When the mess goes deep inside, I open the controller for a full clean. That’s the only way to fix DualShock 4 sticky residue if surface cleaning doesn’t work. Cleaning right away saves the buttons from long-term damage.
Overuse or Heavy Gaming Sessions
Long gaming sessions take a toll on your PS4 controller. Continuous pressing wears out the conductive pads and weakens the button springs over time. That’s why older controllers often show delayed or no response—or start showing signs of PS4 controller drift where the analog stick moves on its own.
Here’s how I handle it. First, I test each button for feedback. If a button feels soft or doesn’t respond, the pads are probably worn out. The fix? Replace the conductive pads or the full button set. I recommend using high-quality silicone pads instead of cheap replicas—they last longer and give better feedback.
If you’re not comfortable opening the controller, consider professional DualShock 4 button repair after heavy use. It’s the safest way to keep your controller working like new.3
When to Replace Parts Instead of Repairing
Not every controller problem can be fixed with cleaning or a quick reset. Some issues go beyond simple DIY fixes and need part replacement.
Here are common cases where I replace parts:
- Broken or cracked PS4 controller buttons that stick or don’t press right.
- Worn-out conductive pads after months of heavy use.
- Water damage causing corrosion on the internal board.
When this happens, I always go for original Sony parts or high-quality aftermarket options. Cheap replicas might save money now, but they usually wear out faster and can mess up responsiveness.
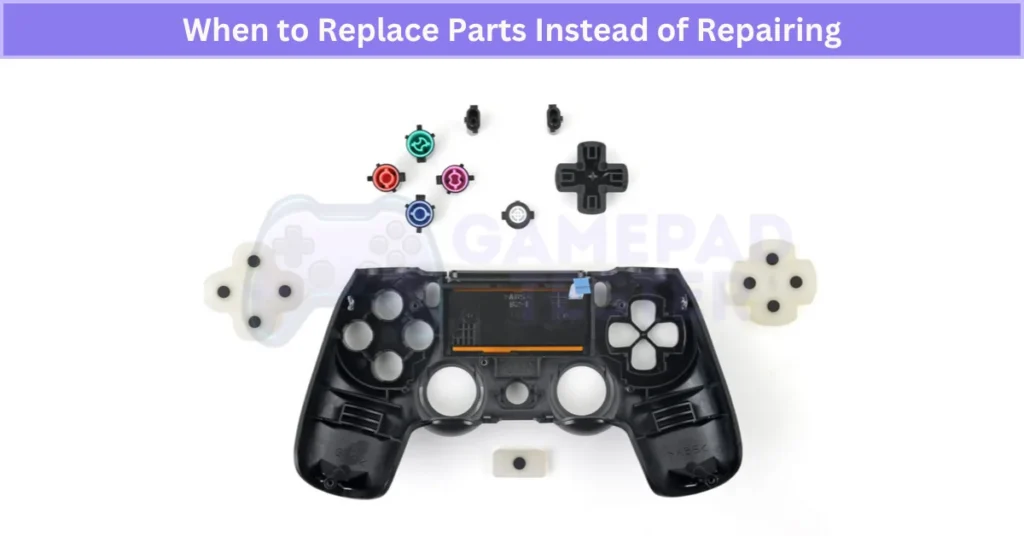
If you’re unsure about opening the controller, professional repair is the safest option. Sometimes the cost of fixing severe damage is close to buying a new controller, so weigh the options before starting.
Real User Fixes & Community-Backed Solutions
I found a Reddit thread where a PS4 user complained about a stiff X button, and the community suggested simple fixes. The top advice was to clean around the button with a cotton swab dipped in rubbing alcohol, as dirt or oil buildup is often the cause. Others recommended carefully disassembling the controller for a deeper clean, washing the button parts with mild soap and water, and ensuring everything is completely dry before reassembling. Some users even had success by lightly brushing around the button or blowing air to remove debris—all quick solutions before considering a replacement.
I found a hilarious yet surprisingly effective fix in a Reddit thread where a user’s PS4 controller only worked in the menu but not in games. After trying everything from resetting to reconnecting, the community’s top advice was… smack the controller. Yes, users reported that giving the controller a few firm taps on a chair, desk, or even their knee instantly fixed the issue.
While it sounds like a joke, dozens of gamers confirmed it works because the impact can dislodge dust or debris on the sensor causing the input problem. This can be especially useful when your DualShock 4 controller does not turn on, and nothing else seems to work. So, before you panic or replace your controller, a gentle (but firm) tap might be all it needs.
Quora
I checked a Quora thread where someone asked how to fix sticky PS4 controller buttons, and the most recommended solution was cleaning them with isopropyl alcohol and cotton swabs. Many users suggested turning off the controller, lightly applying alcohol around the buttons, and pressing them repeatedly so the liquid can break down grime or residue. Others mentioned using a soft toothbrush or even compressed air to clear out debris without opening the controller. If the issue is severe, some advised disassembling the controller for a deep clean, but only if you’re confident since it can void the warranty. Simple cleaning usually solves the problem without needing a replacement.
Final Verdict
Sticky or unresponsive DualShock 4 buttons are usually caused by dirt, residue, or worn-out parts—not a major hardware failure. A quick surface clean with rubbing alcohol or a soft brush often fixes minor issues, while deeper problems like spills or internal debris might require opening the controller for a full clean.
If cleaning and resetting don’t work, the problem is likely physical damage or worn pads, which means replacing parts is your best bet. Start simple, stay gentle, and only move to repairs when needed. With the right care, your PS4 controller can feel brand new again.
FAQ’s
How to fix unresponsive buttons on PS4 controller?
If your PS4 controller powers on the console but the buttons don’t work, start by resetting it. Use a small pin to press the reset button on the back for a few seconds. Next, re-pair the controller using a USB cable for a proper connection. After that, check for firmware updates to make sure the controller is compatible with the latest system. If none of this works, try a different cable or port. These steps usually fix unresponsive buttons without replacing the controller.
How to fix PS4 controller buttons getting stuck?
Unplug your controller before cleaning. Dip a cotton swab in a little rubbing alcohol and gently clean around the stuck button. This removes dirt and grime from the crevices. Let it dry fully before using again.
What are the signs of a faulty PS4 controller?
A bad controller often shows issues like unresponsive buttons, weak connectivity, or fast battery drain. Start by checking the battery level, then inspect the USB cable and port. If everything looks fine, Bluetooth interference could be the reason.
How to fix PS4 controller stick stuck?
If your PS4 analog stick feels stuck, apply a little graphite as a dry lubricant. You can use a pencil to gently rub graphite around the base of the stick and contact points. It also helps when PS4 triggers start sticking.
How to fix a stuck controller?
First, unplug the controller for safety. Lightly dampen a cotton swab with rubbing alcohol and clean around the sticky button. Get into the small crevices to remove dirt. Let it dry fully before using.
PS4 DualShock 4 Not Connecting or Pairing? Quick Fix Guide 26 Jul 10:58 PM (2 months ago)
Ever had your PS4 DualShock 4 Not Connecting or Pairing? Yeah, I’ve been there too. A DualShock 4 won’t pair for a bunch of reasons—maybe the battery’s low, the firmware’s outdated, or Bluetooth just glitched out. It’s super common and honestly not a big deal.
These connection errors usually pop up after system updates or when the controller syncs with another device. Fixing it fast matters because constant pairing fails can mess up your controller in the long run.
Follow these quick steps to fix PS4 controller and get back in the game without the stress.
Quick Fix Checklist For PS4 DualShock 4 Not Connecting or Pairing
Before diving into complex fixes, check these basics first. Most PS4 controller not pairing problems come from simple issues you can solve fast:
- Check the USB Cable: Inspect for damage or a loose fit before connecting.
- Use a Certified USB Cable: Regular charge-only cables won’t pair the controller.
- Update System Software: Ensure your PS4 has the latest firmware installed.
- Fully Charge the Controller: The DualShock 4 should have a full battery before pairing.
- Turn Off Other Bluetooth Devices: Reduce interference by disconnecting extra devices nearby.
These quick steps often handle DualShock 4 troubleshooting without extra effort.
Common Reasons PS4 DualShock 4 Not Connecting With Solutions
Fixing a Faulty Wired Connection on DualShock 4
A bad USB cable can stop your PS4 controller from connecting via USB. Rough handling or worn-out wires often cause this. Sometimes, the port itself collects dust and makes the problem worse.
Here’s how to fix a PS4 controller USB cable problem:
- Try another high-quality or Sony-certified USB cable
- Make sure the connection is snug on both ends
- Test a different USB port on your PS4 or use a powered hub
- Gently clean the USB port to clear dirt or debris
Tip: If the new cable works, your old one was the issue.
Loose Cable Connections Causing Pairing Issues
A loose PS4 controller cable can easily break the connection and stop pairing. Even a slight gap interrupts the data link.
Fix it:
- Push the USB cable fully into the controller and PS4
- Check for a snug fit—no wobble
- Try a short, good-quality cable for better stability
Tip: If it still feels loose, the port may be worn out and need repair.
USB Ports Blocked by Dirt or Debris
Dust and dirt inside the USB port can block the connection, making your PS4 controller not connect even with a good cable. Over time, debris builds up and causes pairing issues.
How to clean PS4 controller USB port safely:
- Use a dry cotton swab or soft cloth to remove dirt
- For deep cleaning, use compressed air (short bursts)
- Never use liquids or harsh cleaners—they can damage the port
Tip: Regular cleaning prevents loose connections and wired pairing problems later. Keep the port covered when not in use.
Wireless Connection Issues with DualShock 4
A PS4 controller wireless connection issue usually happens when Bluetooth signals get weak or unstable. This can make the controller disconnect or fail to pair. In many cases, this happens when DualShock 4 Not Syncing to the Console due to firmware or Bluetooth pairing issues.
Common reasons include too many wireless devices nearby, interference from electronics, or even sitting too far from the console. Distance matters more than you think.
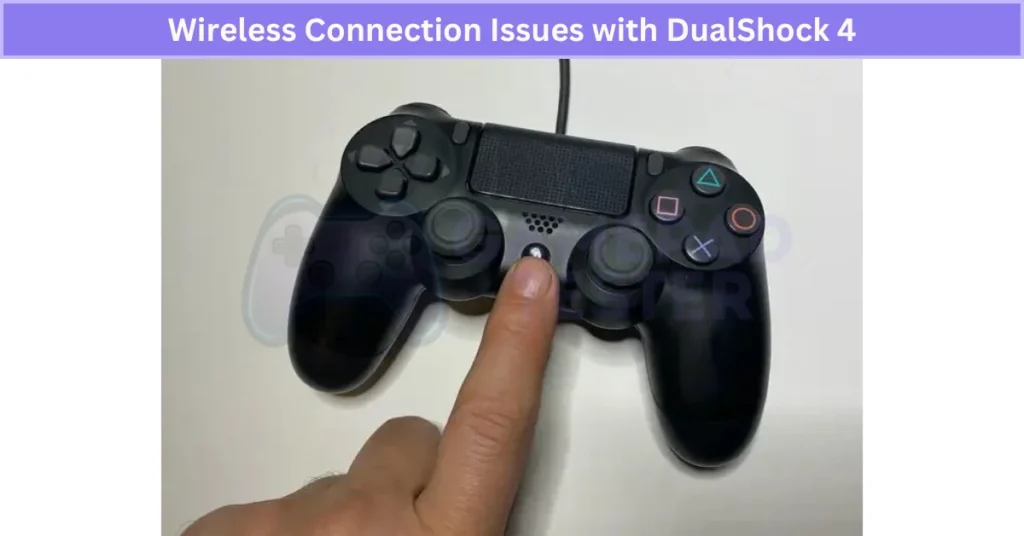
If your DualShock 4 Bluetooth is not connecting, the problem could be the environment, not the controller. Next, let’s look at ways to fix wireless pairing on your PS4 controller.
Controller Already Paired with Another Device
A PS4 controller connected to another device won’t pair with your console because it only supports one active Bluetooth connection. If you’ve used it on a PC or phone, that link stays saved.
To fix it, unpair the DualShock 4 from the old device and then connect it back to your PS4 using a USB cable. This clears the stored Bluetooth data and makes the pairing smooth again. After that, you can switch back to wireless mode easily.
Bluetooth Interference Affecting PS4 Controller Connection
Bluetooth interference can cause a DualShock 4 wireless connection issue, making your controller disconnect or fail to pair. This usually happens when too many Bluetooth devices are active or the controller is too far from the console.
Strong signals from nearby devices, like wireless headsets or even Wi-Fi routers, can also disrupt pairing. Sometimes this even causes other issues like DualShock 4 Is Not Vibrating due to unstable power or connection loss. To fix PS4 controller Bluetooth problems, move closer to the console and turn off unnecessary Bluetooth devices.
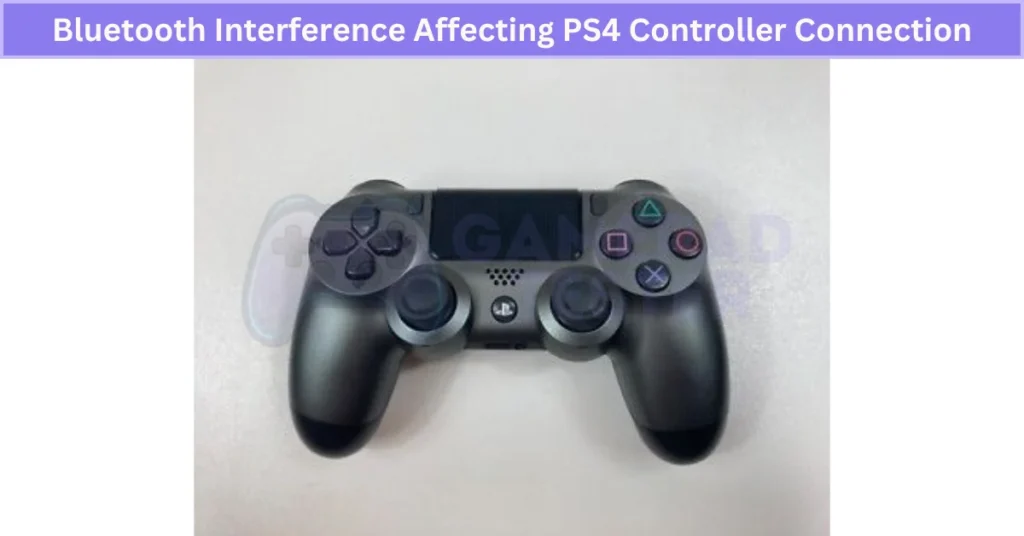
Reducing signal congestion improves stability and lowers lag. Keeping the PS4 and controller in a clear line of sight also helps prevent connection drops during gameplay.
Low or Failing Battery Preventing Controller Connection
A DualShock 4 battery issue is one of the most common reasons for pairing problems. When the battery is weak or almost dead, the controller can’t hold a stable Bluetooth signal, so it won’t sync properly. In some cases, this leads to the DualShock 4 Controller Not Turning On, especially when the battery is beyond recovery.
If your PS4 controller is not connecting due to low charge, plug it into the console using the original USB cable and let it charge fully before trying again. Always use a good-quality charger because cheap ones often fail to deliver enough power.
Over time, battery cells lose capacity, so even a “full charge” might not last. If charging doesn’t fix it, you may need to replace the PS4 controller battery to restore proper wireless connectivity.
Reset and Reconnect Your DualShock 4
Sometimes the quickest way to fix PS4 controller not pairing is a simple reset. It refreshes the Bluetooth settings and clears small glitches without wiping your console data.
Here’s what I do:
- Use a paperclip to press the small reset button near the L2 trigger (this is a soft reset)
- Restart your PS4 to clear temporary errors
- Connect the controller again using a USB cable, then switch to wireless
If it still won’t sync, try a full console reset as the last option. This usually gets the DualShock 4 reconnected in no time.
Outdated PS4 System Software
An old PS4 firmware can cause pairing problems because the controller and console stop communicating properly. This often leads to DualShock 4 not connecting after update failures or random disconnects.
The fix is simple: go to Settings → System Software Update and install the latest version. Make sure your PS4 has a stable internet connection and enough storage space before starting.
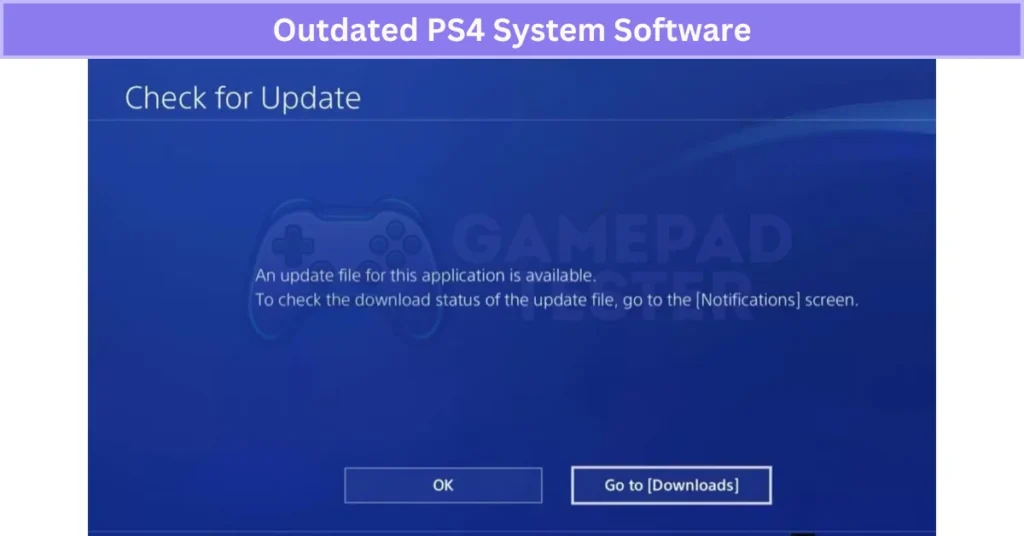
Sony often includes Bluetooth stability improvements and bug fixes in these updates, so keeping your PS4 system software updated helps prevent controller pairing issues in the future.
Outdated Controller Firmware
When the DualShock 4 firmware is old, pairing can fail because the controller uses outdated Bluetooth protocols. This often causes random disconnections or the controller not syncing at all.
To update PS4 controller software, connect your controller to the PS4 using a USB cable. Updates usually install automatically when the console firmware is current. On PC, use official Sony software or DS4 tools to apply the latest update. If you’re using controller apps, Fix Panda Gamepad Pro PS4 Controller Issues may require firmware syncing too.
Keeping the controller firmware updated improves stability, fixes bugs, and prevents connection drops. Always use official update tools to avoid compatibility or security issues.
Too Many Paired Devices
When your PS4 controller has too many paired devices, it can’t connect to a new one because its Bluetooth memory is full. The DualShock 4 can only store a limited number of profiles, and once that limit is reached, pairing fails.
To fix PS4 controller pairing issues, go to your PS4 Bluetooth settings and remove any old or unused devices. After clearing them, pair your controller again using a USB cable.
Removing old profiles not only frees space but also reduces interference, making your connection more stable.
Third-Party or Non-Compatible Cables
A PS4 controller not connecting with third-party cable is common because many cheap cables only charge—they don’t transfer data. Without data transfer, the controller can’t pair with the console.
Even if the light bar comes on, a non-compatible USB cable for PS4 controller can block syncing. This is also seen in models like the Fix Kunai 3 Gamepad Right Controller Problems, where faulty cables or limited compatibility interfere with pairing. These cables often cause unstable connections or failed firmware updates.
The fix? Use the official Sony cable or a high-quality certified cable that supports both charging and data transfer. That’s the only way to ensure a reliable DualShock 4 connection every time.
Fix DS4 Won’t Connect to PC or Android
On PC, the most common issue is missing drivers or an outdated Bluetooth stack. These problems sometimes go hand-in-hand with No Sound on PC When Using DualShock 4, which suggests a deeper conflict with drivers or device profiles. On Android, hidden Bluetooth settings or pairing glitches can block the connection.
Here’s the fix:
- For PC: Install the latest drivers and use tools like DS4Windows or Steam Input for full compatibility.
- For Android: Turn on Bluetooth visibility, restart your phone, and re-pair the controller.
These steps usually solve the PS4 controller Bluetooth issue on PC and fix DS4 pairing on Android without extra hassle.
Real User Fixes & Community-Backed Solutions
I researched this issue and found a Reddit thread where a user struggled to sync their PS4 controller, even after trying multiple controllers and cables. The top community response revealed that the problem usually isn’t the console—it’s the cable. Many USB cables only support charging, not data transfer, which is required for syncing. The advice? Use a proper data cable or reset the controller with a pin. Some users also suggested putting the controller in pairing mode for Bluetooth connection. Simple fix, big relief!
Quora
I came across a popular discussion where a gamer asked why their DualShock 4 wouldn’t connect to their PS4. The community shared several practical solutions. The most common fix was to use a proper USB data cable since many charging-only cables can’t transfer data, which is required for syncing. Others suggested performing a hard reset on the controller using the tiny reset button on the back and then reconnecting it to the console with a cable.
Another helpful tip was to put the controller into Bluetooth pairing mode by holding the PS and Share buttons, which allows it to reconnect wirelessly. If none of these steps work, users advised deleting all previously paired controllers in the PS4 Bluetooth settings using a secondary controller and then re-pairing the DualShock 4. These quick checks usually solve the issue without needing repairs.
Final Verdict
If your PS4 DualShock 4 Not Connecting, don’t stress—it’s almost always something simple like a bad cable, low battery, or Bluetooth interference. Start with the basics: use a proper USB data cable, fully charge the controller, and update your PS4 software. Most pairing problems vanish with these quick fixes.
If that doesn’t work, reset the controller, clear old Bluetooth connections, and make sure you’re in pairing mode. Still no luck? It’s probably time for a battery replacement or a new cable. With these steps, you’ll have your PS4 controller back in action without the headache.
FAQ’s
Why is my Dualshock 4 not connecting to PS4?
Your DualShock 4 may not connect due to issues like a faulty USB cable, low battery, Bluetooth interference, outdated PS4 software, or the controller being paired to another device. Resetting and updating both devices usually fixes it.
Why is my PS4 controller just flashing and not connecting?
Your PS4 controller flashes but doesn’t connect when it can’t sync with the console. Common causes include low battery, a bad USB cable, Bluetooth interference, or outdated firmware. Charging it and resetting the controller usually solves the issue.
How do I force my PS4 controller into pairing mode?
To put your PS4 controller in pairing mode, hold the PS button and Share button together for about 5 seconds until the light bar starts flashing rapidly. This means it’s ready to connect via Bluetooth.
Why Your PS4 Controller Keeps Disconnecting (How To Fix) 16 Jul 9:12 AM (3 months ago)
I know how annoying it is when your PS4 Controller Keeps Disconnecting, especially when you’re in the middle of a game or browsing through menus. You’re definitely not alone in this – a lot of PS4 users run into this problem. Don’t worry, though! There’s a fix. In this guide, we’ll go over the common causes like battery issues, Bluetooth interference, or even software bugs, and show you how to fix them so you can get back to gaming without interruptions.
Common Reasons PS4 Controller Keeps Disconnecting With Solutions
Weak Battery Can Cause Random Disconnections
If your DualShock 4 controller keeps disconnecting and not working, it could be due to a weak or dying battery. Over time, the battery may not hold a charge as well, especially after 2–3 years of use. This problem tends to show up more during gameplay when the controller is under load.
In some cases, battery-related issues may also lead to PS4 controller drift, making gameplay even more frustrating. To fix this, try fully charging your controller. If the issue still happens, plug the controller into a USB cable. If it stays connected, the battery might need replacing.
Test with a Different Power Source or USB Port
If your PS4 controller keeps disconnecting while charging, it might be due to an insufficient power source. This can happen when using a low-power outlet, faulty USB hub, or a cheap charger, especially if the controller is trying to charge while you’re playing. Try plugging the controller directly into the PS4’s front USB port or a powered USB hub. Avoid using worn-out surge protectors or unpowered USB hubs, as they can disrupt the connection.
Your Controller’s Battery May Be Worn Out
If your DualShock 4 isn’t holding a charge or keeps disconnecting, it might be due to a worn-out battery. PS4 controllers use lithium-Signs include the controller only working when plugged in or dying quickly after charging — and in some cases, PS4 DualShock 4 not connecting properly even after recharging attempts.
These batteries usually last for 300–500 charge cycles before performance drops. Replacing the battery is often cheaper than buying a new controller, and you can find replacements online. If you’re up for it, try watching a teardown guide to replace the battery yourself, or take it to a repair shop.
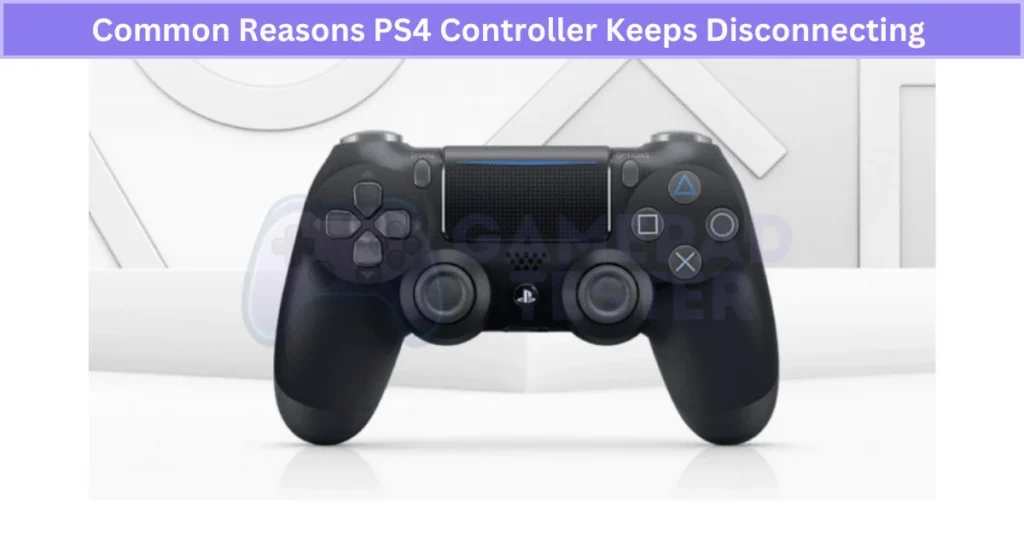
Nearby Devices Can Disrupt the Bluetooth Signal
Your PS4 controller connects wirelessly using Bluetooth, which operates on a 2.4 GHz frequency. Unfortunately, many household devices, like Wi-Fi routers, microwaves, and even baby monitors, also use this frequency. This can cause interference, leading to connection problems or the controller failing to pair properly. To fix this, try moving closer to the console, reducing nearby wireless devices, or temporarily using a wired connection to see if the issue is related to Bluetooth interference.
Bluetooth Antenna Problems Can Disrupt Connection
The Bluetooth antenna in your DualShock 4 manages the wireless signal between your controller and the PS4. If it becomes faulty or blocked, it can cause the controller to disconnect randomly— similar to what happens with some mobile or PC setups like those seen in Fix Panda Gamepad Pro PS4 Controller Issues, where Bluetooth problems are common.
Diagnostic Tips:
- Make sure there’s nothing large, like a metal object or wall, blocking the signal between the controller and console.
- Check for physical damage to the antenna, especially if you’ve opened the controller before.
Fixes:
- Replace the antenna (you can find kits online) or take the controller to a repair shop for help.
- Try a factory reset to fix potential firmware issues causing connection problems.
This should help get your controller back to normal!
Controller May Be Too Far from the Console
Your PS4 controller connects via Bluetooth, but the signal weakens if you’re too far from the console—usually beyond 20–30 feet, especially in large rooms. Walls, furniture, or other wireless devices can also reduce the range. To improve connection stability, try sitting within 6–10 feet of the console. Make sure there are no obstacles blocking the line of sight between the controller and the PS4, as this will help maintain a stronger, more reliable signal.
A Faulty USB Cable Can Cause Sync and Power Issues
If your USB cable is damaged, low-quality, or worn out, it can cause your PS4 controller to randomly disconnect or fail to sync properly. Some cheap cables only transfer power and don’t support data transfer, which can stop the controller from charging or syncing. To fix this, try using the original Sony cable or a certified, high-quality USB cable. You can also test the controller with a different USB port or try it on another device to make sure the cable is the problem.
A Dirty or Damaged USB Port Can Interrupt Connection
If your PS4 controller keeps disconnecting even with a good USB cable, the issue might be with the USB port on the controller or the console. Dust, debris, or a loose connection can prevent a solid link between the two. To fix this, gently clean the USB port with a soft-bristled brush, dry cloth, or compressed air.
If that doesn’t work, try using a different USB port or device to see if the issue persists. If the port seems damaged, you may need to have it professionally repaired or replaced.
Using an Incompatible or Unsupported Controller
If you’re using a third-party or non-official PS4 controller, it may not be fully compatible with the console. This can lead to issues like random disconnections, failure to pair, or other features not working.
These problems usually occur because of outdated firmware or missing driver support. To fix this, try switching to an official DualShock 4 or another PS4-compatible controller. You can also check the manufacturer’s website or the PS4 support page for updates on compatibility or firmware downloads before buying.
Overheating Due to Poor Console Ventilation
If your PS4 isn’t getting enough airflow, it can overheat, which affects system performance and causes issues like controller lag or disconnections. Overheating can mess with Bluetooth signals, leading to random dropouts.
To prevent this, make sure your console is placed in an open area with plenty of space for ventilation, not in tight cabinets or under other electronics. Regularly clean dust from the vents to keep airflow smooth. If overheating is a constant issue, you might want to try using a cooling stand or external fan to improve airflow.
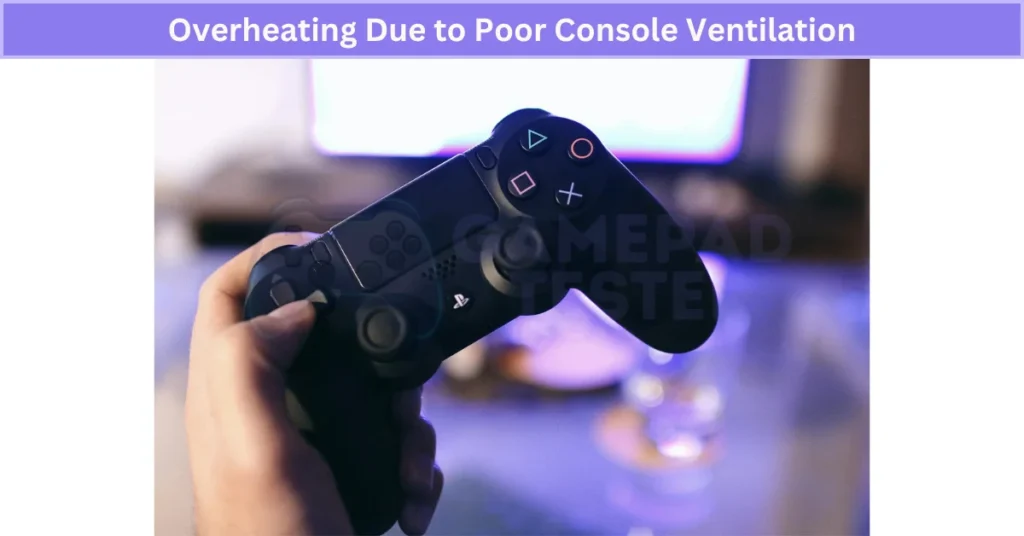
System Software or Data Corruption Issues
If the PS4 system software or data is corrupted, it can cause problems with how the console connects to the controller. This can lead to random disconnects, unresponsiveness, or lag. Start by trying to rebuild the PS4 database in Safe Mode.
It’s a safer option and often fixes these types of issues. If that doesn’t work, you may need to reinstall the system software, but be sure to back up your data first since reinstalling will erase everything. These steps should help restore smooth functionality and fix persistent connection problems.
Internal Hardware Problems with the Console or Controller
If your PS4 controller keeps disconnecting despite trying common fixes, the issue may lie in the hardware. It could be a malfunctioning USB port, Bluetooth chip, or even a faulty motherboard in the console or controller. Issues like DualShock 4 buttons not working are often signs of internal damage that also affects connectivity.
To figure out where the issue is, test the controller on another PS4 or device. If the problem persists, it’s best to have the console or controller checked by a certified technician to address any potential internal hardware faults.
Some Generic Fixes
Restart Your Console to Refresh the Connection
If your PS4 controller keeps disconnecting, restarting the console might fix minor system glitches — it’s a quick way to reset firmware conflicts. This simple restart method can even fix bugs like PS4 controller touchpad not working, which sometimes show up after updates or long gaming sessions.
- Hold the power button until you hear two beeps for a safe shutdown.
- If unresponsive, hold the button for 8+ seconds to force a shutdown.
- After restarting, reconnect your controller and test it.
If the issue persists, check for firmware updates or consider environmental factors like nearby wireless devices that might be causing interference. Restarting also clears the system cache, which could resolve software or Bluetooth-related bugs.
Perform a Hard Reset and Resync the Controller
If your PS4 controller keeps disconnecting or isn’t syncing, a hard reset on both the controller and the console can help fix the issue. This is also a common fix for other bugs like DualShock 4 not vibrating, where resetting clears hidden firmware glitches.
- Power off the PS4: Unplug it from the wall completely.
- Locate the reset button: It’s on the back of the controller near the L2 button.
- Press and hold: Use a paperclip to hold the reset button for 5 seconds.
- Reconnect power: Plug the PS4 back in and turn it on.
- Connect the controller: Use a USB cable and press the PS button.
- Check the light bar: When it turns blue, your controller is resynced.
This process resets the controller’s firmware cache and can clear any syncing issues. If it still doesn’t work, try using a different USB cable or port before considering a hardware issue.
Can the Wi-Fi Router Be the Culprit?
Yes, Wi-Fi routers can interfere with your PS4 controller’s Bluetooth signal because both use the 2.4 GHz frequency. If the router is too close to the console or controller, it can cause signal conflict, leading to disconnects or lag. To fix this, try moving the router farther away from the PS4 or using a wired Ethernet connection for a more stable connection. If possible, switch your router to the 5 GHz band to reduce interference from the 2.4 GHz range.
Quick Fixes vs. Permanent Solutions
| Issue | Temporary Fix | Permanent Fix |
|---|---|---|
| Weak Battery | Keep controller wired | Replace battery |
| Bad Cable | Try another cable | Buy original USB cable |
| Bluetooth Interference | Move closer | Replace Bluetooth antenna |
| Controller Drift | Spray compressed air | Replace analog stick |
| USB Port Issue | Use another port | Get port repaired |
| Firmware Bug | Restart PS4 | Rebuild database / reinstall software |
Real User Fixes & Community-Backed Solutions
A user reported that their PS4 controller randomly disconnects and won’t reconnect unless the console is restarted. This kind of Bluetooth instability is also common in other setups, such as the Kunai 3 Gamepad right controller, where faulty connections or overheating can mess with pairing. Attempts with different controllers and USB connections didn’t help. Community members pointed out that the PS4 overheating is a common cause, recommending cleaning the console’s fan and ensuring proper ventilation. Some users suggested placing the console on stilts or elevating it to reduce heat buildup. Others mentioned network-related issues, like using Wi-Fi instead of Ethernet, could also cause controller disconnects. While some found temporary fixes, many concluded that persistent problems might mean the console is aging and due for replacement.
Quora
Frequent disconnections can be caused by Bluetooth interference from other devices, physical obstacles blocking the signal, or outdated firmware on the controller or console. It’s important to ensure the PS4 system software is updated and to reset the controller by pressing the tiny reset button on its back. Faulty or low-quality USB cables can also cause issues, especially during syncing. Some users noted that power-saving settings or a damaged Bluetooth module in the controller or console might lead to frequent drops. Testing with another controller or wired connection can help isolate the problem.
Final Verdict: Why Your PS4 Controller Keeps Disconnecting
If your PS4 controller keeps disconnecting, it’s usually something simple like a weak battery, a bad USB cable, or Bluetooth interference. Start by charging the controller fully, testing with a high-quality USB cable, and reducing wireless interference around your PS4. A quick reset using the small button on the back and a system restart often solves the problem. Updating your PS4 software and rebuilding the database can also fix firmware-related issues.
If the disconnects continue, the problem may be hardware-related—like a faulty Bluetooth antenna, worn-out battery, or damaged USB port. At that point, try replacing the battery or using a wired connection as a temporary fix. For persistent issues, professional repair or a controller replacement might be the best option. Addressing these common causes will usually restore a stable connection and keep your gaming sessions smooth.
FAQ’s
Why does my Dualshock 4 keep disconnecting?
The most common reason your PS4 controller might be disconnecting is a low battery. Before diving into other fixes, check your battery status to make sure it’s charged. Another possible cause is the controller’s auto shutoff feature, which turns it off after being idle for a while. So, if you’re not using it for some time, it could disconnect automatically. Start by ensuring your battery is charged to avoid unnecessary troubleshooting.
Why does my controller keep disconnecting with full batteries?
If your controller keeps disconnecting even with a full battery, the issue may be with the battery pack itself. Check that the metal connector piece on the battery pack is properly aligned and that the pack is securely locked in place. If the battery pack is firmly in position and the problem persists, it could be that the battery itself is faulty and needs to be replaced.
Why does my PS4 controller stop working randomly?
If your PS4 controller isn’t working or connecting, it could be due to Bluetooth interference, a desynced controller, a low battery, or a faulty USB cable. Start by using a data-capable micro-USB cable (not just for charging) to charge the controller for 10–15 minutes. Then, press the PS button to try reconnecting. If the controller is still not responding, check for other issues like wireless interference or a faulty cable.
Why does my PS4 controller keep flashing and disconnecting?
If your PS4 controller is flashing and disconnecting, it could be due to a battery issue or a Bluetooth connection problem. If the controller is fully charged, the next step is to simply resync it with your PS4 console. This can be done even if you only have one controller, so don’t worry. Re-pairing the controller should fix the connection issue and get you back to gaming.
Why does my controller keep blinking on and off?
If your controller is blinking on and off, it could be due to weak or improperly installed batteries. To fix this, turn off your console first. Then, open the battery compartment on the back of the controller and check if the batteries are correctly installed. If they seem loose or incorrectly placed, re-seat them or replace them with fresh ones. This should resolve the blinking issue and restore normal functionality.
Why Your DualShock 4 Is Not Vibrating (How to Fix It) 16 Jul 8:54 AM (3 months ago)
So your DualShock 4 Is Not Vibrating? Yeah, that happens more often than you’d think. If your DualShock 4 isn’t vibrating, or the PS4 controller vibration’s not working at all, don’t worry—you’re not the only one.
Sometimes it’s just a setting. Other times, it’s a small PS4 rumble issue or a game that doesn’t use vibration. I’ll help you figure out what’s going on and how to fix the controller vibration without making it worse.
Common Reasons for DualShock 4 Is Not Vibrating With Solutions
Low Battery or Charging Habits Affect Vibration
If your PS4 controller vibration’s not working, the battery might be the reason. When the battery’s low, the system may cut off vibration to save power. A weak controller battery can also cause this over time. I’ve seen issues when people play while charging — it puts stress on the battery. And yeah, overcharging doesn’t help either. It can mess with both the battery and vibration motor. Best thing? Charge it fully, then unplug. Try not to game while it’s charging. That’s how I fix DualShock 4 vibration issues before they start.
Vibration Might Be Disabled in Settings
Ever wonder why your PS4 controller’s not vibrating in game, even though everything else works fine? It could just be a setting you forgot about — similar to issues like PS4 Controller Touchpad Not Working. Sometimes vibration gets turned off by mistake — either in the PS4 system or the game itself.
Here’s how to turn vibration on PS4 controller:
- Go to Settings > Devices > Controllers
- Make sure Enable Vibration is checked
Also check your game’s settings too. Some games let you turn off vibration there. Easy fix.
Bluetooth or Connection Interference (Mostly on PC)
If the PS4 controller vibration’s not working on PC, Bluetooth could be the problem. I’ve had this happen when too many wireless things were connected—like Fix Panda Gamepad Pro PS4 Controller Issues, where wireless interference affects key functions. That Bluetooth interference can mess with controller features not working, like vibration.
Try this:
– Unplug or turn off extra Bluetooth stuff
– Or just use a USB cable instead
A wired setup usually fixes the DualShock 4 PC connection issue fast. Simple, but it works.
Internal Vibration Motor May Be Damaged
If your DualShock 4’s not vibrating and you hear a weird rattle or click inside, that’s usually a PS4 vibration motor issue. It’s also common alongside analog PS4 Controller Drift, especially if your controller’s taken some falls. Sometimes only one side stops working, so you feel weak or no vibration at all.
If that’s the case, don’t force it. In some cases, DualShock 4 Buttons Not Working may appear alongside vibration failure due to internal damage. You can try to fix the vibration motor on PS4 if it’s out of warranty. Otherwise, it’s best to get it checked by a repair shop.
Some Games Don’t Support Controller Vibration
Not every game uses vibration. So if your PS4 controller’s not vibrating in a specific game, it doesn’t always mean something’s broken. Some titles just skip the rumble.
To be sure, test the vibration feature in a game like FIFA or Call of Duty — those support haptics for sure. You can also check the vibration settings per game or look in the manual to see if it’s even an option.
Outdated Console Software Can Interrupt Controller Vibration
I’ve skipped updates before, and yeah — things get weird. If your controller vibration stopped after an update, or just isn’t working, the PS4 system update might be the reason. Sometimes the DualShock 4 firmware sync gets messed up if you delay updates.
Here’s what I do:
Go to Settings > System Software Update and install the latest version. These updates fix random stuff — like that annoying console update glitch that kills vibration. Always worth checking.
How to Check If Your Controller’s Vibration Motor Still Works
Not sure if the vibration problem is from the game or your controller? Doing a quick test can help. It’s a simple way to see if the motor still works or if it’s something else — like settings or software.
Here’s how to test PS4 controller vibration:
– On PS4:
Go to Settings > Devices > Controllers and make sure vibration is turned on. Then try a game like FIFA or Call of Duty — they always use rumble.
– On PC:
Use tools like gamepadtest.com (just open it in your browser) or DS4 Windows vibration test. Both can trigger the motor directly.
If you don’t feel anything on both PS4 and PC, the motor might be dead. But this test helps you know for sure.
Fixing DualShock 4 Vibration on PC or Steam
If your PS4 controller vibration’s not working on Windows or DS4 isn’t vibrating on Steam, don’t stress. It often relates to connection issues similar to PS4 DualShock 4 Not Connecting, especially if Steam settings or drivers aren’t set up right.
Here’s how to fix DualShock 4 vibration on PC:
- Open Steam in Big Picture Mode
- Go to: Settings > Controller Settings
- Enable: PlayStation Configuration Support
- Start a game that supports vibration: For example, Rocket League or GTA V
Still no rumble? Try this:
– Download DS4Windows — it’s free and lets you turn on vibration
– Open DS4Windows and go through the setup
– Test vibration from inside the app
Also check Device Manager > Human Interface Devices and update the driver for “HID-compliant game controller.” Audio bugs and No Sound on PC When Using DualShock 4 can also stem from outdated drivers.
Just know: some PC games don’t support vibration, even with everything set up right. So try a few games before assuming it’s broken.
How to Replace a Faulty Vibration Motor (DIY Repair Guide)
Yes, you can replace the PS4 vibration motor, but it’s not for beginners. You’ll need to open the controller, handle tiny parts, and do some light soldering. It also voids your warranty — so be sure before you start.
Here’s a simple step-by-step if you’re comfortable with DIY repairs:
- Grab your tools: Small screwdrivers, tweezers, soldering iron, and a replacement motor (around $5–10 online).
- Open the controller: Unscrew and carefully open the shell.
- Disconnect the battery: Gently remove it to access the internal parts.
- Remove the old motor: Take it out from its slot.
- Solder the new motor: Attach it securely in place.
- Reassemble and test: Put everything back together and check the vibration.
You can also check teardown videos on YouTube or iFixit for help.
If you’re not confident with electronics, I’d say skip this and let a repair shop fix the DualShock 4 motor for you. Better safe than sorry.
Real User Fixes & Community-Backed Solutions
A user shared a solution for the PS4 controller not vibrating in Final Fantasy XIV. They confirmed the controller vibrates during limit breaks but not otherwise. The fix involved unsyncing the controller by connecting a different one and removing the main controller from Bluetooth devices, then reconnecting it. Additionally, they disabled and re-enabled vibration both in the PS4 system settings and within FFXIV’s menu. While not all steps might be necessary, this method helped restore vibration functionality. The user posted this due to a lack of clear info online about this issue.
Another user reported that when connecting their PS4 controller via Bluetooth to PC using DS4Windows, the vibration and touchpad features didn’t work, though both worked fine wired — an issue similar to what some users face when trying to Fix Kunai 3 Gamepad wireless problems. The community solution was to open DS4Windows (Ryochan’s version), go to the Settings tab, click “Device Options,” select the controller, and enable the “Copycat” option. This fixed the vibration issue for many users. Some others confirmed this method after months of searching. A few noted that not all versions of DS4Windows have this option visible.
Final Verdict
If your DualShock 4 Is Not Vibrating, it’s usually not a lost cause. Most problems come from simple things like low battery, settings turned off, or connection issues—things you can fix yourself without much hassle. Sometimes it’s a game that doesn’t support vibration or your console needs an update. Testing the vibration on different games or devices helps figure out if it’s a hardware or software issue.
If it’s a hardware problem, like a broken vibration motor, repairing it can get tricky and might need tools and soldering skills. For those not comfortable with DIY fixes, it’s safer to get help from a repair shop. Many users have also found fixes by resyncing controllers or tweaking settings in PC apps like DS4Windows. So don’t give up—there’s usually a way to get your controller rumbling again.
FAQ’s
Why is my Dualshock 4 not vibrating?
If your DualShock 4 isn’t vibrating, the feature might be off. To fix it, go to Settings > Devices > Controllers on your PS4 and check the box for Enable Vibration. This usually gets the rumble working again.
Why is my controller not vibrating?
If your controller isn’t vibrating, the battery might be low. When the charge runs low, the controller turns off vibration to save power. It’s kind of like a safety feature to keep you playing longer. So, make sure your wireless controller’s battery pack or batteries are fully charged. Once charged, the vibration should work again like normal.
How do I make my Dualshock 4 vibrate?
To make your DualShock 4 vibrate, go to Settings > Devices > Controllers on your PS4 and make sure the Enable Vibration option is turned on or checked.
How to test dualshock 4 vibration?
You can check if your DualShock 4 vibration is working by first making sure vibration is turned on in your PS4 settings. Just go to Settings > Devices > Controllers and enable vibration. Then, try testing it in a game that supports rumble. If you want to test it on PC, there are online tools and apps you can use to trigger the vibration and see if the motor works properly.
How do I force my controller to vibrate?
To force your controller to vibrate, first make sure vibration is turned on in your PS4 settings. Head to Settings > Devices > Controllers and tick the Enable Vibration box. After that, you can test the vibration by playing a game that uses rumble or, if you’re on PC, use an online vibration test tool to check if it’s working properly.