Savoring Morocco: A Journey Through Spices and Stories 23 Oct 5:17 PM (yesterday, 5:17 pm)

The first spoonful of tagine stopped me mid-bite. The sauce was silky and rich, the meat tender, but it was the harmony of flavors that caught my attention—lemon brightening the edges, turmeric grounding it, and a whisper of cinnamon tying everything together. Morocco’s cooking doesn’t shout; it lingers, unfolding its secrets one spice at a time. My first taste of authentic Moroccan food hooked me instantly.
It was the first day of my trip to Morocco, my second visit in two years, and so far, the food exceeded my high expectations. I developed a passion for the flavors of the country on the first visit. Since I grew up with the intense flavors of Pakistan, Bangladesh, and Indonesia, I recognized the turmeric, ginger, and cumin, yet I appreciated the lighter touch used in authentic Moroccan food.
I often connect to a country through its food, and I’ve found that a food tour is a great way to start a trip. It’s a jumpstart for the senses, walking through the markets, seeing the colorful produce, smelling foods cooking on a grill, and tasting little bites. The guides always steer me to foods they recommend, and learning the names of common dishes means I’ll know what to order on the rest of my trip. For my second visit to Morocco, I wanted to learn more, so I scheduled a food walking tour in Tangier through Get Your Guide and a cooking class in Marrakech through Cookly.me.
More articles on Morocco in Inga’s Adventures, including the Magic of Morrocco in Two Weeks:
Food Walking Tour, Tangier

Mohammed Marrakchi, a resident of Tangier, escorted us through the local markets and tiny storefronts in the older part of the city on the Food Walking Tour in Tangier. He was an excellent guide, sprinkling in tidbits about the history of the city and tips on where to visit elsewhere in Morocco. His deep knowledge of the history of his country, excellent English language skills, and easy-going personality make him a wonderful guide.

“In this small shop, you will meet Ahmed. I call him the Soup DJ,” said Mohammed with a smile. Ahmed’s creamy bissara soup made from pureed split peas was pure comfort food.
As we walked through the market, I accepted a bag of olives from a vendor and sampled sweet dates stuffed with crunchy walnuts and cashews. A filling fruit smoothie made from mango and pomegranate worried me because I couldn’t stop drinking it, despite how full I was getting. I had to save some room. A highlight was briouat, a meltingly flaky pastry filled with savory meat spiced with saffron, cinnamon and ginger. I thought that was the end of the tour, but the tagine was still to come.
Tagine

Tagine is ubiquitous in Morocco, and even I can tire of it. The conical pottery cooking vessel for sale in any market is known as tagine, and so is the savory stew cooked in it. The cone shape allows moisture to collect and drip back to the bottom. Historically, people cooked tagine on hot coals or an open flame, though modern cooks use an electric stovetop or oven. Many tourist establishments serve a simple tagine with a base of couscous topped with mildly spiced meat. Colorful strips of carrot and squash laid over the couscous rise to meet at a point under the top of a conical tagine cooker. However, I learned that couscous is not normally served with tagine in Moroccan households—it’s only for tourists. Couscous is popular in Morocco, just not with tagine. For tourists, the couscous is steamed separately, piled into the tagine cooker and topped with tagine because, apparently, we expect it.

Bread
With tagine, Moroccans eat yeasty khobz bread, a traditional flatish bread (not as flat as the type we think of for wraps). Khobz may be cooked at home if the house is equipped with an oven but is often still cooked in communal ovens. It’s a common sight to see people walking through the narrow streets of the old-town medina to the communal oven conveying a tray covered with a cloth hiding soft mounds of dough. Mohammed ushered us into a dim communal oven where the morning bread making transitioned to roasting waiting trays of nuts.
The tagine I sampled at the casual establishment in Tangier on our food tour was exquisite, bursting with flavor. The sounds of Arabic table talk among the men, who all seemed to know each other, faded as I savored the chicken falling off the bone. White beans, green beans, quince, potatoes, cauliflower and carrots rounded out this hearty meal. Leaving the remains of salad, kebabs, bread and olives behind, I focused on finishing the tagine. This was by far the best tagine I had ever had.
White Flowers Cooking Class

The class description for the White Flowers Cooking Class in Marrakech offered a different menu for each day of the week. I chose the day based on the menu, so I was surprised when we were asked what we wanted to make. Perhaps it was because we were the only participants that day. After leaving it up to Fatima, our cooking instructor, and Zach, our translator, they chose kefta tagine, made with minced meat. Off we went to the market to purchase ground beef, as well as vegetables for a second tagine.
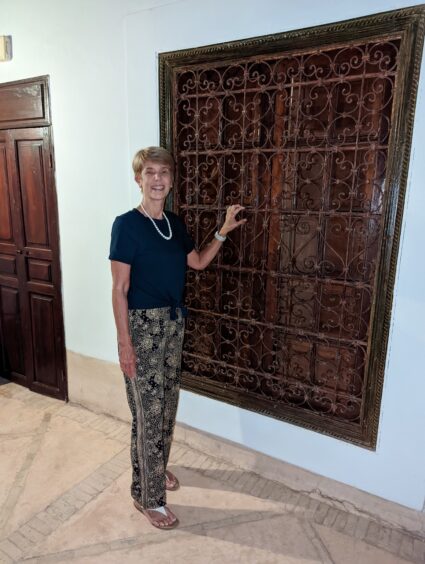
As we walked along the narrow streets, Zach pointed out things I hadn’t noticed, such as the high and low door knockers. In the old days, the high knocker was for men while the lower one was for women, so a person on the inside could tell who was knocking.

Outdoor Kitchen
From the outdoor kitchen on the roof, we had an expansive view across the top of the medina. Thankfully, a thatched roof covered the cooking space providing protection from the sun. In the kitchen was a portable two-burner gas stove, like a Coleman stove, a round table, and a knife. No measuring instruments. Fatima had pureed the tomatoes, separated the garlic cloves and washed the vegetables to make things easier for us.
“These are the spices that every Moroccan kitchen has,” said Zach, translating for Fatima. She pointed at five small ceramic dishes with salt, ginger, turmeric, cumin and black pepper. “Cooks may use more, but this is the minimum. When I was a poor student, I would go to the market. I could purchase tiny packets of these spices. It was enough for one meal.”

Tagine Recipe
Fatima guided us through the steps to make our kefta tagine.
- Pour oil into the tagine cooker, then add the pureed tomatoes.
- Add pinches of spices and fresh, chopped garlic to tomatoes and simmer for ten minutes.
- Form small meatballs and add to the tomatoes.
- Simmer until cooked.
- Add lots of chopped parsley, even thick stems.
- Add whole or scrambled eggs (optional).
As the tagine bubbled on the stove, we chatted with Zach and Fatima. We learned that Zach had been trapped in Turkey during the pandemic, where he was attending university, missing his family terribly. Fatima wasn’t sure she wanted to get married. She was enjoying working at the riad, teaching cooking and making her own money. I was struck by how much they had in common with young people anywhere in the world, having their schooling interrupted by the pandemic and not knowing exactly where life would take them.
The Reward
When the tiny meatballs were ready, they were light and tender, like puffs of cloud. The few spices perfectly balanced the tang of the tomato sauce. We didn’t use any spices in the meatballs, but because they were so small, they picked up plenty of seasoning from the sauce. This simple meal came together quickly, packed with flavor.

A vegetable tagine followed with chopped onions, pureed tomatoes, peas, and sliced wedges of potato and zucchini, topped with chopped parsley. The flavors were bright and fresh with contrasting textures. It would make a tasty side dish, or with the potatoes, there was enough heft to stand on its own.
Benefits of the Tour and Class

Not only did we taste exquisite meals, but we learned so much. I ordered bissara soup many times on the rest of our trip, each time giving silent thanks to Mohammed, for I probably wouldn’t have ordered it without having tasted it on the tour. I learned to discern the different flavors in the tagines that I tasted. My photo album is full of photos of foods I liked so I could remember the ingredients and create my own versions at home. Many Moroccan recipes are available online, but knowing just a little about the dishes we tasted in Morocco helped me find authentic recipes. I even learned to make the khobz bread since there’s nothing like it in my town in California—a little misshapen and not as light, but still evoking wonderful memories of aromatic tagines as I sop up the savory sauce.

Through these meals, I carried Morocco home with me, each flavor a reminder that food is one of the most powerful ways to connect with a place and its people.

Adapted from an article first published in Food, Wine, Travel Magazine.
The post Savoring Morocco: A Journey Through Spices and Stories appeared first on Inga's Adventures.


Ghostek Nautical Slim Waterproof Case Gear Review 31 Aug 10:03 AM (last month)

The Ghostek Nautical Slim waterproof case was my ticket to underwater photography using my Pixel 6 Pro Android smartphone. Going on a trip involving two snorkel experiences drove me to take the big step, but there were so many choices. I subscribed to the Snorkeling Explorer newsletter that made a recommendation for the Ghostek Nautical Slim waterproof case. I ordered the case in anticipation of a trip to Indonesia involving two separate weeks of snorkeling.

The Ghostek waterproof case arrived a few days later, but I’ll admit I was a little nervous about submerging my phone in water. I followed the manufacturer’s recommendation to submerge the case without the phone to test the seal. Seeing that the inside stayed dry did a lot for my confidence in the product.

Specs
In reviewing the materials for the case, I learned:
- The case is submersible down to six feet for 90 minutes.
- There’s a protective camera lens cover, and the Nautical Slim case acts as a screen protector.
- There is shock protection with drop resistance up to 12 feet.
- Wireless charging is preserved (not tested by author).
- Ghostek offers the Nautical Slim waterproof cases for Pixel 6 through Pixel 9 phones as well as Apple and Samsung phones.
Prep at Home
When I received the product, I opened the port buckle at the bottom and peeled off the back to separate the two parts. I examined the pieces to ensure that they were clean and undamaged.

I pressed the pieces back together and made sure they were completely sealed. I thought the two pieces were together, but I saw some places that looked deformed. I pressed firmly around all the edges until they looked uniformly secure with no gaps or puckers. I pushed the port buckle in place to complete the seal.

I tested the seal by submerging the sealed case under water for ten minutes without the phone. An eight-inch square baking dish worked well at home; the sink worked well at the dive resort. After I dried the case with a towel, I could see there were no leaks. If you do this test and see any water inside, don’t use the product and contact the company.
The case came with some wipes, and while I used them I didn’t use the product for several weeks. Once I used it, I had it on and off quite a bit, so the cleaning didn’t seem relevant to me.
I followed the directions to remove the fingerprint sensor protection sticker and used the cardboard wedge over the fingerprint sensor. I didn’t need to rescan my fingerprint, but if it doesn’t work for you, you might need to rescan it.

I attached the included wrist strap to the bottom of the case.
Field Test
The first experience was a 4-day liveaboard trip on the Samara I boat in the Komodo Islands off Flores, Indonesia. I was so enthralled by the underwater scenes I saw every day that I couldn’t focus on setting up and figuring out how to operate the camera on phone with the case. Besides, we had a guide and a photographer with us for every dive so I didn’t think my amateur photos would add much. We stayed together as a group and there wasn’t much time for me to be tinkering with buttons, but I was a bit jealous of everyone else’s photos and vowed to figure it out.

A week later, we were at a land-based resort, Papua Explorers, in Raja Ampat off West Papua, Indonesia, where I had more free time to fiddle around. I retrieved the case from the bottom of my suitcase, laid out the two pieces and eyed it, debating whether I wanted to deal with the distraction. Deciding I’d never be in a better place to get underwater photos, I tested it again in a sink full of water and then I set up the camera with the case. Figuring out how to take photos underwater took some fiddling initially. I had some free time at the house reef at the resort and after a few tries I figured out some tips and tricks.
Securing the Camera
I used the included wrist strap to secure the camera to my body. It didn’t feel very secure, but it worked, and I didn’t lose my phone. I usually never had the phone out of my hand. If I needed to stroke, I held the phone in my hand, and it functioned like a web.

Taking Photos
I was unsuccessful taking photos initially because I couldn’t get the fingerprint sensor to work underwater. I finally figured out that the volume buttons on the side of the camera also function as the shutter. If you need to check or change this setting, go to the Pixel camera settings. On my Pixel 6, these are the settings:
- Click the Gear icon in the camera app.
- Click “More settings.”
- Click “Button shortcuts.”
- Look at “Volume key action” and verify that it says “Shutter” or change it.

Also, when my phone is asleep, a double click of the power button will open directly to the camera. Therefore, it may be a two-step process to take a photo.
- Double-click the power button to open the camera app.
- Click the volume button up or down to fire the shutter.

Shooting Video
Once I mastered taking photos underwater, I wanted to shoot some short videos. The only way I could figure out how to switch between the two functions was to flip over like an otter, press the button on the screen to switch to video, flip back underwater and use the volume button to start and stop the video. I used the same procedure if I wanted to change the zoom aspect for still photos.
I wrote to tech support, and they confirmed that the fingerprint sensor won’t work underwater, and my workaround is the correct method. There is a video on the manufacturer website about how to test and set up the case, but no information about how to take photos.

Google Lens
It made me very happy to get photos of what I was seeing, and I verified that Google Lens is incredible at naming the specimens. This was the only way I could start learning the names of the fish and coral I saw every day.
Removing the Case
It works best to start at the bottom, at the port buckle, but sometimes I still have a hard time getting it open. I used a thin coin, but the manufacturer recommends using a credit card, to get the two sections to separate. When I was on the trip, I had no coins, but I used the lever end of my nail clippers effectively.

Overall impression
The Ghostek Nautical Slim waterproof case worked perfectly the whole time, and I never saw a drop of water inside. Once I learned how to shoot photos and video using the buttons on the phone instead of the fingerprint sensor, it was simple to switch between modes and shoot more photos and video than I could possibly use.
Product Information
Ghostek Nautical Slim waterproof case for Pixel 6 Pro
Ghostek Nautical Slim on Amazon: $19.98
All photos by Inga Aksamit, unless otherwise credited.
Disclosure: I did not receive anything from the manufacturer. I purchased the product for personal use.
Disclaimer: As an Amazon Associate, I earn from qualifying purchases.
The post Ghostek Nautical Slim Waterproof Case Gear Review appeared first on Inga's Adventures.
Beyond Bali: Your Indonesia Island Itinerary Guide 4 Aug 1:46 PM (2 months ago)

So many superlatives, so little time. Indonesia is like a vast necklace of islands, each with its own personality, and I never feel like I have enough time to see it all. With ten UNESCO World Heritage Sites and over 17,000 islands (only about 6,000 are inhabited), there’s enough to keep you exploring for years. Deciding where to go is the biggest challenge when choosing an Indonesia itinerary.

I’ll focus on eight main islands, along with a side trip to Bali (because I still can’t resist):
- Sumatra
- Java
- Kalimantan
- Flores-Komodo
- Sulawesi
- Lombok
- Gili Islands
- West Papua-Raja Ampat
- Bali
I’ve been traveling to Indonesia since 1976, when my parents moved to Jakarta for work. Altogether, I’ve spent over 18 months there, broken up into shorter trips over decades. So why isn’t there more Indonesia content on Inga’s Adventures? Honestly, I get overwhelmed trying to figure out how to cover it all. But here goes. This article will share some itinerary ideas, and I’ll go into more detail in future posts.

For those of us coming from North America, Indonesia is a long haul—20+ hours and at least one layover. Jetlag is a big problem for me, but the Timeshifter app helps. I hope you have at least two weeks to make the trip worthwhile. If you only have a week, I suggest focusing on one, or at most two, locations that really interest you. You could start with Jakarta, or Jakarta plus one other stop. Or maybe you just want to crash on a beach in Bali—no judgment. I’ll admit, even when I’m headed somewhere else, I often squeeze in a few days in Bali because it’s still hard to resist.
One thing to keep in mind: Indonesia is incredibly diverse, and that includes religion and local customs. While the country as a whole has the largest Muslim population in the world, the vibe can differ greatly from island to island. Some areas are more conservative, especially parts of Sumatra and Java. Bali is primarily Hindu, while many of the eastern islands, like Flores and West Papau, are largely Christian. You’ll also find elements of animism, especially in more remote communities. It’s one of the things that makes Indonesia so fascinating—but it also means it’s good to read up a bit on local norms before you go.

Itineraries
I usually begin trip planning starting from the western islands, moving east. Jakarta, on the island of Java, is in the west and has the easiest airport access at Soekarno-Hatta International Airport (CGK).
Scan through the list and see what is most appealing to you. Then, put your itinerary together. Group the islands you want to see and avoid hopping from one end of the archipelago to the other (it can take 9 hours to fly end to end). Group the western islands together (Java, Sumatra, Kalimantan), the central islands (Bali, Flores, Sulawesi), or head to the most remote parts in the east, including West Papua and other islands such as the Maluku Islands or Nusa Tenggara.

One week (choose one island)
- Java (Jakarta and Yogyakarta)
- Sumatra (Orangutan Preserve and Lake Toba)
- Flores (3-day trip to Komodo Islands and overland trip)
- Sulawesi (Toraja Land and beach resort)

Two weeks (two islands)
Mix and match from the one-week options:
- Java and Sumatra
- From Jakarta consider adding an overnight trip to Krakatoa Volcano or other nearby islands.
- Java and Bali
- From Yogyakarta: Climb Mt Bromo and see nearby waterfalls. Continue on the ferry to Bali or return to Yogyakarta.
- Sumatra and Kalimantan
- In Sumatra, add Weh Island or Nias Island.
- In Kalimantan, consider adding a Mt. Kinabalu climb in Malaysian Borneo.
- Bali and Flores
- From Bali, consider adding the Gili Islands via a fast boat.
- In Flores, consider 1–4-day trips to the Komodo Islands.
- Bali and Lombok
- From Bangsal, Lombok, take a ferry to the Gili Islands
- Sulawesi and Flores
- Jakarta and West Papua/Raja Ampat. Because of the transportation challenges, it’s not practical to go to West Papua for only a week unless it’s the only way. Ten days might be possible, but two weeks is preferable.
Longer trips: Keep adding islands or go deeper with intensive activities like mountain climbs, yoga retreats, or 7–14-day diving/snorkeling trips. You can also push into more remote areas such as the interior of West Papua (with a guide), West and East Nusa Tenggara (including Timor) or the Maluku Islands (including Ambon and Halmahera Islands).
Consider leaving part of your itinerary open as you may discover different destinations, and you’ll be a pro by the end. Last-minute travel is easy in Indonesia.
Island Highlights
Java

Java: Jakarta, the financial hub, has a shiny downtown, the leafy Kebayoran Baru neighborhood, and Old Town. In Jakarta, the National Museum (aka Elephant Museum, so named for the elephant statue in front) and Old Town (the seat of Dutch Government) are valuable for visitors seeking to understand more about Indonesian culture and history. The Indonesian Heritage Society provides English-language tours through the National Museum.

In Jogjakarta, the ancient cultural center, history goes back much further. Most visitors want to visit the Borobudur Buddhist temple and the Prambanan Hindu temple, dating back to the eighth and ninth centuries. After so much intensive cultural immersion, climbing Mount Bromo can be refreshing to watch the live cauldron of an active volcano. If you have more time, there are three other national parks on the eastern end of Java.

Transportation: Fly into Jakarta to start. Use the Grab rideshare app or Bluebird Taxi on the ground. I recommend taking the train from Jakarta to Yogyakarta during the day. The scenic ride takes about eight hours and moves from a dense urban environment to rice paddies, then winds up and down through hills and valleys. Ground transportation can be used to access parts of eastern Java from Yogyakarta and there’s a ferry over to Bali. Or there are many flights out of Yogyakarta.
Sumatra

Sumatra: This large island to the west of Java is known for orangutans (in Gunung Leuser National Park), beautiful Lake Toba (You can visit a lake on Samosir island in Lake Toba on the island of Sumatra–it goes on and on), stunning beaches and excellent diving and snorkeling.

Transportation: There are direct flights into Medan from hubs in SE Asia such as Singapore, Kuala Lumpur or Bangkok as well as Jakarta.
Kalimantan (Borneo)

Kalimantan: The massive island north of Java is known as Borneo for the parts owned by Malaysia and Brunei, and as Kalimantan for the huge Indonesian segment. This is one island I haven’t visited, but it’s on my list. It’s best known for rainforests, orangutans and other endangered species, overnight stays on klotok river houseboats, and diving/snorkeling. On the Borneo side, climbing Mount Kinabalu (13,435 feet/4,095 meters on a two-day trek is a popular activity.

Transportation: Flights are available from Jakarta and other airports in Indonesia, as well as Singapore and Malaysia.
Bali

Bali: Bali still deserves a mention, though my focus here is beyond Bali. If you’ve been going hard visiting temples or have been doing something intense like a hiking or dive trip, you might need some downtime at the beach in Kuta or a yoga retreat in Ubud. Also, Bali tends to be a hub for transportation and planning for trips further east in the archipelago. My strategy in Bali is to avoid driving long distances, meaning anything longer than 10 minutes to a restaurant. There’s still magic to be found, but it’s not on the clogged roadways. Find a place you want to be, walk everywhere, and relax.

Transportation: There’s an international airport in Bali with direct flights to far-flung destinations. There are ferries over to Java and Lombok, and fast boats to the Gili Islands.
Lombok

Lombok: So close to Bali that you can get there in 1.5 hours on a fast boat, Lombok features beautiful beaches and a climb up Mt Rinjani (12,224 feet/3726 meters).

Transportation: A regular ferry connects Padang Bai in Bali with Mataram in Lombok. There is an international airport in Mataram.
Gili Islands

Gili Islands: The Gili Islands are perfect for relaxing and not doing much. These tiny atolls are good for swimming, doing a little snorkeling (but don’t expect much), reading and drinking beer. You can walk around each of them in a couple of hours. They are a fun excursion from Bali or Lombok for a couple of days. They are too tiny to handle much development—already Gili Trawangan is known for its lively party scene and nightclubs, so don’t expect a peaceful romantic getaway. Gili Meno is the smallest and quietest. Gili Air is bigger than Gili Meno and livelier than Gili Meno.

Transportation: Fast boats are available from several locations on Bali, including Padang Bai. If you’re traveling from Lombok, ferries ply the waters between Bangsal, at the northern end of Lombok, and the Gilis, as well as other locations.
Sulawesi

Sulawesi: Sulawesi, with several long peninsulas radiating from a center, is known as the Orchid island. It’s located near the center of the Coral Triangle, a vast area of ocean known for its reef-building corals and marine biodiversity, so diving and snorkeling are popular. In addition, the Toraja culture, with their animistic beliefs and elaborate funeral rituals involving burial sites carved into rocky cliffs and massive boat-shaped traditional houses known as tongkonan, is fascinating, and changing fast as people convert to Christianity. Sulawesi also has excellent beaches and diving/snorkeling.
Transportation: There are flights from Bali and Jakarta and other destinations.
Flores

Flores: This is one of the most accessible extensions from Bali because it’s a short flight. The Komodo Islands are accessed from Labuan Bajo, with incredible snorkeling and Komodo Dragon viewing. If you have more time, an overland trip through Flores offers a glimpse of a fast-disappearing way of life.

Transportation: There are easy flights from Bali and Jakarta to Labuan Bajo, the most common airport to fly into.
West Papua/Raja Ampat

West Papua: West Papua shares the second-largest island in the world with the independent Papua New Guinea. Sorong, in West Papua, is the main jumping-off city to Raja Ampat, a distinct archipelago of 1500 small islands spread over 27,000 square miles in the Coral Triangle. Raja Ampat is in the global epicenter of tropical marine biodiversity. This is often considered a must-see destination by serious divers and snorkelers. There are many liveaboard, dive resorts and homestays. Sorong is also a gateway to interior tribes living traditional lifestyles.

Transportation: Transportation can be challenging. There are a few flights a day from other parts of Indonesia, mostly in the middle of the night. There are some ferries. Most high-end resorts provide their own boat transportation.
This is a quick taste of a few islands worth exploring—this will help you plan your Indonesia itinerary. I’ll be sharing more detailed posts soon, so stay tuned—or better yet, subscribe so you don’t miss them.

The post Beyond Bali: Your Indonesia Island Itinerary Guide appeared first on Inga's Adventures.
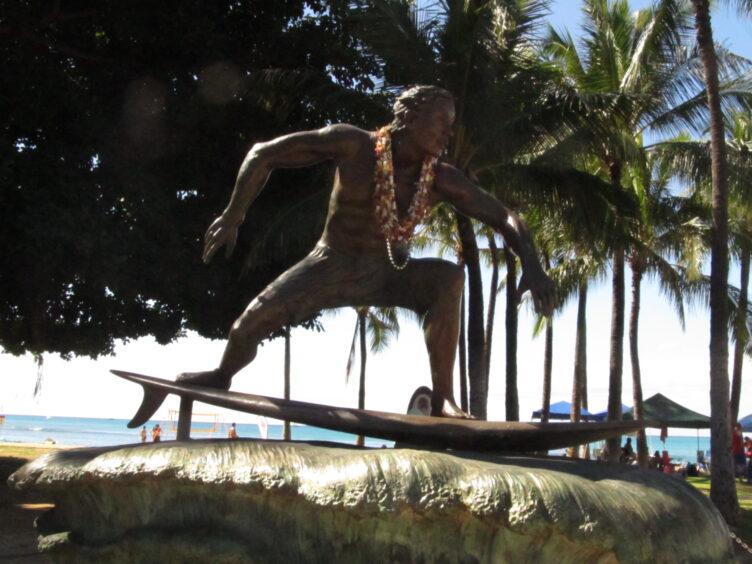
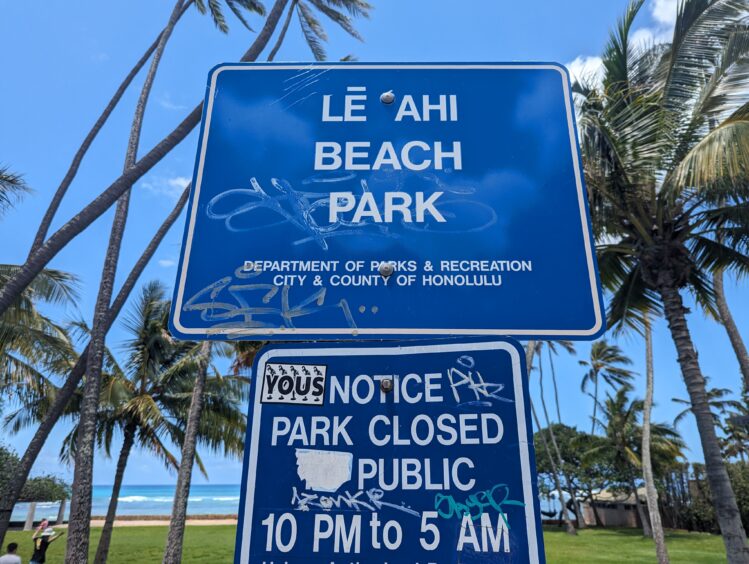
Coast Walk Around Diamond Head, Oahu, Hawaii 2 Feb 12:37 PM (8 months ago)
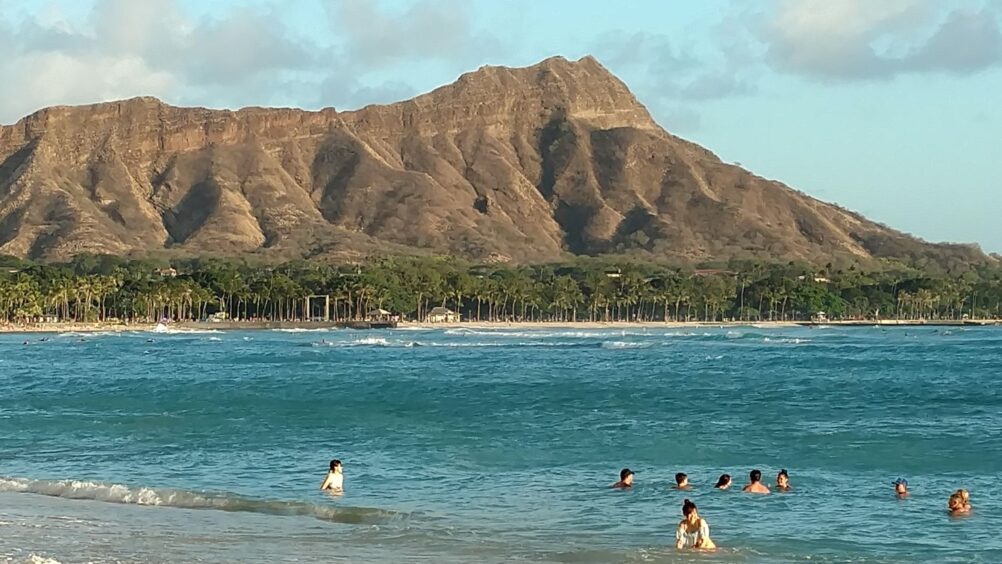
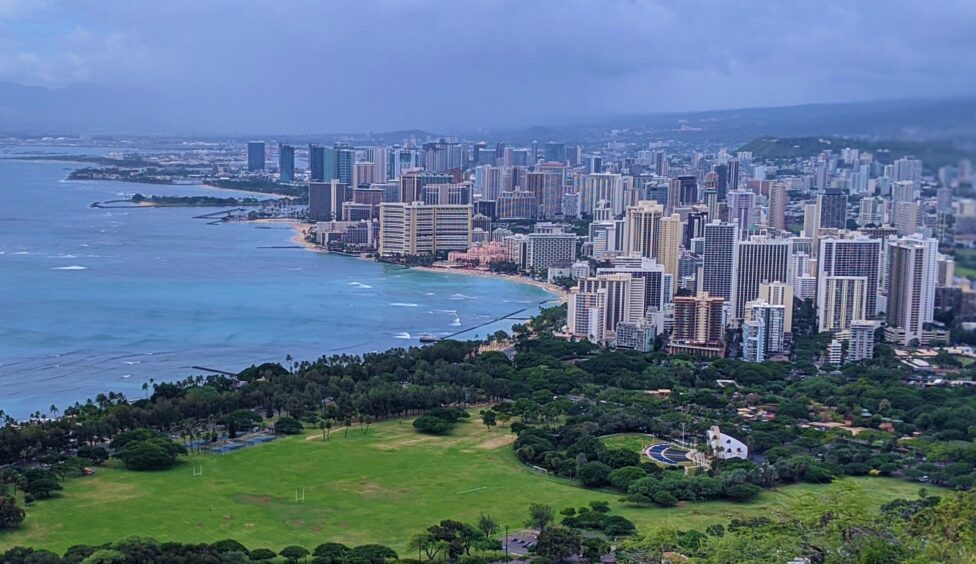
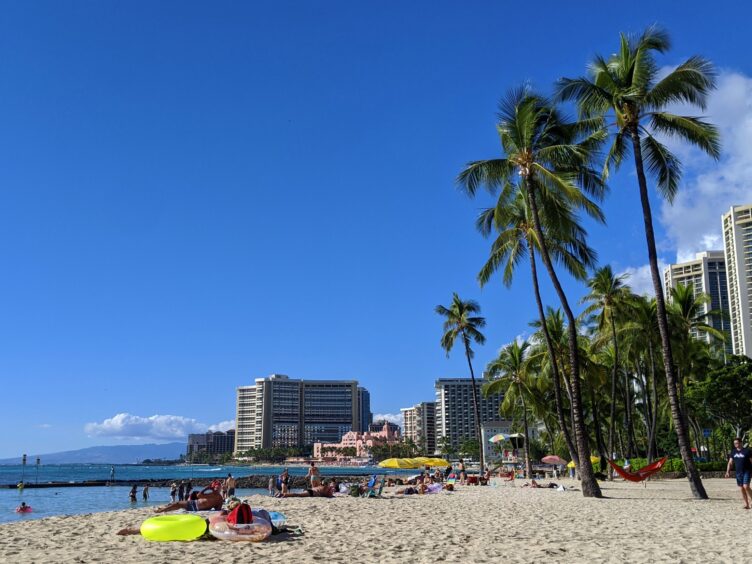
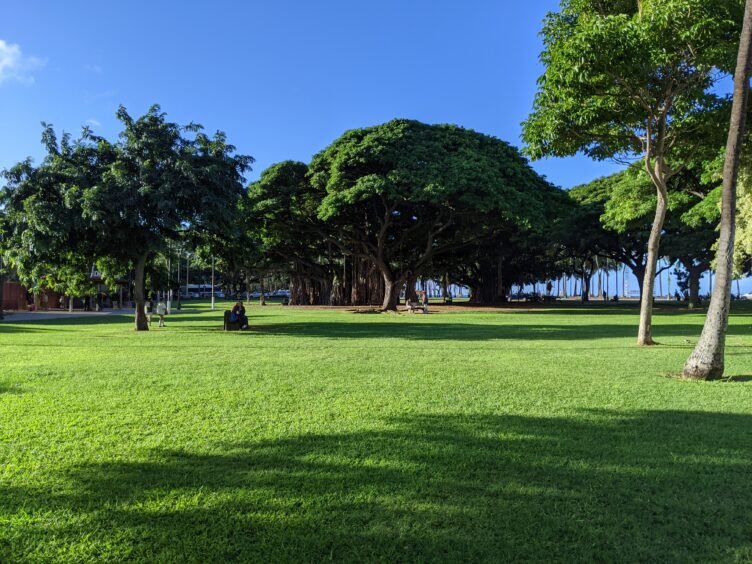
Diamond Head, the iconic landmark of the Hawaiian islands, is more than a distinctive volcanic tuff cone. It’s also a neighborhood that encompasses the 300-acre lush green Kapiolani Regional Park at the edge of Waikiki and miles of coastline dotted with beaches and pocket parks.
History
Hawaiians believed Diamond Head is a manifestation of Pele, the goddess of fire, volcanoes, and creation. They also believed it was a source of spiritual power and a place where ancestors could communicate with the gods. It’s a sacred place where Hawaiians would offer gifts to the gods.
Known as Leahi in Hawaiian, the name may describe the promontory (lea) that resembles the dorsal fin of tuna (ahi). British sailors mistook the sparkling calcite crystals for diamonds, leading to the current name.
A fort was established by the United States in 1906 as Diamond Head Reservation and renamed Fort Ruger in 1909 for the purpose of defending its newly annexed territory.
Kapiolani Park was originally a popular horse racing site, established by King Kalakaua in the 1870s.
Walks
If you’re staying in Waikiki or Diamond Head, there are a number of walks of varying intensity, ranging from short strolls to the longest, tracing a circle around the base and including a trek to the top.
Sample Distances
- Waikiki Police Station to Sans Souci/Kaimana Beach=1 mile
- Loop around Kapiolani Park=1.8 miles
- Inside loop around Kapiolani Park + zoo=1.1 miles
- Loop around Kapiolani Park and Diamond Head=4.8 miles
- Route up and down Diamond Head=1.6 miles (entry reservation required by foot or vehicle)
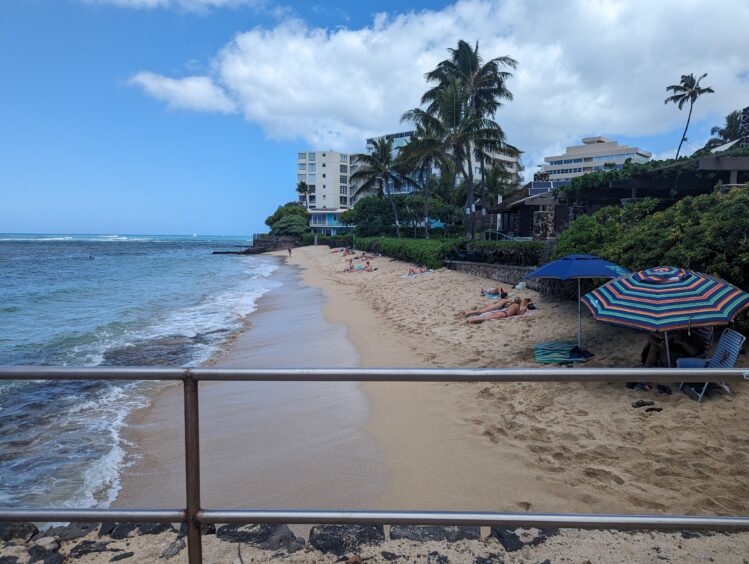
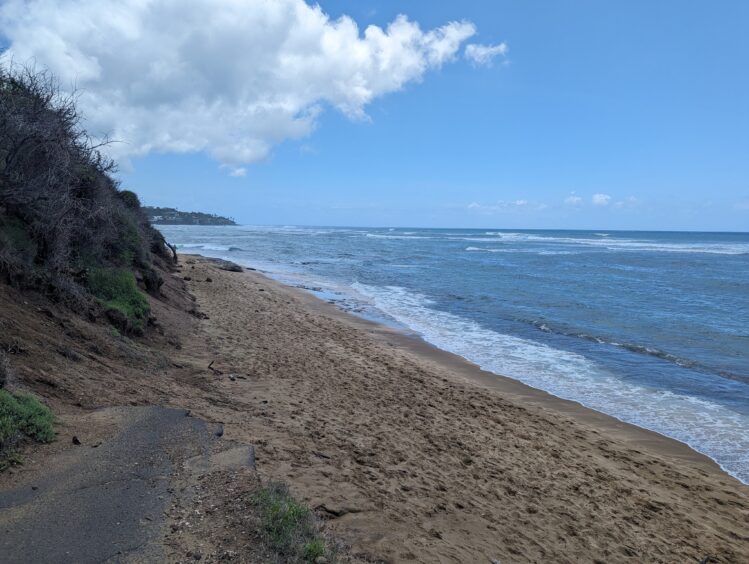
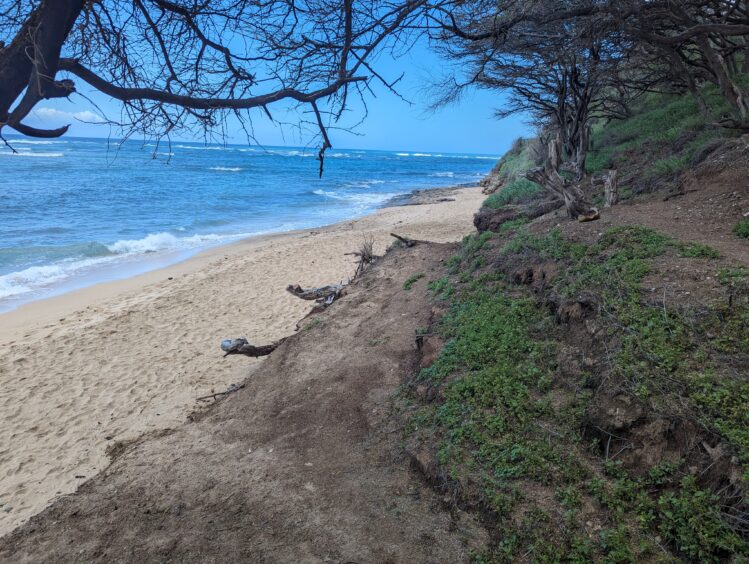
Coast Walk
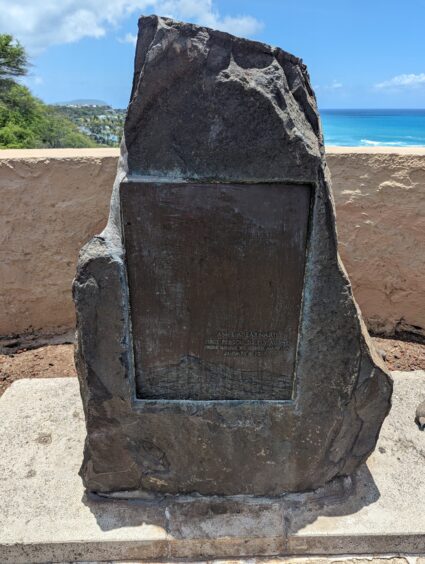
For this article, I’m going to cover the section south of Kapiolani Park heading toward Kahala along the coast, where several small parks offer access to the sea. This route starts at Sans Souci/Kaimana Beach and ends at the Amelia Earhart Memorial.
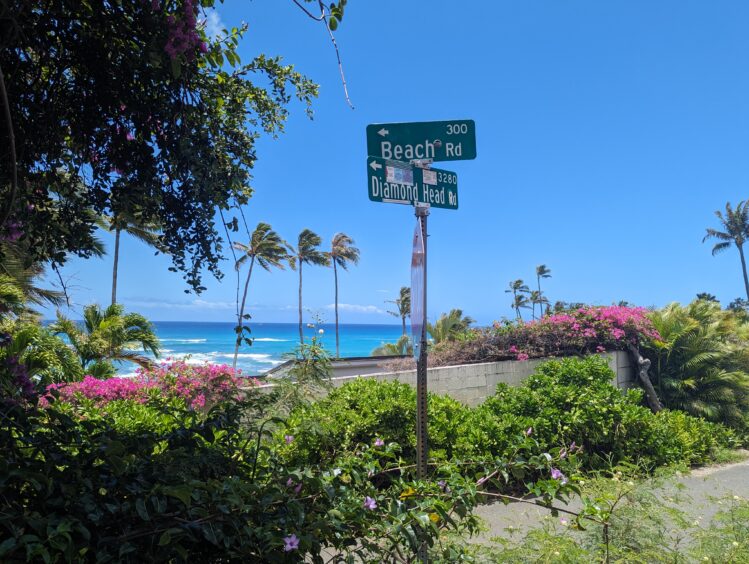
Start on Kalakaua Avenue at Sans Souci Beach and walk south. Altnerative start: you can also start from Waikiki on Kalahaua Avenue. Turn left on Coconut Ave. Turn right on Diamond Head Avenue and keep going to the barely recognizable Amelia Earhart Monument (see photo at the end). To continue the walk around the base of Diamond Head, continue curving around the mountain on Diamond Head Avenue to the visitor entrance to the Diamond Head State Monument. Note that at Fort Ruger Park, you’ll need to turn left to stay on Diamond Head Ave.
Reservations
Reservations are not required for most of the walks listed here, but if you want to climb Diamond Head, you’ll need one. You’ll need a reservation to enter Diamond Head State Monument by vehicle or foot–get them from the Hawaii Division of State Parks.
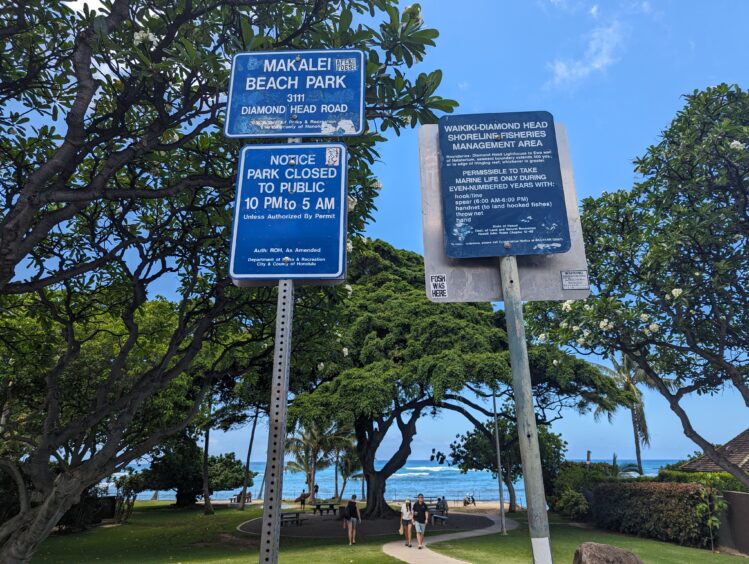
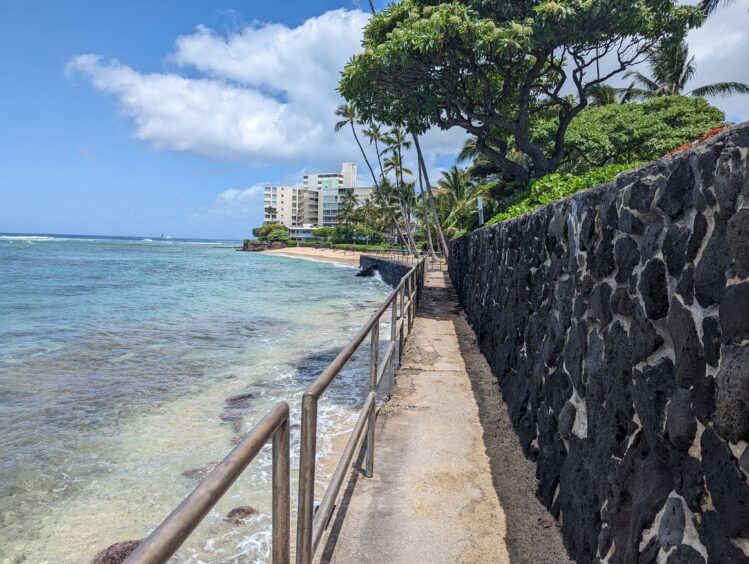
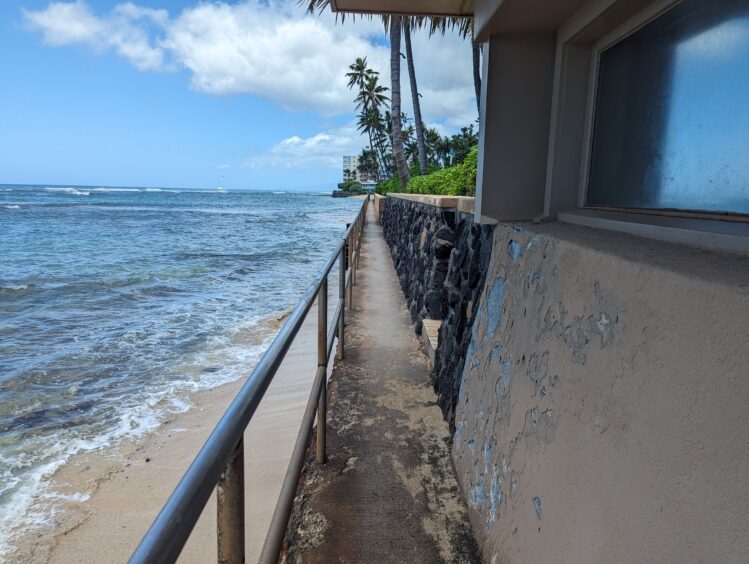
Connector between Makalai Beach Park & Leahi Beach Park (Inga Aksamit)
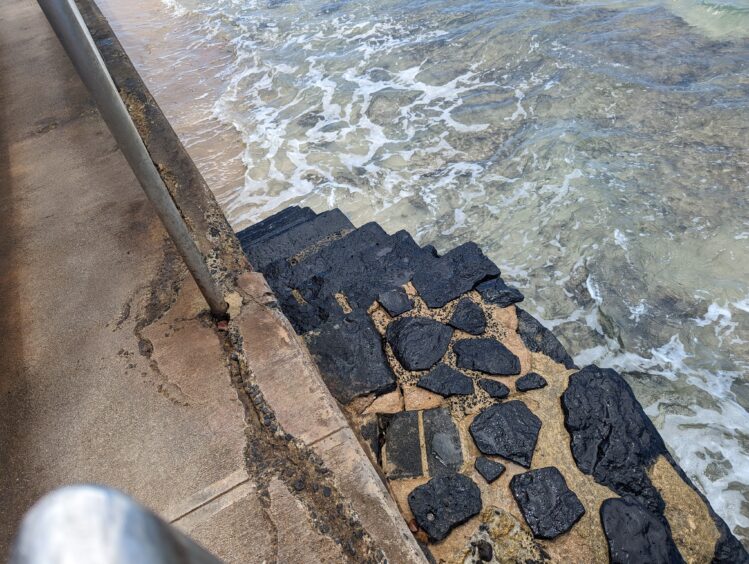
Steps to the ocean between Makalai Beach Park & Leahi Beach Park (Inga Aksamit)
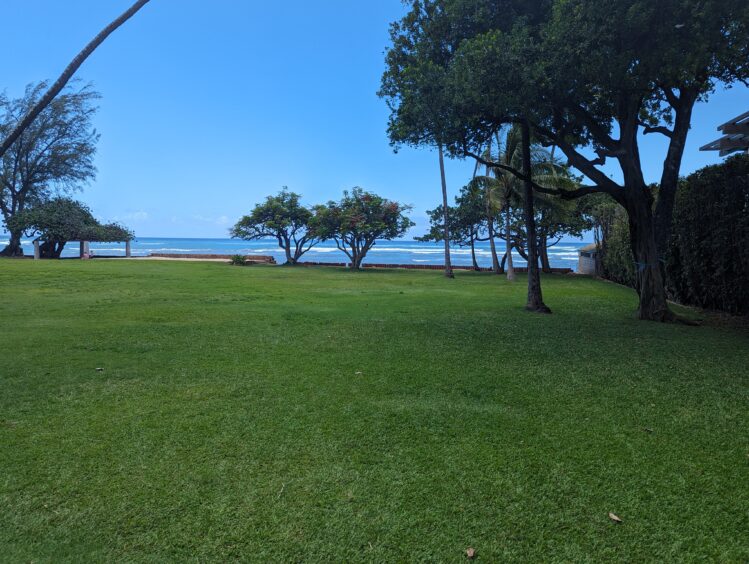
Head down Beach Road to Kamasutra Beach Park (Inga Aksamit)
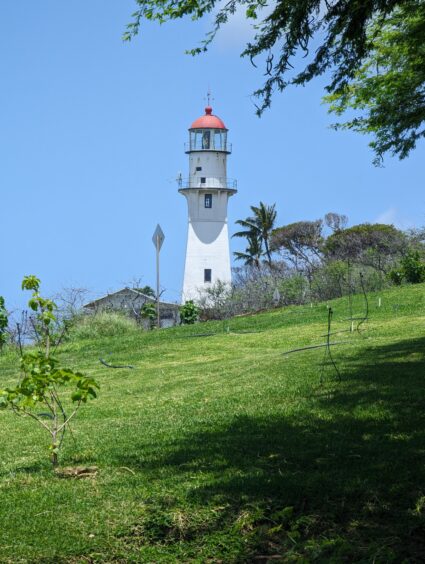
Diamond Head Lighthouse (Inga Aksamit)
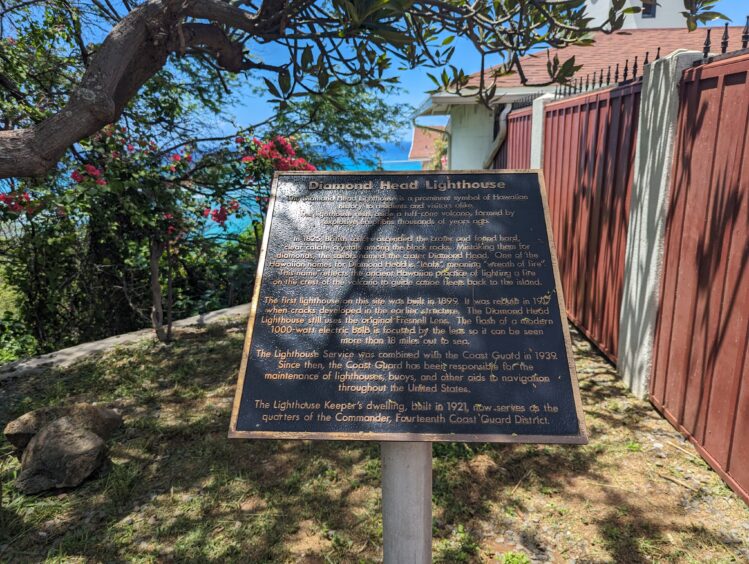
Diamond Head Lighthouse (Inga Aksamit)
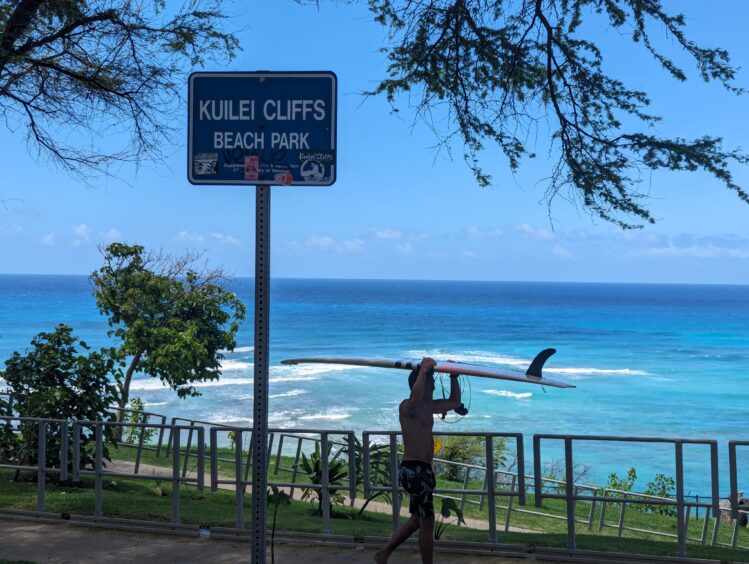
Kuilei Cliffs Beach Park gets a lot of love from volunteers (Inga Aksamit)
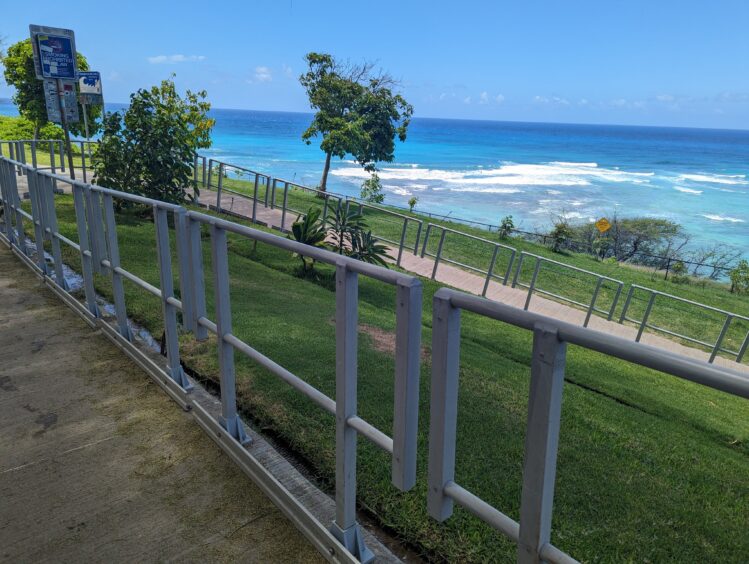
Kuilei Cliffs Beach Park (Inga Aksamit)
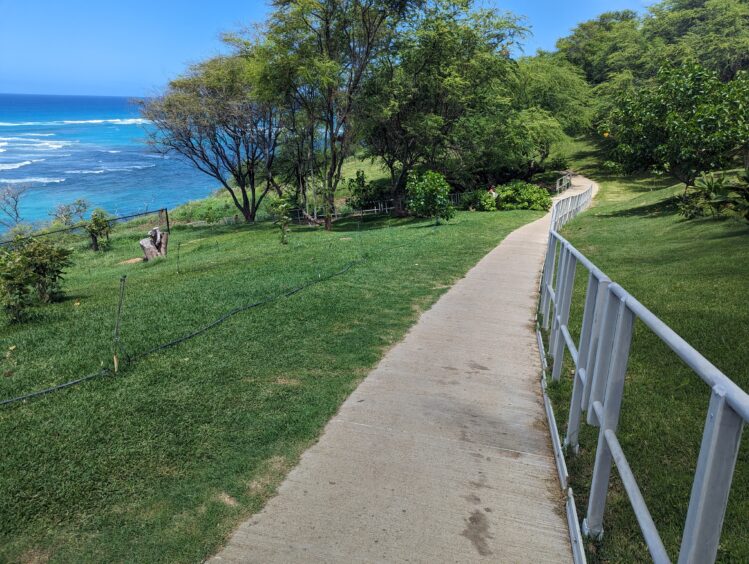
Kuilei Cliffs Beach Park (Inga Aksamit)
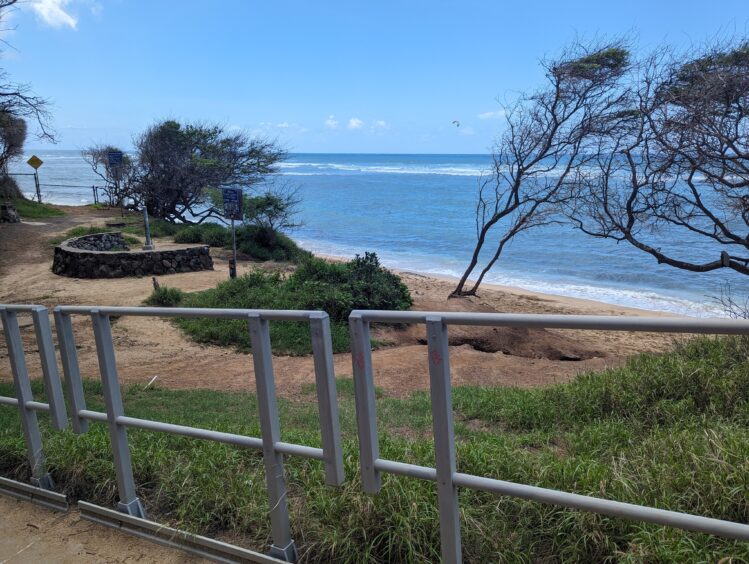
Kuilei Cliffs Beach Park (Inga Aksamit)
Kuilei Cliffs Beach Park (Inga Aksamit)
Kuilei Cliffs Beach Park (Inga Aksamit)
The post Coast Walk Around Diamond Head, Oahu, Hawaii appeared first on Inga's Adventures.
Five Hikes on the Kenai Peninsula, Alaska 29 Oct 2024 5:05 AM (12 months ago)
In a previous article, I described my favorite hikes around Anchorage. In this article, I describe five hikes further south from Anchorage on the stunning Kenai Peninsula. The scenery couldn’t be more dramatic than the soaring peaks and water views of the Cook Inlet and Gulf of Alaska. These five hikes on the Kenai Peninsula take full advantage of the beautiful landscapes.
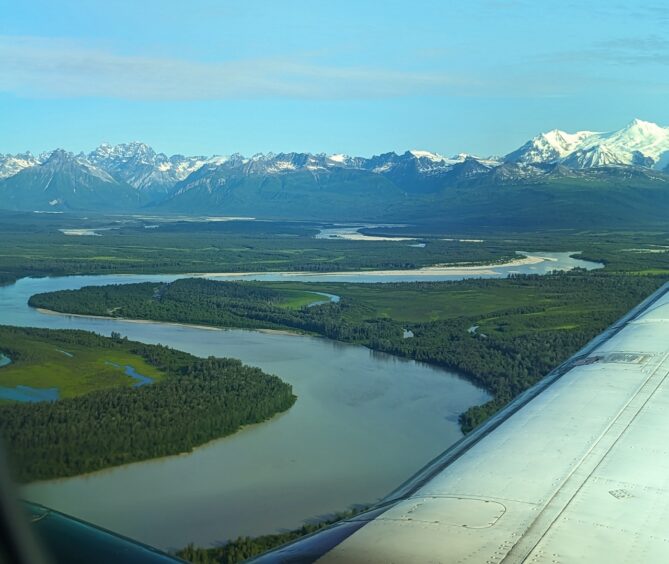
The first three hikes can be reached by road and are two-to-four hours away from Anchorage by car. Fore the last two, a water taxi is needed to visit Katchemak Bay State Park and Lake Clark National Park is reachable only by air.
Brief List of Hikes
- Resurrection Pass Trail, Hope, AK
- Exit Glacier Hikes, Seward, AK (Exit Glacier National Park)
- Tonsina Creek Rrail, Seward, AK
- Grewingk Glacier Lake Trail, Homer, AK (Katchemak Bay State Park)
- Tanalian Falls Trail, Port Alsworth (Lake Clark National Park)
Resurrection Pass Trail
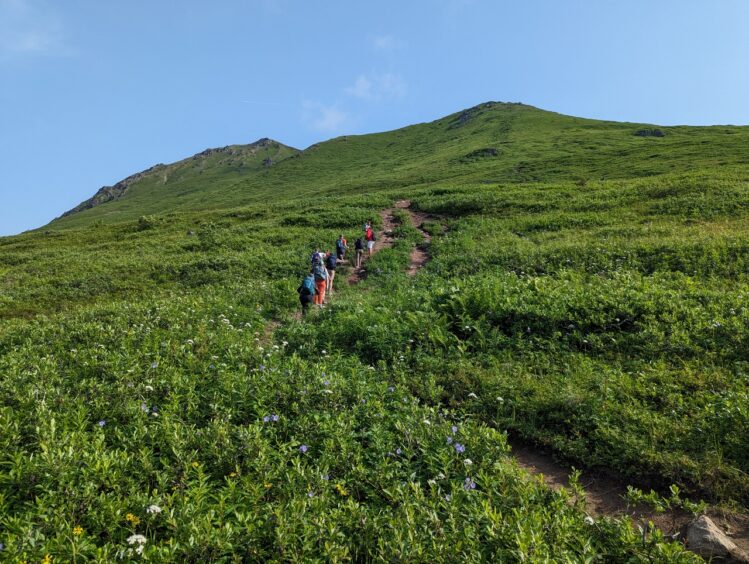
Located in Chugach National Forest, the 38-mile Resurrection Pass Trail can be accessed from either Hope or Cooper Landing for day hikes, backpackers, or hut-to-hut hikers. While there is a 2,600-foot pass, it’s nicely graded with only a few steep sections.
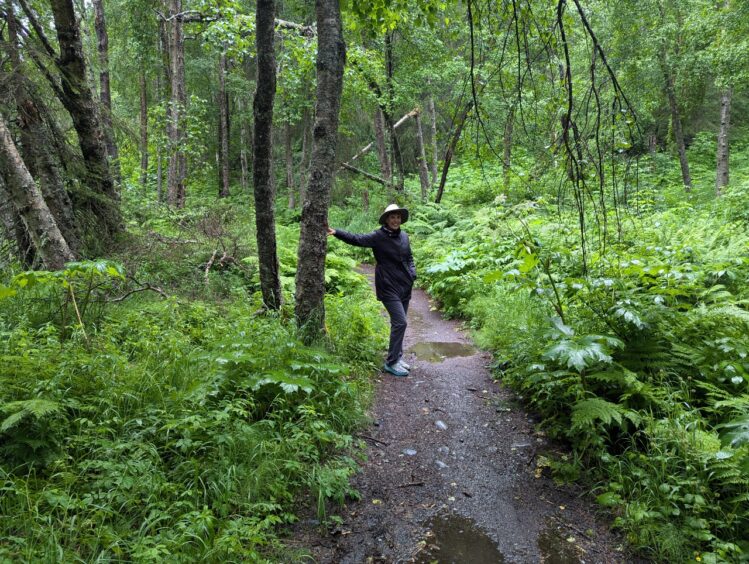
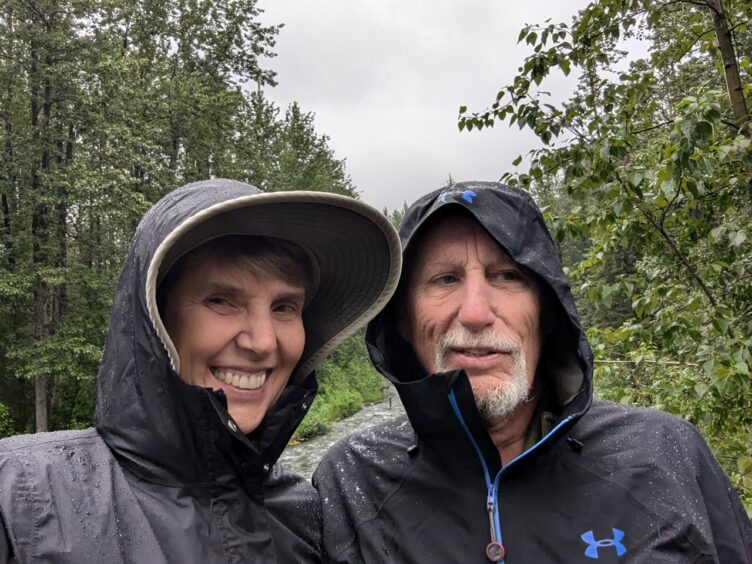
We did a day hike from historic Hope, an original and relatively untouched Gold Rush Town, and found the gentle, tree-lined trail along the Resurrection River to be pleasant, peaceful walking. The trail can also be accessed from Cooper Landing on Highway 1 at the opposite end. We hiked a couple of miles and reversed our tracks to return to Hope. Hope was a delightful town with few tourists.
Backpackers can hike the trail in three to five days or longer, staying in any of 19 campsites or eight public use cabins. Permits are not required for tent campers. Cabins can be reserved but demand is high—book these six months in advance by cabin name on Recreation.gov. See the Guide to Backpacking the Resurrection Pass Trail on Alaska.org for cabin and campsite information.
Alltrails: Resurrection Pass Trail
Exit Glacier Trails
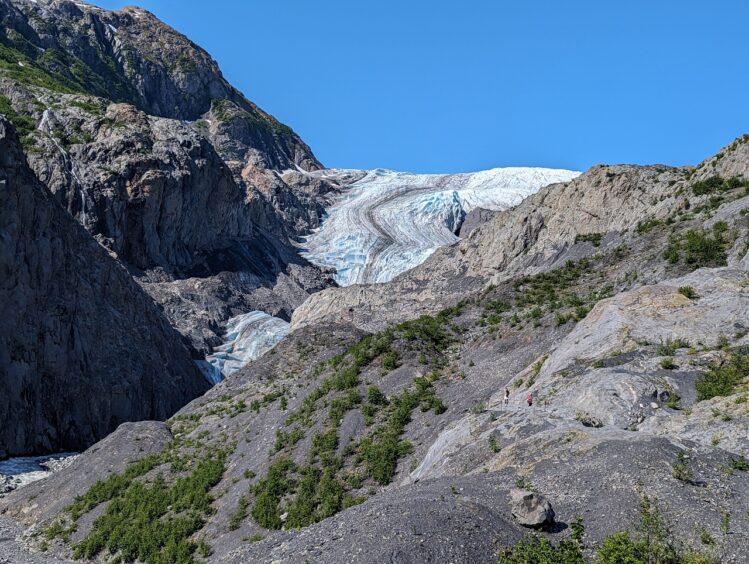
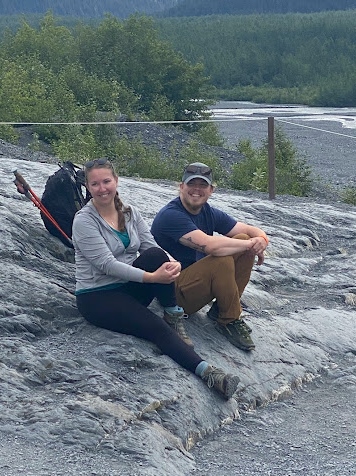
At the end of the Seward Highway is the Exit Glacier in Kenai Fjords National Park, just one of 40 glaciers flowing from the massive Harding Icefield in Seward, AK. From the Kenai Fjords National Park visitor center, there are a couple of hiking options.
The Glacier View Loop Trail and Glacier Overlook Loop Trail form a network of short trails that provide stunning views and photo opportunities of the Exit Glacier, as well as short side trails to the outwash plain at the bottom of the glacier. The trail is 2.2 miles of easy walking.
The Harding Icefield Trail offers a more challenging 8.6-mile (round trip) trail with an elevation gain of 3,198 feet. It’s a hard, steep hike from the visitor center to the edge of the Harding Ice Field.
Alltrails: Glacier Loop Trails
Alltrails: Harding Ice Field Trail
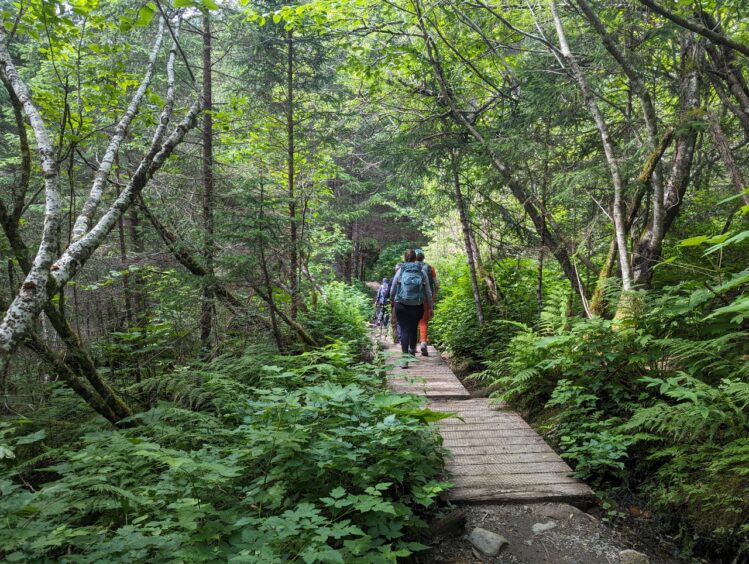
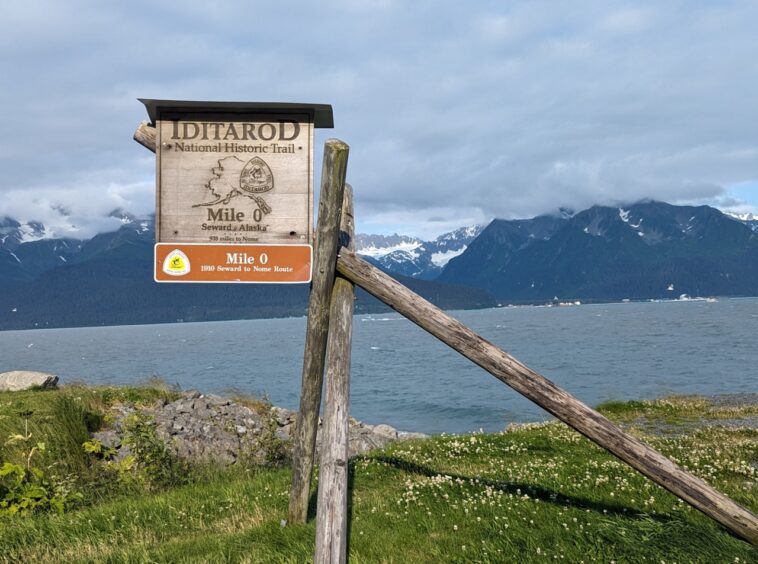
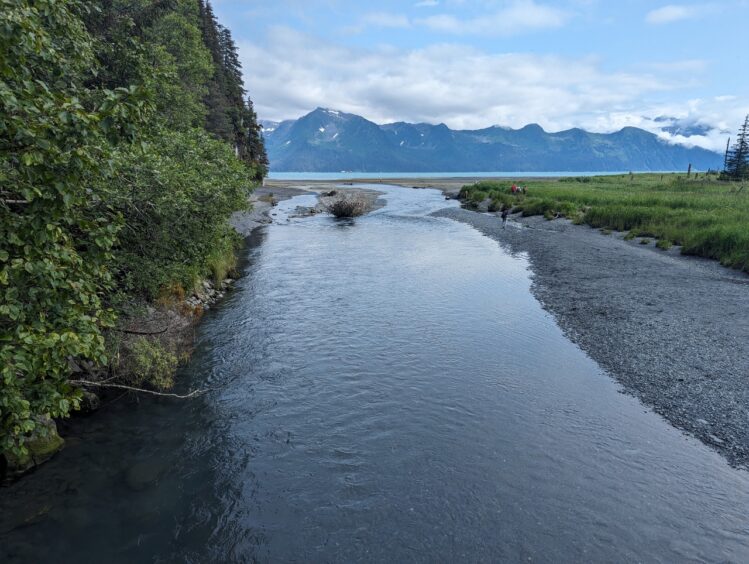
Tonsina Creek Trail
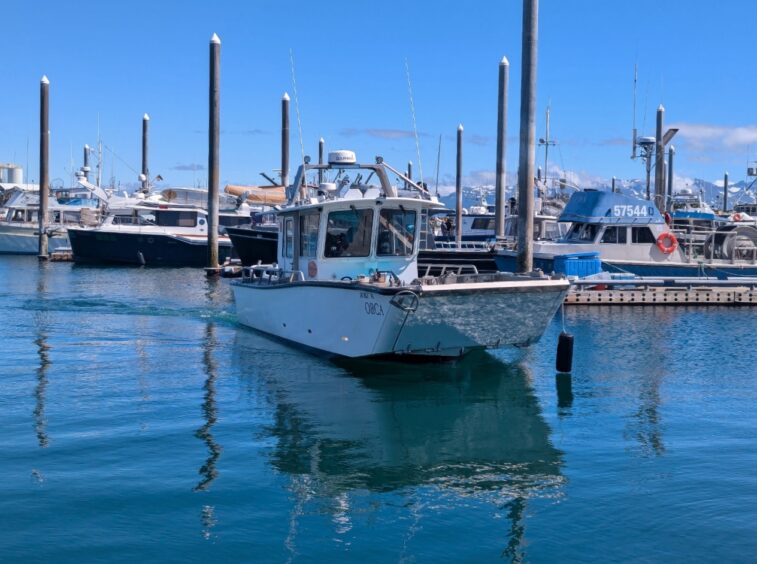
Just outside of Seward is the 3.1-mile (round trip) Tonsina Creek Trail in Lowell Point State Recreation Site. The trail climbs high above the water in dense forest before dropping steeply down to Tonsina Creek, providing access to a large beachfront site on Resurrection Bay where bald eagles can be spotted during salmon runs.
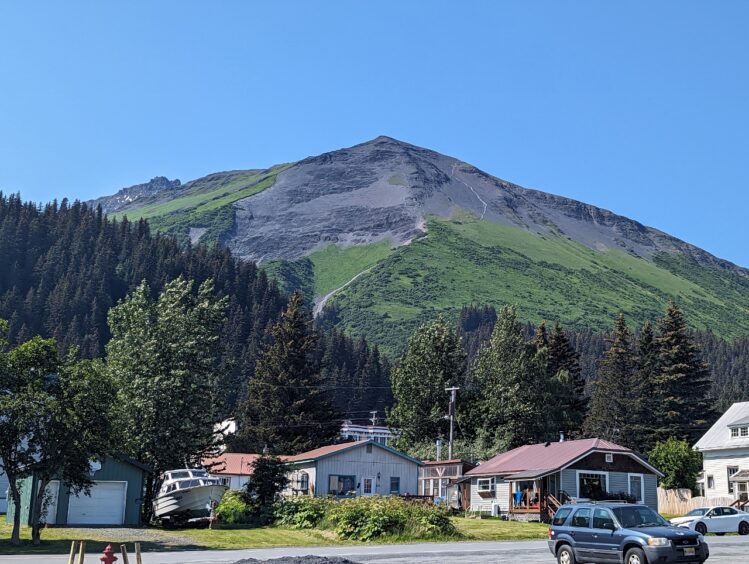
A suggested one-day Seward itinerary is to hike the Exit Glacier Loop trails in the morning, stop by some highlights in Seward and hike the Tonsina Creek Trail in the afternoon. Highlights of Seward include the Benny Benson memorial honoring the child designer of the Alaska flag, a viewing of the very steep Mount Marathon Trail visible from downtown, and the Mile 0 monument that marks the start of the famous Iditarod Race.
Alltrails: Tonsina Creek Trail
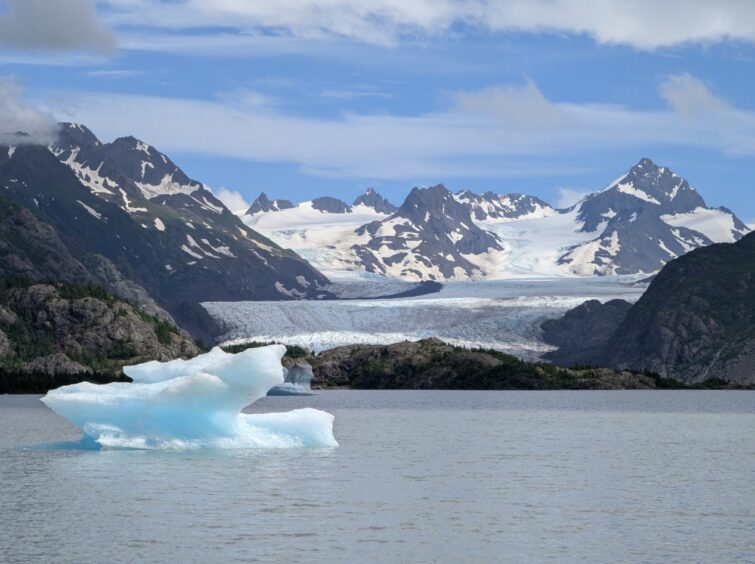
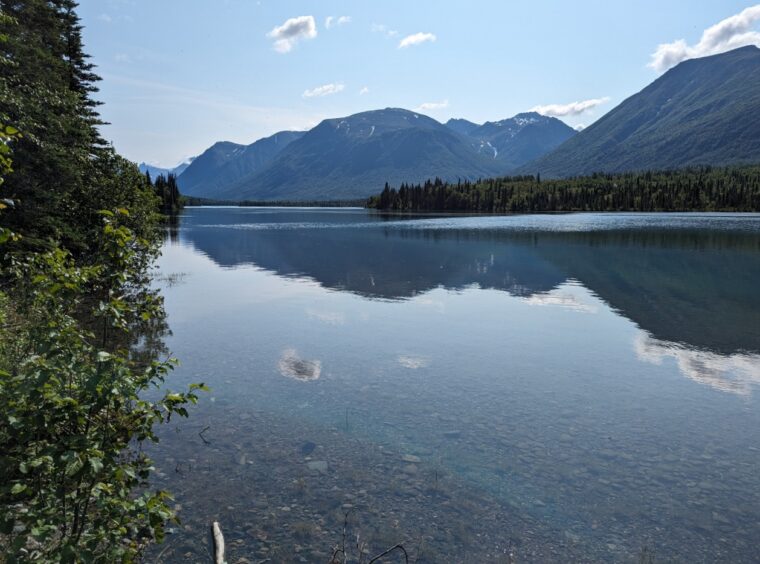
Grewingk Glacier Lake Trail
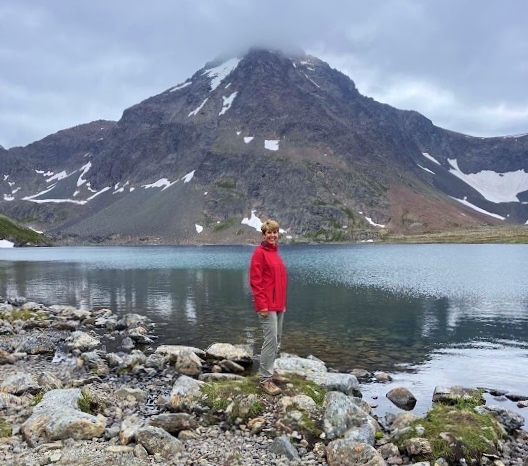
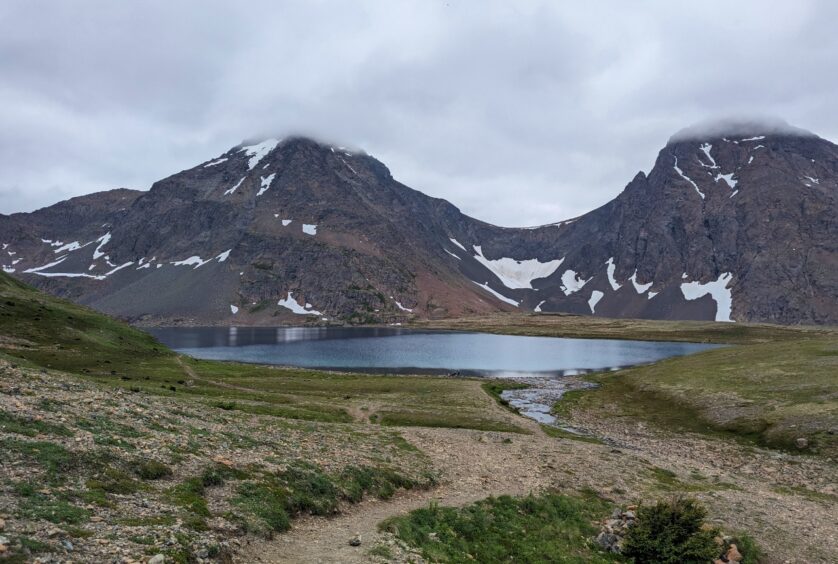
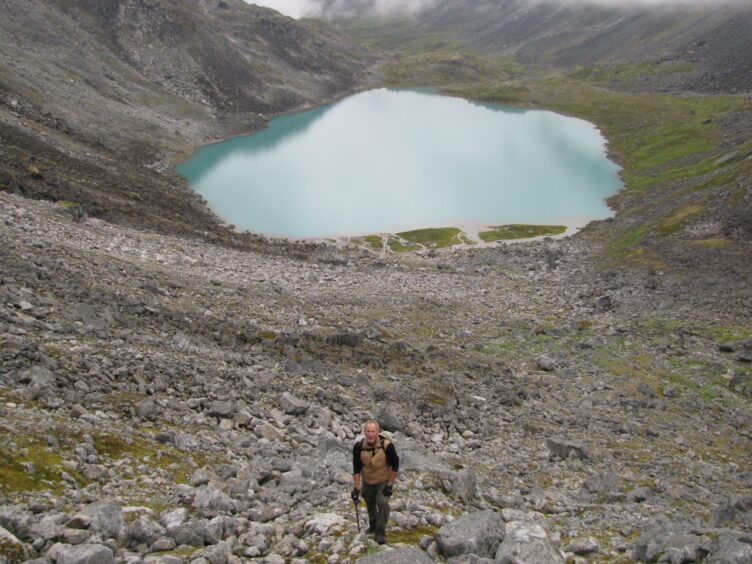
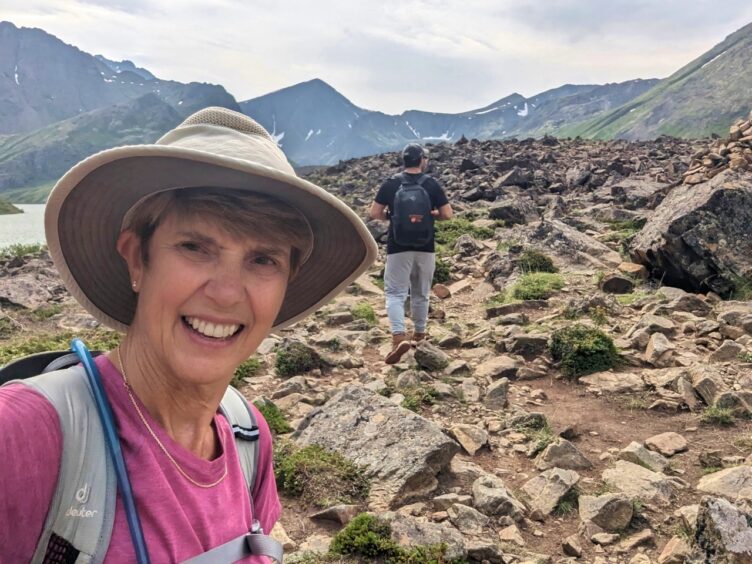
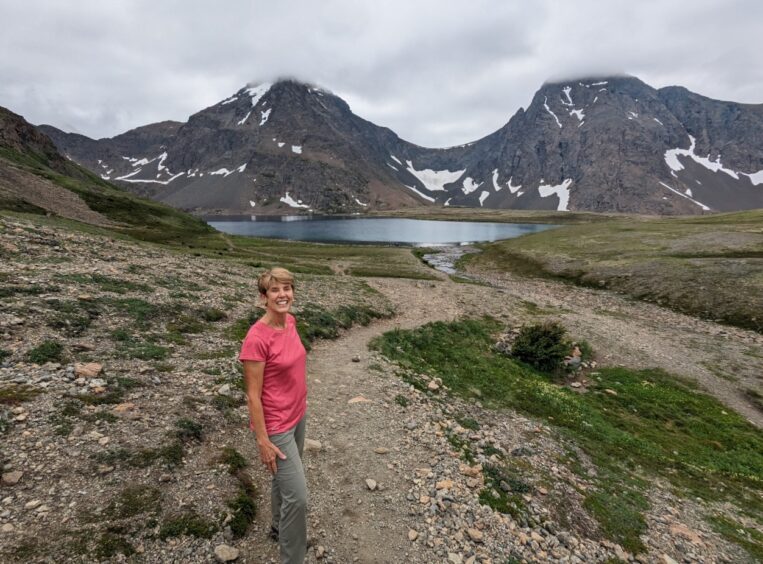
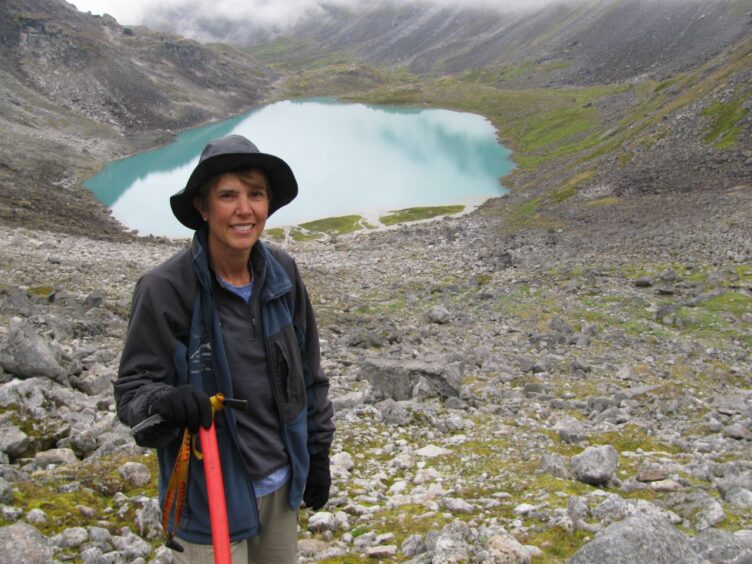
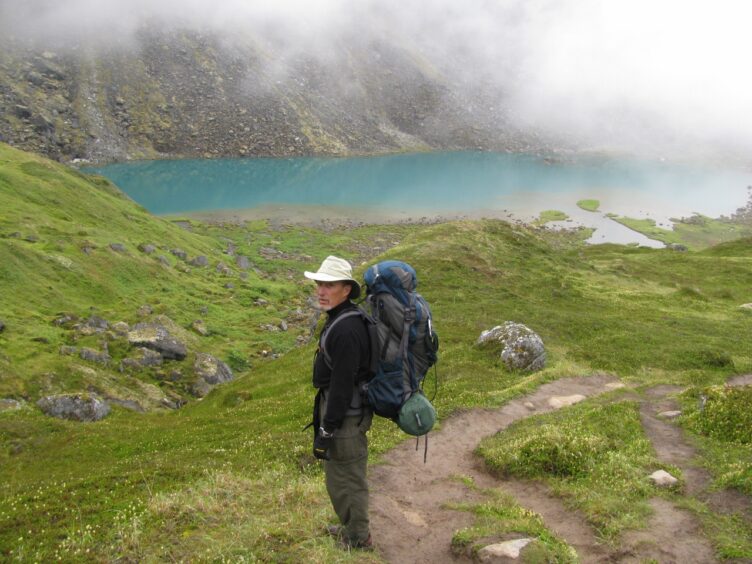
The Grewingk Glacier Lake Trail in Katchemak Bay State Park might be my favorite hike in Alaska. First, there’s the water taxi from Homer to reach Katchemak Bay State Park, then there’s the hike through a hilly forest with gorgeous water views. Then there’s Grewingk Glacier Lake with blue icebergs floating in the lake. The whole experience is magical.
There’s a network of trails around the lake and the water taxi can stop at different places. Arriving late in the day, we only had a couple of hours before we had to catch the last water taxi back. We did a 4.5-mile (round trip) hike to Grewingk Glacier Lake. To reach Katchemak Bay State Park, we took Mako’s Water Taxi to Halibut Cove, hiked the Saddle Trail up a steep hill and connected to the Glacier Lake Trail to reach the lake. We returned the same way. If you want a longer hike, there are several ways to extend the route on intersecting trails. When you purchase a water taxi ticket, you can ask about different places they can drop you and they have maps of different trails.
Alltrails: Saddle and Grewingk Lake Trail

Tanalian Falls Trail
The Tanalian Falls Trail in Lake Clark National Park is the hardest to reach because there are no roads in the national park and access is by small plane, float plane or boat only. The 4.2-mile hike (round trip) passes through birch and spruce forests. We enjoyed a pleasant hike along the Tanalian River to the point where the river drops over a 30-foot rocky escarpment to form the short but turbulent Tanalian Falls. For a longer hike of 6.5 miles (round trip), continue past the waterfall on the Kontrashibuna Lake Trail.
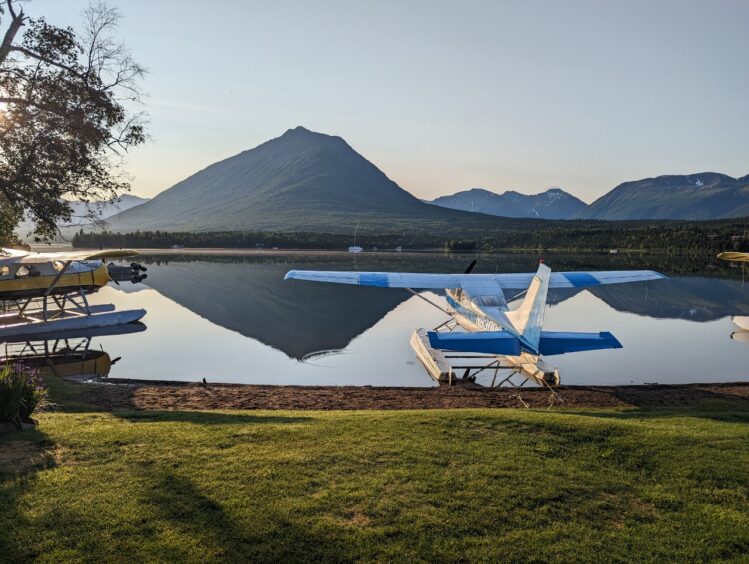
We flew Lake Clark Air from Anchorage to an airstrip at Port Alsworth, where we stayed in a private cabin at the Farm Lodge and Lake Clark Resort for two nights. We transferred to a floatplane to access the historic Dick Proenneke cabin and did a short hike there with a guide. This was a highlight of our trip.
Alltrails: Tanalian Falls Trail
Alltrails: Kontrashibuna Lake Trail
***
Every time I go to Alaska, I think it might be my last, but I can’t seem to get enough of this incredible state that is full of so much natural beauty. Any of these five hikes on the Kenai Peninsula will give the visitor a taste of Alaska.
The post Five Hikes on the Kenai Peninsula, Alaska appeared first on Inga's Adventures.
Five hikes near Anchorage, Alaska 24 Sep 2024 5:00 AM (last year)
Alaska has long been a favorite destination of mine. I love the majestic mountains, remoteness, lingering pioneer spirit, and softly angled light. I’ve flown in and out of Anchorage, Juneau, Fairbanks, and Whitehorse, Yukon, but never spent much time around Anchorage, using it as a launching point for other adventures. Over the last two years, I’ve been able to spend a month in and around Anchorage, sightseeing, exploring, and hiking. Below are five hikes near Anchorage, Alaska.
When you’re in Anchorage and want to stretch your legs, take advantage of the 20-mile paved Tony Knowles Coastal Trail along the city waterfront. The trail has two-way traffic and is open to cross-country skiers, bikers and pedestrians.
When I say “near” Anchorage, I’m including hikes 30-90 minutes away by car.

Brief List of Hikes
I’ll describe more about each hike in the next section.
- Rabbit Lake Trail, Chugach State Park, Seward Highway
- Turnagain Arm Trail, Chugach State Park, Seward Highway
- South Fork Valley Trail, Chugach State Park, Seward Highway
- Marmot Mountain Trail, Hatcher Pass Area
- Reed Lakes Trail and Bomber Glacier, Hatcher Pass Area
Rabbit Lake Trail
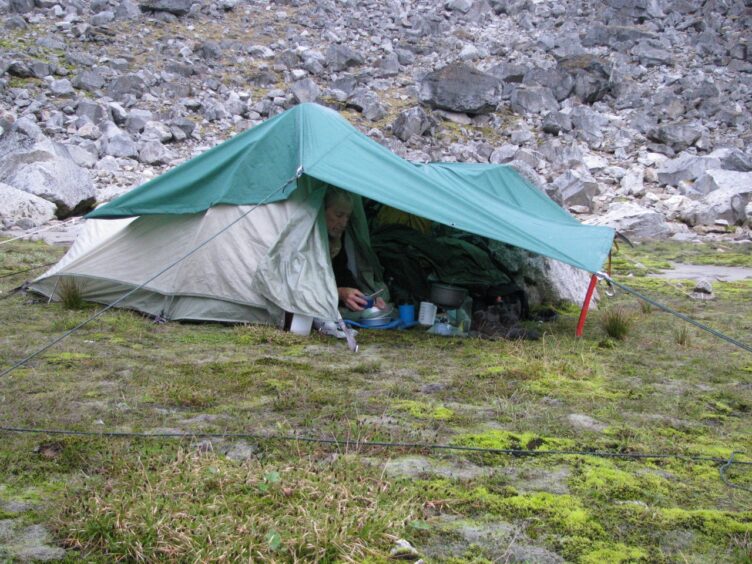
We hiked Rabbit Lake Trail, a wide, gently ascending trail flanked on both sides by steep ridges that sweep up to the sky. This is only one of many great hikes in Chugach State Park, a hiker’s playground 30-minutes away from Anchorage. Moose, bears and Dall sheep can be seen on the flanks, unconcerned by the hikers below. The 8.7-mile (round trip) trail leads to a comely lake with a double peak framed perfectly as the backdrop. The photos compress everything to human scale, but see if you can find the orange tent in the lower right corner of the photo to get an idea of the size. p on the ridge to the south is Rabbit Creek Trail, a parallel trail, if you want to make it a loop or do hike with a different view.
To reach the Rabbit Lake Trailhead, drive 30-minutes south from Anchorage on the Seward Highway.
Turnagain Arm Trail
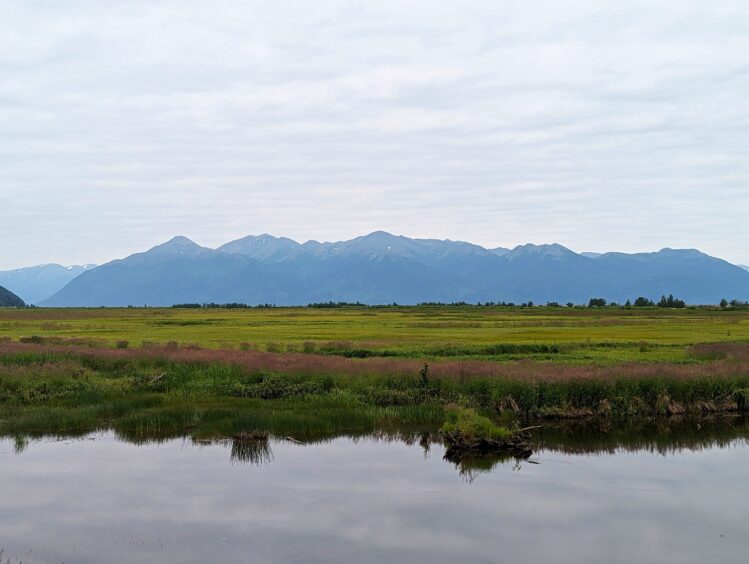
Turnagain Arm Trail is an easy trail with convenient access from Seward Highway in Chugach State Park. The trail extends 10 miles, but you can make it short or long by turning around when you wish. The water views of Turnagain Arm are spectacular on a clear day when you break through the thick forest.
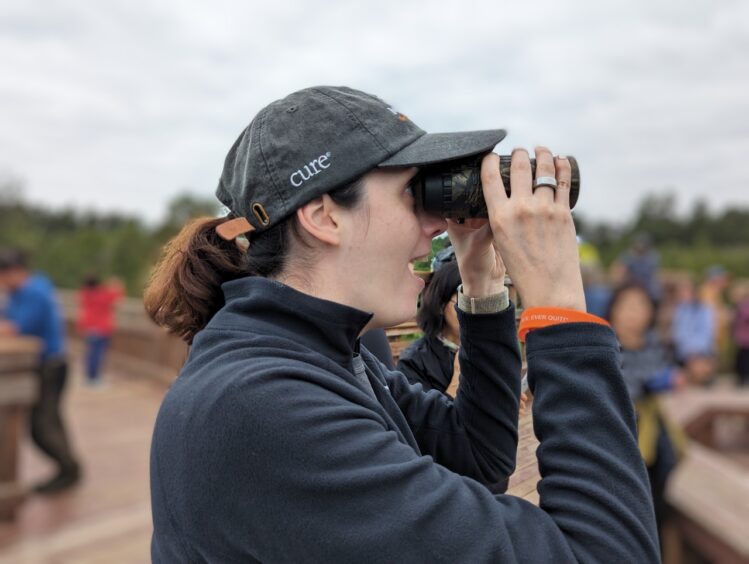
A fun addition to this hike is a quick stop at the Potter Marsh Boardwalk that extends 1500 feet over the marsh. If you’re lucky, you’ll see bald eagles, too. Stop at the boardwalk parking lot before you get to the Potter Trailhead parking lot. It’s just past the Rabbit Creek exit.
To reach the Northern Turnagain Arm Trail, drive 20 minutes south of Anchorage on the Seward Highway to the Potter Trailhead parking lot.
Marmot Mountain Trail
Marmot Mountain Trail looks benign, but the steep, rocky shoots straight up the mountain with a nary a switchback. It’s a short, 2.6-mile round trip, intense workout with a knife edge and gorgeous views at the top.
To reach the Marmot Mountain Trail, drive northeast for 90 minutes from downtown Anchorage. The road winds up a gently ascending route through lush hills to the Fishhook Trailhead parking lot. If you’re on your way to Denali, it wouldn’t be too out of the way to stop here for this hike. It’s only about a half-hour drive from Palmer or Wasilla.
Alltrails: Marmot Mountain Trail
Reed Lakes and Bomber Glacier
In the same vicinity as the Marmot Mountain Trail is the Reed Lakes Trail and beyond the Lakes is a steep ascent to Bomber Glacier, a glacier featuring wreckage from a bomber crash. You can customize the length: 6.7 miles round trip to Lower Reed Lake, 8.7 miles round trip to Upper Reed Lake, 10.5 miles round trip to Bomber Glacier. Note that you’ll need Microspikes and poles to hike on the glacier safely. This is a beautiful trail with varied terrain ranging from well-maintained trail to boulder hopping and it’s not uncommon to find lots of water running through it.
To reach the Marmot Mountain Trail, drive northeast for 90 minutes from downtown Anchorage to the Reed Lakes Trailhead parking lot.
Alltrails: Lower Reed Lakes Trail
Alltrails: Upper Reed Lakes Trail

South Fork Valley Trail
South Fork Valley Trail is in Chugach State Park but is accessed from a different direction. This is a long, 10.8-mile out-and-back hike that is relatively easy because there is little elevation gain. Rewards are plentiful with wide open spaces, a well-maintained trail and two lovely lakes separated by an extensive boulder field. If the boulder field is intimidating, you can skip it and it’s still a very nice hike. There are several other hikes in the vicenity, as well.
To reach the South Fork Valley Trailhead, head northeast out of Anchorage for about 30 minutes.
Alltrails: South Fork Valley Trail
Guides
I hiked some of these with my husband and others with a guide, Nate Dietrich, when I joined a fundraising group from the Multiple Myeloma Research Foundation. Nate and Siobion did a wonderful job, planning and pivoting every day to meet the needs of the group, feeding us, encouraging us, shepherding us, and laughing and crying with us. Based in Fairbanks, they have lived in Alaska a long time, are seasoned adventurers and experienced in guiding. If you’re looking for a guide in Fairbanks, Denali or Anchorage, contact Nate at Get After It Guiding.
Weather
Weather is famously variable in Alaska. When we arrived in mid-July, we were told that Anchorage had barely seen any sun the whole summer, and daily rain was the norm. We lucked out and had one week of perfect sunny weather, followed by a week of partly cloudy weather that was perfect for hiking. The only days it rained were the first and last days, when it poured all day long. Luckily, we had planned to go to the fascinating Anchorage Museum the first day and the last day was a travel day when we fit the small Anchorage Air Museum in. Another year, we got rain nearly every day.
Clothing
Layers are the key to hiking and traveling around Anchorage and the Kenai Peninsula in summer. My packing list included:
- Quick dry hiking pants
- Synthetic short sleeve T-shirt
- Synthetic long sleeve T-shirt
- Light down puffy jacket
- Head net for mosquito protection
- Light raincoat that fit over my down jacket
- Altra Timp trail runners
- Oboz Sawtooth waterproof low top hiking boots
- Darn Tough wool and Tilley travel socks
- Brimmed Tilley hat
- 28-liter Deuter backpack with pack cover
- 1-liter water bottle with Tailwind Nutrition electrolyte powder
- 3-liter Platypus hydration bladder
Some of my favorite hiking in the world is in Alaska and I drank in the views every day, so grateful that the rain held off and the mosquitoes didn’t bother me. I can’t wait to return because there is always more I want to see.
Navigation
I used Google Maps to reach all the trailheads using the location names provided for the parking lots.
For navigating the trails, I used Alltrails to get an overview and GaiaGPS once I was on the trail. Both apps work well.
Lodging
It’s best to keep expectations low in Alaska unless you’re on an unlimited budget, because of the eye-watering rates, even for “budget” hotels. Lodging is unusually expensive, as are other goods and services, which reflects the remoteness of the area.
The Holiday Inn Express was clean and comfortable, with large rooms that accommodated all our hiking gear. Breakfast was adequate if uninspired with hard-boiled eggs, yogurt, fruit, cereal, pancakes and pre-formed omelets. The nightly rate for this modest lodging ranges from $300-400, to give you an idea.
I have also stayed at the Hyatt House Anchorage ($450) and Hyatt Place Anchorage-Midtown ($500), with the latter being more upscale.
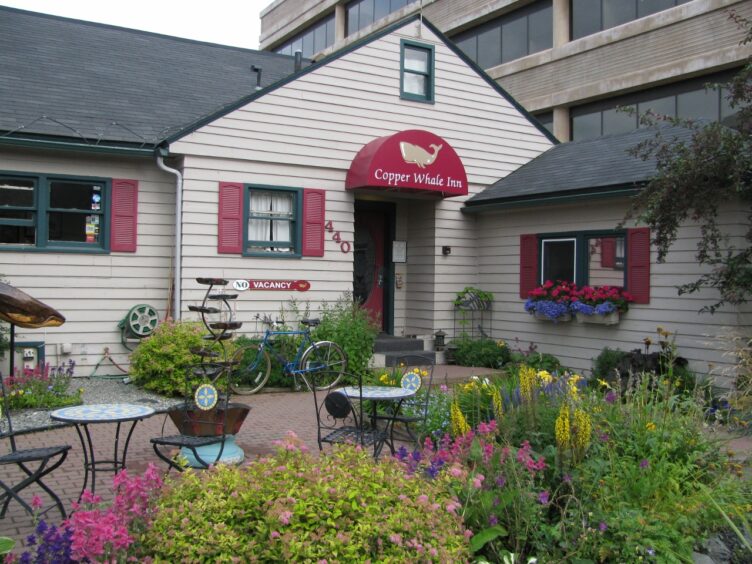
Many years ago, we stayed at the Copper Whale Inn. I was pleased to see that the historic building, built in 1939, is still there, and rates are fairly reasonable at $250-350 per night, including a continental breakfast. This B&B is a hidden gem downtown with wonderful water views and easy access to the Tony Knowles Coastal Trail.
There is so much hiking around Anchorage with majestic views and gorgeous terrain. I hope you enjoy my selection of five beautiful hikes near Anchorage, Alaska.
Photo Gallery
The post Five hikes near Anchorage, Alaska appeared first on Inga's Adventures.
Three Days in Lima: Traveling Back in Time 21 Aug 2024 2:21 PM (last year)
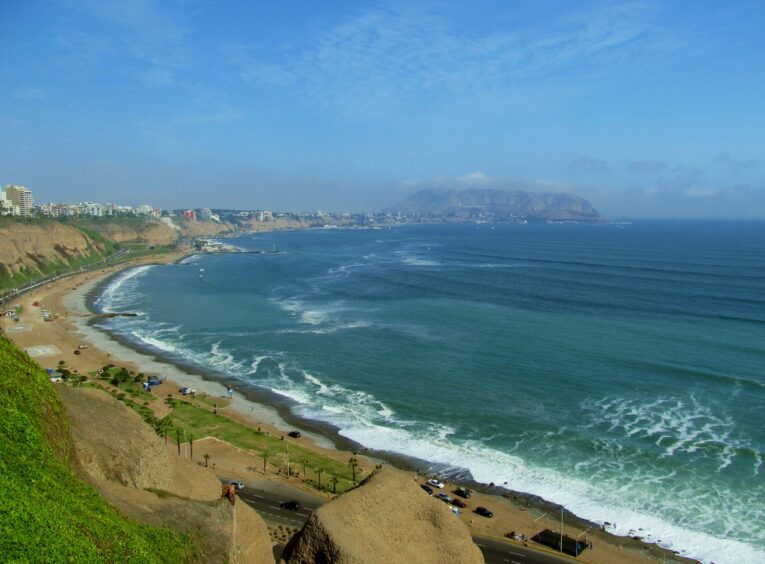
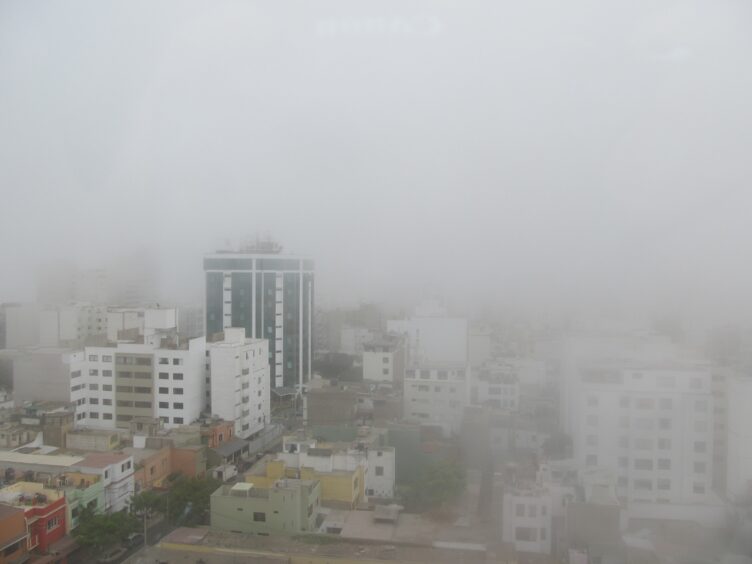
Lima, Peru is a city that has a lot to offer but doesn’t always make a good first impression due to the cloak of chilly fog it wears for months of the year. Not to mention the press of nine million residents in the capital city. However, it is rich in history and there is much to see. If it’s your first visit, it’s a place to begin appreciating the bredth and depth of Peru’s multifaceted culture, ranging from the pre-Columbian era to the Inca Empire, Spanish conquistadors and, finally, independence and the modern world. Three days in Lima is like traveling back in time.
Visitors may not be aware that Peru is one of the six cradles of civilization in the world, each of which developed independently from other civilizations, including better known sites like Egypt and the Indus Valley. The pre-Columbian period began around 6,000 BCE along the coast of Peru, while the Incas later dominated the inhabitants of the Andes mountains before the Spanish conquerors arrived.
My interests in history, culture and archeology drew me to an excellent museum and the wonder of an archeological site right in the middle of Lima—no long bus ride needed to see a dig in action. In just one to two days, you can experience the best of Lima and get an overview of the different regions of Peru. I’ve listed what I consider the essential sights of central Lima on Day 1, in case you only have a day. Day 2 will shed more light on ancient cultures and fun tourist activities in Miraflores. Day 3 allows time to enjoy the more whimsical side of Lima in Barranco.
Day 1: Plaza Mayor & Larco Museum (Museo Larco)
My favorite things to see in downtown Lima are Plaza Mayor, the Catacombs, and Plaza San Martin. Lima was established by the Spanish conquistador, Francisco Pizzaro in 1535. This area was technically part of the Inca Empire, but distant from the Inca capital in Cusco.
If you are visiting Lima for the first time, odds are that you will be heading to Cusco and Machu Picchu, where you will see ancient Inca cities that date from the 12th century. If you are lucky enough to head north to Chiclayo or Trujillo, you’ll see evidence of large, well-developed pre-Columbian settlements that started before the Common Era or soon after. To travel through Peru is to travel back in time, measured in centuries.
To get around, take the bus, Uber, or a taxi arranged by your hotel to Plaza Mayor. After taking in all the sites there, take a taxi to the Larco Museum. Lunch can either be downtown or the charming restaurant at the Larco Museum.
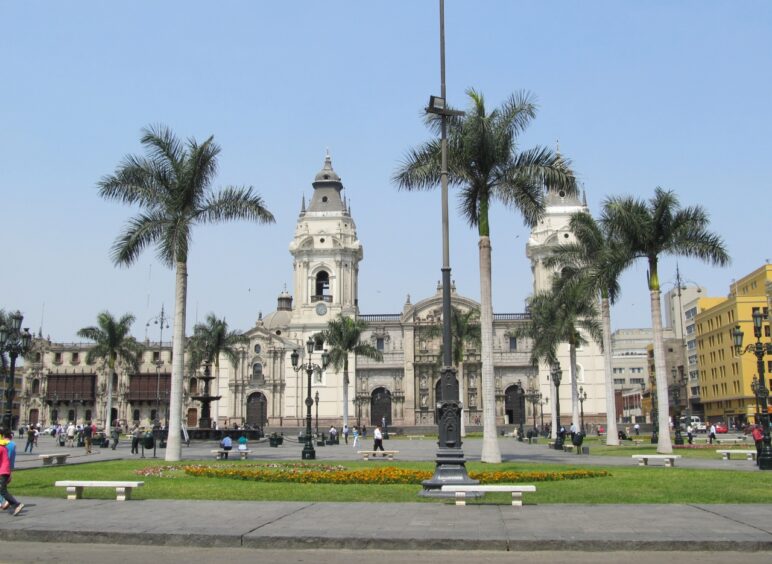
Plaza Mayor
- Plaza Mayor. Previously called Plaza de Armas, Plaza Mayor is worth a stroll around the perimeter to admire the different architectural styles from the colonial period across the street. You’ll be able to see from the plaza the stately Government Palace/Palacio de Gobierno (Neo-baroque style), Municipal Palace/City Hall/Palacio Municipal de Lima (Colonial style), Archbishop’s Palace/Palacio de Arzobispal (Baroque elements with Moorish-style carved balconies). In the center of the plaza sits a fountain where gallows once stood.
- Basilica of San Francisco Catacombs. Underground tombs containing innumerable bones are always worth a visit and I highly recommend the catacombs tour at Basilica of San Francisco. Following the introduction of Catholicism by the Spanish conquerors, many churches were built, including the Lima Metropolitan Cathedral/Basilica Catedral de Lima (Renaissance style), Basilica of/de San Pedro (Baroque style) and La Merced Church/Basilica Nuestra Senora de la Merced (Baroque style).
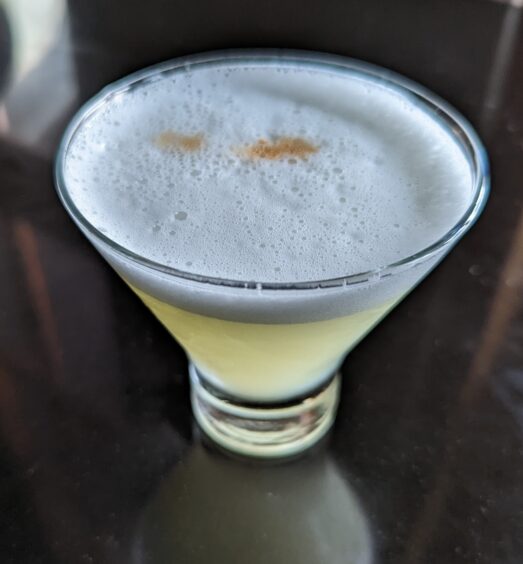
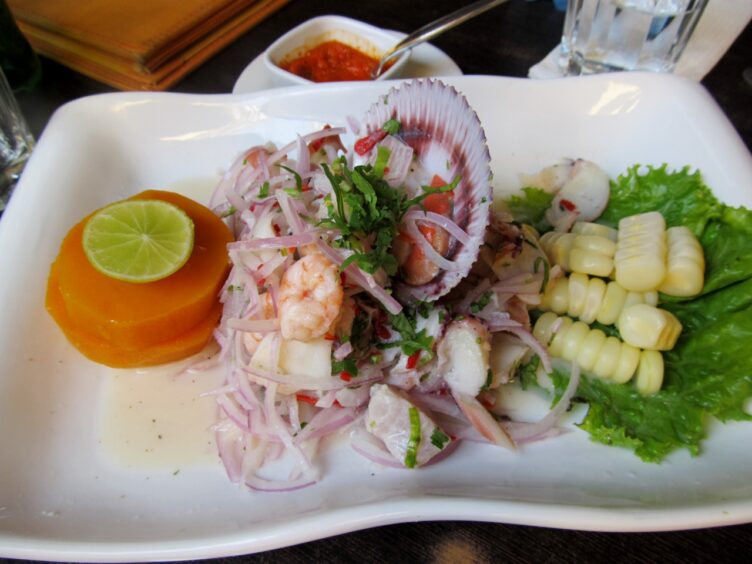
- Food. There are many cafes and restaurants in the area, and I recommend trying the ceviche (raw fish marinated in lime juice) and a Pisco Sour for an authentic Peruvian meal. If you are headed to Cusco, you’ll be far from the ocean, so Lima is the place for ceviche.
Plaza San Martin
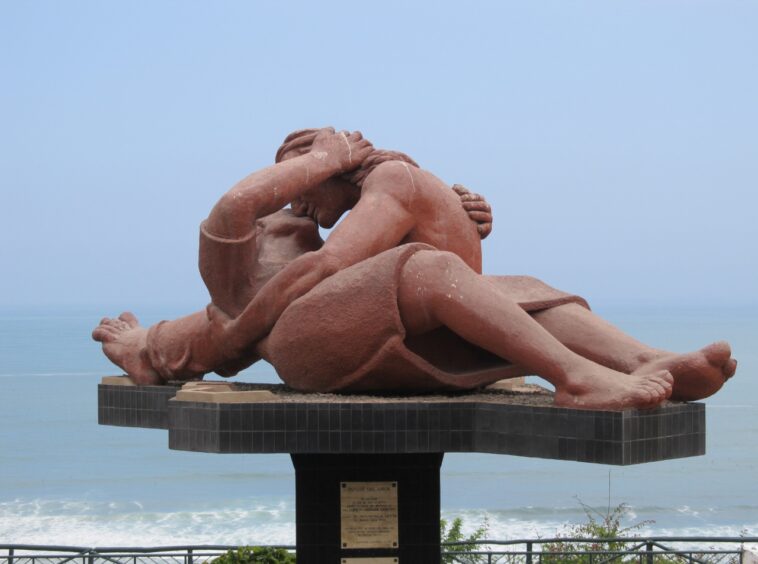
- Plaza San Martin. Compared to the older buildings around the Plaza Mayor, Plaza San Martin was practically built yesterday, though it was really the 1920s. A large, open space with a relaxed vibe, it was built to commemorate a century of independence. It’s a nice place to relax a bit after the density of buildings and concentration of important sites around the plaza. The historic significance of honoring Jose de San Martin, the liberator of Peru, Chile and Argentina from Spanish rule, balances the powerful influence of Pizarro, the Spanish conqueror of Peru, around Plaza Mayor. At the statue of San Martin, don’t miss the statue at the base of Madre Maria—the artist in Spain was to create a headdress of flames called “llama” but not understanding the double meaning, he topped her head with a tiny llama, the animal.
- There is a pedestrian route lined with shops and cafes on Jiron de la Union that connects the east side of the Plaza Mayor with Plaza San Martin
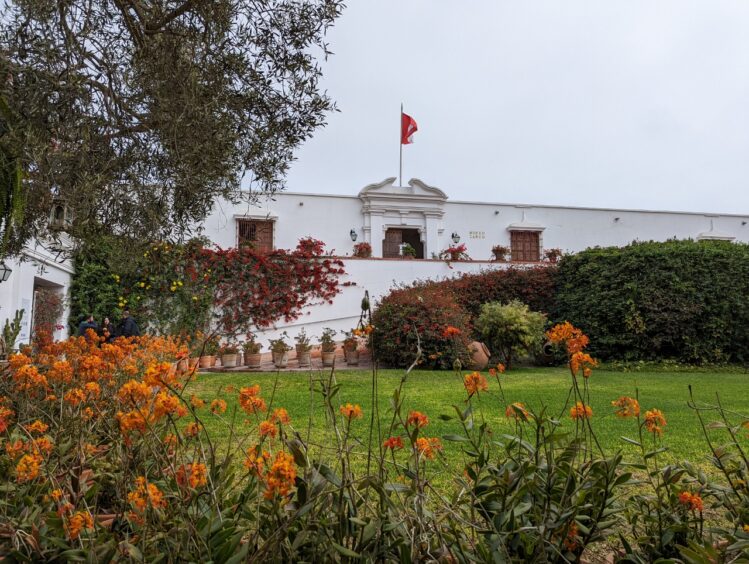
Larco Museum (Museo Larco)
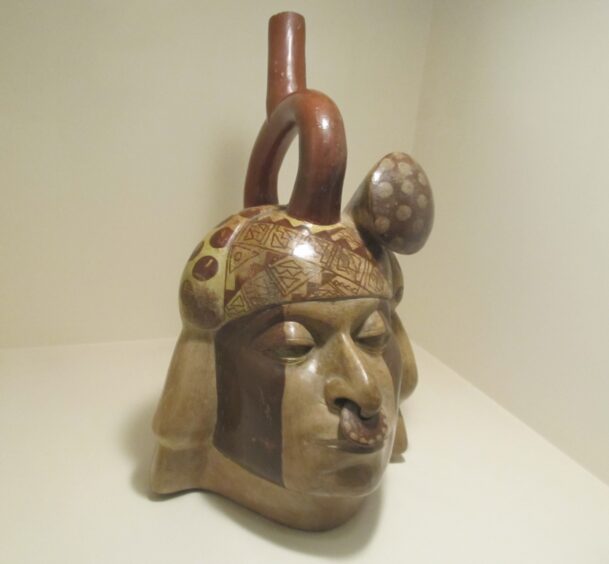
- Larco Museum (Museo Larco). One of my favorite places in Lima is the Larco Museum, located in a walled compound with lovely grounds, a wonderful airy restaurant, and a well-designed museum. The focus of the museum is the ancient culture of pre-Columbian Peru, which preceded colonial rule, including the pre-Inca and Inca collections. This has particular significance for me from the time I lived in Piura, Peru when I was a child and became familiar with the pottery and metalwork of the Moche, Vicus, Lambayeque and other pre-Columbian cultures.
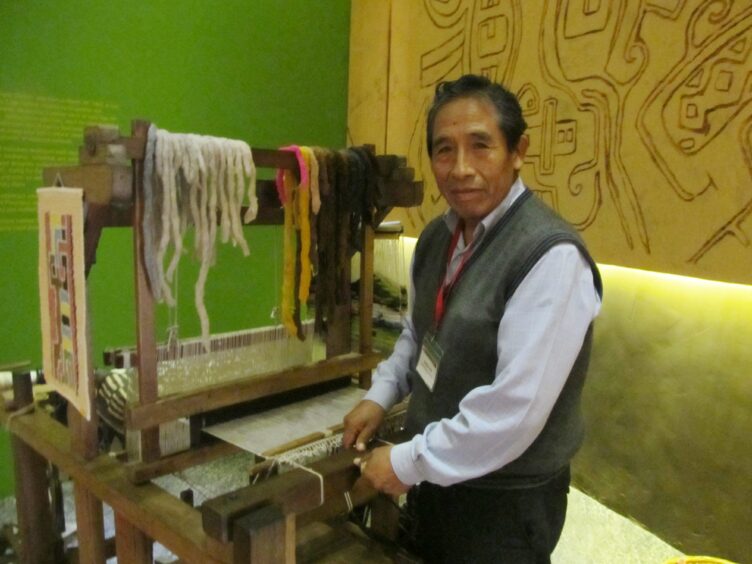
- National Museum of Archeology, Anthropology and History of Peru (Museo Nacional de Arqueologia, Antropologia e Historia del Peru). If you like museums, this one is also also excellent, but unlike the Larco Museum, which is bite-sized, you could spend a day in this enormous museum. It’s a 20-minute walk from the Larco Museum so you could do both in one day.
Day 2: Miraflores and Huaca Pucllana
I always stay in the Miraflores district because it’s a pleasant neighborhood where it feels comfortable to stroll at night and is loaded with restaurants and hotels.

Huaca Pucllana
I have no idea why it took four visits to Miraflores for me to learn about Huaca Pucllana, a pre-Inca archeological site dating from AD 500, right in the middle of the district. It’s fascinating to see an active archaeological dig anywhere, but especially in the middle of a city. Like the Larco Museum, they have a wonderful restaurant overlooking the site. I highly recommend the Huaca Pucllana tour, followed by lunch, leaving the afternoon to explore Miraflores.
Miraflores
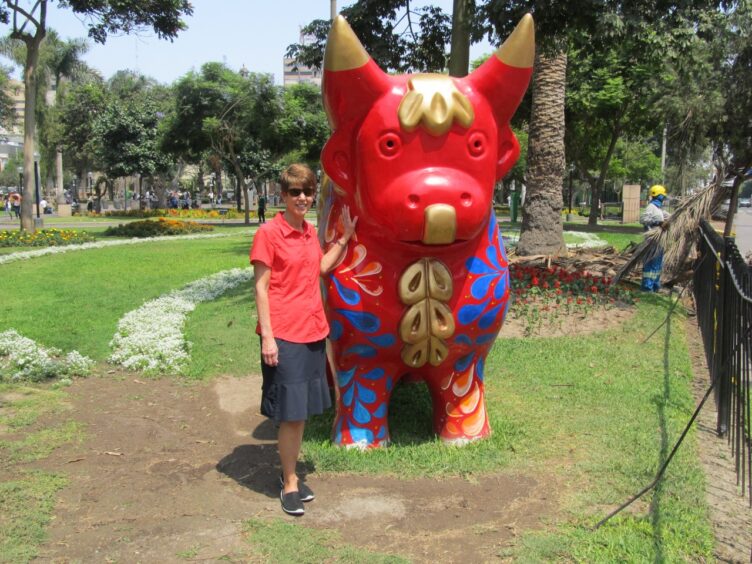
There’s a lot to explore in Miraflores, from parks to beaches and plenty of shopping. We always find intriguing restaurants tucked away on side streets and you can find lodging at all price points, from hostels to luxury hotels. We usually stay on Avenue Jose Larco near the ocean. It’s a nice walk north to Kennedy Park/Parque Kennedy, which is loaded with cats, and Seventh of June Park (Parque 7 de Junio) using the Av 28 de Julio diagonal street. At the south (ocean) end is Salazar Park/Parque Salaza, anchored by the high-end Larcomar shopping center, with panoramic views over the cliffs to the Pacific Ocean. To find these on Google Maps, search for directions between Larcomar and Parque Kennedy.
Day 3: Barranco
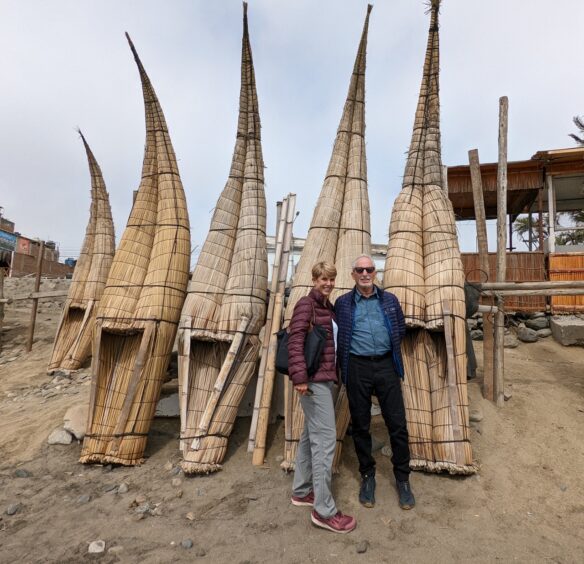
Barranco is a laid-back artsy part of Lima with a bohemian vibe. There’s lots of street art, crafts and shopping, as well as several historic sites. It faces a nice beach, which is great for strolling or surfing if the weather is fair. The main sights include the Plaza de Armas of Barranco, the Cathedral of Barranco, and Puente de los Suspiros (Bridge of Sighs). La Feria is the craft market where homemade clothing, crafts and food are sold on weekends. Previously used by fishers to reach their boats, the cobbled “Bajada de Banos” is a popular place to stroll from the Bridge of Sighs to the beach. Barranco is another good place to enjoy ceviche.

Barranco is a little further down the coast from Miraflores and there are several ways to enjoy it. If you’re staying in Miraflores and you want some exercise, you could walk from Miraflores to Barranco on the 6-mile Malecon boardwalk along the coast. Taxi and Uber are also good options. Get Your Guide offers a bicycle tour, food tour and other tours that include Barranco, while Viator offers a street art walking tour.
Arrival in Lima
When you arrive at the Jorge Chavez International Airport in Lima, you can get local currency using ATMs. Fees vary and if you want to get the best rates, get a small amount at the airport and replenish in town where you’ll have more options.
I always use the Green Taxi kiosk, located just before the exit, to get a ride to my hotel. Pay in advance with a credit card for safe and reliable service.
Uber is not a licensed taxi service and is not permitted to serve the airport.
Lodging
I usually stay in Miraflores, which is the most popular place for tourist lodging in Lima. There are many hotels and hostels at different price points, as well as restaurants, stores and parks. Barranco is another popular option, but it’s further from the airport and downtown. Downtown is dense and noisy, so it has never appealed to me to stay there. Here are hotels where I’ve stayed and can recommend.
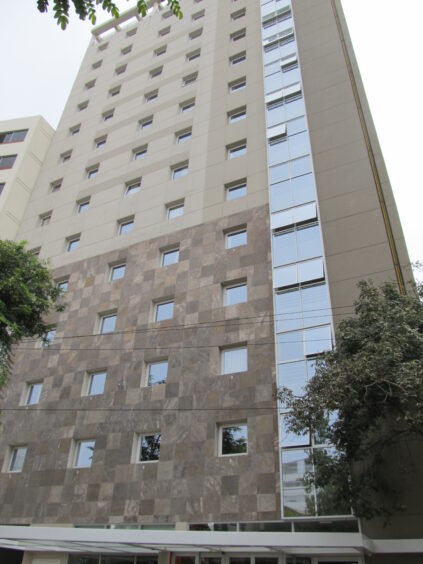
- Ibis Lima Larco Miraflores. We often stay in Ibis Hotels (Accor) when we arrive in a big city because they are clean, affordable and usually in good tourist locations. This Ibis is a particularly well-situated hotel with an ample breakfast buffet. They have stored belongings for us for prolonged periods when we leave backpacking or other gear. Typical of Ibis Hotels, bedrooms and bathrooms are characteristically small, but adequate for our needs.
- AC hotel by Marriot. Near the luxury JW Marriott at the end of Avenida Jose Larco near the ocean, the AC Hotel is a step up from Ibis with larger rooms and a full service restaurant.
- Wyndham Costa del Sol Hotels. When I’ve needed to stay at the airport, I use the Wyndham Costa del Sol Hotel. You can walk to it by crossing the street after exiting the airport. I’ve also stayed in other Wyndham properties in cities throughout Peru and have always found them to be conveniently located near tourist activities and well appointed.
Other chain hotels and budget hostels are sprinkled throughout Miraflores, many along the main street, Avenida Jose Larco.
Weather
Peru has a wet and dry season, which varies by region. The wet season is during the North American winter, from December to March. The dry season occurs from May to October. In Lima, the dry season is also fog season, known as garua. From June to October, Lima is often drenched in thick, damp fog that casts a gray hue over the city. Temperatures are generally moderate, in the 60s F, so a light wrap is all that is needed.
In general, clothing is casual and comfortable, with business attire being common downtown. Jeans or khaki pants are fine. There is an active foodie scene and it’s appropriate to dress up a little at nice restaurants and bars. I usually wear some variation of black pants, black flats, and a nice top for dinner. Tourists dressed in expedition gear for their Amazon and Inca Trail excursions look a little out of place, but truly, no one cares. You can dress how you want.
During all my visits to Lima, I’ve always found new things to do and see. I recommend that people visiting for the first time allow three days in Lima, Peru, but it’s still worth it if you only have a day or two.
The post Three Days in Lima: Traveling Back in Time appeared first on Inga's Adventures.
Sink Laundry when Traveling 23 Jul 2024 3:56 AM (last year)

People often ask how I can travel for five weeks or five months with a carry-on suitcase. The key is to do sink laundry when traveling. I can pack for about a week and go indefinitely if I can wash my clothes in the sink when I travel. I mostly wash as I go, a little at a time.
Laundry Options
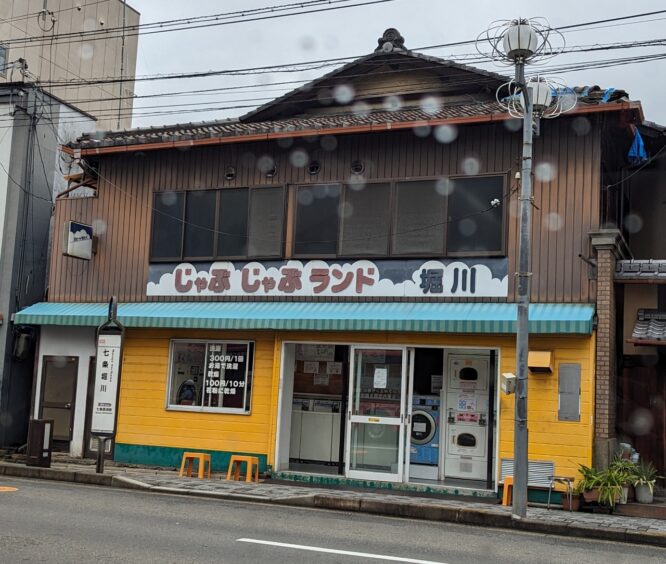
I almost always do a bit of laundry every day so it’s not a burden, but on some of our more active trips, such as backpacking for a week, I’ve either done a load of laundry in a hotel or short-term rental apartment or I’ve sent it out to a laundry service. For example, in Peru, I found an inexpensive laundry right next to our hotel. When I’m in the US, I take advantage of the little-known fact that most US hotels have coin-operated guest washers and dryers, whether you’re in a budget or five-star hotel. I learned this when I used to travel every week for work, and it can be a lifesaver.
A few years ago, my husband Steve and I traveled through Southeast Asia and Australia for five months with carry-on luggage. We sent our laundry out once in Vietnam and had access to a washer/dryer in Australia. Otherwise, we did sink laundry. More recently, we traveled through Spain, Portugal, and Morocco for five weeks with a Travelpro Maxlite 21-inch carry-on suitcase and laptop pack. Later, I challenged myself to travel for three-weeks with a Travelpro Maxlite International Carry-on 19-inch carry-on plus laptop pack. I can report that I still liked my clothes when I had more variety with the 21-inch bag. I got bored with my limited selections with my 19-inch suitcase, but I was happy with the lighter weight.
I’m a backpacker and you can check out how I do this on the trail. Having a sink and running water is a luxury in comparison. So is having a hanger instead of a bush to hang wet laundry on.
Doing Laundry on the Backpacking Trail, from Inga’s Adventures
Sink Laundry Equipment
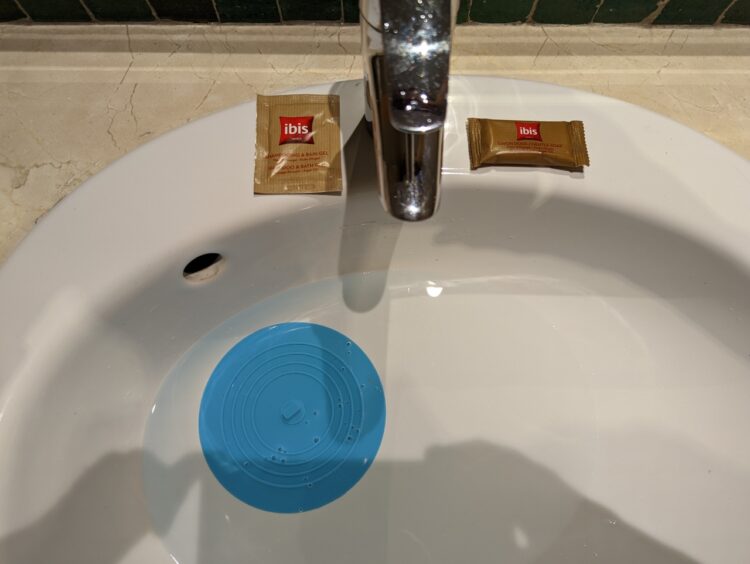
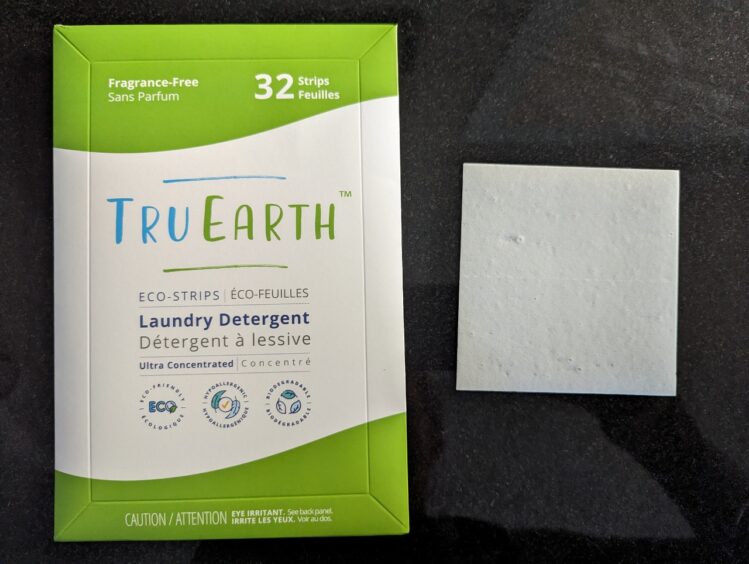
Doing laundry in the sink is simple, but one item makes a big difference. Having a flat, rubber universal plug means you can do laundry even if the sink or tub plus is missing or non-functional. Soap can be shampoo, body wash, bar soap, laundry detergent, or detergent sheets. I use a towel to wring out excess water at the end. Everything else is optional.
Required:
- Universal plug
- Some form of soap
- Towel
Optional Items:
- Dryer sheet (optional but nice to have if you have access to a washer and dryer)
- Travel clothesline (optional for hanging clothes)
- Hangers (optional—from hotel room)
- Shout spot remover moist towelettes (optional for spot treatment before washing)
Sink, Shower, or Tub
Sink laundry is the term I’ll use, but I can wash clothes in the shower or tub just as easily.
- Sink laundry: I use the sink plug or a universal plug to wash my underwear, socks, and shirt.
- Shower laundry: If there’s a little lip in the shower pan, I might use my universal plug or a washcloth to plug the drain for a short time, toss my underwear, socks, and shirt down and lather up (both me and the clothes).
- Tub laundry: Occasionally, Steve and I will both have a few things to wash, and we find easier to fill the tub.
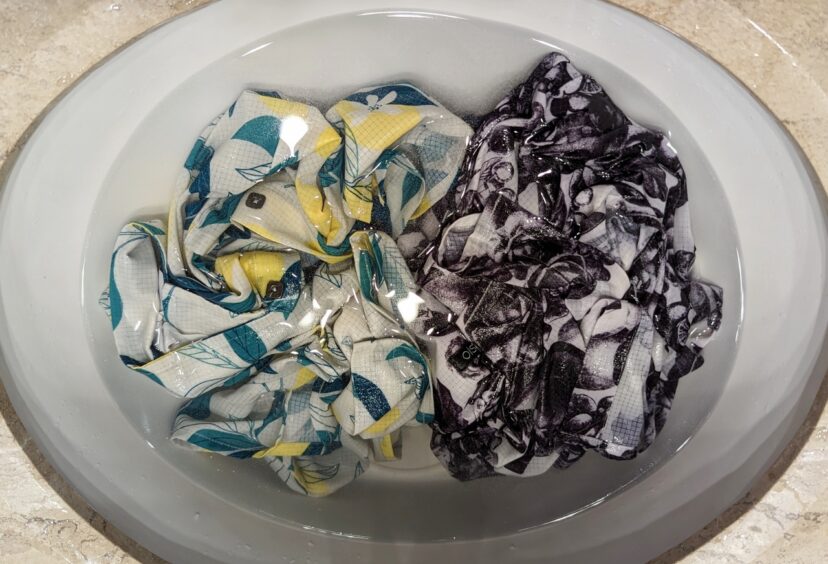
Sink Laundry Procedure
- Use the sink or universal plug and fill the sink with warm water.
- Add liquid or powdered soap.
- Add clothes, let them absorb water and lather up.
- If using bar soap, scrub in the places that need it most.
- Drain the soapy water and wring clothing lightly.
- Fill sink with clean water.
- Swish clothes around and wring to remove soap.
- Repeat with clean water.
- Lay a towel on the floor (a dry towel is good, but it can be the damp towel from your shower)
- Lay the clothes flat on the towel, roll up from the bottom and either wring gently or step back and forth on the roll in bare feet to remove excess water.
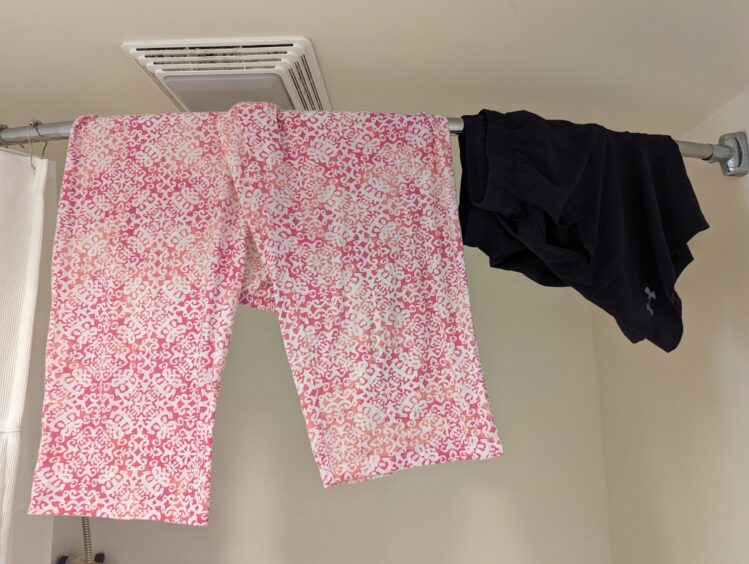
- Hang to dry.

Tips for Drying
My clothes will dry overnight 90% of the time. If I have something that I know might be in the 10% of items that might take longer, such as a cotton shirt or merino wool socks, I’ll save them until I’m in a place where we’ll be staying at least two nights.
- It’s best to use quick-dry clothing to start with. Synthetics dry faster than cotton or wool.
- The towel-wringing step is important.
- A travel clothesline sounds like a good investment, and I carried one for years. We used it a few times, but I ditched it this year when I realized I hadn’t used it in a long time, and it was taking up needed space in my toiletry bag. Try it and decide if you like it.
- Bathrooms are the logical place to hang clothes to dry, but they often have no ventilation or air flow. I prefer to hang my clothes in the hotel room. For example, I’ll hang them in the closet with the closet door open, or in a window when there’s a slight breeze. No one wants to hang out in a laundry room, so sometimes I move them back and forth between the bathroom and bedroom. If that sounds like a hassle, remember that I might only have one shirt with some underwear hanging on the hook.
- Socks used to be my biggest challenge until I found Tilley travel socks. They always dry overnight, even in the humid tropics. I also wear Darn Tough hiking socks, and I choose their thinnest running socks.
- To test your clothes at home, wash them in the washing machine and hang them to dry. Check every four hours and see which ones dry fastest. I had a bunch of similar looking synthetic T-shirts, and this exercise was helpful in choosing a few that dried the fastest.
- Jeans—don’t bother. Wear them until they can stand up on their own or send them out to be laundered because they won’t dry overnight. Duer has a good article on how often to wash jeans.
- Hiking pants do well but I don’t wash them every time I wear them. They can go for several wearings.
Quick Dry Products
My travel clothing comes from a wide range of brands. Some are outdoor, travel or just regular, everyday brands. Technical outdoor clothing is often a good choice, especially for pants, but many of my shirts, dresses and skirts are mainstream brands at a variety of price points. Here are a few brands I’ve used. I look for thin, lightweight fabrics that resist wrinkles. For active-wear, I look for odor-resistant clothing.
- Kuhl, REI, North Face, Columbia, and Royal Robbins have a wide range of travel and outdoor clothing, including pants and outerwear.
- Rip Skirt Hawaii has skirts, dresses, and T-shirts. I like their colorful T-shirts because they feel soft, dry quickly and are a little shorter than others so they go well with skirts.
- Under Armour T-shirts and shorts come in a variety of fabrics and many have odor control properties.
- Tommy Bahama and Talbots are two of my favorite stores for travel clothing.
- Tilley travel socks and Darn Tough running socks are good for travel and active wear.
- Jockey Women’s No Panty Line Promise tactel bikini underwear dries overnight.
- Urban Coco (Amazon) has a wide range of inexpensive clothing that works well for travel.
Some brands listed are pricey, but discount brands also have light, thin clothing that dries quickly. I have a few items from expensive brands that have lasted for many years of travel along with inexpensive clothing that is lightweight and quick drying.
Fabrics to look for: nylon, polyester, Tencel, polynosic rayon synthetics, or silk. Thin cotton and merino wool take longer to dry but are also options. I usually have at least one cotton T-shirt because it feels cool and soft against my skin.
Give it a Try
It might sound like a lot of work, but the key to being able to do sink laundry is to wash as you go, a little at a time. If I pack for a week, I can go indefinitely if I can do sink laundry when I’m traveling.
Disclaimer: As an Amazon Associate, I earn from qualifying purchases.
The post Sink Laundry when Traveling appeared first on Inga's Adventures.
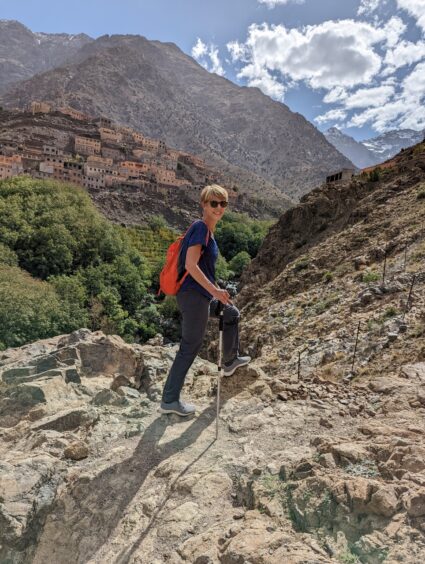
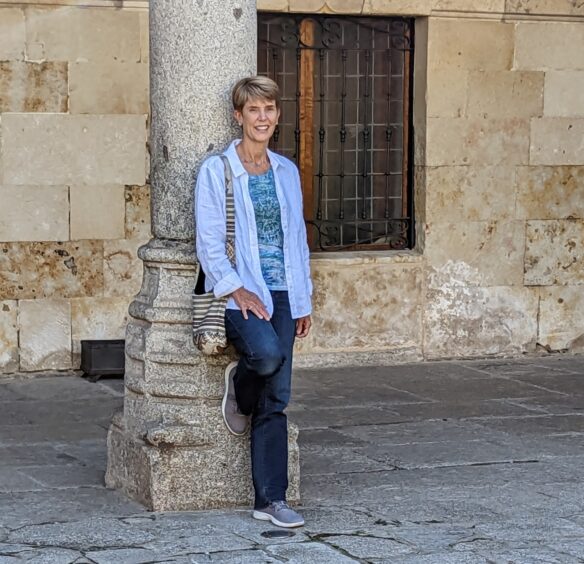
How to Dress in Morocco, India and Other Conservative Countries 9 Jul 2024 5:29 AM (last year)
I’ll start by saying that there is no dress code in Morocco or India, and I saw a wide range of clothing choices among tourists. This is an opinion piece—it’s my opinion about how I choose to dress in conservative countries, and I wouldn’t presume to tell others how to dress. I am sharing it because questions in travel groups often come up about how to dress in Morocco, India and other places in the Middle East and beyond. This is one person’s strategy for how to dress in Morocco and India and other conservative countries.
I’m a committed carry-on-only packer, so I favor a capsule wardrobe where pieces mix and match. I do sink laundry, so much of my travel clothing is lightweight and quick-dry.
My history

My experience growing up as an American girl in an expat family informs my clothing choices. We moved from California to Pakistan, a Muslim country, when I was four and I swung between a few years overseas and a year or two in California until I was in my early 20s. Besides Pakistan, I lived in Bangladesh, Peru, and Indonesia. Since then, I have continued traveling all over the world. Times have changed and I’m more relaxed about clothing, but I still feel more comfortable covering up more in conservative countries than I do at home out of respect and convention (my family’s convention).
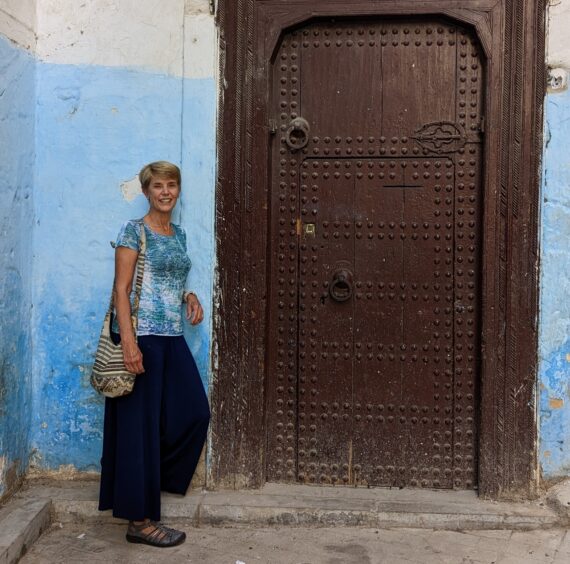
Guiding principle
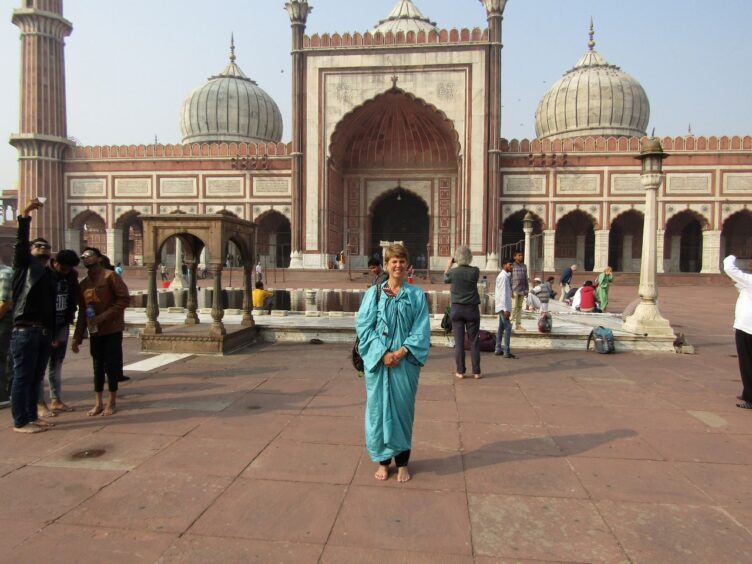
My guiding principle in conservative countries is to keep shoulders and legs covered. It’s that simple.
For me, this basic guideline translates to:
- No leggings or tight pants (unless under a long tunic top)
- No shorts and especially no short-shorts
- No mini-skirts or dresses
- No sleeveless shirts
- No tank tops
- No spaghetti straps
- No visible bra straps

It varies a bit by country and activities. In some countries and in some houses of worship, it may be appropriate to cover the head or whole body. In some mosques and temples, they may rent full length robes.
Beach and pool locations are often more relaxed, and it may be acceptable to wear shorts or sun dresses at times.

I observe how local women are dressed. I don’t always dress as conservatively as they do, but it informs my choices. I then look at how tourists are dressed and see how much attention they draw. If groups of men stare or gawk or make catcalls, I’m going to cover more skin because I don’t want that kind of attention.
When visiting Aceh, a very conservative community in Sumatra, I identified a few women who looked like they could be Indonesian businesswomen who boarded the plane with bare heads. When we landed in Aceh, I watched to see if they covered their heads, and if they did, I planned to pull out my scarf. Because they didn’t, I left my head bare, but I was ready if I needed it.
See my free downloadable packing lists: https://ingasadventures.com/download/
Weather
In cold weather, everyone is covered. The harder decisions are about how to stay cool in searing deserts and tropical jungles, where temperatures can climb above 100F, and humidity can make it feel like a sauna. I usually choose loose, comfortable clothing. Natural fibers are a plus, but I also have quick-dry synthetic fabrics that don’t wrinkle and feel cool.
The conservative countries where I’ve lived and visited are mostly in the Global South and tend to be in equatorial latitudes, which often translates to hot and humid.
See my article on Packing Light for a Trip to India for more tips.
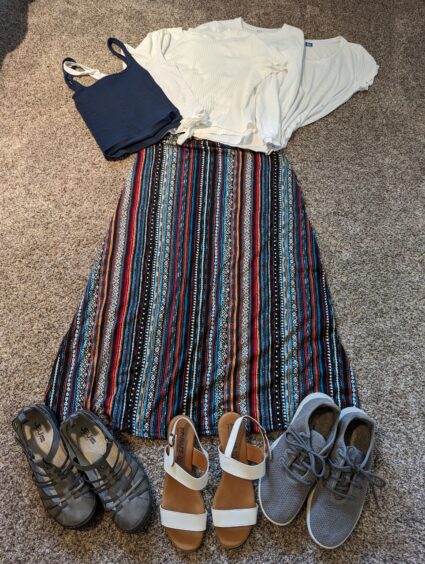
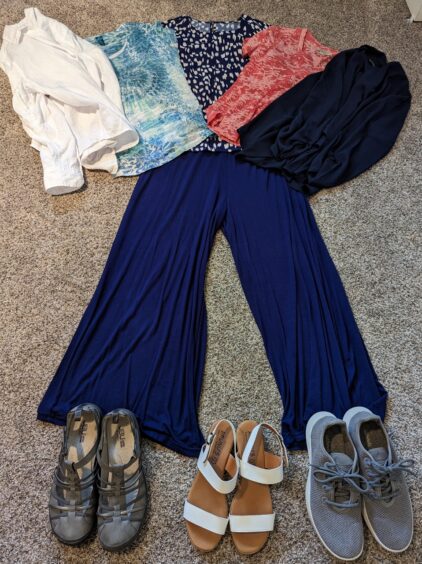
My packing list
Pants-3 pairs
- Travel pants, gray, Kuhl Trekr
- Loose, wide legged pants, blue, purchased at a stall in India
- Patterned straight leg pants for nice dinners, blue, Liverpool Bali
Shirts-7
T-shirts, variety of solid colors and patterns, short sleeve (4)
- Button-down, collared shirts, variety of patterns (2, Ouiselle, Benjamina Button)
- Long sleeve white button, collar shirt to wear as an outer layer (Tommy Bahama, Costalina)
Underwear
Women’s underwear (3, Jockey-No Panty Line Promise-Tactel)
- Socks, quick dry (1, Darn Tough Running Socks)
- Socks, quick dry (1, Tilley Travel Socks)
Outerwear (3)
- Light blazer, black, blue or other color for nice dinners (Urban Coco, Chiffon blazer)
- Packable light down jacket, plum (Uniqlo UL down jacket)
- Raincoat, thin, fits over down jacket, black (Kuhl raincoats)
Shoes (3)
- Sneakers, gray (Allbirds, Tree Runners)
- Sandals, white, for dinners (purchased in Portugal)
- Sandals, walking, gray (JBU, Peace)
- If space allows, consider Altra Timp trail runners, black flats)
- If beach time, add Teva Mush flip flops
Other
- Pajamas
- Hat
- Purse
- Toiletries
- Bathing suit if beach or pool activities are planned

Luggage
- Travelpro Maxlite 5 Compact Carryon, 22-inch hard sided suitcase, clamshell design
- Alternative: Travelpro Maxlite 5 International Carryon Spinner, 19-inch soft sided suitcase, bucket design
- Laptop backpack, Lovevook, 15” with trolley strap
- Alternative: Targus Spruce 17” with trolley strap
Photo Gallery


Disclaimer: Amazon Affiliate links may be used, and Kuhl Trekr pants were provided free in exchange for an honest review. Opinions expressed are my own.
The post How to Dress in Morocco, India and Other Conservative Countries appeared first on Inga's Adventures.
Three Weeks in Japan: A Complete Itinerary 19 Jun 2024 3:16 AM (last year)

Japan is a relatively small country (California is a bit bigger) but is packed with so much history, culture, and natural beauty that it’s difficult to narrow down the choices. There’s so much to appeal to so many different interests that there are plenty of opportunities to personalize an itinerary. Our three weeks in Japan included a loose plan, but now I can share a complete itinerary with you. My husband and I wanted to balance our time between cultural activities in the cities and hiking in the countryside, with a strong dose of food-related activities and plenty of train travel in between.
We spent roughly one week around Tokyo, one week on the northern island of Hokkaido, and one week traveling around lower Honshu, the main island of Japan. The last week included Kyoto, Hiroshima, the Nikko area and Mount Fuji. I loved the contrast of the pulsing megacity of Tokyo with the pastoral scenes and rugged mountains of sparsely populated Hokkaido. This set the tone for an itinerary that evolved into cultural activities in cities followed by hiking through forests with breathtaking views in natural surroundings.
Our itinerary was 25 days but could easily flex to a 21-day or 28-day trip.
Initial Planning
For this three-week trip to Japan, we blocked out chunks of time in the three geographic areas we wanted to visit, including Tokyo, Hokkaido, and the southern half of Honshu. We noted a few things we wanted to do based on what we gleaned from our preliminary research and suggestions from friends but didn’t make any reservations other than the first few nights in Tokyo.

Guidebook
Are guidebooks outdated? I still use Lonely Planet guidebooks to get itinerary suggestions and to have a centralized place to gather reliable information. I like the digital version of guidebooks, so I don’t have to carry a brick. Lonely Planet Japan (Amazon affiliate link: if you click and buy, I get a few cents!) had good information on the places we were headed to, and I enjoyed reading about the next place on our list the night before.
Internet Sources
I don’t use guidebooks for things that change quickly, such as transportation schedules or prices for lodging—the internet shines for this. So much of what is available on the internet comes from commercial sources offering tours or from blogs (like this?) that vary in quality (doing my best to make mine useful!). I used several apps for planning, including the following:
- Google Flights (flight times and prices)
- Rome2Rio (ground transportation)
- Booking.com (lodging)
- Get Your Guide (activities and tours)
- AirKitchen (cooking classes)
- Tripit (trip organizer)
- Timeshifter (jet lag tool)
- Google Translate (language translation)
See my article, These 10 Apps Make Travel Easier, and my review of the Timeshifter app for more information.
Artificial Intelligence
I’ve started using Chat GPT, an artificial intelligence tool, to get a rough idea of a potential itinerary. It helps to see an example of how to divide the time between the days we have in a trip, and I provide a detailed prompt that includes our interests, so it won’t include things like nightclubs or Disney activities or shopping, activities that not of interest to us. It might sound odd for a travel writer to suggest using ChatGPT, but I believe artificial intelligence can be a useful in addiditon well crafted blogs.
I used this prompt:
“Please suggest an itinerary for a three-week trip to Japan. I like hiking, hot springs, food, and architecture. I would like to include Tokyo, Hokkaido, Mt, Fuji, Kyoto, and Hiroshima. What else should I do?”
Itinerary
Here’s a quick look at our itinerary. Details for each area are covered in articles listed at the end, but this provides the overall view. Lodging is listed in parentheses.
- Day 1: Tokyo (Hotel Metropolitan, Tokyo Station)
- Day 2: Tokyo
- Day 3: Tokyo
- Day 4: Tokyo
- Day 5: Hokkaido-Sapporo (MyStay Aspen)
- Day 6: Hokkaido-Sapporo
- Day 7: Hokkaido-Asahikawa (JR Inn)
- Day 8: Hokkaido-Asahidake Onsen, Daisetsuzan National Park (Daisetsuzan Shirakaba-so Ryokan)
- Day 9: Hokkaido-Asahidake Onsen, Daisetsuzan National Park
- Day 10: Hokkaido-Hakodate (JR Inn)
- Day 11: Kyoto (Mercure Kyoto Station)
- Day 12: Kyoto
- Day 13: Kyoto
- Day 14: Kyoto
- Day 15: Kyoto
- Day 16: Hiroshima (The Knot)
- Day 17: Hiroshima
- Day 18: Hiroshima
- Day 19: Nagoya (Sanco Inn)
- Day 20: Nagoya
- Day 21: Lake Kawaguchiko (Hotel Regina)
- Day 22: Lake Kawaguchiko, Mount Fuji
- Day 23: Lake Kawaguchiko
- Day 24: Tokyo (Hotel Metropolitan, Tokyo Station)
- Day 25: Tokyo
Japan Articles
- A Week in Tokyo—Never Enough
- Hiking in Japan
- A Week in Hokkaido Using Public Transportation
- Three Hikes in Daisetsuzan National Park, Hokkaido, Japan
- Kyoto and More in Lower Honshu Island, Japan
- Three Weeks in Japan: A Complete Itinerary
The post Three Weeks in Japan: A Complete Itinerary appeared first on Inga's Adventures.