Why It’s Important to Clean Your Natural Stone Flooring 16 Oct 2024 6:46 AM (last year)
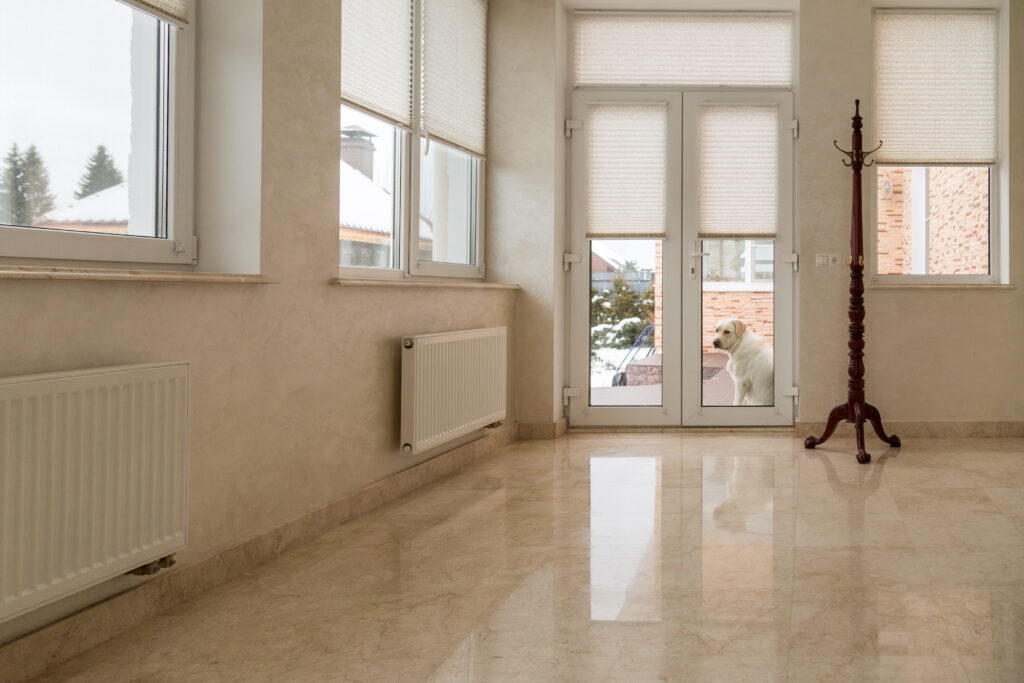
Natural stone flooring, with its unique beauty and durability, adds a touch of luxury to any home. However, maintaining its natural beauty requires proper care and cleaning.
Over time, dirt, spills, and foot traffic can dull the stone’s surface and even cause long-term damage if not properly addressed. This is why regular cleaning is essential to preserve the elegance and longevity of your natural stone floors and protect your initial investment.
5 Reasons to Regularly Clean Your Natural Stone Floors
There are various reasons to clean natural stone floors. Let’s explore why keeping your stone flooring clean is crucial and how doing so will prevent staining, wear, and other costly repairs over time.
1. The Stone Is Porous
Natural stone is a porous material with tiny holes and crevices that can easily absorb dirt, liquids, and other debris. If left uncleaned, this grime can penetrate deep into the stone, leaving behind stains that may be impossible to remove. Over time, this absorption will weaken the stone, making it more prone to chipping and cracking.
In addition, certain acidic substances that come into contact with the flooring can create etching when absorbed, further damaging the stone’s appearance. Because of this, it’s important to regularly clean the stone and remove any contaminants before they seep into it, thereby preserving its beauty and strength.
2. Your Flooring Experiences Heavy Traffic
Natural stone flooring endures a lot of wear and tear over time in high-traffic areas, such as kitchens, entryways, and hallways. Dirt, sand, and other abrasive materials from shoes can get tracked onto the floor, scratching its surface. Even the most durable stone can become dull and worn if not properly maintained.
Routine cleaning helps eliminate dirt particles from foot traffic, reducing the risk of scratches and preserving the floor’s polished finish. Additionally, keeping your floors free of dirt can enhance their safety by making them more slip-resistant.
3. Your Flooring Can Become Heavily Stained
If natural stone flooring isn’t sealed or the sealant has worn off, it can be prone to staining. Spills from oil, wine, coffee, or other substances can quickly seep into the stone and leave hard-to-remove stains. This risk is the highest in kitchens and bathrooms, where spills are more common.
You should remove any potential staining agents by cleaning your natural stone flooring before the stone absorbs them. It’s important to spot-treat any stains as soon as they occur, as this will help maintain the stone’s appearance and prevent permanent discoloration.
4. The Stone Loses Its Luster Over Time
Over time, your natural stone flooring may lose its luster. Even the most maintained stone flooring may be subject to this if not regularly cleaned and cared for. Daily wear combined with dirt and spills can dull the stone’s surface.
By regularly cleaning the floors and removing dirt buildup, you can help restore their natural shine. In addition, using proper cleaning techniques and products designed specifically for natural stone can help protect its finish, allowing it to retain its original brilliance for years to come.
5. Bacteria Can Build on the Stone
In areas like kitchens, bathrooms, or other spaces prone to moisture, natural stone flooring can become a breeding ground for bacteria, mold, and mildew if it’s not properly cleaned. Because stone is porous, moisture can penetrate the surface, creating the perfect environment for these harmful microorganisms to thrive.
Bacteria buildup on flooring can compromise the cleanliness of your home and even pose health risks to your family—particularly those with allergies or respiratory issues. To remove harmful contaminants and promote a healthier, cleaner living environment, regularly clean your natural stone flooring with the appropriate products.
How to Clean Your Natural Stone Flooring
Caring for your natural stone flooring requires specific protocols to ensure it doesn’t incur any damage and maintains its natural beauty and durability. By using the correct care and cleaning procedures, you can ensure your natural stone floors remain in pristine condition for years to come.
Daily Maintenance
It’s important to clean your natural stone flooring to keep it looking its best. For everyday cleaning, use a soft-bristle broom or microfiber dust mop to remove dirt, dust, and debris. You can also use a vacuum to remove these particles.
Mopping
Use a pH-neutral natural stone flooring cleaner for routine mopping, such as Rock Doctor’s Flooraid Multi-Surface Liquid Floor Cleaner. Avoid acidic or harsh chemical cleaners, such as vinegar, lemon juice, or ammonia, as these can etch or dull the stone’s surface.
When mopping, stick with microfiber mop pads and change them as needed to prevent excess dirt from damaging the stone.
Cleaning Spills
Because natural stone is prone to staining, cleaning up spills as soon as they happen is crucial. It’s better to blot the stain up rather than wipe, as blotting will only spread it further. Once the spill is absorbed, clean the area with Rock Doctor’s cleaner and dry thoroughly.
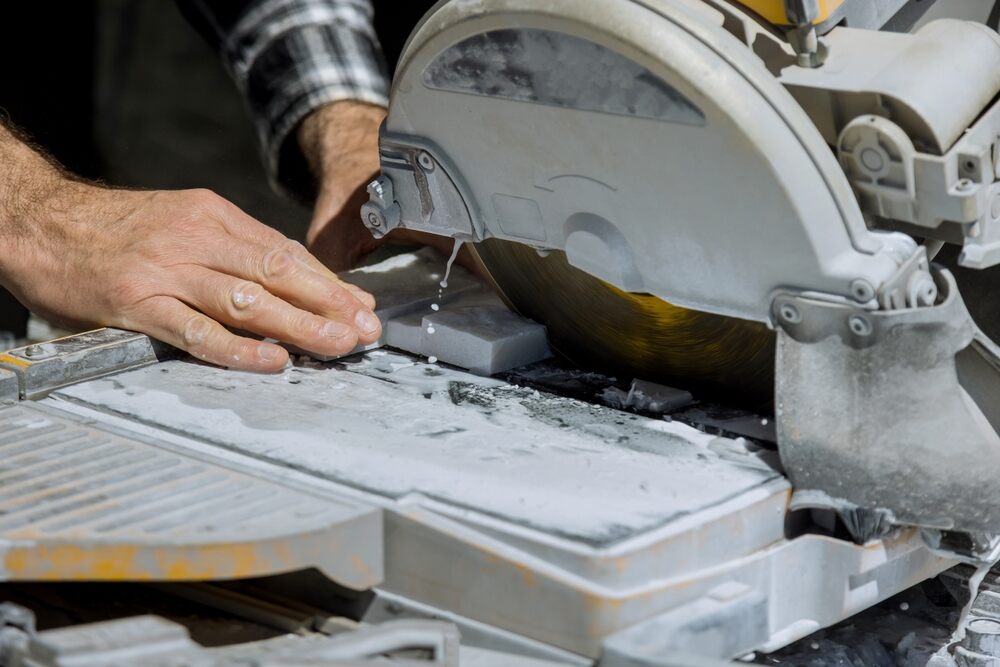
Deep Cleaning
You should deep clean your natural stone flooring every few months to remove stubborn dirt. To remove additional grime, clean tile crevices and grout lines with Rock Doctor’s Tile and Grout Cleaner.
By following these cleaning practices and being mindful of the products you use, you can preserve the beauty, longevity, and structural integrity of your natural stone floors.
Rock Doctor makes natural stone care easy! We have a full list of products to ensure your natural stone flooring is properly maintained and cleaned. Shop online today, or find us at these local retailers.
The post Why It’s Important to Clean Your Natural Stone Flooring appeared first on Rock Doctor.


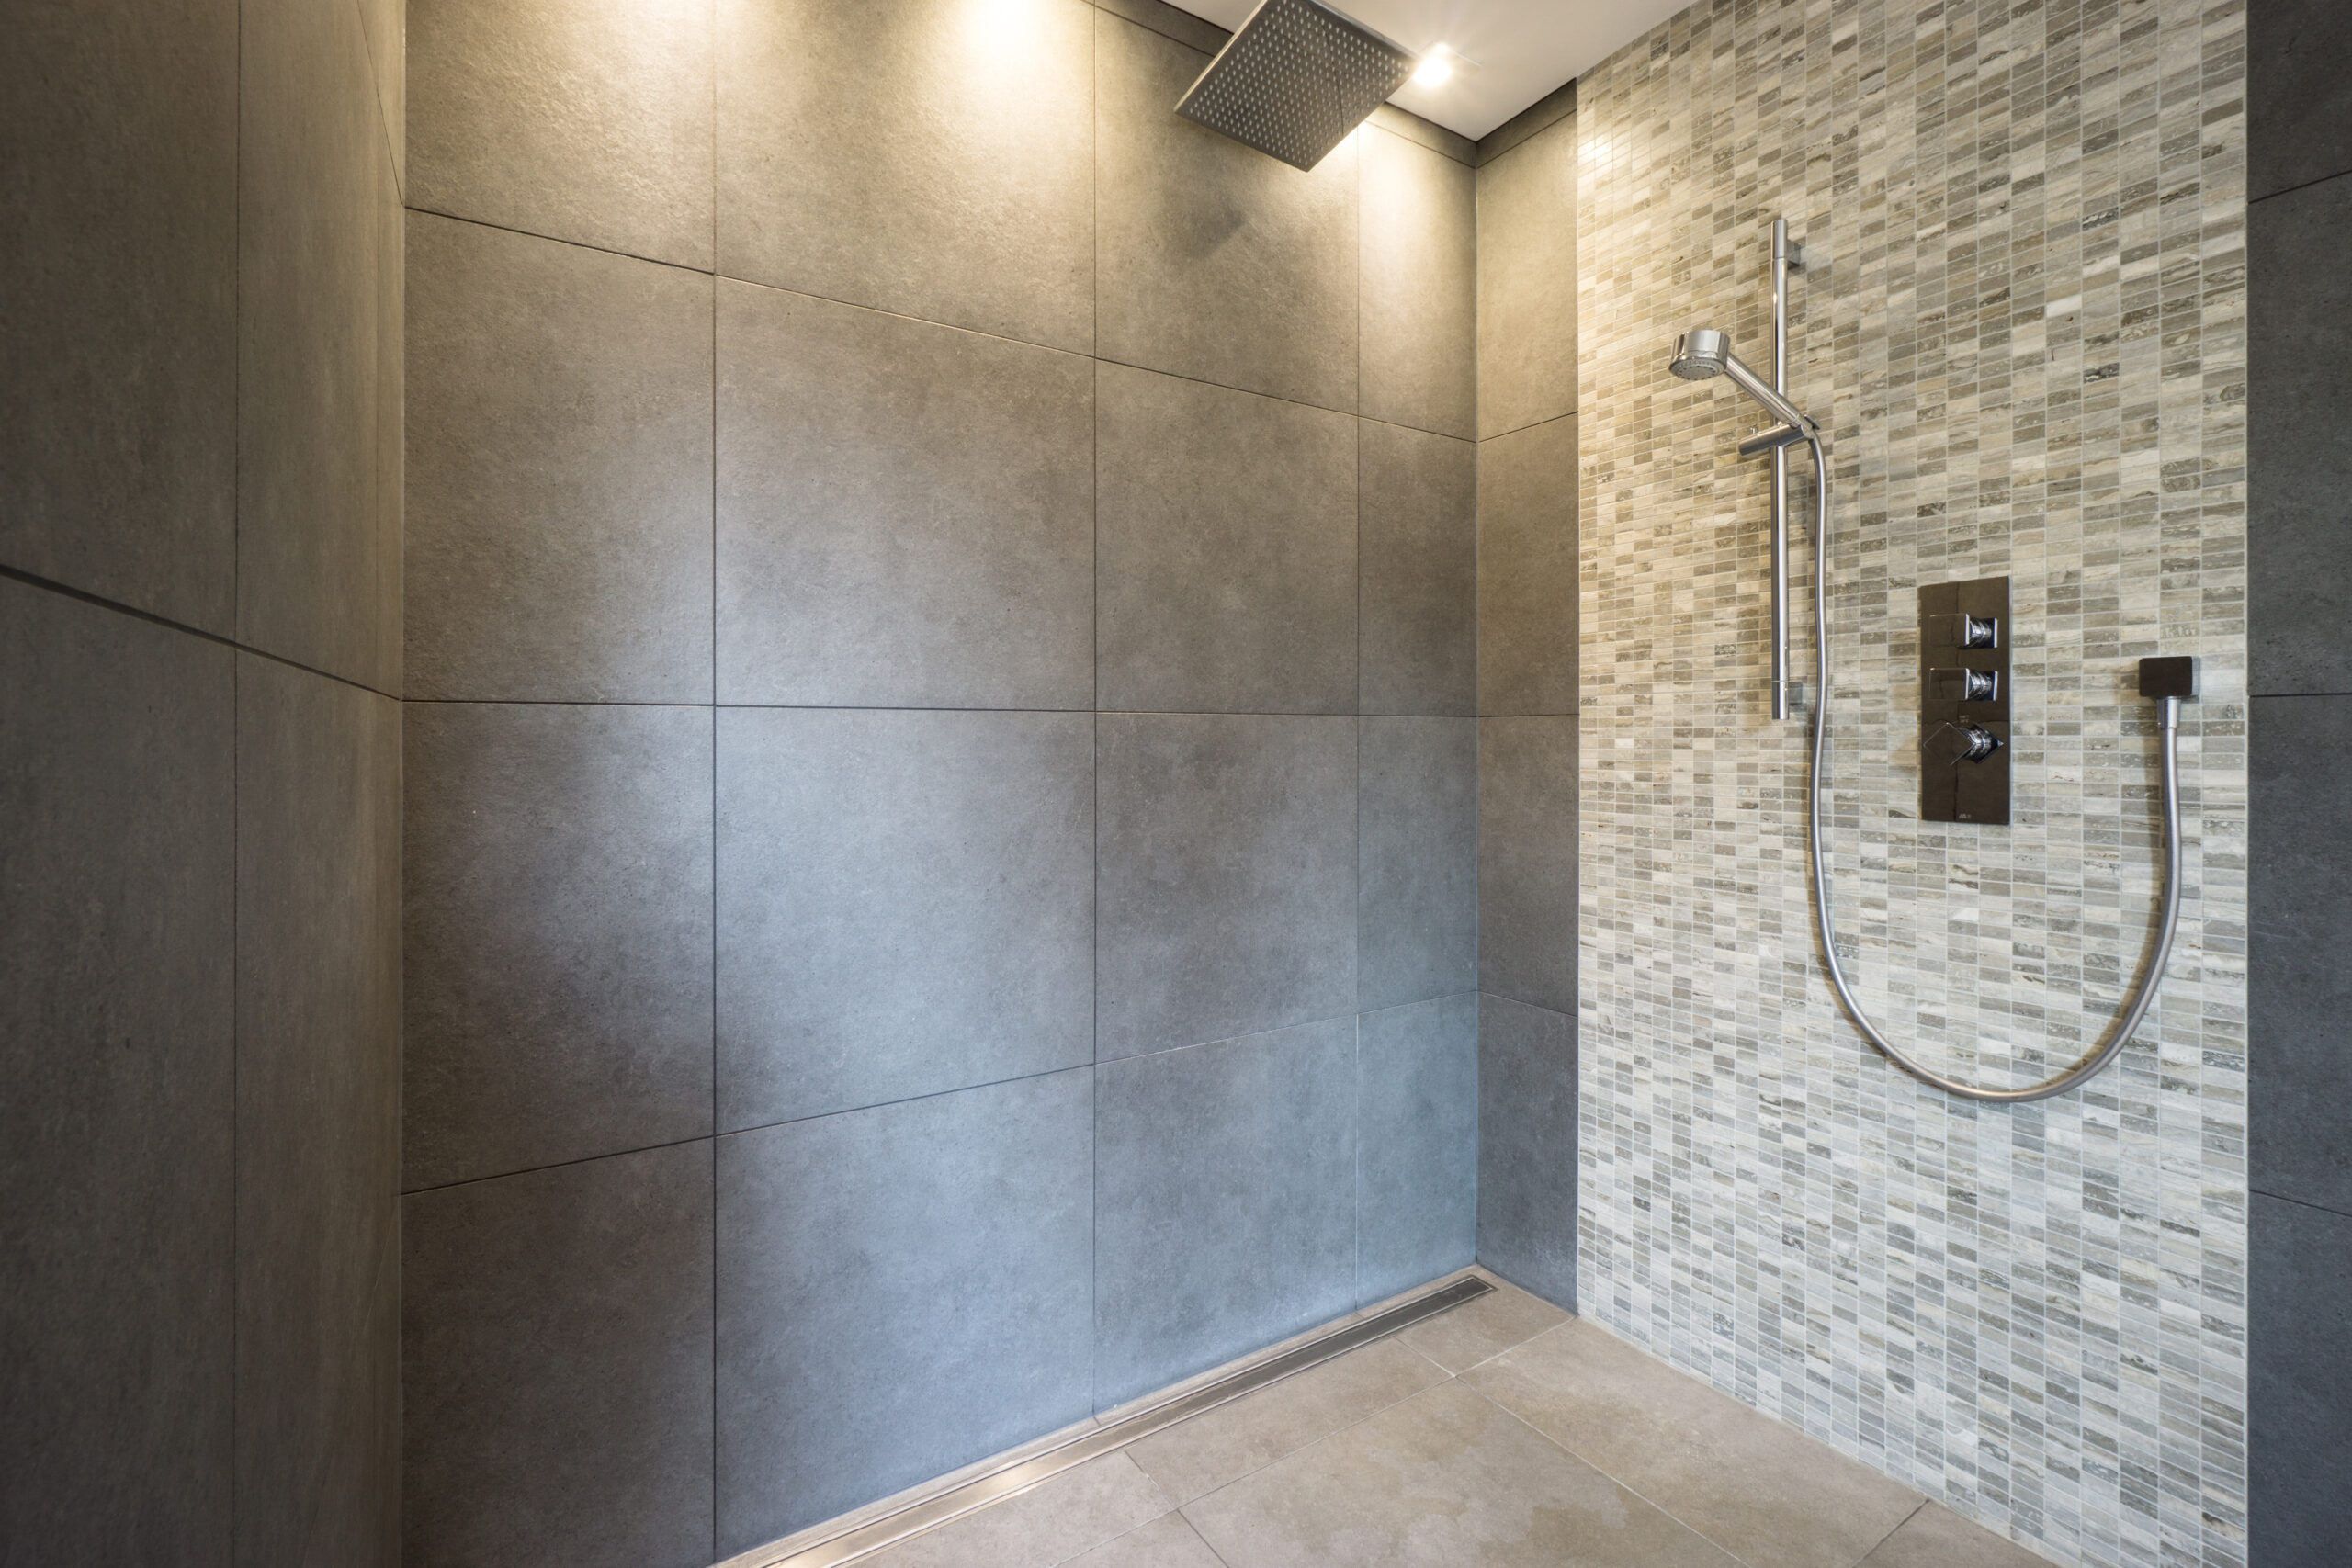
How to Care for Stone Shower Tiles 30 Sep 2024 7:22 AM (last year)
Your home’s natural stone surfaces should be properly cared for to ensure long-term functionality and appearance. However, caring for stone surfaces can be a bit tricky, especially if these surfaces are constantly exposed to moisture.
Your shower’s natural stone is likely exposed to water daily. Because of this, you should take certain measures to prevent damage to the stone while keeping it looking its best.
7 Tips for Caring for Natural Stone Showers
Let’s take a look at a few important tips for caring for stone shower tiles.
1 .Know Your Stone
First, it’s important to know what type of stone your shower is and what type of stone finish it has. Some stones may require specified cleaning techniques. For example, marble is more porous than other stones like granite, meaning it will need an appropriate cleaner for the job.
You’ll also want to consider the stone finish. Some stones may have a polished finish, while others may be honed. Consider this fact as you clean your stone shower.
2. Keep the Tiles Clean
Stone shower tiles—whether marble, granite, or quartz—require frequent cleaning.
Weekly cleaning with a stone-safe cleaner is the perfect solution for dirty, grimy shower tiles. When doing so, it’s important to avoid products with acid or ammonia, as they can easily damage the natural stone. Instead, use a product like Rock Doctor’s Marble Shower Cleaner or Granite and Quartz Cleaner to safely clean all-natural stone tiles.
Additionally, to keep soap scum from building up, you can rinse the shower down after each time it is used to make sure no shampoo or soap is lingering on the tiles for an extended period of time.
3. Dry the Tiles After Showering
Leaving natural stone wet all the time can lead to mildew and mold growth. Daily, or after each shower, it’s important to squeegee or use a microfiber cloth to dry the tiles thoroughly.
A squeegee removes moisture, allowing the tiles to dry faster. However, if you really want to ensure the tiles are completely dry, wiping with a cloth is a better option.
Overall, removing excess moisture while cleaning a natural stone shower is a strong defender against mold growth, and can even decrease the humidity levels in your bathroom.
4. Avoid Harsh Chemicals
When caring for a natural stone shower, it’s best to avoid using harsh or acidic chemicals. These types of cleaners can wear down the stone’s sealant, leading to discoloration, scratches, and even staining.
Instead, use pH-neutral products, specifically those that are made for cleaning natural stone.
5. Pay Attention to Your Grout
Grout may seem unimportant next to your beautiful stone tiles. However, if neglected, the grout can become dirty, regardless of how great your tiles look, and can diminish the natural beauty of the shower.
To clean your grout, use a toothbrush or soft nylon brush to gently lift grime. It’s best to also use a stone-safe grout cleaner like Rock Doctor’s Tile and Grout Cleaner.
6. Eliminate Mold and Mildew
Not only is mold gross, but it can also be a health hazard for your family. Breathing in mold spores can increase allergies and irritate those with respiratory conditions. For this reason, it’s best to clean away mold and mildew as soon as possible.
To eliminate mold and mildew, use Rock Doctor’s shower cleaner in addition to a non-scratch sponge or pad. This ensures that you will gently remove the mold from the surface of the stone without scratching or damaging it.
You can prevent mold by keeping the stone tiles as dry as possible between showering sessions, as mentioned above.
7. Seal Stone Tiles Regularly
Regardless of where natural stone is in your home, it needs to be sealed to prevent damage from elements like moisture and dirt. Your tiles are even more at risk for water damage in the shower, so it is important that you seal these tiles often.
While sealing stone can normally be done every six to 12 months, when it comes to sealing shower tiles, you might want to start checking around every four to six months to see how the sealer has held up. In some cases, you might need to seal the stone more often to keep it protected. If you don’t use appropriate cleaners on the tile, you are likely to strip the sealer off early.
Rock Doctor’s Granite and Stone Sealer is the perfect sealer for in-shower stone tiles. It is safe on all types of natural stone and will keep the tiles in your shower safe from frequent exposure to excessive moisture.
What NOT to Do When Caring for Natural Stone Showers
When caring for stone shower tiles, you’ll also need to consider what not to do to avoid damage. This includes the following:
- Do not use just any cleaner. Non-stone-specific cleaners, whether in cream, liquid, or powder form, can damage the stone.
- Do not use ammonia products. These can dull the surface of the stone.
- Do not use soap scum removers.
- Do not use generic mildew stain removers on polished stone tile.
- Do not use harsh disinfectants or self-cleaning products.
Rock Doctor’s collection of natural stone products ensures clean and properly cared-for surfaces. Shop online today or visit a retail location near you.
The post How to Care for Stone Shower Tiles appeared first on Rock Doctor.
7 Common Myths About Natural Stone 15 Mar 2024 10:17 AM (last year)
Natural stone has been used for centuries in the construction of buildings, statues, walkways, baths, and more because of its timeless elegance. However, several myths and misconceptions have cropped up surrounding the use of natural stone as a construction material.
In this article, we will look at the truth behind these common natural stone myths. We’ll explore seven prevalent myths surrounding natural stone to help homeowners make informed decisions when considering using it in their homes.
Myth #1: Natural Stone Isn’t a Trend That Will Last
A common myth about natural stone is that it is a passing trend that will soon be out of style. As new materials are designed and fabricated in an increasingly modern world, natural stone, and other natural materials will no longer have a place in modern architecture. This is simply not the truth.
Natural stone’s popularity has lasted centuries, and we don’t see it going away anytime soon. It has a timeless beauty, versatility, and elegance that simply cannot be fully copied by modern manufacturing. It’s been used for centuries, from the classical era up through the contemporary, and it continues to be a popular choice among both homeowners and designers.
Natural stone will continue to be a staple in home construction for generations to come, especially since it offers a unique character and durability that is difficult to replicate.
Myth #2: Natural Stone Is Expensive
Another big misconception is that natural stone is extremely expensive and cost-prohibitive for most homeowners. It is true that natural stone is not the cheapest option available; Still, it is an investment that offers long-term benefits.
While the initial cost of using natural stone may be higher than that of other materials, the durability of the stone makes it cost-effective in the long run. It requires minimal maintenance and will last the test of time with a little care.
Additionally, it adds significant value to your home. It is a great draw for prospective buyers, and the initial investment will not go to waste.
Myth #3: Natural Stone Requires a Lot of Maintenance
Some may be hesitant to choose natural stone for their home because they are worried it will require extensive and frequent maintenance. We can easily dismiss this myth simply by sharing how to care for natural stone properly.
Natural stone does indeed need some maintenance and care to resist stains, but it isn’t as much work as some people think. Regular sweeping, wiping, or damp mopping is all that natural stone requires on a weekly basis. Some types of natural stone do require occasional sealing, but this only needs to be done once a year and often less frequently than that.
Caring for Natural Stone Countertops
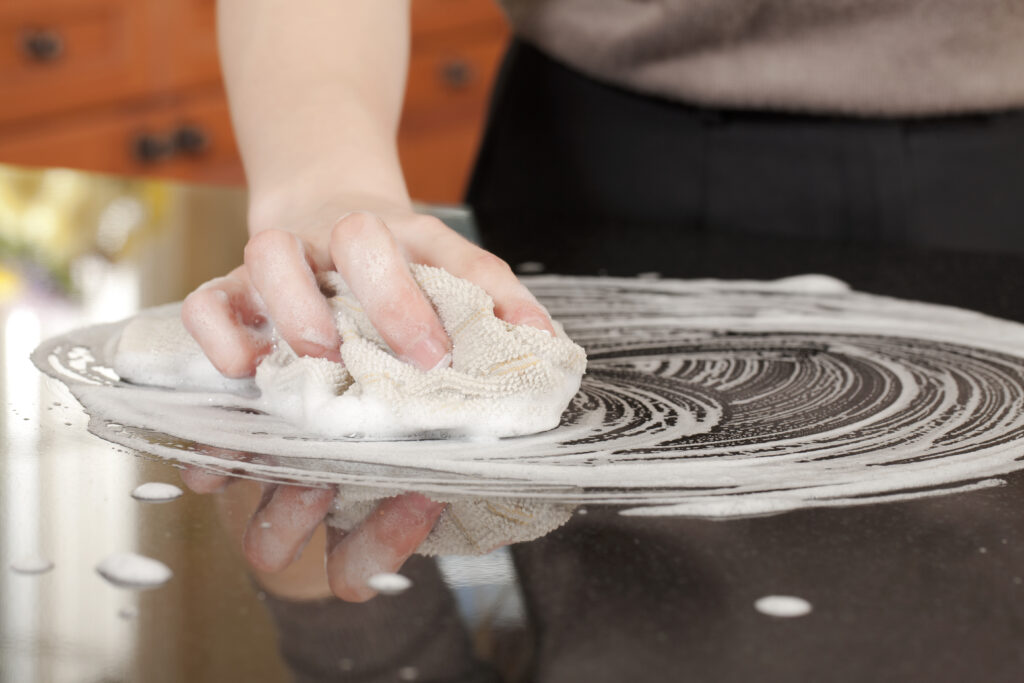
Caring for natural stone countertops is fairly simple. Follow these basic natural stone care steps:
- Wipe your stone down with a safe natural stone cleaner once a day or as needed.
- Clean up spills immediately; don’t let them sit.
- Avoid putting hot objects or any acidic items (e.g., lemon juice) directly onto the stone.
- Polish your stone monthly or as needed if you want that additional gleam.
- Test the seal on your stone once a year. If it fails the test, use a natural stone sealer to restore the seal.
These are general natural stone maintenance and cleaning tips; it is best to find a quick care guide for the particular stone you are interested in. Not all types of stone will need to be polished or sealed, and some are more resistant than others to heat and acid.
Caring for Natural Stone Flooring

Regular sweeping and damp mopping are typically sufficient to keep natural stone floors clean. It is important to use a pH-neutral natural stone floor cleaner. The best cleaner for stone floors is Rock Doctor’s Floordaid+. Once your floors are swept or vacuumed, test a small section with Flooraid+, then spray the floor down and wipe with a sponge mop, mop pad, or microfiber cloth.
Learn how to clean stone tile floors with our Ultimate Guide to Caring for Stone Flooring. We recommend using Rock Doctor’s Tile and Grout Cleaner for an extra deep clean on tile and grout flooring.
Periodically sealing the stone helps protect it from stains and wear. Test the stone annually to see if it absorbs water or if the water beads up into a puddle. If the stone absorbs the water, it is time to re-seal it.
Myth #4: Natural Stone Is Bad for the Environment
The next myth we’ll address is that using natural stone is harmful to the environment. Homeowners are worried about the effects of quarrying and the emissions from transporting large amounts of stone.
The environmental impact of natural stone will vary based on several factors, such as sustainable quarrying practices (such as water regulation), stone processing, and transportation emissions.
Many natural stone quarries are committed to sustainable practices, minimizing their environmental footprint. The Natural Stone Institute gives the stone industry practical, sustainable guidelines, training programs, and certifications to help reduce any environmental impact.
As for transportation, the best way to reduce emissions is to choose a locally sourced natural stone.
Many homeowners assume that choosing a manmade material is better for the environment than using natural stone since this doesn’t involve as much quarrying.
Unfortunately, manmade materials require many more manufacturing steps and working with chemical compounds, which can create pollution and increase the carbon footprint. Quarrying natural stone does not release chemical off-gassing into the environment like creating manmade building materials does.
Natural stone is also an energy-efficient material, as it retains heat in colder months and stays cool in hot weather, reducing the need for artificial heating and cooling.
Myth #5: Natural Stone Stains Easily
Another concern homeowners raise is the myth that all types of natural stone easily stain, which makes it unsuitable for areas with high traffic, bathrooms, and kitchens. While some types of natural stone can stain, this is easily preventable with some basic maintenance.
Special products are used to create a protective barrier on stone surfaces that keeps the stone from absorbing liquid or being etched with acid, which reduces or eliminates any chances of staining. It’s still best practice to wipe up spills, especially acidic ones like wine, vinegar, or coffee, as they occur to prevent the acid from eating through your protective seal.
Using a pH-neutral cleaner designed specifically for stone countertops, such as Rock Doctor’s Natural Granite & Quartz Cleaner, is an excellent way to clean and maintain natural stone while preventing stains.
Carpet runners can be used to protect stone or any other flooring material from damage in high-traffic areas. Learning how to clean stone floors is an easy process to keep your floors looking beautiful.
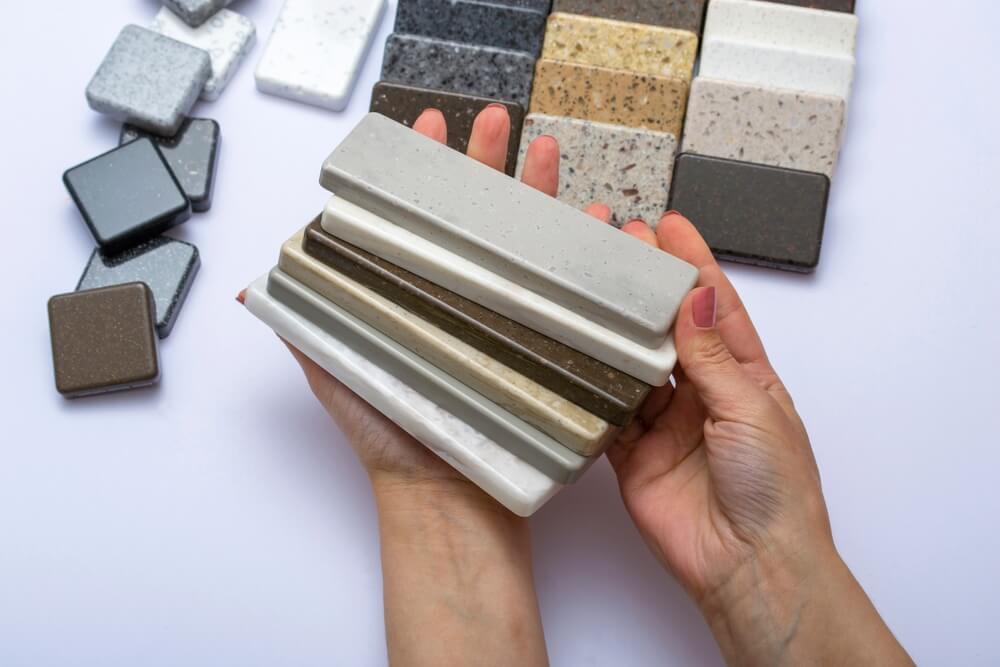
Myth #6: Natural Stone Options All Look the Same
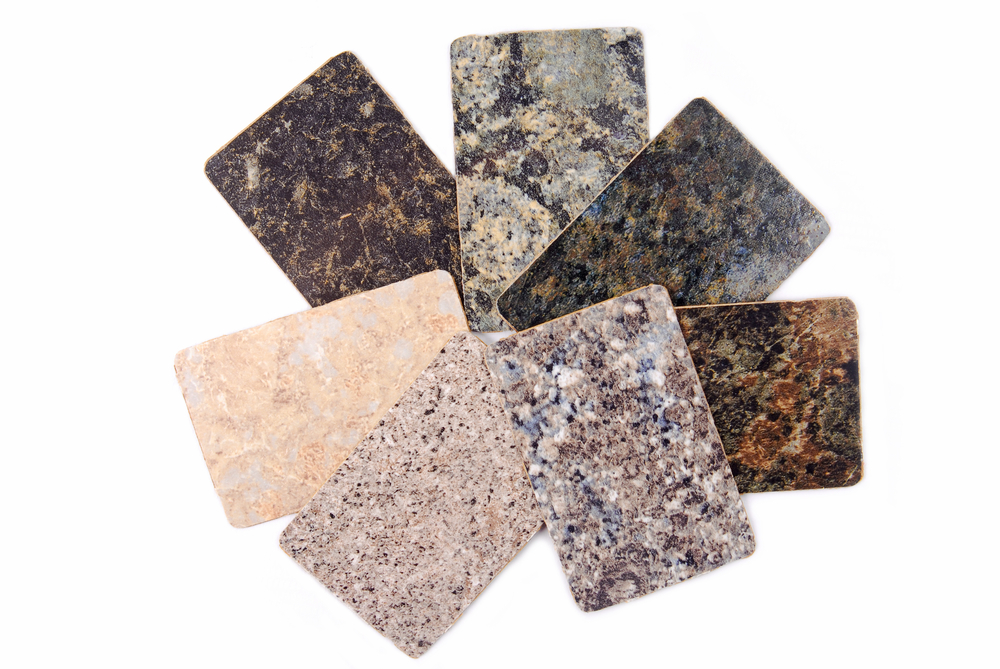
Another common misconception homeowners have is that all natural stone options look similar, which will limit their design options.
This myth is easy to debunk with a simple look at the wide variety of options, colors, textures, and patterns there are to choose from when selecting a natural stone. Homeowners can choose from options like marble, granite, limestone, travertine, and slate, each with a unique appearance and characteristics.
Whether you are looking for a classically elegant style of Carrara marble or something with a more rustic charm like slate, homeowners can find a natural stone that suits their style and design preferences.
The variety available in natural stone choices allows homeowners and designers to create interesting and unique designs that personalize their homes.
Myth #7. Natural Stone Isn’t a Great Investment
The last myth for us to discuss is the misconception that natural stone isn’t a great investment in a home. The concern is that the cost is not worth the value it brings to the home.
However, in a 2019 survey conducted by the National Association of Home Builders (NAHB), prospective buyers indicated that 57 percent had a clear preference for granite or other natural stone countertops. Prospective buyers are definitely interested in natural stone, and it is an important selling point that will warrant additional consideration.
Natural stone has a large number of benefits and represents an excellent investment for homeowners looking to personalize their home and improve its value. It enhances aesthetic appeal and doesn’t require frequent replacement or renovations. Properly installed and cared for, natural stone can last 100 years or more and is a sought-after feature for potential buyers.
Remember to use the best cleaner for stone floors and countertops, and follow proper maintenance practices to keep your natural stone surfaces looking stunning for years to come. Don’t let myths deter you from experiencing the timeless beauty and benefits of natural stone in your home.
Find Rock Doctor Stone Care products online or at a local retailer near you.
The post 7 Common Myths About Natural Stone appeared first on Rock Doctor.
5 Benefits of Having Bamboo Flooring In Your Home 4 Mar 2024 9:12 AM (last year)
Hardwood is a popular flooring choice for many homeowners—it’s easy to clean and brings a classic and luxurious look to any home. Homeowners looking for an eco-friendly option for hardwood floors may consider bamboo, a material that has gained significant popularity in recent years.
Bamboo flooring offers several benefits and can be personalized to your home’s style and color palette. If you’re thinking about making the switch to bamboo hardwood, read on to learn more about its benefits.
Why You Should Consider Bamboo Flooring
As a lived-in space, your home needs durable materials that are guaranteed to last for many years to come. This is especially important for the floors since years of foot traffic and wear and tear can take a toll on their appearance and functionality.
One of the many reasons to consider bamboo flooring is its durability. This makes taking care of your bamboo floors a lot easier despite heavy use.
It’s also important to note that bamboo is an engineered wood flooring option. This means that it can come in a variety of styles and colors. Choosing bamboo flooring means bringing a uniqueness to your home, along with giving you the flexibility of something that’s affordable and easy to maintain.
Bamboo Flooring Benefits
If you’re looking to add a modern look to your home that’s sure to stand out, consider the following benefits of bamboo flooring.
1. Sustainable & Eco-Friendly
One of the main reasons to choose bamboo flooring is its sustainability and eco-friendliness. Bamboo is a renewable material that grows back three to four times faster than traditional hardwood trees. It can be harvested in as little as three years, and is often farmed in a sustainable manner. In fact, a lot of effort has been put into reducing the carbon emissions of manufacturing bamboo flooring to ensure minimal impact on the environment.
Bamboo flooring is also considered a natural insulator. This can help keep your heating bill low in the winter, and your cooling bill low in the summer.
2. Affordable
In addition to bamboo’s fast-growing rate and lower production costs, it is relatively affordable compared to other wood floor options. This can turn into massive cost-savings for homeowners who want something that is more budget-friendly.
Additionally, just because bamboo flooring doesn’t cost as much as hardwood flooring doesn’t mean it cannot hold up to the same quality and durability. Properly processed and installed, bamboo flooring has a long lifespan and is an excellent investment for any home.
3. Versatile
Bamboo flooring is a versatile material that can be produced in a wide array of styles, colors, and finishes. Whether your home has a traditional, rustic aesthetic or is more modern and sleek, bamboo flooring can accommodate your tastes.
It can also be adjusted for certain characteristics, like increased durability, water resistance, or heat resistance—for example, if you want heated flooring installed in your home.
4. Easy to Maintain
Maintaining bamboo flooring is easy, which is definitely ideal for homeowners with busy lifestyles and schedules. Simply sweeping or vacuuming on a regular basis will keep your floors looking clean.
Like any wood floor, an occasional quick and simple damp mopping is also recommended. Be sure to use a bamboo floor cleaner specifically designed for bamboo surfaces, such as Rock Doctor’s Bamboo Floor Cleaner, to avoid damaging the finish.
Bamboo flooring has a natural resistance to mold, allergens, and other living pests, which makes it easier to maintain. This also means it is a fantastic flooring option for individuals with allergies.
5. Durable & Water-Resistant
Normally, durability is associated with high costs, but bamboo flooring is an exception to this. Bamboo is harder than many other hardwoods, and is resistant to denting and typical wear and tear.
Some bamboo flooring options are designed to allow breathing. In contrast, other options are specifically designed to have water-resistant properties, which make them suitable for kitchens, bathrooms, and other moisture-prone areas.
However, not all bamboo flooring is water-resistant, and it is important to choose the right materials for the right locations. Even water-resistant flooring is not fully waterproof, so it is best to clean up spills quickly and use a damp mop rather than one that is sopping wet.

How to Care for Bamboo Flooring
To get the most out of its benefits, it’s important to know how to properly care for bamboo flooring. Follow these bamboo flooring cleaning methods:
Regular Cleaning
A regular cleaning schedule is the best way to keep your bamboo flooring in great condition. Routinely sweep or vacuum the floor to remove dirt, dust, and debris. This is to prevent any dents and scratches from foot traffic that smashes or scrapes rocks or other small debris along the flooring.
It’s also best to avoid using anything too abrasive, such as a broom or certain vacuum attachments, that could easily scratch the surface.
Avoid Excessive Moisture
While your bamboo floors are mostly water-resistant, it’s important to prevent standing water or excessive moisture on its surface. Quickly clean up spills to prevent any damage and water absorption. Use a damp mop for mopping, but do not pour water directly onto the floor for mopping.
Use Safe Floor Cleaners
When it comes to cleaning your bamboo flooring, choose Rock Doctor’s Bamboo Floor Cleaner, which is specifically designed for the surface. Avoid anything that can damage the flooring’s finish, such as harsh chemicals, ammonia, or abrasive cleaning agents.
Protect Against Scratches
Place felt pads or furniture gliders under the legs of heavy furniture to prevent scratches and dents. Don’t drag heavy, abrasive, or sharp objects across the floor.
Use Mats and Rugs
Mats and rugs can be used in doorways and hallways to help trap dirt and keep it from being tracked through the house. Use mats with a non-slip backing to keep mats in place and avoid any damage to the finish.
Trim Pet Nails
Preserving bamboo flooring also means regularly trimming your pet’s nails to prevent scratches. Mats can also be used in pet frequented areas to reduce damage to flooring.
Bamboo flooring comes with many benefits and is an overall great wood floor option for homeowners—especially those who are looking for a practical and eco-friendly flooring option. Follow proper bamboo flooring care and maintenance guidelines, and your flooring will retain its beauty and functionality for decades to come.
Looking for the right cleaning solution for bamboo or natural stone surfaces in your home? Shop online for products from Rock Doctor, or find us in a store near you.
The post 5 Benefits of Having Bamboo Flooring In Your Home appeared first on Rock Doctor.
How to Choose the Right Natural Stone for Your Home 31 Jan 2024 5:47 AM (last year)
Natural stone has an inherent beauty that can elevate the aesthetics of your home. Whether you’re planning to incorporate it into your kitchen countertops, bathroom vanities, flooring, or other locations, selecting the right natural stone is crucial to achieving the desired look and feel.
With a wide range of natural stone options available, from granite to marble, limestone to slate, making the right choice can be a daunting task. In this comprehensive guide, we’ll explore the essential factors to consider when choosing the perfect natural stone for your home.
Things to Consider When Choosing Natural Stone
Before delving into the tips for selecting the right natural stone for your home, it’s essential to understand the characteristics and properties of different natural stones.
Each type of natural stone has its unique qualities that can influence your decision. Here are some key things to consider:
- Durability: Natural stones vary in hardness and durability. Some stones, like granite and quartzite, are highly durable and resistant to scratches and stains, making them ideal for high-traffic areas like kitchen countertops. Others, such as marble and limestone, are more prone to scratching and staining and may require more maintenance.
- Color and Pattern: Natural stone comes in a wide array of colors and patterns. Some stones have uniform colors and veining, while others exhibit more dramatic patterns. Consider the overall color scheme of your space and the visual impact you want to achieve when selecting a stone.
- Finish: Natural stones can have different finishes, including polished, honed, and leathered. Each finish offers a unique look and texture, so choose one that complements your design aesthetic.
- Maintenance: Natural stone requires regular maintenance to preserve its beauty. Some stones are more high-maintenance and require sealing and cleaning more frequently than others. Be prepared to invest time and effort in maintaining your chosen stone.
- Cost: The price of natural stone can vary significantly based on the type of stone, rarity, and quality. Set a budget that lines up with your project goals and explore options within your price range.
Now that we’ve covered the basics, let’s dive into some practical tips for choosing the right natural stone for the countertops or vanities in your home.
6 Tips for Choosing the Right Natural Stone for Your Home

1. Consider Your Home’s Theme & Decor
Before selecting a natural stone, take a close look at your home’s existing theme and decor. Are you aiming for a contemporary, rustic, or traditional style? The natural stone you choose should harmonize with the overall design concept. For instance, if you have a modern kitchen with sleek cabinetry and stainless steel appliances, a dark granite countertop with a polished finish can create a stunning contrast and focal point.
Conversely, if you have a more rustic or farmhouse-inspired interior, a honed limestone or soapstone countertop with a warm color tone may complement the cozy and inviting atmosphere. The key is to choose a natural stone that enhances your home’s style and doesn’t clash with it.
2. Determine the Mood You’d Like to Create
Natural stone has the power to set the mood and ambiance of a space. Consider the emotional impact you want to achieve in each room. For instance, if you’re designing a spa-like bathroom retreat, a soft and calming marble with subtle veining can evoke a sense of tranquility and luxury.
On the other hand, if you want your kitchen to exude warmth and comfort, selecting a natural stone with warm earthy tones, such as beige or brown, can contribute to a cozy and inviting atmosphere. Neutral tones, such as beige and gray, can add a sense of elegance and coziness to your space.
3. Determine the Level of Contrast You’re Looking For

Contrast plays a significant role in the visual appeal of your home’s interior. The choice of natural stone can either create a striking contrast or provide a subtle blend with the surrounding elements.
For instance, if you have dark cabinetry and flooring, opting for a light-colored marble or quartzite countertop can create a visually pleasing contrast that draws the eye.
Conversely, if you prefer a more cohesive and harmonious look, selecting a natural stone that closely matches the color of your cabinets or flooring can create a seamless flow in your space. Keep in mind that the level of contrast you choose can dramatically impact the overall aesthetic of your home.
There should be some level of contrast if you have visually complex pieces. If your flooring, cabinets, walls, and kitchen countertops are all visually complex and intricate, the room can become overwhelming and dizzying. It’s often best to limit how many visually complex pieces there are to give them a little “white space” and better display their appearances.
4. Examine Different Natural Stone Color Families
Natural stone options for home design are available in a wide range of colors, each with its own unique charm. To make an informed decision, explore various natural stone color families, including:
- Neutral Tones: Neutral tones like beige, gray, and white are versatile and can complement a wide range of design styles. They create a timeless and elegant look.
- Warm Tones: Stones with warm hues like brown, gold, and red can add a sense of coziness and warmth to your home. These tones work well in kitchens, living rooms, and dining areas.
- Cool Tones: Cool-toned stones in shades of blue and green can bring a refreshing and calming feel to your space. They are excellent choices for bathrooms and areas where relaxation is a priority.
- Dramatic Tones: If you want to make a bold statement, consider stones with dramatic veining or intense colors. These stones can become the focal point of your room.
Take into account the existing colors in your home and select a natural stone color that complements or enhances its overall palette.
5. Think About the Light In Your Space
Many homeowners fail to take into account the lighting in their space. They look at stone samples in dim warehouses or home improvement depots and make their decisions based on other samples and paint colors they gathered and inspected in dim storelight.
It is essential to take samples home and look at them in the light of the room they will be in. Remember that lighter tones will brighten a room, and darker shades may require more or brighter lighting to be installed.
Additionally, natural light can significantly impact the appearance of natural stone. The same stone may look different in a room with abundant natural light compared to one with limited light. When choosing a natural stone, consider the amount of natural light in the space where it will be installed.
If your room receives plenty of sunlight, a bold, bright-colored stone can shine and exhibit its beauty more vividly. In contrast, in rooms with limited natural light, darker stones may appear richer and more inviting. Pay attention to how the stone interacts with the available light to ensure it meets your expectations.
6. Keep Durability and Maintenance in Mind
Durability and maintenance are crucial factors when selecting natural stone for your home. Some stones, like granite and quartzite, are highly durable and resistant to scratches, heat, and stains. They are ideal for high-traffic areas like kitchen countertops.
On the other hand, softer stones like marble and limestone may require more delicate handling and regular sealing to prevent staining and etching. Assess your lifestyle and willingness to invest time and effort in maintenance when choosing a natural stone.
Remember that proper care and maintenance can extend the lifespan of your natural stone and keep it looking pristine for years to come.
Natural Stone Options for Your Home
Here are six popular types of natural stone for your home.
1. Granite
Color Tones: Granite is known for its wide range of colors, from cool blues and greens to warm browns and reds. It can also have striking patterns and veining that add visual interest.
Durability: Granite is one of the most durable natural stones available. It’s highly resistant to scratches, heat, and stains, making it an excellent natural stone choice for kitchen countertops.
Maintenance: While granite is relatively low maintenance, it benefits from regular sealing to prevent staining. Routine cleaning with Rock Doctor’s Granite & Quartz Cleaner is usually sufficient to keep it looking pristine.
2. Marble
Color Tones: Marble is famous for its luxurious and classic appearance. It often comes in shades of white, gray, beige, and black, with beautiful veining that can vary in color from gold to red.
Durability: Marble is softer than granite, making it more susceptible to scratching and etching from acidic substances. It’s best suited for low-traffic areas like bathroom vanities and fireplace surrounds.
Maintenance: Marble requires more maintenance than some other natural stones. Marble should be sealed regularly to protect against stains and spills and should be cleaned promptly to prevent etching.
3. Quartzite
Color Tones: Quartzite can mimic the appearance of marble with its white and gray tones, but it also comes in a variety of other colors, including shades of pink, green, and blue.
Durability: Quartzite is exceptionally durable, even more so than granite. It is highly resistant to scratches, heat, and stains, making it an excellent choice for both kitchen and bathroom applications.
Maintenance: Quartzite is relatively low-maintenance, requiring periodic sealing with Rock Doctor’s Stone Sealer to enhance stain resistance. Regular cleaning with Rock Doctor’s Granite & Quartz Cleaner is typically sufficient.
4. Limestone

Color Tones: Limestone is known for its soft, muted colors, such as beige, cream, and light gray. It has a gentle, earthy appearance.
Durability: Limestone is softer than granite and quartzite, making it more susceptible to scratching and staining. It’s best suited for low-traffic areas like bathroom floors and walls.
Maintenance: Limestone requires regular sealing to protect against stains. It’s essential to avoid acidic cleaning products, as they can damage the stone’s surface. Use a neutral cleaner like Rock Doctor’s Natural Stone Cleaner to avoid damage.
5. Slate
Color Tones: Slate is often associated with deep, rich tones like dark gray, black, green, and purple. It has a natural, rustic appearance.
Durability: Slate is a durable natural stone that can withstand heavy foot traffic, making it an excellent natural stone choice for flooring or home exteriors.
Maintenance: Slate is relatively low-maintenance and typically doesn’t require sealing. Regular sweeping and occasional mopping are usually sufficient to keep it clean.
6. Soapstone
Color Tones: Soapstone is known for its distinctive solid black or greenish-gray color. It often darkens over time and develops a natural patina.
Durability: Soapstone is a dense and durable stone that is resistant to heat and stains. It’s commonly used for kitchen countertops and sinks.
Maintenance: Soapstone is relatively low-maintenance and doesn’t require sealing. It can be oiled to enhance its appearance and hide surface scratches.
Understanding the characteristics of these different natural stones, including their typical color tones, durability, and maintenance requirements, will help you make an informed decision based on your design preferences and practical needs. Whether you prioritize durability, aesthetic appeal, or a balance of both, there’s a natural stone that’s perfect for your home.
In conclusion, choosing the right natural stone for your home is a decision that should be made with careful consideration of your design preferences, the ambiance you want to create, and practical factors like durability and maintenance. By taking these tips into account and exploring the diverse natural stone options available, you can transform your living area into a stunning and inviting space that reflects your unique style and personality.
When you are ready to seal, clean, or polish your natural stone, count on Rock Doctor’s proprietary products, which are designed specifically for natural stone. Our products will do a perfect job of sealing, cleaning, or polishing without leaving stains or harming your stone. Find our products in a retailer near you!
The post How to Choose the Right Natural Stone for Your Home appeared first on Rock Doctor.
6 Facts About Quartz Countertops You Should Know 27 Dec 2023 5:20 AM (last year)
Quartz countertops are great options for homeowners who are looking to bring a certain level of elegance and aestheticism to their home. They have excellent functionality and durability, are relatively low-maintenance, and come at a reasonable price.
One of the reasons quartz countertops are so appealing is because they are incredibly unique and offer a number of great features. However, while quartz countertops have become a popular commodity in recent years, there are many things that people may still not know about these beautiful countertop surfaces.
1. Quartz Countertops Are Made of Engineered Stone
Most natural stone countertops, such as granite or marble, are 100 percent made of their respective natural rock. Quartz countertops, on the other hand, are considered engineered. This is because, while the quartz itself is a natural stone, it is mixed with a composition of other stones and minerals. This is why quartz countertops are considered engineered.
Marble, granite, and slate are all quarried stone that come in large slabs. Quartz countertops are made up of a mix of crushed quartz, granite, marble, stone, and more. Sometimes recycled industrial waste like ceramic, silica, glass, and mirrors are also added.
Quartz countertops are between 88 and 93 percent aggregate materials, with a binder or resin making up the remaining seven to 12 percent. This resin is polymeric or cement-based and binds all the materials together.
Pressure and heat are then applied to the mixture to create the engineered stone product.
2. Quartz Countertops Can Come in Nearly Any Color and Pattern
Since quartz countertops are engineered stone, they allow for a wide range of colors and patterns. Changing the stone aggregate and adding dyes to the resin can result in many different variations. Dark, light, gray, green, and nearly any other color you can think of can be used when manufacturing quartz countertops.
Quartz countertops can be engineered to look like a natural stone, such as granite, limestone, slate, or marble. They can even be made to look like fine, finished concrete.
Increasingly popular, though, are results that can only be achieved with the quartz-making process. With different patterns, flakes, mirrors, and other pieces added to the quartz, each quartz countertop can be unique.
3. Quartz Is Very Stain-Resistant
The very nature of the quartz countertop means that the resin and binders used to create it make it completely waterproof. This means that quartz countertops are completely sealed and do not require annual maintenance and or stone-sealing products.
The non-porous nature of quartz countertops makes them resistant to bacteria and stains from acidic ingredients. They are less likely to get any sort of water stain, as water wipes off easily.
While fairly resistant to harm, avoid using scouring pads and harsh chemicals when cleaning quartz countertops. The best way to clean quartz countertops is with Rock Doctor’s Granite & Quartz Cleaner for safe and easy cleaning that is tough on grime and safe on quartz.

4. Quartz Is Highly Durable with a Forgiving Nature
Quartz countertops do not easily scratch. They have a very hard, durable nature, even more so than granite.
While quartz countertops do possess some of the durable features of natural stone, they also come with the forgiving characteristics of synthetic materials. While quartz has greater strength than granite, it also has enough give in the resins and polymers to give it just a little flexibility.
This flexibility makes quartz countertops tougher and more forgiving than more brittle natural stones. Quartz countertops are not prone to chipping, cracking, or scratching.
However, that is not to say they are invulnerable. Enough force, pressure, or something hard enough (diamond, hardened steel, or hardened glass) can cause quartz to scratch or break. Additionally, the binders in quartz countertops are susceptible to heat damage, so make sure to use a hot pad when putting down pots and pans.
Light scratches in quartz countertops can be buffed out with a polish. Deeper scratches can be repaired with an epoxy filler. Always use a wooden or plastic cutting board to avoid scratches and protect your countertops.
5. Quartz Countertops Are Eco-Friendly
Around 90 percent of the stone-like materials that form the bulk of quartz countertops are waste byproducts from other quarrying or manufacturing processes, which makes quartz a very eco-friendly countertop material. The manufacturing process does not create much in the way of carbon emissions, nor does it release harsh chemicals into the air when the stone is being sealed.
6. Quartz Patenting Process Originated in Italy
The Breton company, located in northeast Italy, first created and patented the process for Bretonstone Technology. This technology is the process of blending pulverized natural stone aggregate with polymers, binders, and resin mixtures. The air is then removed, and the material is heated and shaped into slabs with the hardness and appearance of natural stone.
The Bretonstone Technology has been licensed to over 50 different companies located around the world. The Breton company remains involved in the process, providing much of the highest quality quartz aggregate.
The three most famous brands for quartz countertops are Silestone, Cambria, and Caesarstone. Each of these brands adds twists to the process with their own nuances, flair, and aesthetics.
Bonus Fact: The Cambria Company Owners Also Make Cheese
Cambria is located in Le Sueur, Minnesota, and is one of the top producers of engineered quartz countertops in the United States. It has additional facilities throughout the United States and Canada. Cambria is privately owned by the Davis family, who are also well-known for their cheese.
Stan Davis started in the dairy business in the 1930s. He sold butter to the U.S. government during World War II. Eventually, the family business grew and turned into Davisco Foods International, which has grown into one of the largest dairy producers in the country.
In the year 2000, the Davis family decided it was time to expand beyond the dairy industry. It cost them $36 million to get their first quartz countertop production line running in 2001. Today, Cambria is one of the top three brands in the world for quartz production.
Rock Doctor offers high-quality and safe Quartz cleaning and polishing products throughout the United States. Our products are 100 percent safe to use on quartz countertops. You can find our products online or in retail stores near you.
The post 6 Facts About Quartz Countertops You Should Know appeared first on Rock Doctor.
How Do You Clean a Natural Stone Shower? 28 Nov 2023 7:06 AM (last year)
Natural stone adds a luxurious vibe to a bathroom, giving it a unique and classy aesthetic. Because of the popularity of using natural stone to create an elegant and functional shower, it’s important to know how to care for natural stone tiling.
While maintaining a natural stone shower can be intimidating at first glance, it’s actually as simple as a quick clean once a week.
Types of Natural Stone Used in Showers
Various natural stones have been quarried and shaped for thousands of years for their appearance and lasting nature. Slate, limestone, granite, marble, and more have been used in abundance.
The most popular choices for natural stone shower tiling are soapstone, travertine, and granite due to their more dense, less porous nature. Other stones can undoubtedly be used but must be sealed to resist absorbing water.
Types of natural stone used in showers can include:
- Granite: Granite is prized for its hardness and durability. It is easier to care for than marble and other stones because of its resistance to ingredients found in hygiene products.
- Travertine: Travertine is a type of limestone found in sedimentary rocks. It is popular for bathrooms with a shower and tub configuration.
- Onyx: A banded stone similar to agate, polished onyx is conspicuously stunning—usually in a sleek, black color. However, it is very absorbent and needs to be sealed. It isn’t quite as durable as marble or granite and requires routine maintenance, but homeowners still choose it due to its natural beauty.
- Slate: Considered a low-maintenance stone, slate has a variety of colors, including deep shades of brown, grays, and vibrant warm stones. Slate is made of layers of sediment that were crushed and pressured into stone.
- Marble: Known for soft, light coloring and fascinating veining, marble has been famous for years. While it is porous and requires regular sealing and cleaning, it remains popular.
- Soapstone: This versatile stone comes in shades of gray with distinctive white veining similar to marble. Soapstone is very durable and dense, making it ostensibly ideal for use in the bathroom. It doesn’t get slippery when wet, making it suitable for shower floors. However, soapstone is very soft, can be easily scratched, and resists sealers due to its density.
Best Natural Stone Shower Cleaner
Using the right cleaner to clean your natural stone bathroom is important to avoid stains, mishaps, and damage to your stone. It’s best practice to seal dense stone to avoid holding on to water and inviting stains or mold; unfortunately, acidic cleaners will break down the sealant that is protecting your stone. For this reason, you should not use distilled white vinegar or any other harsh chemical cleaner containing bleach, vinegar, and ammonia.
The key to cleaning natural stone tiles is using a natural, non-acidic, or pH-neutral cleaner (pH level 7 is neutral).
Rock Doctor’s Tile and Grout Cleaner is the best natural stone shower cleaner because it removes grease, dirt, oil, and soap scum from grout and tile without damaging the stone or its sealant. It contains a blend of surfactants, organic salts, and water conditioning agents to create an acid-replacement cleaner that is environmentally friendly and biodegradable. With no unpleasant fumes, the Tile and Grout cleaner is perfect for those small, confined spaces like showers.
Rock Doctor’s Tile and Grout Cleaner is safe for use on grout, porcelain, ceramic, and most natural stone surfaces. Do not use it on marble, limestone, and other calcium-based stone. Use Rock Doctor’s Natural Granite & Quartz Cleaner instead for marble, limestone, and other calcium-based stone.
Steps For Cleaning Natural Stone Showers & Grout
Cleaning natural stone tiles is easy. Every day, use a microfiber cloth or rubber squeegee to remove water from the stone after your shower. Then, once a week, use Rock Doctor’s Tile and Grout Cleaner to clean your shower.
Using Rock Doctor’s Tile and Grout Cleaner is simple and easy:
- Test the cleaner in an inconspicuous area.
- Spray onto the surface and let it sit for one to three minutes.
- Scrub with a brush, damp sponge, or cloth for heavily soiled areas.
- Rinse thoroughly with water or wipe away with a clean, damp cloth or sponge.
Natural Stone Shower Cleaning FAQs
Here are some questions we frequently get asked about when cleaning natural stone showers:
- How do I clean porous stone that hasn’t been properly sealed?
For both organic and oil-based stains, use Rock Doctor’s Cleaner. Rinse, then scrub with a damp cloth or sponge. Rinse more, and finally, re-seal the stone.
- How do I clean a stubborn stain on my natural stone?
Using one of our natural cleaners, the first thing to try is scrubbing with a wet brush or sponge with hot water. Never underestimate the power of steam. If the stain is still resistant even with heat and more aggressive scrubbing, the next step is to slowly increase the abrasion of your scrubbing tool.
After a soft cloth, sponge, and then a brush, try a green scrubby pad. The softer your stone, the more likely your stone will scratch, such as soapstone. Some stones can adequately withstand even a soft wire brush, which can sometimes be the only saving grace when soap scum is caked on. A wire brush will ruin softer stones like soapstone, so be careful and always test somewhere inconspicuous beforehand.
Other Natural Stone Shower Maintenance Tips
One of the best natural stone maintenance tips for stone shower tiles is to wipe down your tiles after each use with a rubber squeegee. Removing most of the water will help prevent the buildup of soap scum and mineral deposits and reduce or eliminate mold growth.
Additionally, it is essential to seal your natural stone regularly—usually every six to twelve months for best results. To test if you need to seal your stone, simply determine if water on the stone beads up or if it gets absorbed into the stone. Use Rock Doctor’s Granite & Stone Sealer to ensure your stone resists water.
Routinely sealing your stone will allow your shower tiles to shed water and, as a result, resist soap scum and mold.
Shop online to find Rock Doctor’s great stone care products to clean and seal your natural stone shower tile.
The post How Do You Clean a Natural Stone Shower? appeared first on Rock Doctor.
How Easy Is It to Tile Your Own Natural Stone Backsplash? 1 Nov 2023 12:01 PM (last year)
A natural stone backsplash is a great way to bring character to your kitchen, bathroom, or laundry room. Installing a backsplash also comes with a number of benefits, including protecting the wall behind it from moisture, grease, and more.
You may be considering tiling your own natural stone backsplash rather than hiring a professional to do it for you. While tackling this DIY project on your own can be intimidating, it is possible to do it with little to no hassle. With the right step-by-step process, you can complete this project in no time.
Is It Hard to Install a Natural Stone Backsplash?
You’re likely wondering if the process of installing a natural stone backsplash is difficult. This type of do-it-yourself project is considered an intermediate difficulty level, meaning it will involve research, planning, measuring, and the use of power tools.
Once you’ve gathered the right information and tools, the project itself is fairly straightforward. The most important thing to remember is to have patience, as completing a backsplash can take up to two days. This is because it takes at least twenty-four hours for the mastic adhesive to dry before grouting the tile.
One of the most challenging parts of the installation process will be choosing the right natural stone backsplash for your home. With so many natural stone options available on the market, the choice can be overwhelming. Because natural stones vary so much in tone, striations, and more, it can be difficult to match them to your current countertop.

The safest bet is to follow one of two design rules: the stone backsplash should be the same stone material as your countertop, or it should contrast. Trying to have eye-catching designs on both your countertops and backsplash will overwhelm the senses. Instead, choose one to be light and the other dark, or one to be patterned and the other more neutral.
Another factor to consider is what size of tiling you want. For your first time tiling a backsplash, we recommend larger tiles, as they can be easier to cut to size, rather than the smaller meshes of tiles, which can be trickier to cut on a wet saw.
Once you’ve figured out the type of tile that will look best in your home, it’s time to get started on the installation process.
How to Install a Natural Stone Backsplash
So, how do you go about installing a natural stone backsplash? Every space is a little different, and you may encounter some challenges for which you’ll have to figure out a solution.
A medium-sized backsplash will take at least two days to tile. Prepare, research, purchase enough materials, and start from a specific focal point. If a window or oven vent hood will be the focal point, start right in the middle of it. Starting in the middle ensures that each tile looks great. This is especially important for larger tiles.
10 Steps for Installing a Natural Stone Backsplash
Follow these steps to install a natural stone backsplash in your home:
- Clean and prepare the wall.
- Measure and mark with pencil where the tile will go.
- Buy supplies and tools. Add ten percent more tiling than you think you need.
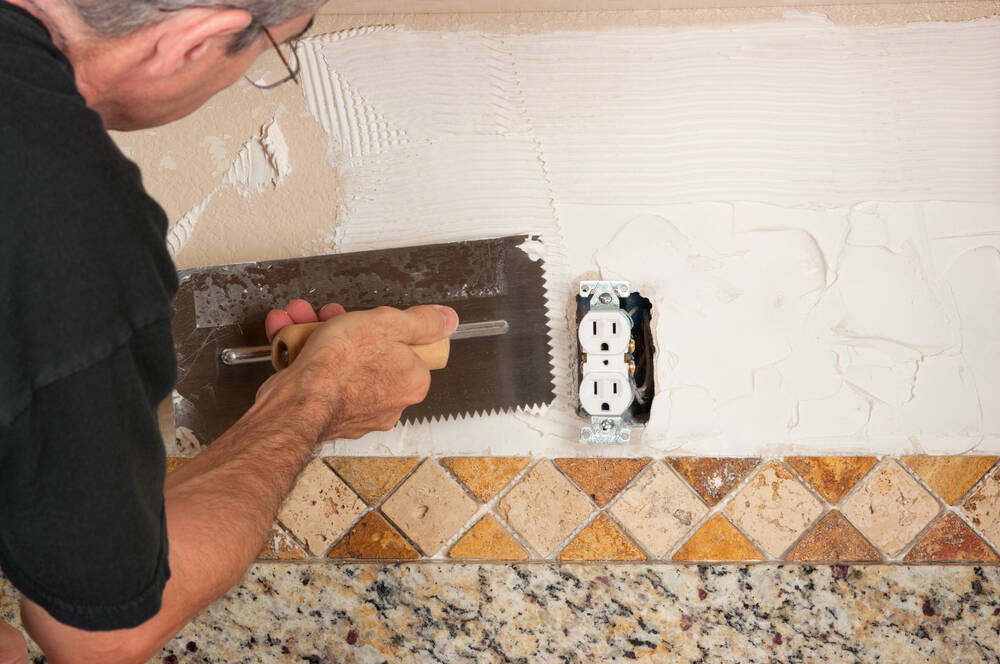
- Install backer board if the area will be getting wet often. Spread mastic adhesive on the wall or backer board.
- Set the tile.
- Saw tiles for exact fits around outlets and corners.
- Let mastic adhesive dry for 24 hours.
- Apply the grout and remove excess with a damp sponge.
- Scrape out corners and caulk the edges and corners.
- Let the grout dry for one to seven days, depending on the manufacturer. Then, use a stone sealer on the backsplash, as this will seal both the tiles and grout.
Bonus tip: When cutting tiles to size, use a wet saw rather than a tiler cutter or tile nipper to prevent chipping or breaking.
How to Care for a Natural Stone Backsplash
As we see in Step Nine of tiling a backsplash, the stone and the grout need to be sealed. This will add a protective shield over the stone and grout, helping it resist water.
Rock Doctor’s Granite & Stone Sealer is the best product for placing a protective layer over your new natural stone backsplash and grout. No matter which kind of stone you decide to use, our Stone Sealer will protect your backsplash against stains and other hazards.
We recommend re-sealing your natural stone every six to twelve months. If you’re unsure whether your stone needs to be resealed, sprinkle some water on the surface. If the water beads up, your seal is still good. If it spreads out and darkens the stone, it’s time to apply another coat of stone sealer.
 Cleaning your backsplash will occur more regularly than sealing. You’ll want to wipe it down every time grease or other substances, such as spaghetti sauce or toothpaste, splash onto your backsplash. Use Rock Doctor’s Tile & Grout Cleaner to clean your natural stone backsplash.
How to Care for Backsplash Grout
Similar to the natural stone on your backsplash, your grout will need to be cleaned and periodically resealed. Use Rock Doctor’s Tile & Grout Cleaner to clean your grout. This powerful cleaner is designed to remove grease, dirt, oil, and soap scum from grout and tile. It’s quick and easy to use, safe for both glazed and unglazed tile, and safe to use on ceramic, porcelain, natural stone, granite, and grout.
Your grout should be resealed every year or two. This is less often than your natural stone requires resealing, and it doesn’t hurt to knock the two out simultaneously. You can find our outstanding Sealer and Cleaner at a local retail store near you or find us at one of our online retailers!
The post How Easy Is It to Tile Your Own Natural Stone Backsplash? appeared first on Rock Doctor.
How To Remove Hard Water Stains and Rings From Granite 25 Sep 2023 10:07 AM (2 years ago)
We all love the beauty, grace, and durability of granite countertops. They are each unique, natural stone slabs that can bring a captivating homeliness to any kitchen. Granite is hailed as a durable natural stone countertop that is easy to take care of. While that’s true, it can still be susceptible to the occasional hard water stain. Luckily, the process of how to remove water rings and stains is relatively simple.
What Causes Water Stains on Granite?
Different types of stains may occur on granite countertops. Many can easily be cleaned off with a granite cleaner. Some, however, are more difficult to clean.
Hard water stains are more entrenched than other stains. Hard water is water that contains minerals within it. When it dries, it leaves tiny minerals behind, such as calcium, magnesium, and other elements that react with soap and mar your countertop. Sometimes these hard water stains are referred to as “soap scum”.
These hard water stains often build up around your faucets, sprayer, fixtures, or soap dispensers. They turn into a scaly-looking, hard (often white) powder that dulls the look of your granite countertops.
How to Remove Hard Water Stains and Soap Scum from Granite Countertops
Removing soap scum and mineral deposits from granite countertops is easy with Rock Doctor’s Spot & Ring Remover.
Follow these steps to remove hard water stains:
- Shake Spot & Ring Remover to mix up its contents.
- Squeeze it directly onto the surface, a damp sponge, or a microfiber cloth.
- Rub the area gently with the sponge or cloth in a circular motion.
- Repeat the process for tough stains.
- Wipe the area down with a clean, lightly damp sponge or cloth.
For really stubborn stains, you can let Spot & Ring Remover sit on the stain for several minutes and scrub softly with a Brillo pad.
What Not to Use to Remove Water Stains
It’s important to know what not to use to clean granite, including harsh chemicals, abrasive cleaners, or vinegar. Acidic cleaners and vinegar are the enemies of natural stone countertops and will dull your granite and seep into the stone.
Harsh chemicals like bleach or ammonia are also dangerous to stone countertops. These products will eat through your sealant and attack the stone countertops.

How Do I Prevent Future Hard Water Rings on Granite?
Now that you have an easy solution for cleaning water stains, preventing future stains may seem unimportant. Still, a little prevention now saves time later. Whenever you see excess water on your counter, wipe it up or into the sink. The less water you have drying on your counters, the better.
One of the reasons hard minerals are latching onto your countertops is that they are grabbing onto porous surfaces and hardening. A proper application of Rock Doctor’s Granite Sealer will seal your granite and make it a smoother surface that is much harder for minerals to latch onto and much easier to wipe away with a damp sponge.
Seal Your Granite Countertops
How do you know when it’s time to reseal your granite countertop? You can perform a simple test to check if your granite needs to be resealed.
Pour a penny-sized drop of water into various sections of your granite countertop and let it sit for 30 minutes. Observe what happens to the drops. If the granite darkens before the time is up, it is time to reseal your granite.
To seal the granite, first clean your countertops with Rock Doctor’s Granite Cleaner to ensure your counters are clean and ready to be sealed.
After cleaning, follow these steps to apply the Granite Sealer:
- Shake the can well.
- Test on an inconspicuous part of your countertop.
- Double-check that your counter is clean and ready to be sealed, as you don’t want to seal in a stain.
- Hold the can six to eight inches from the surface and spray the Sealer on the desired area.
- Let it stand for two to three minutes, and then wipe away using a clean, dry cotton cloth or paper towel.
- Allow 30 minutes for the sealer to dry completely before placing items back on your countertops.
Polish Your Granite Countertops
Once the hard water stains are removed, and your countertops are resealed, you can bring back their lustrous shine with Rock Doctor’s Granite Polish. Polish will bring a glow to your countertops and add an additional layer of protection on top of your granite sealer.
To apply the polish, lightly spray your countertops with the aerosol polish and wipe down with a clean cloth. Wait two to three minutes and wipe them down again in a circular motion with a clean cloth.
Rock Doctor’s Dedication to Beautiful Countertops
Rock Doctor has over 25 years of working with stone care and kitchen cleaning products. Each is produced to solve problems our customers are experiencing.
We want to help you make your kitchen and bath look clean and shiny, like it is brand new. Each of our products is thoroughly tested on an array of different stones and materials to ensure we get the formula just right.
When you buy Rock Doctor, you know that you’re buying the best possible, safest product for your countertops. Use our Store Locator to find Rock Doctor products near you.
The post How To Remove Hard Water Stains and Rings From Granite appeared first on Rock Doctor.
Stainless Steel Countertops: Everything You Should Know 28 Aug 2023 9:53 AM (2 years ago)
Stainless steel countertops have been a staple of industrial and commercial kitchens for decades, offering many benefits. They are easy to maintain and resistant to heat, corrosion, and breaking. Additionally, they are non-porous, making them easy to sanitize, which is critical for commercial settings.
Stainless steel appliances and cooking equipment have been trending in residential kitchens for some years. Over the last couple of years, stainless steel countertops have also become increasingly popular in homes. Let’s look at everything you should know about stainless steel countertops.
5 Pros of Stainless Steel Countertops
Stainless steel countertops are becoming so popular due to their many benefits. Let’s take a look at a few of the reasons that homeowners are considering stainless steel countertops in their kitchens.
1. Durable
Stainless steel countertops are incredibly durable and resilient. They are highly resistant to breaking, cracking, chipping, or splitting. Stainless steel can take a lot of abuse without sustaining damage. Over time, these countertops will develop a used look with light scratches and marks. Those add to the appeal for many homeowners, and most are relatively easy to adjust or fix if you are unhappy with the appearance.
2. Resistant to Common Countertop Problems
In addition to their durability, stainless steel countertops are water-, heat-, and stain-resistant. You can put hot pans and cookie sheets on your steel without worrying about marking or cracking it. The steel can easily absorb the heat without any adverse side effects, unlike many stone countertop options.
Stainless steel is also resistant to coloring from food, oils, fats, and acids, which might normally damage a stone countertop. It is also resistant to rust and corrosion due to the chromium in the steel.
3. Beautiful
Stainless steel countertops certainly have a distinctive elegance to them. They give a sleek, modern appearance to a kitchen. It is a very monochrome look. With proper lighting, you can utilize the reflective nature of stainless steel to make the kitchen look bigger than it is.
4. Easy to Clean and Maintain
Because stainless steel countertops are non-porous, they are easy to clean and hygienic. For homeowners, maintenance is very simple. Use a stainless steel cleaning product, such as Rock Doctor Stainless Steel Cleaner & Protectant, to keep countertops clean and streak-free. A proper stainless steel cleaner will help remove dirt, grease, fingerprint marks, smudges, and more.
The Stainless Steel Cleaner & Protectant from Rock Doctor not only helps keep countertops clean without harsh chemicals, but it also helps protect the natural patina of the steel with a special, proprietary blend of natural oils.
5. Easy to Install
For installation, a metal sheet is wrapped around a wooden frame and cut to size. You’ll need extra sizing depending on how you prefer the edges or if you want a backsplash. A hardwood slab is sometimes placed underneath to support the steel countertop and help better resist dents.
No sealing is necessary. Once the stainless steel countertop is installed, it is ready for use.

4 Cons of Stainless Steel Countertops
Every countertop material has its downsides. Here are some of the cons of stainless steel countertops:
1. Scratches and Dents Easily
Stainless steel is a strong, durable material, but there are still limitations. Freshly installed, your counter will be incredibly smooth and uniform, probably with a particular “grain” pattern. This isn’t truly a grain pattern but rather just the direction the steel was polished in.
With use, your countertop will gain light scratches. Over time, these scratches will develop into a used patina effect that many homeowners find attractive. However, not all homeowners find it appealing; some prefer the newly polished look.
If heavy items are dropped from a height, they may dent your countertop. Dents can be mitigated by installing your stainless steel countertop over a hardwood base. If they are in close contact, the hardwood can absorb kinetic energy from dropped pans and reduce denting on the countertop. If you have the budget, a thicker stainless steel countertop (a smaller gauge) will also better absorb impacts and dents.
2. Shows Fingerprints
If you’ve ever had stainless steel appliances like a fridge, you’ll know that fingerprints tend to leave their mark. This will be maddening for some homeowners, and frequent wiping will be necessary. Luckily, the fingerprints are very easy to clean with a stainless steel-specific cleaner.
3. Looks Industrial
Stainless steel has a cold, cool sort of aesthetic. It varies between a modern, sleek look and a stern, industrial look. In terms of color, steel is very neutral, allowing it to match any color or theme you want in your kitchen.
Some homeowners embrace the cool, elegant look. Others use the benefits of stainless steel where it is best suited. For example, you might install stainless steel countertops around your oven and stove and have granite countertops for your prep areas. Stainless steel around your oven and stove lets you set hot pans and dishes down to cool, while the granite adds interest and color to your kitchen.
4. Produces Loud Noises
There’s a reason restaurant kitchens always sound loud and boisterous. When you drop things on a stainless steel countertop, they make a lot of noise. Stainless steel is noisy. Clashing and clanging pots and pats, along with the risk of dents, will teach you to put them down gently. The extra noise does take some getting used to.
How Are Stainless Steel Countertops Installed?
Stainless steel countertops are generally custom-fabricated specifically for your kitchen. Sheets of stainless steel are cut to match your countertop space. The sheet is typically wrapped over the edge to look similar to other countertop materials. This wrapping helps protect the borders and looks nice but also costs more.
You can even have the stainless steel run up the wall for a backsplash. Alternatively, you can have the stainless steel cut to be flush with the wooden support base to save money. There are many edge options to choose from, including beveled, bullnose (rounded), no wrap, and square.
What Are the Finish Options for Stainless Steel Countertops?
The finish you select for your stainless steel countertops can have a dramatic impact on the look and feel of the surface in your kitchen. Here are four types of stainless steel countertop finishes to consider:
- Mirror Polish: The steel has been polished and given a mirrored-appearance, allowing you to easily see your reflection on its surface. It looks great. However, imperfections, scratches, and especially fingerprints are more noticeable on a mirror polish finish.
- Satin Finish: A slightly rougher grit is used compared to the mirror polish to achieve a satin polish. Satin and brushed metal finishes are the most common. This finish has enough polish so that you can see vague shapes and shadows in the light reflected from its surface. It hides scratches more easily than a mirror polish, and it is harder to see fingerprints.
- Brushed Finish: Sometimes called a “directional satin finish,” a brushed metal finish is similar to a satin finish. The difference is all the polishing is done in the same direction, giving the steel a sort of “grain” looking pattern.
- Antique Matte Finish: As the name suggests, the matte finish is even less reflective. The steel has a neutral gray appearance.
There are a few more options when it comes to stainless steel finishes. You can have your countertops blackened, blued, or all manners of other treatments. All you have to do is find someone capable of doing the job (though you should double-check that their method is food-safe).
Tips for Buying Stainless Steel Countertops
Purchasing new countertops can be stressful. With so many different options to choose from, it can be a long road just to choose the right material for your home. And once you make that decision, there are many other decisions you need to make, as well. Here are a few expert tips for purchasing stainless steel countertops.
- Cost: High-quality stainless steel countertops cost between $75 and $150 per square foot installed, a ballpark similar to the cost of marble. The price will vary depending on the gauge (thickness) and how much customization you need. The thicker the countertop, the more steel required, and the more expensive the steel is. But a thicker countertop is less likely to dent.
- Gauge: In a home kitchen, contractors will typically recommend 16- or 18-gauge steel for countertops. Lower gauge steel is going to cost considerably more, but higher gauge steel won’t be durable enough for most homes.
- Appearance: Remember to research edge profiles and finishes prior to making a final purchase. You will want to consider how each will make your countertops look, as well as how these decisions will impact the cost of your final purchase.
How to Care for Stainless Steel Countertops
One of the best features of stainless steel countertops is how easy they are to maintain. Don’t use harsh cleaners or abrasives on stainless steel countertops like steel wool. Instead, use Rock Doctor’s Stainless Steel Cleaner & Protectant.
Our proprietary blend of natural oils and solvents will clean and protect your stainless steel, chrome, or aluminum surfaces and eliminate fingerprints, smudges, dirt, grease, and other kitchen spills. It will polish your stainless steel countertops back to their original shine.
Stainless steel does indeed “stainless.” It is not, however, “stain-free.” It can stain or darken with enough exposure to water or acid (vinegar, lemon juice, etc.). Wipe up water and acids immediately, and don’t let them set on your countertops. If you do run into a stain that isn’t coming out easily, use a little baking soda and rub it in the direction of the steel grain. Follow up the stain removal with a quick clean.
Do you have questions about Rock Doctor’s products? Feel free to call today at 913-894-0288, and one of our experts will answer any questions.
The post Stainless Steel Countertops: Everything You Should Know appeared first on Rock Doctor.