SmartSort 1.24 for InDesign | Added Canadian Aboriginal Syllabics 14 Oct 7:12 AM (14 days ago)
![]() Sometimes, the most interesting development stories begin with a simple email from an unexpected corner of the world. This summer brought one such adventure with SmartSort, our language-aware paragraph sorting script for InDesign…
Sometimes, the most interesting development stories begin with a simple email from an unexpected corner of the world. This summer brought one such adventure with SmartSort, our language-aware paragraph sorting script for InDesign…
In July 2025, John Bishop, a Toponymist working for the Cree Government in northern Quebec, reached out with an intriguing request. He was working on a Cree dictionary with syllabic headwords and wondered if SmartSort could be customized to handle Canadian Aboriginal Syllabics sorting.
“I work for the Cree Government in northern Quebec and am working on a Cree dictionary with Syllabic headwords. I would like to customize SmartSort so that it can sort in syllabics (…). Is this something you could help with?”

The Challenge
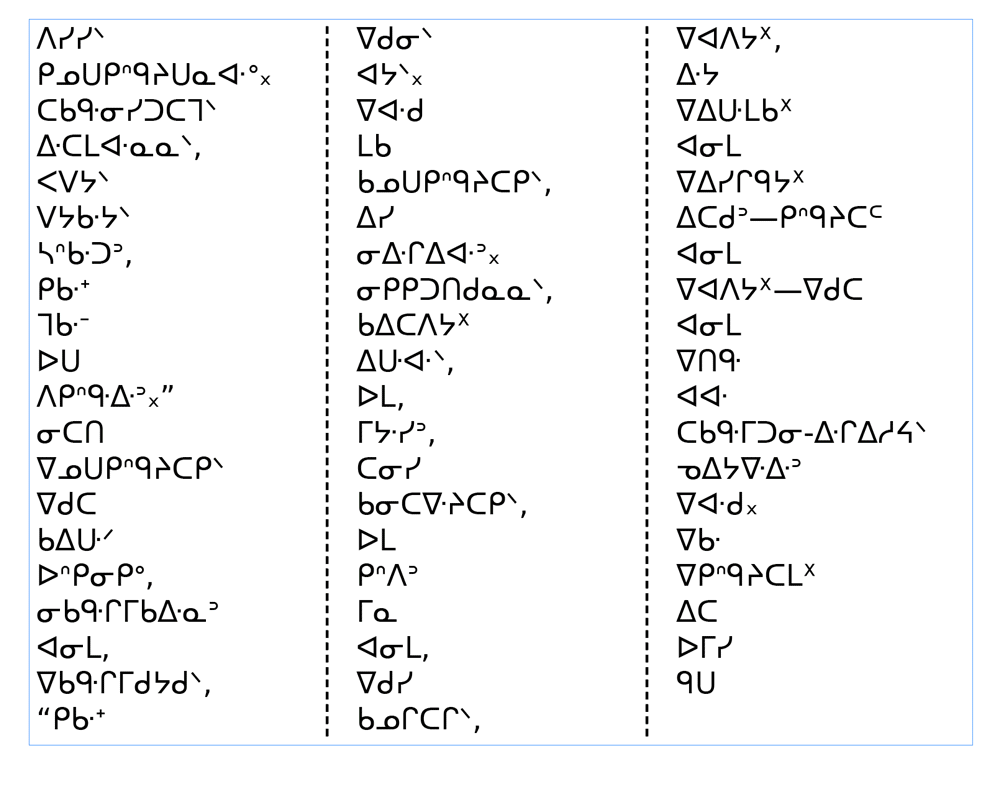
What a fascinating territory! Canadian Aboriginal Syllabics represent a unique writing system used for languages like Cree and Inuktitut, covering Unicode blocks U+1400..U+167F and U+18B0..U+18FF. The challenge wasn't just technical—it was also linguistic and cultural.
The existing SmartSort release supported many languages, but had never ventured into syllabic writing systems. The collating sequence for Aboriginal languages wasn't well-documented in standard Unicode resources, making this a journey into uncharted waters.
Diving into this request meant exploring Unicode's Canadian Aboriginal Syllabics blocks, the Default Unicode Collation Element Table (DUCET) weights, academic resources like the conversion guides from the University of Wisconsin, and the relationship between syllabic characters and their phonetic values.

The above reference chart shows the complexity of the syllabic system, with its unique approach to representing consonant-vowel combinations and final consonants in both Western and Eastern variants.
Despite having no direct feedback mechanism from Cree language experts, the implementation relied on Unicode's standard collation weights. My approach was to:
— Integrate Unicode blocks, i.e. add support for Canadian Aboriginal Syllabics (U+1400..U+167F, U+18B0..U+18FF, etc).
— Follow DUCET standards using the Collation Element Table as the sorting foundation.
— Include Cree and Inuktitut in the SmartSort language list.
— Maintain flexibility and keep the system open for future tailoring based on user feedback.
The Silent Update
Here's where the story takes an interesting turn: after creating and sending the alpha version (SmartSort 1.23a) to John Bishop, there was... silence. No response, no feedback, no validation from an actual Cree language user.
Yet the work was done, the implementation seemed sound based on Unicode standards, and the feature could benefit other users working with Aboriginal languages. Hence SmartSort 1.24 has just been released with full, although experimental, Canadian Aboriginal Syllabics support—a feature born from one person's request but never validated by its intended user.
Hence the update to SmartSort 1.24 includes:
• Extended character support: Full coverage of Canadian Aboriginal Syllabics Unicode blocks.
• New language options: Cree and Inuktitut added to the language selection menu.
• DUCET-based sorting: Reliable collation based on Unicode standards.
• Backward compatibility: All existing features remain unchanged.
The implementation leverages the existing $$.Collator.jsxlib library, extending its capabilities to handle the new character ranges while maintaining the script's performance and reliability.
This experience highlights an interesting aspect of open-source development: sometimes you build features into the void, hoping they'll find their users. The Canadian Aboriginal Syllabics support in SmartSort exists as a testament to this approach—a feature requested by one person, implemented with care and research, but released without the validation of its intended community.
Perhaps John Bishop is busy with his dictionary project. Perhaps the solution didn't meet his specific needs. Or perhaps it worked perfectly, and he simply moved on to the next challenge. In the absence of feedback, the feature remains a small bridge between Unicode standards and practical typography needs.
Looking Forward
SmartSort 1.24 is now available with Canadian Aboriginal Syllabics support. If you're working with Cree, Inuktitut, or other related languages, this update might be exactly what you need. And if you are John Bishop reading this—or anyone else working with Aboriginal languages—your feedback would be more than welcome.
Sometimes the most meaningful features are born not from market research or user surveys, but from a single email asking, “Is this possible?” The answer, as it turns out, is often yes—even when delivered into the silence of cyberspace.
• See also: How to Update/Reinstall SmartSort Properly.


ByteStream: Your Swiss Army Knife for Binary Data in InDesign Scripts 30 Sep 8:42 AM (28 days ago)
Gone are the days of manually parsing bytes and wrestling with endianness! ByteStream (a powerful addition to the IdExtenso framework) introduces a declarative format string syntax that lets you read complex binary structures in a few lines of code. Whether you're extracting metadata from font files or parsing proprietary formats, ByteStream transforms hours of painstaking byte manipulation into readable code…
What is ByteStream?
Imagine you're a digital archaeologist, but instead of digging through ancient ruins, you're excavating the hidden treasures buried deep within binary files. The new ByteStream class in IdExtenso is your trusty pickaxe, chisel, and magnifying glass all rolled into one elegant tool.
Whether you're reverse-engineering a proprietary file format, building a custom export pipeline, or just need to peek inside that mysterious binary blob that landed on your desk, ByteStream transforms what used to be a painful byte-by-byte slog into an almost magical experience.
Before diving into the magic, here's how to set up ByteStream in your IdExtenso project:
// Include IdExtenso framework
#include 'path/to/$$.jsxinc'

// Use the ByteStream class
#include 'path/to/etc/$$.ByteStream.jsxlib'

// Load the framework
$$.load();

// Your ByteStream code here...

// Don't forget to cleanup!
$$.unload();
The Magic of Format Strings
The heart of ByteStream's power lies in its format string syntax. Think of it as a recipe that tells the class exactly what ingredients to extract from your binary soup:
// Read a file header in one line
var myHeader = $$.ByteStream(myBinaryData);
var ret = {};

myHeader.read(
    "TAG:signature ASC*4:version U32:size U16*2:dimensions",
    ret);

// `ret` now contains:
// ret.signature, ret.version, ret.size, ret.dimensions[]
ByteStream speaks fluent binary with support for all the usual suspects:
• Integers: I08, U08, I16, U16, I24, U24, I32, U32 (signed/unsigned, 8 to 32 bits)
• Floating Point: F32, F64 (IEEE754 floats and doubles)
• Fixed Point: FXP, UFX, F2D (for when precision matters)
• Strings: STR, ASC, LAT, HEX (raw, ASCII, Latin, hexadecimal)
• Special: TAG (those 4-character Adobe/OTF identifiers)
Endianness Made Easy
Remember the dark days of manually handling big-endian vs little-endian byte order? ByteStream makes it as simple as adding a > (big-endian) or < (little-endian) to your format:
// Read the same data in different byte orders
var myBE = myStream.readU32();     // Default: big-endian
var myLE = myStream.readU32(true); // Explicit: little-endian

// Or use format strings for multiple values
var myData = {};
myStream.read("U32>:bigValue U32<:littleValue", myData);
Real-World Magic: Font File Surgery
Let's say you want to extract the font name from an OpenType font file. Here's how ByteStream turns a complex task into child's play:
// Read that mysterious .otf file
var myFontStream = $$.ByteStream($$.File.readBinary("./myfont.otf"));

// Skip to the 'name' table (simplified for demo)
const NAME_TB_START = 416; // <= Use the actual index!
myFontStream.jump(NAME_TB_START);

// Read the name table header
var myHead = {};
myFontStream.read("U16:format U16:count U16:storageOffset", myHead);

// Create a substream for the string storage area
var mySubStream = myFontStream.copy(NAME_TB_START + myHead.storageOffset);

// Loop through name records to find the font name (nameID = 1 or 4)
var myFontName="", rec={}, i;
for( i=-1 ; ++i < myHead.count && !myFontName ; )
{
    myFontStream.read(
      "U16:pID U16:encID U16:langID U16:nameID U16:length U16:offset",
      rec);

    // Look for font family name (nameID 1) or full name (nameID 4)
    if (rec.nameID === 1 || rec.nameID === 4)
    {
        // Jump to the string in the storage substream
        mySubStream.jump(rec.offset);
        myFontName = mySubStream.read("STR*" + rec.length);
        break;
    }
}

alert( "Font name: " + myFontName );
Note. — In a real-world implementation, the NAME_TB_START offset would be dynamically discovered by first parsing the OpenType font header and directory table to locate the name table entry. This involves reading the initial sfnt header and iterating through the table directory records until you find the one with tag 'name', then using its offset value. The hardcoded offset shown here is just for demonstration purposes.
Input vs Output Streams: Two Sides of the Same Coin
ByteStream is actually two classes disguised as one:
Input Streams (IStreams) - The Readers
// Create from binary data
var myReader = $$.ByteStream(myBinaryArray); // or string
myReader.peek("F32*3"); // Look ahead without moving
myReader.read("F32*3"); // Read and advance
myReader.backup();      // Save position
myReader.restore();     // Go back
Output Streams (OStreams) - The Writers
// Create (empty) for writing
var myWriter = $$.ByteStream();
myWriter.write("F32*3", [1.0, 2.5, 3.14]);
myWriter.writeU16(42);
var myBytes = myWriter.getBytes(); // Get final byte array
Note. — The new operator is not required (i.e. implicit) when creating a $$.ByteStream instance.
Advanced Sorcery: Structured Data
The real magic happens when you start using keys and counts (*N) together:
// Parse a complex structure in one go
var myImageData = {};
myStream.read(
  "TAG:signature STR*4:version U32:width U32:height U08*768:palette",
  myImageData);

// Now myImageData contains:
//   myImageData.signature = "PNG "
//   myImageData.version = "1.0 "
//   myImageData.width = 1920
//   myImageData.height = 1080
//   myImageData.palette = [r1,g1,b1, r2,g2,b2, ...]
// REM: 256 colors × 3 bytes = 768 bytes
Some performance tips and tricks:
1. Use shortcuts for simple reads:
readU16() is faster than read("U16")
2. Batch your operations:
read("U16*10") beats ten separate readU16() calls
3. Copy vs Clone:
Use copy() for shared data, clone() for independence
4. Static encoding:
$$.ByteStream.encode(myData, "U32*2") for quick conversions
As to error handling, ByteStream doesn't leave you hanging when things go wrong:
// Check if your format is valid before using it
if( !$$.ByteStream.isFormat("U16*3 F32") )
{
    alert( "Houston, we have a problem!" );
}

// Calculate how many bytes you'll need
var myByteCount = $$.ByteStream.sizeOf("STR*20 U32*5");
// Returns 40
Sometimes you need to work with hex data directly:
// Read 3 bytes as a 6-character hex string
var myColorHex = myStream.read("HEX*3"); // "FF0080" (bright magenta)

// Write hex string as bytes
var myColorStream = $$.ByteStream();
myColorStream.write("HEX*3", "FF0080"); // Writes [0xFF, 0x00, 0x80]
A Complete Real-World Example
Here's a practical example showing ByteStream in action with binary data manipulation:
try
{
    // Create some binary data: Fixed Point + string + byte + double
    var myData = '\x01\xFF\x3F\xFF' + 'abc' +
      '\x10' + String.fromBytes([64,9,33,251,84,68,45,24]);

    // Create an input stream
    var myIStream = $$.ByteStream(myData);

    // Parse structured data in one go
    var myResult = {};
    myIStream.read(
      "FXP:fixedValue STR*3:name U08:count F64:piValue",
      myResult);

    // Display results using IdExtenso's JSON formatter
    alert( "Parsed data:\r" + $$.JSON(myResult) );
    // Shows: {"fixedValue": 511.249984741211, "name": "abc",
    //               "count":16,"piValue":3.14159265358979 }

    // Create an output stream and write some data
    var myOStream = $$.ByteStream();
    myOStream.write("F64 STR:name FXP:fixedValue", myResult);

    // Get the final bytes
    alert("Written bytes:\r" + myOStream.getBytes());

}
catch(e)
{
    $$.receiveError(e);
}
The ByteStream class transforms InDesign scripting from a world where binary data was your enemy into one where it's your best friend. Whether you're building the next great InDesign plugin, reverse-engineering file formats, or just trying to understand what's inside that binary file, ByteStream is your faithful companion.
Ready to dive deeper? The ByteStream class source code is available at github.com/indiscripts/IdExtenso. As always, the IdExtenso framework provides the path to advanced InDesign scripting.
GitHub Links:
→ ByteStream Notice
→ ByteStreamDemo.jsx (in /tests subfolder)
→ IdExtenso root page
IndexMatic³ | 10 Tricks That Almost No One Knows 3 Jul 2:54 PM (3 months ago)
![]() So you use IndexMatic³ regularly, at cruising speed, but do you know the more secret features that no one ever told you about? Take advantage of the summer to give yourself a crash course on increased productivity. Hidden tools, shortcuts, and little-known tricks: here are our top 10…
So you use IndexMatic³ regularly, at cruising speed, but do you know the more secret features that no one ever told you about? Take advantage of the summer to give yourself a crash course on increased productivity. Hidden tools, shortcuts, and little-known tricks: here are our top 10…
⚡ Click on each animation to see all the details.
1. Quickly Adjust the Sorting Language
When opening the dialog box on a new InDesign document, you may have encountered this little alert icon ⚠ indicating a mismatch between the target language of the Stop Words and the alphabetical Sorting language. There is a quick way to restore the concordance without going through Output⏵Sorting: simply Ctrl-Click on the language label located to the right of the Stop Words list. This automatically readjusts the sort language.

Note: A single click (rather than Ctrl-Click) would just take you to the Sort panel.
2. Use the “Context” Button to Improve Lexical Consistency
During document preparation or analysis — prior to the indexing process —, a common problem is to identify the environment of a particular expression, not the pages where it appears. For example, you may want to verify that the uses of a word are consistent throughout the entire book. Or, you might want to ensure that a surname used in an IndexMatic query doesn't refer to homonymous contexts or distinct people, etc.
The Matches in Context function is well documented in the manual, but you might have neglected to use its services! Here, for example, is the extraction of the word “blood” from Hamlet (19 occurrences):

Note: The width of the "context" area is adjustable in the Preferences panel.
3. Report Not Found Entries using a Particular Symbol
By default, IndexMatic excludes terms with zero frequency from the index, i.e., those corresponding to unsatisfied queries. However, you can force it to output literal keys (tokens), although missing from the document, by lowering the minimum frequency to 0 (zero) in Output⏵Destination. Additionally, you can customize the character to display instead of page numbers, via Output⏵Layout⏵Ranges.
In the example below, the word serendipity (missing from the InDesign document) has been added to the Query List. It is then marked in the index with a long dash character (default option).

Note: This feature only makes sense in Query List mode. It specifically concerns literal expressions, since no explicit term is derivable from a regular expression.
4. Duplicate Word Search
IndexMatic can quickly find duplicates, i.e., single words that repeat with or without intervening punctuation. A predefined regular expression is saved among your favorites, so simply select it and run a Quick Scan (⚡) whenever needed:

Note: The regex in question, /(\w{2,})\W{1,3}(\1)/w, is quite elaborate, although intelligible to the most expert among you. You are, of course, free to improve it if it doesn't meet your expectations... and then to create your own favorite query!
5. Access to Online Resources
Did you know that the iX³ icon button is clickable and takes you directly to the program's home page in your default browser? No more searching through your archives for the user manual or a link to a forgotten tutorial: all the information about IndexMatic is right here.

6. Assign a PageRank Locally
Let's return to the Hamlet example. Some terms to be indexed are ubiquitous, such as love or king. The problem with working with a list of explicit queries is that you can't increase the PageRank globally, as you would lose some rarer terms that should be included in the index anyway. On the other hand, high-frequency words generate a considerable number of pages, which overloads the index. The solution is to assign a local PageRank flag (e.g. …/4) to the keywords that require more selective filtering.
The animation below shows how to target the most representative pages for certain keywords. The result is then reflected in the Hits window:

Note: A local PageRank flag (in your Query List) always overrides the PageRank option specified in the Finder.
7. Exotic Alphabets and Custom Stop Words
IndexMatic allows you to work with many languages and non-Latin alphabets. Even systems rarely encountered in an InDesign document, such as the Khmer script, are supported by the search engine. In some cases, the alphabet is indeed recognized — allowing you to extract theoretical words via a \w+ query — even though the linguistic resources (sorting language, stop words) are not available. But you can still define your own custom list of stop words to properly filter the units extracted by an automatic search.
Once you've selected the Alphabet in use, simply select the “[Custom]” field in the Stop Words list. This will open an editable text file that the program will then save and re-use when necessary.

Note: Using the same procedure, IndexMatic allows you to edit or expand any pre-existing stopword list, including built-in lists. Also, regarding the sorting of index entries, it is recommended to select the DUCET (Unicode sorting) option if no language is provided for the text under consideration.
8. Regular Expression Typing Shortcuts
Most IndexMatic metacharacters rely on the backslash followed by one or more characters, for example \w (alphabet letter), \M (capital letter), \p{…} (Unicode property), etc. Since these sequences are quite tedious to type on the keyboard, IndexMatic offers some undocumented shortcuts to speed up typing in the Find field.
| Metacharacter | Shortcut |
|---|---|
| \w | Ctrl W |
| \W | Ctrl Shift W |
| \l | Ctrl L |
| \L | Ctrl Shift L |
| \m | Ctrl M |
| \M | Ctrl Shift M |
| \d | Ctrl D |
| \D | Ctrl Shift D |
| \s | Ctrl S |
| \S | Ctrl Shift S |
| \b | Ctrl B |
| \B | Ctrl Shift B |
| \t | Ctrl T |
| [^\t] | Ctrl Shift T |
| [\'‘"“«] | Ctrl Q |
| \Q | Ctrl Shift Q |
| [\'’"”»] | Ctrl E |
| \E | Ctrl Shift E |
| \u | Ctrl U |
| \u{ | Ctrl Shift U |
| \y | Ctrl Y |
| \p{ | Ctrl P |
| \P{ | Ctrl Shift P |
The most common combination (Ctrl W for \w) is illustrated in the animation below:

9. How to Create a Weighted Word List for Wordalizer
From any document, IndexMatic can easily extract a list of words in a given frequency domain, then produce a Hits report associating each element with its frequency weight. If you want to represent this data as a word cloud through Wordalizer, you just need to retrieve it in an InDesign text frame and convert the spaces to colons in order to provide the script with a weighted word list. Here's a brief guide to how to do it:

10. Keep the Original Query List Order
The option to preserve the order of items as they appear in a query list is clearly described in the manual… but many users continue to ask us about it! Is this a documented hidden feature? Well, here's the trick:

InDesign 20 Goes to MathML — Part 2 22 Mar 6:54 PM (7 months ago)
In the first part of this paper, we explored the basics of MathML and how it's incorporated into InDesign's Math Expressions panel. For script developers working with ExtendScript and/or UXP, the underlying SVG structure requires further investigation. This will lead us to intriguing issues and potential challenges…
Scripting DOM: Changes and Additions
It is uneasy to trace the changes made to the Scripting DOM with the advent of MathML in InDesign. I used GitHub Desktop features to reveal these recent transformations.
Application (app)
| METHOD | TYPE | COMMENT |
|---|---|---|
| getContextMathMLDescription() | → str | (Internal.) Used by UXP mathjax-interface. |
| getPathToExportMml2svg() | → str | (Internal.) Used by UXP mathjax-interface. |
| handleMathMLMessage(resync) | → und | (Internal.) Used by MathExpr panel. |
All MathML methods exposed to app are for “internal use only”. This does indicate that the Math Expressions panel and the nested WebView component (UXP plug-in) make heavy use of InDesign's scripting API. We will see that this has significant consequences on execution time.
Document
| METHOD / PROPERTY | TYPE | COMMENT |
|---|---|---|
| mathObjects | MathObjects | Collection of available Math objects. |
| appliedMathMLFontSize | number | (R/W) Font size (pt) for Math objects. |
| appliedMathMLSwatch | Swatch/str | (R/W) Swatch for Math object color. |
| appliedMathMLRgbColor | number[3] | (R/W) RGB Color applied on MO, 0-255 range. |
| tintValue | 0..100 | (R/W) “Percent of base color.” |
| createFromMathML(mml,pge,lyr,pos) | → MathObject | Creates and places a new MO from a MathML description. |
| handleMathMLMessage(resync) | → und | (Internal.) Used by MathExpr panel. |
Note. - The weird tintValue property (added to Document instances) actually controls the default tint percentage in Math Expressions ⏵ Fill (popup).
myDoc.createFromMathML(...) expects four mandatory arguments: a MathML description (string), a Page and a Layer instance, then a [x,y] position in Ruler coordinates. This position determines the top-left corner of the inner MathObject (MO) instance, which seems to behave as a SVG object but would be better described as a “SVG proxy” (see below.)
Rectangle
| PROPERTY | TYPE | COMMENT |
|---|---|---|
| mathObjects | MathObjects | Collection of available Math objects. |
Rectangle is the only PageItem subclass that supports the new .mathObjects collection, implying that the parent of a MO is necessarily a rectangle. The fun fact is that InDesign users could well transform that container into any polygon through Object ⏵ Convert Shape... In which circumstances you can no longer access the underlying MO from its container. (Also, the MO might export incorrectly!)

As reported by my Japanese colleague ホーム (Ten—A) on his excellent blog (JP), the mathObjects collection of the Rectangle class does not actually allow you to insert a MO inside any existing rectangle. When you try the below snippet, you get a new parent rectangle on the first page of the document.
var mml ='''<math> <mrow> <mi>x</mi> <mo>=</mo> <mfrac> <mrow> <mrow> <mo>-</mo> <mi>b</mi> </mrow> <mo>±</mo> <msqrt> <mrow> <msup> <mi>b</mi> <mn>2</mn> </msup> <mo>-</mo> <mrow> <mn>4</mn> <mo>⁢</mo> <mi>a</mi> <mo>⁢</mo> <mi>c</mi> </mrow> </mrow> </msqrt> </mrow> <mrow> <mn>2</mn> <mo>⁢</mo> <mi>a</mi> </mrow> </mfrac> </mrow> </math>'''; // Having a Rectangle selected: var rec = app.selection[0]; var mob = rec.mathObjects.add(mml); // ⚠ The MathObject is NOT created inside the rectangle :-(
This is a serious inconsistency. The best you can do is to provide additional arguments to get the new MathObject placed at the rectangle location, e.g.
// . . .
var mob = rec.mathObjects.add(
  mml,
  rec.parentPage,
  rec.itemLayer,
  rec.geometricBounds.slice(0,2).reverse()
);
but you still won't get the mob.parent===rec relationship you were hoping for.

Graphic
| PROPERTY | TYPE | COMMENT |
|---|---|---|
| parent | various | Can now include Spread. |
Note. - In principle, a Graphic refers to an “imported graphic in any graphic file format (including vector, metafile, and bitmap formats).”
Making the Spread object a possible parent of Graphic seems quite insignificant, but everything suggests that this option coincides with the insertion of MathObject into the InDesign graphics space. I have not yet found the exact reason for this amendment though.
SVG (subclass of Graphic)
| METHOD / PROPERTY | TYPE | COMMENT |
|---|---|---|
| isMathMLObject | bool | “Is the SVG Object a MathML object.” |
| parent | various | Can now include Spread. |
| resync(data) | → und | Internal use. |
Surprisingly, MathObject instances are not reported in regular SVGS collection. So MathObject and SVG entities are clearly distinct from the DOM standpoint. Even worse, MOs are not registered in myDoc.allGraphics, so you definitely need to explore the special myDoc.mathObjects collection. Yet the SVG class exposes an obscure isMathMLObject boolean property now, which suggests that both classes may inherit similar features from Graphic. In fact, they don't.
My working hypothesis is that MathObject is intended to (drastically) restrict the standard SVG prototype, including disallowing access to any internal link (i.e. the itemLink key of regular Graphic classes) and entirely removing transform features. This explains why the new MathObject entity, though semantically assimilated to a placeable Graphic, only provides the following, minimalistic interface:
MathObject
| METHOD / PROPERTY | TYPE | COMMENT |
|---|---|---|
| isMathMLObject | bool | “Is the SVG Object a MathML object.” |
| id | uint | Unique ID of the MathObject. |
| isValid | bool | Whether its specifier is valid. |
| parent | Rectangle | ⚠ The parent of the MO should be a Rectangle. |
| index | uint | Index of the MO within its containing object. |
| events | Events | Collection of events. |
| eventListeners | EventListeners | Collection of event listeners. |
| appliedMathMLFontSize | number | (R/W) Font size in pt. |
| appliedMathMLSwatch | Swatch/str | (R/W) Swatch for Math object color. |
| appliedMathMLRgbColor | number[3] | (R/W) RGB Color applied on MO, 0-255 range. |
| tintValue | 0..100 | (R/W) Percent of base color. |
| mathmlDescription | str | (R/W) “MathML description of the SVG Object. Returns empty string if not a MathML Object.” |
| label | str | (R/W) Property that can be set to any string. |
| name | str | Name of the MathObject; “this is an alias to the MathObject's label property”. |
| properties | obj | (R/W) Property that allows setting of several properties at the same time. |
| insertLabel(key,val) | → und | Sets the label to the value associated with the specified key. |
| extractLabel(key) | → str | Gets the label value associated with the specified key. |
| toSource() | → str | Generates a string which, if executed, will return the MathObject. |
| getElements() | → MathObject[] | Resolves the object specifier, creating an array of object references. |
| toSpecifier() | → str | Retrieves the object specifier as a string. |
| addEventListener(...) | → EventListener | Adds an event listener. |
| removeEventListener(...) | → bool | Removes an event listener. |
Note that the informative property isMathMLObject is the only one that belongs specifically to both SVG and MathObject classes. But given a Rectangle with a MathObject, the contentType of the container remains UNASSIGNED and it doesn't appear that you can access the internal MO other than through the myRec.mathObjects collection. So it is difficult to elucidate what isMathMLObject could be used for!
• A MathObjects collection was created too, in correspondence with the MathObject structure; it provides the common Collection interface — everyItem(), itemByID(), etc — including the add(...) method which works as specified in Document.createFromMathML(...) and without regard to the collection container.
• An interesting feature of MathObject instances is that they are shown in the Layer panel within their container (Rectangle), so the GUI allows the user to hide them separately. (The same treatment can only be applied to Graphics via a script.)
• If the user rescales/distorts a MO from the GUI, you won't be able to access its transform state via rotationAngle, transformValuesOf(), etc.
More on the SVG Mystery
For the record, SVG Support dates back to InDesign 2020 and the SVG object is visible in the DOM since version 15.0 or thereabouts. The case of MathObject raises the question of access to the XML stream constituting the SVG file.
As we have just seen, MathObject as a placeable-like entity should expose Graphic properties, but it does not. Its container, a Rectangle, has its svgs.length==0 although a “ghost SVG” is actually involved.


Everything happens in Math Expressions, a UXP panel that takes a very complicated path to generate a hidden SVG file through MathJax. You need to inspect com.adobe.indesign.mathexprpanel in InDesign's Resources/UXP directory to reconstruct the process. Additionally, there is a separate mathjax resource (which in turn contains the entire MathJax distribution) that provides a mathjax-interface.idjs script. The latter calls the Scripting DOM and is very likely our best entry point to the secret SVG file:
// In InDesign/Resources/mathjax/mathjax-interface.idjs

// . . .
let sample = app.getContextMathMLDescription();
let pathToExport = app.getPathToExportMml2svg();

// . . .
//  Create DOM adaptor and register it for HTML documents
const adaptor = liteAdaptor();
const handler = RegisterHTMLHandler(adaptor);

//  Create input and output jax...
const mml = new MathML();
const svg = new SVG({fontCache: 'none'});
const html = mathjax.document('', {InputJax:mml, OutputJax:svg});
const node = html.convert(sample);
let innerhtml = adaptor.innerHTML(node);

let resultStr = {
  width:node.children[0].attributes.width,
  height:node.children[0].attributes.height,
  svg_str:innerhtml
};

fs.writeFileSync(pathToExport, JSON.stringify(resultStr));
The last line of this snippet shows that a temporary file is created at the location returned by app.getPathToExportMml2svg(). (Obviously, this method only returns a edible path in the so-called “internal usage” context.)
WebView Detour
Regarding the Math Expressions panel, it essentially relies on a WebView, that is, a browser window displayed inside the UXP plugin. “WebViews can be used to display complex web pages inside the UXP plugins. You can use it to access external web services, to create custom UI and to isolate the web content from the rest of the plugin.”
→ developer.adobe.com/indesign/uxp/reference
“WebView support has been introduced in UXP quite recently, adds Davide Barranca, first in modal dialogues only, then, reluctantly, in modeless panels as well. While developers were requesting the WebView sometimes as a way to work around UXP limitations (in other words, trying to re-create a browser CEP-like environment in disguise), Adobe did express concerns about system resources consumption and loading time, which were the leading causes for the CEP's demise.”
→ Professional Photoshop UXP, p. 160.
The most important thing to remember is this sentence from Kerri Shotts: “Webviews do incur a fairly heavy memory and performance hit.”
→ forums.creativeclouddeveloper.com
When you setup a communication channel between WebView and some plugin, the data is sent via the postMessage() method and the whole processing is done, in both directions, from event listeners.
This is what you will find if you browse the structure of com.adobe.indesign.mathexprpanel:
• manifest.json sets the webview permissions: enableMessageBridge: "localAndRemote"
• index.html includes index.js and declares the <webview> component, setting the essential uxpAllowInspector="true" attribute.
• index.js contains the basic UXP stuff and installs the event listeners of the communication channel:
// Skeleton of
// Resources/UXP/com.adobe.indesign.mathexprpanel/index.js

const uxp = require('uxp');
const fs = require('fs');
const { app } = require("indesign");
function showAlert(str){...}

// TO WebView
document.body.addEventListener('uxpcommand', event =>
{
   var data = event.data;
   let webView = document.getElementById("panelWebview");
   // . . .
   webView.postMessage(event.data);
})

// FROM WebView
window.addEventListener("message", (e) =>
{
   // . . .
   // Typical call of InDesign DOM API:
   app.handleMathMLMessage(msg);
   // . . .
});
• test.html (as its name does not indicate!) integrates the WebView itself, that is, a kind of encapsulated, local HTML page that can talk to MathJax:
// In Resources/UXP/com.adobe.indesign.mathexprpanel/test.html

<script src="polyfill.min.js" />
<script id="MathJax-script" async src="./mathjax/es5/mml-svg.js" />
<script src="Events.js" />
<script>MathJax={ loader:{load:['[mml]/mml3']}, mml:{forceReparse:true} };</script>

// etc
Note. - The test.html name is another good reason to think MathObject is not finished! We really feel that the InDesign team was content to illustrate a PoC.
• Finally, Events.js handles all internal events, syntax errors, formatting of MathML descriptors, and so on. It sends messages back to the UXP host using window.uxpHost.postMessage(...)
These few insights at least allow you to measure the extraordinary interweaving of technologies to achieve the goal, i.e. produce some SVG stream from a MathML syntax. Should we encounter bugs or discomfort in the Math Expressions panel, we now know where to hack it!
Taking a shortcut to MathJax!
The most interesting code pattern is probably the mathjax-interface.idjs script I already mentioned. It is likely that one could set breakpoints there and extract the temporary location of the SVG file to, for example, copy and transform it into a real Graphic itemlink.
Better, you can invoke MathJax for your own needs from an idjs script. Well, this still involves copying the library into your project in order to make the require mantra work. The following code shows how to generate a “flesh and blood” SVG file from a MathML expression.
let { app } = require("indesign");

const fs = require("uxp").storage.localFileSystem;

// Assuming your project contains the [mathjax] distrib.
const path = './mathjax/mathjax_modules/';
const {mathjax} = require(path + 'mathjax-full/js/mathjax.js');
const {MathML} = require(path + 'mathjax-full/js/input/mathml.js');
const {SVG} = require(path + 'mathjax-full/js/output/svg.js');
const {liteAdaptor} = require(path + 'mathjax-full/js/adaptors/liteAdaptor.js');
const {RegisterHTMLHandler} = require(path + 'mathjax-full/js/handlers/html.js');

function showAlert(str)
{
  const dialog = app.dialogs.add();
  const col = dialog.dialogColumns.add();
  const colText = col.staticTexts.add();
  colText.staticLabel = ''+str;

  dialog.canCancel = false;
  dialog.show();
  dialog.destroy();
  return;
}

try
{
const sample = `<math>
  <mrow>
    <mi> x </mi>
    <mo> + </mo>
    <mrow>
      <mi> a </mi>
      <mo> / </mo>
      <mi> b </mi>
    </mrow>
  </mrow>
</math>`;

// Create DOM adaptor and register it for HTML docs.
const adaptor = liteAdaptor();
const handler = RegisterHTMLHandler(adaptor);

// Create input and output structures.
const mml = new MathML();
const svg = new SVG({fontCache: 'none'});
const html = mathjax.document('', {InputJax: mml, OutputJax: svg});

const node = html.convert(sample);
let svgStr = adaptor.innerHTML(node); // `<svg...>...</svg>`

// const nodeAtt = node.children[0].attributes;
// If needed => { width:'...', height:'...', viewBox:'...', ... }

const fd = await fs.getTemporaryFolder();
const ff = await fd.createFile("test.svg", {overwrite:true});
ff.write(svgStr);

} catch(e) { showAlert(e) }
You'll have no trouble imagining what's possible next. Note, by the way, that MathJax offers much more extensive functionality than MathML-to-SVG conversion — think LaTeX and AsciiMath.
But rather than digress, let's return to the crucial limitation that you should never overlook: the InDesign API for accessing MathJax and creating MathObjects is excessively slow. This is due to the complexity of the dataflow, the interconnection between DOM and UXP layers, and the event-driven implementation:

If you plan to automate the insertion of equations into a large InDesign document, expect commands like
myDoc.mathObjects.everyItem().appliedMathMLFontSize = 16;
to create fatal issues. We are still far from having a robust and reliable workflow for quality scientific publishing.
GO BACK TO PART 1
Useful links (UXP):
• About UXP WebView
• WebViews and manifest.json
• More on WebViewPermission
• Discussion about “Embedded WebView”
• WebView and postMessage
• On the Logics of postMessage (MDN)
See also:
• MathJax Documentation
• MathJax Source Code
• MathJax: Non-Component-Based Examples
• “Professional Photoshop UXP” (review)
• Adobe XD Platform: storage
How to Update/Reinstall SmartSort Properly 6 Mar 8:36 AM (7 months ago)

Several users have reported that they fail to update SmartSort when a new version arrives. They have downloaded the latest JSX file from this website, replaced the previous one in their Scripts Panel folder, restarted InDesign, but the script dialog box still appears as it did in the previous release and the version number is not up to date in the title bar. So what is going on?
This is a typical issue related to residual instances of the previous script that, for reasons related to your configuration or the Indesign update process, remains active when the application starts up. We will provide here as much technical detail as possible to definitively resolve this problem.
Note. — As I write this, the current version of SmartSort is 1.22 and should be displayed as such at the top of the dialog box. It introduces “Remove Duplicates” and “Remove Empty Lines” options (and some fixes) that were not implemented before.
Abstract
1. SmartSort is a free InDesign script that allows you to sort paragraphs or tables in different languages. Its particularity is that it installs a “Smart Sort…” command (or a localized title) in different menus of the application so that you can quickly execute it in a given context.
2. The mechanism for integrating with InDesign menus involves startup commands that are handled by the script itself. When SmartSort is first run, it creates a shortcut (named SmartSort) in a special startup scripts folder that InDesign examines every time the application restarts.
3. However, the actual script SmartSort.jsx should normally reside in your standard Scripts Panel folder. It is not recommended to install this file directly as a “startup script” (better to let it manage its alias). Please read the User Guide for more information on the installation steps.
4. InDesign has in fact three distinct Scripts Panel folders (and sibling startup scripts folders). One is in the [Application] branch, one is in the [Community] branch, and one in the [User] branch — which can all be accessed from the Scripts panel. Although opinions differ on this point, we recommend installing scripts in the [User] branch because it remains well separated from the application folders and does not pollute multi-user environments.

5. In addition, several versions of InDesign may coexist on your system, and for each a hierarchy of script folders — and possibly different scripts! Depending on your update preferences (and InDesign versions under consideration), a script and/or shortcut transfer procedure may have been initiated automatically.
All these considerations explain why residual scripts or links can hang around in your folders and disrupt the normal update of SmartSort.
Detect and Verify Present Files
1. Preliminary step before any other operation: quit InDesign!
2. The quickest way is to run a search for the SmartSort file(s) on your hard drive. This will reveal all existing instances (including aliases) and their locations.
Note. — A drastic solution is to remove them all, then download and install the latest version!
3. If you are taking a more careful approach, consider the actual SmartSort.jsx files first (or go from their shortcut to the file.) If you are unsure of the version of a release, simply open the JSX file in a full-text editor. The script header always indicates a reliable version number:

4. Regarding shortcuts (i.e. file aliases), the rule is simple: they should be located in a startup scripts folder and point to the up-to-date version of SmartSort.jsx. If not, don't try to fix them manually: just delete them. When you restart InDesign, you'll just need to run SmartSort once from the Scripts panel and it will reinstall its menu items.
The normal structure of a clean installation (for each InDesign version) is as follows:
startup script folder: alias to SmartSort.jsx ↓
Scripts Panel folder: SmartSort.jsx (freshest version)
Typical Issue
The diagram below represents a typical misconfiguration, as can occur when multiple versions of InDesign coexist.

The user downloaded and dropped the latest version of SmartSort (1.22) into the Scripts Panel folder of InDesign 20. However, the older file (1.18) is still present in the ID 19 structure and the startup scripts folder of ID 20 contains a residual shortcut that still points to the old version. When you start InDesign 20, it is the old version of SmartSort that is attached to the application menus!
Canonical solution
If you're tired of endlessly troubleshooting multiple InDesign versions, there's a simple, definitive way to manage your scripts. Gather them into a single, personal folder, and create — once and for all — an alias to that folder in each Scripts Panel folder.

When you need to update SmartSort, simply drop the new version in place of the old one in your MyScripts folder. Nothing else to do then but restart InDesign.
Finally Fixing the “Show Hidden Characters” Menu Action [UPDATE] 15 Feb 8:52 AM (8 months ago)
InDesign does not always show the hidden characters when you ask it to Show Hidden Characters! Why? Because the active document window may then be in some preview Screen Mode that prohibits the appearance of invisible characters. It's a bit silly, but that's how it is. Well, that's how it was until today. A simple startup script will solve this little paradox…
Update (15-Feb-25). Major improvements and bug fixes have been made in version 2.0. See the behaviour of the SMART_MODE option in the source code. My thanks to Branislav Milić for the ideas he suggested.

You know the story by heart, but I'm going to retell it to you anyway: For the 2,749th time in your life, you're going to use the Cmd/Ctrl Alt I shortcut in the hope of seeing the hidden characters in your InDesign document. Or you will go into the Type > Show Hidden Characters menu. And once again, you will have forgotten that a preview mode is enabled, so the invisible character switch is indeed registered but has no effect (yet).
Quite often, this story even has a subplot: you know that the [W] key would normally allow you to return to the desired display mode, but since you are currently inserting text, pressing [W] would unfortunately result in the letter ‘w’ being typed. And you waste another second pondering your disenchantment.
A simple and definitive solution
It seems quite natural (to me) that the plan to reveal hidden characters implies deactivating any preview mode that could interfere with the goal. This is the idea implemented by TypeActuallyShowHidden.jsx, a simple startup script available in the IdGoodies repository.
A startup script should be placed, not in the [Scripts panel] subfolder, but in the [startup scripts] subfolder. This way, it is executed automatically when InDesign starts.
This script acts as a menu action listener. Whenever the user invokes Show Hidden Characters (either via the menu or a shortcut), it decides whether the normal Screen Mode should be restored as well — so you'll never have to deal with that step again.
The video capture below shows the initial and final state of the display mode:
This solution is so obvious that I'm kicking myself for not thinking of it sooner!
Download and install as startup script (InDesign CC/CS6/CS5/CS4):
→ TypeActuallyShowHidden.jsx (GitHub)
.%3C/strong%3E%20Major%20improvements%20and%20bug%20fixes%20have%20been%20made%20in%20version%C2%A02.0.%20See%20the%20behaviour%20of%20the%20%3Ccode%3ESMART_MODE%3C/code%3E%20option%20in%20the%20%3Ca%20href%3D%22https://github.com/indiscripts/IdGoodies/blob/master/full/TypeActuallyShowHidden.jsx%22%3Esource%20code%3C/a%3E.%20My%20thanks%20to%20%3Cstrong%3EBranislav%20Mili%C4%87%3C/strong%3E%20for%20the%20ideas%20he%20suggested.%3C/p%3E%0A%0A%3Cdiv%3E%3Chr%20/%3E%3C/div%3E%0A%0A%3Cp%3E%3Ca%20href%3D%22https://indiscripts.com/blog/public/data/finally-fixing-show-hidden-characters-menu-action/en01.png%22%20title%3D%22A%20laborious%20click%20does%20not%20always%20lead%20to%20a%20tangible%20result!%22%20rel%3D%22lightbox-post%22%3E%3Cimg%20src%3D%22https://indiscripts.com/blog/public/data/finally-fixing-show-hidden-characters-menu-action/_en01.png%22%20alt%3D%22A%20laborious%20click%20does%20not%20always%20lead%20to%20a%20tangible%20result!%22%20/%3E%3Cspan%3E%3C/span%3E%3C/a%3E%3C/p%3E%0A%0A%3Cp%3EYou%20know%20the%20story%20by%20heart,%20but%20I'm%20going%20to%20retell%20it%20to%20you%20anyway:%20For%20the%202,749th%20time%20in%20your%20life,%20you're%20going%20to%20use%20the%20%3Cstrong%3ECmd/Ctrl%C2%A0Alt%C2%A0I%3C/strong%3E%20shortcut%20in%20the%20hope%20of%20seeing%20the%20hidden%20characters%20in%20your%20InDesign%20document.%20Or%20you%20will%20go%20into%20the%20%3Cstrong%3EType%20%3E%20Show%20Hidden%20Characters%3C/strong%3E%20menu.%20And%20once%20again,%20you%20will%20have%20forgotten%20that%20a%20preview%20mode%20is%20enabled,%20so%20the%20invisible%20character%20switch%20is%20indeed%20registered%20but%20has%20no%20effect%20(yet).%3C/p%3E%0A%0A%3Cp%3EQuite%20often,%20this%20story%20even%20has%20a%20subplot:%20you%20know%20that%20the%20%3Ccode%3E%5BW%5D%3C/code%3E%20key%20would%20normally%20allow%20you%20to%20return%20to%20the%20desired%20display%20mode,%20but%20since%20you%20are%20currently%20inserting%20text,%20pressing%20%3Ccode%3E%5BW%5D%3C/code%3E%20would%20unfortunately%20result%20in%20the%20letter%20%E2%80%98w%E2%80%99%20being%20typed.%20And%20you%20waste%20another%20second%20pondering%20your%20disenchantment.%3C/p%3E%0A%0A%3Ch2%3EA%20simple%20and%20definitive%20solution%3C/h2%3E%0A%0A%3Cp%3EIt%20seems%20quite%20natural%20(to%20me)%20that%20the%20plan%20to%20reveal%20hidden%20characters%20implies%20deactivating%20any%20preview%20mode%20that%20could%20interfere%20with%20the%20goal.%20This%20is%20the%20idea%20implemented%20by%20%3Ca%20href%3D%22https://github.com/indiscripts/IdGoodies/blob/master/full/TypeActuallyShowHidden.jsx%22%3ETypeActuallyShowHidden.jsx%3C/a%3E,%20a%20simple%20%3Cem%3Estartup%20script%3C/em%3E%20available%20in%20the%20%3Cstrong%3EIdGoodies%3C/strong%3E%20repository.%3C/p%3E%0A%0A%3Ch4%3EA%20startup%20script%20should%20be%20placed,%20not%20in%20the%20%3Ccode%3E%5BScripts%20panel%5D%3C/code%3E%20subfolder,%20but%20in%20the%20%3Ccode%3E%5Bstartup%20scripts%5D%3C/code%3E%20subfolder.%20This%20way,%20it%20is%20executed%20automatically%20when%20InDesign%20starts.%3C/h4%3E%0A%0A%3Cp%3EThis%20script%20acts%20as%20a%20menu%20action%20%3Cem%3Elistener%3C/em%3E.%20Whenever%20the%20user%20invokes%20%3Cstrong%3EShow%20Hidden%20Characters%3C/strong%3E%20(either%20%3Cem%3Evia%3C/em%3E%20the%20menu%20or%20a%20shortcut),%20it%20decides%20whether%20the%20normal%20Screen%20Mode%20should%20be%20restored%20as%20well%20%E2%80%94%20so%20you'll%20never%20have%20to%20deal%20with%20that%20step%20again.%3C/p%3E%0A%0A%3Cp%3EThe%20video%20capture%20below%20shows%20the%20initial%20and%20final%20state%20of%20the%20display%20mode:%3C/p%3E%0A%0A%3Cp%3E%3Cvideo%20controls%20width%3D%22100%25%22%20muted%3E%0A%20%20%3Csource%20src%3D%22https://indiscripts.com/blog/public/data/finally-fixing-show-hidden-characters-menu-action/ActualShowHiddenChars.mp4%22%20type%3D%22video/mp4%22%3E%0AYour%20browser%20does%20not%20support%20the%20video%20tag.%0A%3C/video%3E%3C/p%3E%0A%0A%3Cp%3EThis%20solution%20is%20so%20obvious%20that%20I'm%20kicking%20myself%20for%20not%20thinking%20of%20it%20sooner!%3C/p%3E%0A%0A%3Cdiv%3E%3Chr%20/%3E%3C/div%3E%0A%0A%3Cp%3EDownload%20and%20install%20as%20startup%20script%20(InDesign%20CC/CS6/CS5/CS4):%3Cbr%20/%3E%0A%E2%86%92%20%3Ca%20href%3D%22https://github.com/indiscripts/IdGoodies/blob/master/full/TypeActuallyShowHidden.jsx%22%3ETypeActuallyShowHidden.jsx%3C/a%3E%20(GitHub)%3C/p%3E)
MATE for InDesign: Once Upon a Time in the Revolution! 3 Feb 8:38 AM (8 months ago)

Preamble
This is not InDesign's first brush with the realm of AI. The application already has Firefly-powered generative features like Text to Image and Generative Expand. In addition, script developers have not been slow to build bridges with existing AI systems — see for instance OpenAI for InDesign from Roland Dreger.
What's new with MATE — a mind-blowing extension released by Eugen Pflüger — is that it definitely opens the black box of automation to non-developers. And this is just enough to make us shiver! Under the hood, MATE for InDesign whispers to an oracle called ChatGPT, or Claude. The oracle can occasionally deliver unexpected results, but it is clear that on average, it overcomes the most daring challenges.

Eugen Pflüger — aka Plugisto — is a UX/UI expert specializing in creating innovative solutions for Adobe products, and it is not by chance that he received the Developer Champion 2024 medal! As a product designer and part-time plugin developer, he already created Arranger and OMATA for Illustrator (both available for free). He lives in Germany.
• Hi Eugen! Tell me briefly about your background.
 Eugen Pflüger : I taught myself programming with Flash and never stopped learning. I love design. I also enjoy coding and scripting. With developing plugins for design tools like InDesign, Illustrator, Photoshop, Express, and Figma, I can combine both.
I also love generative design and art (I'm not talking about NFTs).
• MATE is a thunderbolt in the world of Adobe automation. How did this project come about?
E. P. : As a designer you sometimes need to do tasks that are incredibly tedious and slow that can be accomplished in seconds with code. E.g. arranging some items in a circular layout. Incredibly painful to do by hand, incredibly simple with script. That's how Arranger came to be.
With OMATA I wanted to expand this concept and give designers the “power of code” to easily create, transform, and randomize hundreds of objects without knowing how to code. The idea was to make it easy to create generative designs / generative art. OMATA is a no-code or “visual code builder”. You can stack commands (like “random opacity”) on each other and Illustrator executes those commands.
It was a very slow process to build all those commands and maybe Illustrator with its old and in parts quirky API was not the best choice to start with.
• That's when ChatGPT happened...
E. P. : Yes, after OMATA was released, ChatGPT appeared. Like many others I started to play with it and got fascinated by how a machine could understand my words. I asked myself if now someone would replace my plugins. The next thought was, why don't I try to replace them myself? I started to experiment:
Arrange items in a grid. Arrange in a circular layout. Random opacity. Of course, the AI hallucinated sometimes and the flipped Y axis¹ in Illustrator API is still an issue. But it worked quite well. I soon realized that with MATE I could accomplish tasks that are possible with OMATA. But it was simpler, faster, and I could do so much more. E.g. applying random opacity (with min/max) to the current selection requires several steps in OMATA. In MATE it's just typing a simple sentence and waiting for a few seconds. If you want to do more complex tasks, e.g. make sure that 10% of the items have an opacity of more than 50, it's almost impossible with OMATA. With MATE it's just another simple sentence and it's done.
1. Adobe changed Illustrator's document origin from bottom/left to top/left in CS5. This introduced persistent difficulties in getting scripts properly manage the coordinate systems.
And then you can even ask MATE to “Generate UI” and it will show you a dialog where you can input min and max values. There are so many tasks it can do for you. It's mind-blowing. Users like Jean-Claude Tremblay and Laurent Tournier and others, come up with incredible use cases and solutions everyday.

• Let's give our readers a straightforward use case starting from a 300-page document…
Speaking of 300 pages… this is a quote from Jean-Claude Tremblay from our Discord server (yesterday):
“I need to set all rows height to at least 0.125' in all tables in a document! I need to resize the width of all tables to their text frame width! Three prompts with MATE, and Voilà! All done in a 300-page document! I ❤️ MATE!”
MATE is a flexible tool for all kinds of use cases. The best part is: you can transform this tool to work on your specific need.
• But roughly summarizing, MATE is an assistant to automate tasks via ChatGPT or Claude. What does it bring more than directly invoking an AI?
E. P. : MATE does a lot of things to help you with daily tasks. First of all, it saves you from constantly copy-pasting between InDesign and ChatGPT/Claude. But it's more. It helps you to keep your flow. MATE can read your selected items and directly execute on them. With “auto run” turned on, MATE not only writes a script, it also executes it. You ask again. It executes. It's like having a real person sitting next to you and doing the tasks for you.

Besides that, you can save your scripts locally (and run them locally) and build up a nice collection of tools. Next to “Chat” MATE has other modes: “Text” and “Images”. It can correct spelling errors, translate to over 30 languages, shorten or lengthen texts. You can create images as placeholders or create them to get inspired.
• By the way, how to switch from ChatGPT to Claude Sonnet?
E. P. : You need to have the latest installation (v1.2.0 and above). In the chat view at the left corner there is this button with a bolt icon. You can switch between models for each chat and even for each prompt. In “Settings” you can also choose a default model. Every chat will then start with this model.

• Tell me more about your licensing system and how things fit together with OpenAI and Anthropic.
E. P. : MATE is available as a monthly subscription and a yearly subscription (you will get two months for free). I need to offer it as a subscription because the AI providers (OpenAI, Anthropic) are charging me for usage. You can also get a version that works with your own OpenAI API key — soon with your custom Claude (Anthropic) API key. Then it's a one-time payment only, not a subscription. Also, right now you can get MATE as a “lifetime deal”. That means you pay once and can use it forever.
Technical questions
• The product is quite easy to install when using the Creative Cloud application via Adobe Exchange. But suppose I want to manually install the ZXP source, is that possible?
E. P. : No, it's not possible. I'm not very familiar with all the things that can happen when you manually install a ZXP. Adobe fixed the installation process of extensions some time ago and it works now. I'm a solo developer. I think my time is better spent with developing features and fixing bugs than to answer support requests for installation issues. If there is really a need for it please tell me at support[at]omata{dot}io. I will then take a look into it. But I don't believe it's needed now.
• For the time being, MATE can only produce ExtendScript scripts. Do you plan to add UXP?
E. P. : Yes, that will be possible. I still need to figure out how to handle it in the UI so that users know what they are dealing with. Not every user cares about it. But it will be coming.

• In preparing for this interview, you explained to me that “MATE is not a solution for a single use case”. What did you mean?
E. P. : In software you can often distinct between a “solution” and a “tool”. A solution solves a concrete problem (e.g. Arranger solves circular layouts. That's it.) A “tool” is often more flexible and can be applied to several problems. MATE is a tool. It's the same with ChatGPT that has not a single use. It can be used for emails, programing, writing poems, brain storming, etc.
MATE solves your very specific need in that moment. And this can be anything in your work: styling table cells, rewriting character styles, changing car names in a text to bold, writing GREP, or picking some graphics items randomly to creating an interesting background effect. That's why I like to describe it as a tool for automations, creative work (e.g. random colors), and scripting. It's hard to describe it with a single use case.
• What are the limitations that the user should know about? What is MATE for InDesign unable to do?
E. P. : One important aspect is that MATE does not create a nice editorial page layout for you. Or it won't draw you a unicorn icon. This is by design. I wanted MATE to be your assistant to help you with boring tasks so that you have more energy for the creative things.
Another limit is called “context window”. The AI in the background has a limit of input that it can work on. That means that it can't work on a very, very long single text. You would need to break that down into smaller pieces. Although, the AI vendors are constantly increasing context windows.

• Let's talk about those damn “hallucinations”. In a quick exchange on X we noticed that MATE could sometimes invent InDesign DOM properties that don't actually exist, which then causes a runtime error…
E. P. : Hallucinations mean that the AI invents things that are not there. Like sometimes DOM properties. It happens unfortunately. The system is not perfect. They are rooted in the way LLMs work. Andrej Karpathy has written an interesting post about it. Hallucinations are a feature and not a bug :) Without these inner workings LLMs could not be so creative and flexible. The question is, how we can deal with it? I'm working on improving this. Better handling of errors is the first step. A benefit of AI is that it can fix its own mistakes.
• So, suppose I found a wrong assumption in MATE's reasoning, I can then help it handle the isssue — e.g. “The Spread object does not have bounds property” — and it will and readjust the code accordingly (which is awesome!) But is there really no way to make these fixes persistent?
Unfortunately, the “big” LLMs like ChatGPT, Claude, Mistral… don't learn from mistakes. There is a misconception about what AI and “learning” mean. You can ask them to remember a solution to a mistake but they can't (because the learning/training phase of an AI model is already completed — it's “frozen”). LLMs learn when they're trained, which happens in a phase before it will be released. After that no learning happens from interactions with users.
There are some technical reasons for it but also some conceptional: what if you are intentionally telling a LLM wrong facts and that it should remember them? Who decides which is wrong or right? I believe these are good reasons to not have a trained model be open for feedback. Privacy is another aspect. It would need to save your prompts and data and integrate them in their models. There was a lot of backlash in the beginning of ChatGPT against using user data to train the next model. It's a difficult topic.
As a user of ChatGPT and MATE myself, I can absolutely see the need to correct obvious mistakes and adapt MATE to your needs. I'm doing research on it. There are several concepts, e.g. a RAG system² with memory (for your corrections). I'm working on it.
2. RAG stands for Retrieval-Augmented Generation.

• Branislav Milić reported a few days ago that one can “reverse-engineer” existing scripts using such tool — e.g., parsing a third-party code and adapting it to a different task…
E. P. : Yes, you can do that. But you could do this with ChatGPT from day one. And, you could do all the time with all .jsx files without any AI. You could always open them, change some values, rewrite them. AI only makes that simpler and faster.
• Does this mean that old-school developers like me can retire?
E. P. : I understand the concerns. Just because reverse-engineering is technically possible doesn't mean it should be allowed. It's the same question of rights as with e.g. fonts or photos. Technically it's simple to share them but usually you are not allowed to. (It's not a new topic because of AI: it's as old as design itself.)
I have never heard someone say “We have too many developers.” Developers and engineers are still a rare resource. Although some non-developers can change scripts without an engineer doesn't mean that you have less work. I think it's the opposite. Automations and systems integrations are needed more and more. AI makes mistakes and you need people who can correct them. Developers like you can use AI as a tool to get things done faster and with less mental energy. AI helps you to get the boring parts of coding done faster so that you can focus on the more challenging higher level tasks.
• What do you plan to enhance or fix in the next releases?
E. P. : I want to improve the quality of responses and reduce hallucinations. I want MATE to better understand your documents and your requests. I want to add more AI models. I'm also working on a prompt guide and a trouble shooting guide. It's important to teach people how to deal with errors instead of ignoring them.
This space is moving so fast that it's really hard to keep up and provide the latest and greatest models. The good news is that things are getting better constantly.
Interviewed by Marc Autret
• Where to go from now?
→ OMATA Labs: omata.io
→ MATE: omata.io/mate
→ Adobe Exchange: @plugisto
→ Figma: figma.com/@plugisto
• Related links
→ A Case Study on Arranger: Making the Leap from CEP to UXP
→ OpenAI for InDesign (R. Dreger)
→ Adobe France: InDesign: Scripts, GREP et IA — avec L. Tournier (FR)
The Great Folder Fiasco: A Tale of InDesign 20.1 and macOS 31 Jan 4:50 AM (9 months ago)
As a developer or InDesign scripter, you know how important it is to stay up-to-date on the latest changes and issues affecting your work. Here we'll tackle an obscure, low-level issue affecting InDesign 20.1 on macOS…
Until recently, the low-level ExtendScript method Folder.prototype.create() worked reliably across all platforms, creating entire folder paths from scratch. With a simple line of code, you could create a hierarchy like this:
// dir1 and/or dir2 will be created too, if needed.

var myFolder = new Folder(Folder.myDocuments + '/dir1/dir2/dir3');
myFolder.create();
But, alas, those carefree days are behind us. As of InDesign 20.1 on macOS, our trusty Folder.prototype.create() has become a bit unpredictable. It's like it's playing a game of “folder roulette” — creating only the highest missing folder in the hierarchy, but not the ones below it.
For example, if you try to create a folder like ./dir1/dir2/dir3, it might only create dir1, or dir2 if dir1 already exists. And even if it doesn't throw any errors, you can't always rely on myFolder.exists being true afterwards.
This change has the potential to wreak havoc on your scripts, especially those that rely on predictable folder creation. Some well-established scripts started to bug for no apparent reason after updating to ID 20.1.
Patching the Faulty Method
Since Adobe fixed that particular issue (although not others!) in ID > 20.1, you can patch the faulty method and restore its consistency as follows. IdExtenso already has it implemented, but here's a standalone solution you can use:
if( 'Macintosh' == File.fs && 20.1 == parseFloat(app.version) )
{
  // Backup original method.
  Folder.prototype.__create__ = Folder.prototype.create;

  // Patch.
  Folder.prototype.create = function create()
  {
    return this.exists ||
      (
        (null === this.parent || this.parent.create()) &&
        this.__create__()
      );
  };
}
Note. - This patch works by directly rewriting the native method. In ExtendScript, it's possible to override built-in prototypes, but be careful not to cause any conflicts with other scripts or code. In this case, we're coding a new method that checks if the parent folder exists and creates it if necessary. If the parent folder doesn't exist, it recursively calls create() on the parent folder until all the required subfolders are created. The original method, __create__(), is invoked whenever a pure subfolder creation is required.
So, there you have it — a charming bug and a temporary fix to save the day. May your scripts be folder-creation-friendly!
→ More about Folders in ExtendScript: Folder Object Reference
Best Claquos Themes for your Pie Charts 11 Dec 2024 12:18 PM (10 months ago)

Claquos 3.x for InDesign offers nearly a hundred themes, all customizable, to adjust your pie charts to your document colors. It's more than spoiled for choice!

Now, if you need to quickly pick a theme for a demonstration or project, here is a small selection of the most satisfying assortments in terms of balance and contrast.
1. Bovary

Sober, well-accentuated, the Bovary theme blends ideally into serious but creative layouts. Up to 6 slices.
2. Brewer Pastel

The Brewer Pastel theme is inspired by the famous Color Brewer’s palettes used in cartography. It gives a clean, light style to your graphics without destroying hue discrimination. Up to 8 slices.
3. Broadcast

Broadcast is a complete, solid and consistent set, very well suited for branding a wide thematic range — for example media categories, movie genres, etc. Up to 12 slices.
4. Chanoine

Bright and vivid, the Chanoine theme provides hues that are both uniform and well contrasted. Up to 8 slices.
5. Chroma

The Chroma theme relies on a slight desaturation of canonical colors, resulting in a subtle, less flashy spectrum. Up to 10 slices.
6. Coin-du-feu

Clever gradient of warm colors, this fireside theme — “Coin-du-feu” in French — will bring your graphics to life even in an austere layout. Up to 6 slices.
7. Density 08

The theme titled “Density 08” guarantees a perfect balance of eight dominant colors. It is ideal if your data has exactly this number of categories. Up to 8 slices.
Note. — Claquos also offers a 12-slice “Density” theme.
8. Metallica

If you need to represent a gradual spectrum of technical data in a sober blue-gray tone, then try the Metallica theme. Up to 9 slices.
9. Plaza

Playful and inspired, the Plaza theme will instantly make your charts sparkle. Up to 6 slices.
10. Redlow

Redlow is an eminently thermal (or calorific?) theme. Note that despite this choice of burning flavors, all the nuances remain perfectly discernible. Up to 8 slices.
11. RetroWash

Delightfully vintage and deliberately faded, the RetroWash theme creates a unique, concrete, earthy style that's off the beaten path. Up to 7 slices.
12. Scouts

Antithesis of the previous one, the Scouts theme shares with Broadcast (see above) a large sample of bright and solidly contrasting colors. Up to 12 slices.
13. Stream

Stream is a clear and regular theme to unambiguously identify a small number of topics. It’s hard to make it more effective! Up to 6 slices.
14. WarmRoy

Here is a harmonious and original set. Based on velvet tones, the WarmRoy theme seeks more aesthetics than strong contrast. Up to 7 slices.
15. Wine Spirit

Wine Spirit is also a beautifully crafted theme in a peaceful gradient, mixing the flesh and blood of the vine. Up to 8 slices.
SmartSort 1.21 for InDesign CC/CS6/CS5/CS4 4 Dec 2024 12:52 PM (10 months ago)
SmartSort is a free InDesign script that sorts paragraphs or cells. It produces a lexicographic order consistent with the language considered. Version 1.21 fixes an issue related to case discrimination in various ‘tailored’ languages. It also deals with the letter ⟨ё⟩ in Russian.
The rudtp forum has just reported the atypical case of the Cyrillic letter Ё/ё (U+0401 / U+0451) which, instead of behaving like a diacritical variant, happens to be a separate letter in Russian. At least, that's how it should be treated in dictionaries.
→ See “Russian Alphabet” (Wikipedia)
As a result, it was necessary to “tailor” the sorting model for the Russian language. This has just been done within the $$.Collator module that provides the basic building block of SmartSort.

In the process, another bug was discovered — and fixed! — concerning upper/lower case discrimination and diacritical variants. This bug was occurring in some languages that were undergoing tailoring procedures. The new version of SmartSort can therefore be considered a stability update.
How do I update the script? Simple: extract the new SmartSort.jsx file from the ZIP package, quit InDesign, replace the old file in your Scripts panel folder, restart InDesign. Done.
Why should I update? SmartSort is built upon the IdExtenso framework, which is regularly improved. A major update of the Collator component has just been released and provides stability fixes. SmartSort 1.21 reflects these changes.
• See also: SmartSort user's guide (PDF).
%20which,%20instead%20of%20behaving%20like%20a%20diacritical%20variant,%20happens%20to%20be%20a%20separate%20letter%20in%20Russian.%20At%20least,%20that's%20how%20it%20should%20be%20treated%20in%20dictionaries.%3C/p%3E%0A%0A%3Cp%3E%E2%86%92%20See%20%3Ca%20href%3D%22https://en.wikipedia.org/wiki/Russian_alphabet%22%3E%E2%80%9CRussian%20Alphabet%E2%80%9D%20(Wikipedia)%3C/a%3E%3C/p%3E%0A%0A%3Cp%3EAs%20a%20result,%20it%20was%20necessary%20to%20%E2%80%9Ctailor%E2%80%9D%20the%20sorting%20model%20for%20the%20Russian%20language.%20This%20has%20just%20been%20done%20within%20the%20%3Ca%20href%3D%22https://github.com/indiscripts/IdExtenso/blob/master/etc/$$.Collator.jsxlib%22%3E$$.Collator%20module%3C/a%3E%20that%20provides%20the%20basic%20building%20block%20of%20%3Cstrong%3ESmartSort%3C/strong%3E.%3C/p%3E%0A%0A%3Cp%3E%3Ca%20href%3D%22https://indiscripts.com/blog/public/data/smartsort-1-21-for-indesign-cc-cs6-cs5-cs4/en01.png%22%20title%3D%22Example%20of%20correct%20sorting%20produced%20by%20SmartSort%201.21.%20(Sample%20given%20by%20Mikhail%20Ivanyushin.)%22%20rel%3D%22lightbox-post%22%3E%3Cimg%20src%3D%22https://indiscripts.com/blog/public/data/smartsort-1-21-for-indesign-cc-cs6-cs5-cs4/_en01.png%22%20alt%3D%22Example%20of%20correct%20sorting%20produced%20by%20SmartSort%201.21.%20(Sample%20given%20by%20Mikhail%20Ivanyushin.)%22%20/%3E%3Cspan%3E%3C/span%3E%3C/a%3E%3C/p%3E%0A%0A%3Cp%3EIn%20the%20process,%20another%20bug%20was%20discovered%20%E2%80%94%20and%20fixed!%20%E2%80%94%20concerning%20upper/lower%20case%20discrimination%20and%20diacritical%20variants.%20This%20bug%20was%20occurring%20in%20some%20languages%20%E2%80%8B%E2%80%8Bthat%20were%20undergoing%20tailoring%20procedures.%20The%20new%20version%20of%20%3Cstrong%3ESmartSort%3C/strong%3E%20can%20therefore%20be%20considered%20a%20stability%C2%A0update.%3C/p%3E%0A%0A%3Cdiv%3E%3Chr%20/%3E%3C/div%3E%0A%0A%3Cp%3E%3Cstrong%3EHow%20do%20I%20update%20the%20script?%3C/strong%3E%20Simple:%20extract%20the%20new%20%3Ccode%3ESmartSort.jsx%3C/code%3E%20file%20from%20the%20ZIP%20package,%20quit%20InDesign,%20replace%20the%20old%20file%20in%20your%20%3Ca%20href%3D%22https://indiscripts.com/pages/help%23hd0sb2%22%3EScripts%20panel%20folder%3C/a%3E,%20restart%20InDesign.%20Done.%3C/p%3E%0A%0A%3Cp%3E%3Cstrong%3EWhy%20should%20I%20update?%3C/strong%3E%20SmartSort%20is%20built%20upon%20the%20%3Ca%20href%3D%22https://github.com/indiscripts/IdExtenso%22%3EIdExtenso%3C/a%3E%20framework,%20which%20is%20regularly%20improved.%20A%20major%20update%20of%20the%20%3Ca%20href%3D%22https://github.com/indiscripts/IdExtenso/blob/master/etc/$$.Collator.jsxlib%22%3ECollator%3C/a%3E%20component%20has%20just%20been%20released%20and%20provides%20stability%20fixes.%20SmartSort%201.21%20reflects%20these%20changes.%3C/p%3E%0A%0A%3Cp%3E%E2%80%A2%20See%20also:%20%3Ca%20href%3D%22https://indiscripts.com/blog/public/scripts/en_SmartSort-Manual.pdf%22%3ESmartSort%20user's%20guide%3C/a%3E%C2%A0(PDF).%3C/p%3E)
InDesign Script: Show Me the Rivers 6 Nov 2024 5:01 AM (11 months ago)
 My colleague Mikhail Ivanyushin has just developed a nice utility that detects and highlights text ‘rivers’, these stacks of oblique or vertical spaces which form randomly within a typographic composition and “make it ugly.” Chasing such road accidents is a fetish sport. So if you don't have time to damage your eyes, here's a more comfortable solution…
“The problem is that the layout designer does not see these rivers, because he does not read what he is making up. The rivers are seen by editors and readers.” Mikhail's main script is based on a ScriptUI palette available in English, Russian, Spanish, and French. It provides various settings for fine-tuning text river detection and operates with respect to the cursor position in your InDesign document.

Note. — Remember to re(position) the cursor in the area to be explored before starting the process. Also make sure that the target frames do not have overset text.
The utilities designed by Mikhail Ivanyushin go beyond highlighting rivers. The full product package also delivers a SetSpaceKerning script that will help you improve text justification and get rid of spacing issues. “The idea is to leave the tracking of the text unchanged, and increase or decrease the width of the usual spaces by changing their kerning” (feature that is not directly available to InDesign users.)
Originally written in Russian, the documentation is available in English and Spanish.

Going further:
→ Overview: “Rivers in the text”
→ Demo version (ZIP)
→ User's Guides (ZIP,PDF)
%20the%20cursor%20in%20the%20area%20to%20be%20explored%20before%20starting%20the%20process.%20Also%20make%20sure%20that%20the%20target%20frames%20do%20not%20have%20overset%20text.%3C/p%3E%0A%0A%3Cp%3EThe%20utilities%20designed%20by%20Mikhail%20Ivanyushin%20go%20beyond%20highlighting%20rivers.%20The%20full%20product%20package%20also%20delivers%20a%20%3Ccode%3ESetSpaceKerning%3C/code%3E%20script%20that%20will%20help%20you%20improve%20text%20justification%20and%20get%20rid%20of%20spacing%20issues.%20%3Cem%3E%E2%80%9CThe%20idea%20is%20to%20leave%20the%20tracking%20of%20the%20text%20unchanged,%20and%20increase%20or%20decrease%20the%20width%20of%20the%20usual%20spaces%20by%20changing%20their%20kerning%E2%80%9D%3C/em%3E%20(feature%20that%20is%20not%20directly%20available%20to%20InDesign%20users.)%3C/p%3E%0A%0A%3Cp%3EOriginally%20written%20in%20Russian,%20the%20%3Ca%20href%3D%22https://dotextok.ru/documentation/ShowMeRivers.%2520Manuals.zip%22%3Edocumentation%3C/a%3E%20is%20available%20in%20English%20and%20Spanish.%3C/p%3E%0A%0A%3Cp%3E%3Cimg%20src%3D%22https://indiscripts.com/blog/public/data/indesign-script-show-me-the-rivers/en02.png%22%20alt%3D%22User's%20guide%20in%20English.%22%20title%3D%22User's%20guide%20in%20English.%22%20/%3E%3C/p%3E%0A%0A%3Cp%3E%3Cstrong%3EGoing%20further:%3C/strong%3E%3Cbr%20/%3E%0A%E2%86%92%20%3Ca%20href%3D%22https://shop.dotextok.ru/en/22-the-rivers-in-the-text-find-show-and-remove%22%3EOverview:%20%E2%80%9CRivers%20in%20the%20text%E2%80%9D%3C/a%3E%3Cbr%20/%3E%0A%E2%86%92%20%3Ca%20href%3D%22https://dotextok.ru/documentation/Demo%2520Mode.zip%22%3EDemo%20version%20(ZIP)%3C/a%3E%3Cbr%20/%3E%0A%E2%86%92%20%3Ca%20href%3D%22https://dotextok.ru/documentation/ShowMeRivers.%2520Manuals.zip%22%3EUser's%20Guides%20(ZIP,PDF)%3C/a%3E%3C/p%3E%0A%0A%3Cdiv%3E%3Chr%20/%3E%3C/div%3E)
HurryCover³ | Top 8 Best Tips & Tricks 26 Oct 2024 7:22 AM (last year)
![]() As the user manual is still being finalized, there may be some little-known or underrated HurryCover 3 features that you may have missed. Want to save time when designing advanced book covers in InDesign? Here are the best shortcuts and hidden tricks…
As the user manual is still being finalized, there may be some little-known or underrated HurryCover 3 features that you may have missed. Want to save time when designing advanced book covers in InDesign? Here are the best shortcuts and hidden tricks…
⚡ Click on each animation to see all the details.
1. Cloning a Cover Template
Given an active HurryCover document (in InDesign), the script automatically considers it at startup and allows you to update it. But what if, instead of modifying the existing book cover, you want to create a new template based on the same dimensions and settings? Simply hold down Ctrl (Windows) / Cmd (Mac) and the Update button will become New.

2. Using InDesign Color Preferences
HurryCover offers you a set of fine-tuned colors to indicate fold guides, axes and margins — and you can freely customize these colors from the main dialog. But you can also tell the program that, whenever it has to create a new cover, it should preset guides/margins colors to those defined in InDesign's own Guides & Pasteboard preferences panel (rather than hC internal settings.) To pre-establish this mechanism, turn on Preferences ⏵ Guides/Marks ⏵ Prefer InDesign Colors and restart HurryCover.

3. Working the Book Spine in 90° Preview
Very few InDesign scripts support advanced layout transformations in Rotated Spread View mode. This is not a problem for HurryCover! Hence, in InDesign you can work on the book spine area with respect to its reading direction, while editing the template via hC without going back to the standard orientation of the page.

4. One-off Explicit Measurement Entries
The measurement units block, in HurryCover, governs the consistent display and processing of cover dimensions. (And with just one click, you can uniformly switch to another reference unit.) However, there are times when you want to enter a particular dimension in a different, explicitly specified unit. Then enter the value with its own unit (mm, pt, in, pc, ag…), your input will be immediately interpreted and converted.

5. Getting Printer Marks for the Hinge
When the hinge (gutter) coincides with the standard margin of the template, this line is simply indicated by a “margin guide” — in the InDesign sense — not a printer's mark. If in this context you want an additional mark to be printed, just deactivate the link between Side Margin and Hinge in the Margins panel.

6. Advanced Metadata
HurryCover's Metadata panel allows you to specify essential information such as title, author, etc., but also more advanced identification data such as publisher, series, ISBN number, keywords. You can turn on/off, via a checkbox, the display of certain fields in the footer. The most specialized data conforms to Dublin Core vocabulary and is reflected in the Raw Data section of InDesign's XMP dialog.

Note. — The HurryCover ↔ XMP gateway is bidirectional: any changes made from InDesign to the current document are reflected in hC, and vice versa.
7. Adding Axial Guides
The option Preferences ⏵ Guides/Marks ⏵ Axes allows you to get extra guides at the center of each layout region. Unlike other guides (edges and/or margins), axes are not ‘magnetizable’, meaning that the Auto Layout feature does not snap objects to axes. Axes are handy tools for judging the internal symmetry of your design.

8. Export: Custom Weight/Color Border
HurryCover's Export module generates PNG and/or JPEG thumbnails for each selected cover element. It is then possible to add a border of predefined thickness (weight) and color. A simple trick is to ‘pick’ a dominant color from the artwork and to apply its #RRGGBB code.

Articles and tutorials to discover (in various languages):
→ Crear cubiertas en InDesign (ES) — Iván Gómez, Profeivan (YouTube)
→ Hurry Cover 3 has it ‘covered’ (EN) — Colin Flashman, Colecandoo!
InDesign 20 Goes to MathML — Part 1 17 Oct 2024 7:43 PM (last year)
The latest version of InDesign provides an internal solution for formatting math formulas. The underlying technology is a UXP WebView panel (Math Expressions) interacting with MathJax, a popular JavaScript package capable of processing maths in various formats. In this case, MathML as input and SVG as output…
Even if some implementation choices lack maturity — not to mention the very adoption of MathML, very intimidating for the novice — we salute Adobe's effort to respond to a very old demand from designers of scientific works.

MathML is a markup language focused on mathematical descriptors, so it is in line with many XML/HTML dialects intended to improve both the semantics and the rendering of documents. Although virtually as powerful (and as complicated!) as LaTeX lingo, it remains cumbersome to grasp and debug.
It seems that engineers still haven't figured out that for a non-developer, opening and closing XML branches is an unbearable chore. Considering that MathJax also natively supports AsciiMath, we could hope that the Math Expressions dialog will expand and offer this input alternative in the near future. Could we?
MathML Basics
MathJax supports the MathML3.0 mathematics tags, “with some limitations” (see MathML Support). For its part, Adobe indicates that “some glyphs, such as Closed surface integral, Thick Space, Differential D, Imaginary I, Exponential E, and a rare closing bracket symbol, are not supported and appear as missing glyphs in the generated expression.” Developers promise to fix these issues in future updates.
For now, all you need to know is that a MathML expression has the following form
<math>
  ...
</math>
and that all inner XML elements will start with the letter ‘m’. They are “meant to express the syntactic structure of mathematical notation (…) Because of this, a single row of identifiers and operators will often be represented by multiple nested mrow elements rather than a single mrow.”
The typical example, ‘x+a/b’ is encoded:
<math>
  <mrow>
    <mi> x </mi>
    <mo> + </mo>
    <mrow>
      <mi> a </mi>
      <mo> / </mo>
      <mi> b </mi>
    </mrow>
  </mrow>
</math>

So you can see that each fundamental element has its own locker, explicitly associated with one of the following tokens:
| Token | Meaning | Examples |
|---|---|---|
| mi | identifier | x ; a ; β ; sin ; f |
| mn | number | 1 ; 3.1416 ; 0xFF |
| mo | operator | + ; – ; × ; ∀ ; ≈ ; ⊂ ; ⊕ |
| mtext | arbitrary text | Theorem 1: |
| mspace | space | (any blank space) |
With these elements in mind you have the essential bricks to get started.
Nested Terms and Formatting
MathML then provides formatting schemes for handling groups, superscripts/subscripts, fractional notations, etc. Here are the main tools:
| Element | Arguments | Effect |
|---|---|---|
| mrow | any | Grouping (inline) |
| mfrac | 2 | Fraction (num/den) |
| msqrt | 1 | Square root |
| mroot | 2 | Nth root |
| msub | 2 | Subscript |
| msup | 2 | Superscript |
| msubsup | 3 | Sub & Superscript |
| munder | 2 | Underscript |
| mover | 2 | Overscript |
| munderover | 3 | Under & Overscript |
| mtable | any | Table or matrix |
| mtr | any | Row in table/matrix |
| mtd | 1 | Cell in table/matrix |
| mfenced | any | Fences e.g parentheses |
| menclose | 1 | Enclosing notation |
| mpadded | 1 | Padding attributes |
| mstyle | 1 | Styling attributes |
The deciding parameter is the number of arguments (and the order in which you declare them). For example, the sub-expression x³ requires the encoding
<msup><mi>x</mi><mn>3</mn></msup>
which tells the engine: “I want a superscript structure (hence msup), my base element is the identifier x (1st argument) and my exponent is the number 3 (2nd argument).”
Here is another example… with a tiny bug:
 <mi> i </mi>
 <mo> = </mo>
 <msqrt>
   <mo> - </mo>
   <mn> 1 </mn>
</msqrt>

If I refer to my table, the number of arguments of msqrt should be 1. The above code, <msqrt><mo>-</mo><mn>1</mn></msqrt>, gives the false impression that it could digest two successive elements. In fact, this is a syntax error that InDesign tries to fix on its own by inserting missing mrow element(s).
Note. — Without going into too many technical details, let's point out that the event handler of the UXP resource com.adobe.indesign.mathexprpanel implements some (basic) mathML code cleanup routines. They are far from eliminating all problems, and some can even add unnecessary mrow tags!
The important thing to remember is that the mrow element allows you to “group any number of sub-expressions horizontally” in order to respect the formal syntax, whenever needed. Hence, if a structure is designed to eat one argument, go to the mrow glue:
<math>
<mrow>
  <mi> i </mi>
  <mo> = </mo>
  <msqrt>
    <mrow>
      <mo> - </mo>
      <mn> 1 </mn>
    </mrow>
  </msqrt>
</mrow>
</math>
Best practice is to correct your code manually, to avoid both XML parsing and MathML interpretation errors. For a more comprehensive view on the issue of inline groupings, give a read to the inferred mrow's section of the specification.
Style change (color, size) is primarily handled by common attributes (mathcolor, mathsize) available on most inner elements. The dedicated mstyle container can define a consistent set of attributes being applied at its level and on child elements. InDesign's Math Expressions panel also offers a pair of “Typeface Properties” (font size and fill color) that govern the overall formatting of the expression. Spacing and alignment issues can be controlled from both the mspace token and the mpadded element.
Tokens (in particular mi) also enjoy the important mathvariant attribute, which “specifies the logical class of the token.” It allows the formatting of conventional glyphs (bold, double-struck, fraktur, script) while conveying semantic intent. Here's an example for Cantor fans:

This short introduction to MathML syntax in InDesign does not come close to covering all the subtleties and options available. To learn how to write more elaborate expressions, I recommend:
• elsenaju.eu/mathml/MathML-Examples.htm
• Geeks for Geeks: MathML Tutorial
• mathjax.github.io
GO TO PART 2

%22%20rel%3D%22lightbox-post%22%3E%3Cimg%20src%3D%22https://indiscripts.com/blog/public/data/indesign-2025-everything-works-fine/_anim.gif%22%20alt%3D%22Good%20news!%20All%20essential%20indiscripts%20tools%20run%20fine%20in%20InDesign%2020.0%20(macOS/Windows)%22%20/%3E%3Cspan%3E%3C/span%3E%3C/a%3E%3C/p%3E)
Let's Play with JS Array Objects (in ExtendScript) 13 Sep 2024 11:11 PM (last year)
IdExtenso provides a new ArrayAs2D module that unleashes the hidden strengths of ExtendScript operators. With this toy, you can now write code that adds, multiplies, evaluates 2D points or vectors. For example, if you develop an InDesign script based on Bézier curves or working on polygonal paths, all calculations of points, distances, normalized vectors, etc. become wonderfully compact…
To give you a taste of the joy of working with $$.ArrayAs2D, here is a randomly written example of perfectly valid code:
// Given `myPathPoint` a valid PathPoint instance.
var A = myPathPoint.anchor;

// Some points...
var P = A + [3,5];
var Q = -P + A + [7,8]/3;

// ...or vectors
var U = 1.25 * (A - myPathPoint.leftDirection);
var V = Q + (myPathPoint.rightDirection - A);

if( U > 3 ) // if |U| is greater than 3...
   V += U;
else
   V *= 4;
Whenever an Array happens to have two numeric coordinates x,y, it automatically benefits from so-called overloaded operators which give meaning to addition or subtraction, multiplication or division by a scalar, and so on.
Natively, JavaScript won't be able to interpret the code [3,2] + 5*[6,7], but with ExtendScript we can make it fully functional. The gain is considerable: no intermediate variables, no separate calculations “along x” and “along y” to finally reconcile coordinates in a new object.
If your project involves fairly complex vector operations, condensing the fundamental calculations is a game changer. With $$.ArrayAs2D, not only can you sum or multiply points and/or vectors directly, but many other shortcuts are available:
• +[3,4] returns the norm of the vector (i.e. 5.)
• The distance between two points P and Q is simply written P|Q.
• If you want to save the square root, you can also write P^Q to get the square of the distance.
• U>>V — read “U to V” — yields the (signed) angle between these two vectors.
Note. — But if the second operand is a number α, then U>>α rotates the vector U by α radians; example: [2,3]>>Math.PI.
• 1/U returns the normalized vector U/|U|, so we have the equality 1 == +(1/U).
• Point (or vector) equality is also testable (U==V), relying on your own machine-epsilon, if the default is not suitable.
All you have to do is #include this small module (very light weight) in your IdExtenso script. It can be activated or deactivated on demand. Read its detailed instructions and enter a new… dimension!
→ ArrayAs2D module (IdExtenso)
→ See also “Operator Overloading with ExtendScript”
IndexMatic³ | Hidden Treasures of the ~format Directive 23 Aug 2024 5:39 PM (last year)
IndexMatic users have long been faced with the following problem: when the client provides a list of index entries and adds extra information (birthdates, etc), how can the query list be adjusted accordingly? Introduced with iX³, the ~format directive offers an efficient solution…
Let's imagine that the publisher would submit to you a list of terms to be indexed in the following form (the → character indicating a cross-reference):

I've reduced the realistic size of such a list, but it does a good job of capturing the parameters you'll be dealing with in practice. First, you need to replace the “A → B” schemas (x-refs) with their equivalent in IndexMatic syntax:
// A => B
This should be easy as pie for your text editor.

Regarding actual queries, an immediate fact should then jump out at you. In almost all cases, a comma divides the input line into two parts. The prefix part then almost always constitutes a sufficient key to unambiguously identify this element in the document — provided that it does not collide with homographs.
For example, we shall assume that Aaron matches the entry “Aaron, Jeff (1936-2001)”, as does Alió-Barràs for “Alió-Barràs, Karl (1961)”, and so on:

There are, however, three exceptions to the general scheme:
Diophantos von Alexandria (ca. 250 n. Chr.)
Russell (1855)
Voltaire (Arouet, François-Marie) (1694-1778)
In the first two cases, no comma appears, which prevents us from extracting a relevant key. In the last case, the comma only occurs after the opening parenthesis — “Voltaire (Arouet,…” — which tends to produce a key that is too greedy (we would prefer Voltaire alone).
But we notice that in those circumstances, it is the opening parenthesis (preceded by a space character) which plays the role of optimal separator. So that the combination of the two options (PARENTHESIS or COMMA) produces a criterion always revealing the end of the search key. In regex code, the separator pattern that interests us is therefore expressed:
(\s\(|,)
(translate: “any space followed by an opening parenthesis, or comma.”) If we mentally apply this separator to the original list, we see (in blue below) all the KEYS that our query list should ultimately look for.

Remember this rule. We will only search the document for the elements in blue, but for each match we will associate the complete line as written by the client. Take for example the expression “Alió-Barràs, Karl (1961)”. We actually want our Query List to digest it like this:
/Alió-Barràs/Ih => Alió-Barràs, Karl (1961)
(in order to improve my regular expression, I just added the case sensitivity and generic hyphen options, hence the /Ih flags.)
Now that our objective is clear, the whole question is to implement this process by modifying the existing list as little as possible. This is precisely the purpose of the ~format (or ~split) directives.
Although ~split often works very well when it comes to splitting elements of the input line, I shall use ~format here because it gives more control over the incoming patterns and will allow the special cross-reference syntax to be bypassed.
→ IndexMatic³ Manual: ~format Directive Reference
The first argument to pass to ~format is a regular expression (ExtendScript dialect) that will parse any input line. The idea is to catch the portions that interest us in capturing parentheses, then rearrange them in order to produce the actual query, the one that will be received by IndexMatic's interpreter.
In this case, we want to capture all characters BEFORE the separator pattern (\s\(|,) since this will deliver our search key. But we want to capture this prefix under a double constraint:
1. On the one hand, using a “non-greedy” quantifier which guarantees a minimal match;
2. On the other hand, rejecting the slash character (/) so as to completely ignore the form //... which starts comments or cross-references.
The combination of all our criteria results in the regular expression
/^([^\/]+?)(\s\(|,)/
which can be broken down as follows:

We are only interested in the first captured element. In the directive output scheme, it is symbolized by ^1, while the complete line in its initial state is symbolized by ^0. The query we want to produce therefore looks like /^1/=>^0, to which we'll add security flags to manage case-sensitivity, generic space and generic hyphen: /^1/Ish=>^0.
This results in the complete directive that we will insert at the very beginning of the list (note the :: separator between the regex and the output pattern):
//~ format /^([^\/]+?)(\s\(|,)/ :: /^1/Ish => ^0
You may spend some time coming up with this command—which of course needs to be adapted to the formatting and punctuation of your own file—but remember that once you do that, the list instantly works as a pure Query List without any further editing. This means that it will act on all lines following it (unless it encounters a blank line or a stop directive), regardless of whether there are 100, 500, 1000 or 5000 items to process.
Note. — We even gave ourselves the ability to accept cross-references among incoming data. This little trick relies on the fact that when the ~format directive finds no match in the current line, it simply keeps the line as is and moves on to the next one.
So here is the list of queries ready to be loaded into IndexMatic³:
// IndexMatic3 Query List
// ---

//~ format /^([^\/]+?)(\s\(|,)/ :: /^1/Ish => ^0
Aaron, Jeff (1936-2001)
Alió-Barràs, Karl (1961)
// Ambroise => d’Ambroise
// Arouet => Voltaire
Béraud, Paul (père ~) (1705)
Bertholon de Lazare, Jacques (†1800)
Böhr, Walter (1906-1985)
Calmant, ? (†1840?)
Cochrane, Billy (1898-1938)
Dalla Volpi, Danilo (1925-1995)
d’Ambroise, Lucien (1967)
Diophantos von Alexandria (ca. 250 n. Chr.)
Ehner, Mike (1959)
Fermat, Pierre de (1607-1665)
Frézier, Amédée-François (1682-1773)
Guretzky-Cornitz, Bernhard von (1838-1873)
// Henry => Russ
Jänisch, Carl Ferdinand von (1813-1872)
Krebb, Daniel (1947)
La Croix de Castries, Charles E. Gabriel de (1727-1801)
Laplace, Pierre-Simon (1749-1827)
// Linde => van der Linde
Łuczak, Mario (1939-2009)
McKay, Brendan Damian McKay (1951)
Newton, Isaac (1643-1727)
O’Connor, Joseph (1939)
Parejo Casañas, Francesco N. (?) (1890-1983)
Rabelais, François (ca. 1494 [1483?]; †1553)
Russ, William Henry (1833-1866)
Russell (1855)
Schoumoff, Ilja (Stepanowitsch) (1819-1881)
Talleyrand-Perigord, Charles-Maurice de (1754-1838)
Ukers, William Harrison (1873-1945)
van der Linde, Antonius (1833-1897)
Vandermonde, Alexandre-Théophile (1735-1796)
Voltaire (Arouet, François-Marie) (1694-1778)
Witcomb, H. (1846)
Ximénès, Augustin-Louis, marquis de (1728-1817)
//~

// End of the directive scope
// Add additional queries if needed
There is probably no situation where ~format will cover all queries in your index. More subtle regular expressions are still needed to sort out homonyms, group spelling variations, and/or optimize search keys. However, directives provide a great batch processing tool when the vast majority of your index entries have a predictable, simple, and consistent structure.
Make `&` (almost) Behave as a Reference Operator 9 Aug 2024 2:35 AM (last year)
Suppose you have an ExtendScript class (I mean, “prototype”) whose methods essentially return new object instances. As an obvious example, consider the concat or slice methods of Array.prototype. They always produce a new array rather than reworking the existing one. There are situations where you want to update the calling object —and make this explicit in the code— while still leveraging the methods already available…
Of course, once a new instance is created, you have no other option than to copy it, in whole or in part, into your working reference. I will illustrate here a simple and rather amusing technique to achieve this task.
A few words about the motivation. We need to modify the internal state of an object already referenced (registered, if you prefer) elsewhere in the program. Even locally, a variable myVar can refer to an entity that we want to reconfigure in place, via a certain method that works fine but has the disadvantage of generating a new object.
The assignment myVar=myVar.createNewObj(args) then poses a problem. The myVar identifier is simply redirected to a fresh reference in memory and everything that was in the old reference is lost. So you haven't actually updated the existing object, you've simply pointed the variable to a new thing. (By the way, this consumes a little more memory with each new saved-and-lost reference, making life harder for the garbage collector…)
In a perfect world, a mutation method would exist and it would be enough to call
myVar.update_as_told_by_CreateNewObj(args)
to get the job done inside myVar. But by design many operations on composite objects (such as array concatenation, complex number processing, matrix product…) tend to spawn new entities, because developers assume that operands must persist, and they are certainly right to do so!
So let's consider the simplest example in the world, the traditional 2D point object. Here is one of many approaches to this structure:
// Constructor and prototype (ExtendScript syntax).
// ---
function MyPoint(/*num*/_x,/*num*/_y,/*?str*/_name)
{
   // Small hack: just makes `new` optional.
   if( callee!==this.constructor ) return new callee(_x,_y,_name);

   this.x = _x||0;
   this.y = _y||0;
   this.name = String(_name||"<none>");
}

MyPoint.prototype.toString = function()
{ return this.name+" : ("+this.x+","+this.y+")" };

MyPoint.prototype.newScaled = function(k)
{ return MyPoint( k*this.x, k*this.y) };


// Create two points.
// ---
var p1, p2;

p1 = MyPoint(1,3, "p1");
alert( p1 ); // => "p1 : (1,3)"

p2 = p1.newScaled(5);
alert( p2 ); // => "<none> : (5,15)"
The little curiosity is that I added a name property so that we can identify different instances of MyPoint. The newScaled method multiplies a point by a given factor and returns a new object, and you can easily imagine all the operations of the same kind (addition, subtraction, vector product, and so on).
Thanks to the custom toString method, you instantly notice that the point p2 — i.e. p1.newScaled(5) — has no name. This clearly highlights it is a separate instance, returned by a generating function that leaves p1 unchanged.
Now here is our problem:
// ...

var p3 = MyPoint(2,-1,"p3");

// then...
p3 = p3.newScaled(7);

alert( p3 ); // => "<none> : (14,-7)"
This code is perfectly normal, yet it does not satisfy our secret hopes. It's now a well established fact that p3.newScaled(7) had to return a new instance of MyPoint, ok with that, but how could we properly reassign p3 (the identifier) such that the original instance persists and modifies its internal data as told by ...newScaled(7)?
In particular, how could the scheme
p3 = ... p3.newScaled(7);
maintain the p3.name property unchanged? (Don't lose sight of the essential constraint: the newScaled method is implemented that way and can no longer be adapted to our needs.)
Considering that newScaled(...) —and probably all operating procedures of your class— systematically produces a new instance, a requisite is to add to the prototype a method copying certain data (here, the x,y coordinates) from a source object into the active object (this). The fun fact is that such a cloning helper can be implemented by operator overloading:
MyPoint.prototype['&'] = function(arg)
{
   // Copy arg coordinates in this, then return this!
   // Operation: `P & arg`
   this.x = arg.x;
   this.y = arg.y;
   return this;
};
Look carefully at the code above. What does it mean? It defines the semantics of an expression of the form P & Q, where P and Q denote MyPoint instances. It turns out that, in JS, the default behavior of obj1 & obj2 expressions is supremely uninteresting —unless obj1, obj2 are integers. So the & operator seems ideal for our purpose.
The ExtendScript interpreter silently translates the expression P&Q into P["&"](Q), which calls the above method from P (becoming the this context) and pass Q as argument.
Note. — A second argument (boolean) is passed to the operator-method, but we won't worry about it here.
So you can see that our custom operator is responsible for transferring the coordinates from arg to this (that is, from Q to P) and, crucially, the function returns this. This means that the address of P&Q is still the address of P; in code:
(P&Q) === P // true (for MyPoint objs)
Note. — The parentheses are important in the above test because equality operators have a higher (just slightly higher) precedence than bitwise operators. Fortunately, this is not the case with the assignment operator!
Let's use our new toy:
// ExtendScript syntax for constructor and prototype.
// ---
function MyPoint(_x,_y,_name)
{
   // Makes `new` optional:
   if( callee!==this.constructor ) return new callee(_x,_y,_name);

   this.x = _x||0;
   this.y = _y||0;
   this.name = String(_name||"<none>");
}

MyPoint.prototype.toString = function()
{ return this.name+" : ("+this.x+","+this.y+")" };

MyPoint.prototype.newScaled = function(k)
{ return MyPoint( k*this.x, k*this.y) };

MyPoint.prototype['&'] = function(arg)
{
   // Copy arg coordinates in this, then return this!
   // Operation: `P & arg`
   this.x = arg.x;
   this.y = arg.y;
   return this;
};

// New test:
var p4 = MyPoint(-8,6,"p4");

// Call newScaled() and update p4 itself (!)
p4 & p4.newScaled(0.5);
alert( p4 ); // => "p4 : (-4,3)"
It works, but the expression still looks a bit twisted. What happens is that p4.newScaled(0.5) returns a new point (Q) which is then copied into p4, thanks to our custom P&Q processing. There remains a kind of optical problem, p4 & p4... doesn't look like a direct modification of the p4 object. Can we improve that?
Since p4&... remains stricly equal to p4, an equivalent rewrite of the above operation would be:
p4 = p4 & p4.newScaled(0.5);
which just makes the code unnecessarily longer! Yet this is where our latest trick comes into play: p4 = p4&... can always be abbreviated p4 &= ..., so we finally get this:
p4 &= p4.newScaled(0.5);
More generally, any expression of the form
P &= (any code that yields a point)
will load the data in P as-a-reference, while
P = (any code that yields a point)
still renews P with a new reference.
This difference between P and P & —which means nothing in native JavaScript!— here mimicks a syntactic nuance well known to C programmers.
HurryCover³ | Make Book Covers & Jackets in InDesign 5 Jul 2024 9:09 AM (last year)
It’s official! Building a book cover in InDesign will no longer be a geometric nightmare. The new edition of HurryCover is intended to be a definitive answer to the puzzle of complex templates: with or without flaps, with or without wrap, whether you need a hinge margin or a physical spine gap, the template generated by HurryCover³ remains 100% resizable, even if you have already set up the graphic elements of your artwork…
Version 3 of HurryCover — rebuilt in the IdExtenso framework — is not a simple facelift. Graphic designers, publishers and printers will finally find the technical refinement that was missing from previous deliveries. Judge for yourself:
1 — A template for each project: Soft/Hard Cover, Dust Jacket.

KEY FEATURE. You work safely with a well-defined template, equipped with its own options, for example the wrap area (typically 15 mm) for hard covers. The Dimensions panel adapts to the chosen model. Note that hard covers were not specifically managed by HC 2.
2 — Fine-tuned Margins (side, hinge, spine).

KEY FEATURE. The internal margins of your book cover act as “safety nets” beyond which the printer is no longer responsible! Some service providers also include this measurement among their specs. It is then necessary to distinguish the top/bottom margins, the regular side margins, the hinge margin on either side of the book spine, and a smaller (interior) spine margin. When you unlink the side margin from the hinge margin, HurryCover automatically creates the guides and marks associated with this fold.
3 — Crop Marks versus Fold Marks.

KEY FEATURE. Optionally, HurryCover adds printer's marks (called ‘fold marks’ and ‘crop marks’, respectively) on its reserved, upper layer. You can define their weight and style (solid, dashes, dotted). These elements are of course based on the [Registration] swatch — with a fine [Paper] border to keep them visible on dark-colored bleeds. The Bleeds menu controls the distance of these marks from the edge of the page. It is now possible to assign a separate offset to crop marks, distinct from that applied to other marks.
4 — Switch between Measurement Units, “Revert” button.

KEY FEATURE. The flexible management of measurement units is one of HurryCover's trademarks. Behind the scenes, the program uses high-resolution values, precise to a millionth of a point, which results in conversions even more accurate than those displayed in InDesign or print-on-demand services. (As an example, Amazon KDP gives inch ↔ millimeter equivalences that are distorted by rounding errors.) In HurryCover, you can click the Revert button at any time, which also restores your original unit. Remember that all editboxes accept inputs in any explicitly provided unit — e.g. “18 pt” —, the value will then be converted into the active unit.
5 — Dynamic Book Preview.

KEY FEATURE. HurryCover 3 offers a simplified view of the book. This viewing area reacts to any change in the main dimensions (width, height, spine) and roughly indicates the flap/wrap guides. This is obviously not a faithful 3D rendering, but this little auxiliary tool allows you to appreciate at a glance the relevance of the dimensions you enter.
6 — Custom export in PNG and/or JPEG formats

KEY FEATURE. Unlocked in the PRO version, the Export feature translates your cover template into images of the selected parts (front cover, back cover, spine, etc). It's a great tool for creating PNG or JPEG thumbnails that can be quickly uploaded into your website or online store. For each output format, you'll set either the height (in pixels) or the resolution (in pixels per inch). It is even possible to add a thin border in an RGB color of your choice.
7 — Repositioning and “Auto Layout”.

KEY FEATURE. When any dimension change (for example the spine width, i. e. the thickness of the book), the automatic adjustment of the artwork takes into account all the construction lines. Part of the process involves moving objects according to the anchor points of the cover. A more advanced option — available only in the PRO version — is to “snap” reference lines (including margins, if you wish) so objects in contact are automatically resized or reframed. The Preferences > Auto Layout menu allows you to refine the scope of this algorithm.
8 — Support for print-on-demand services.

KEY FEATURE. As an experiment, the PRO version of HurryCover 3 incorporates settings from print-on-demand services such as Kindle Direct Publishing, Books on Demand, and more to come. The animation above shows how easily you select a service and a set of compatible, interrelated options. You can then convert your current project into a valid POD template with very few manual adjustments at the end.
The few examples given above are far from covering all the new features included in HurryCover 3 (guide colors, extended metadata, footer options…), so:
Don't take my word for it!
• Just install and test the TRY version. If you have used HurryCover 2 before, the difference should be obvious to you. (Note that hC³ and hC² are totally independent scripts. Both can be installed in InDesign without conflict.)
• How is the TRY version limited? All the features are available except three: Auto Layout, Export, and the integration of print-on-demand services. It is however very sufficient to evaluate the program, and even use it in production.
• Upgrade Price. The regular price for one HurryCover 3 lifetime license is €49. However, a €20 discount applies to HurryCover 2 users whenever they decide to purchase the new version. More detailed instructions are provided in the order form.
Acknowledgments
To pay tribute to the shadowy artisans who have nourished the HurryCover saga since the beginning — starting with its godfather, Jean-Christophe Courte — we would have to roll out endless credits! So I reduce the sail and fraternally greet the key players of season 3: Colin Flashman, Emmanuel Fumoleau, Iván Gómez, Nicolas Pichou, Daniel Roudaut, Laurent Tournier, Jean-Claude Tremblay, Camilo Umaña.
Indiscripts Temporary Archives [UPDATE] 2 Jul 2024 6:47 AM (last year)
Some scripts we designed in the past for InDesign CS/CS2/CS3—and even CS4—are no longer available or maintained. But, from time to time we still receive queries for these old files—such as IndexBrutal, IndexMatic, Claquos, Equalizer, HurryCover, BookBarcodeCS3… Here is a special repository dedicated to frustrated users.
BookBarcode TRY (CS3)
Note. — BookBarcode 2.039 (June 2021) no longer supports InDesign CS3. Here is the previous “TRY” version, which despite its restrictions (timer and no batch processing) can still be used to generate EAN13 barcodes in CS3.
EAN13 Barcode Builder for InDesign CS3 — EN/FR/DE — Version 2.035 (Sept. 2010). Download the TRY version
→ See also: BookBarcode for ID CS4/CS5/CS6/CC.
Claquos 1
Pie Chart Builder for InDesign CS/CS2/CS3 — EN/FR — Version 1.2b (Sept. 27, 2007). Download the archive
→ New version: Claquos 3 for ID CC/CS6.
Equalizer 2
Easily reposition and/or resize selected objects from the contextual menu, InDesign CS4 — EN|FR|DE|RU|AR|ES — Version 2.091 (Dec. 7, 2012). Download the archive
→ New version: Equalizer 3 for ID CS4/CS5/CS6/CC.
HurryCover 1 & 2
HurryCover 1, book cover manager for ID CS/CS2/CS3 — EN/FR — Version 1.1b (Sept. 27, 2007). Download the archive
HurryCover 2 for ID CC/CS6/CS5/CS4 — EN/FR/DE/ES — Version 2.028 (Feb. 19, 2021). No longer in our catalog as of May 15, 2024, this product has had a long life (2012-2024) and much recognition. You can still install the TRY version; it provides great features, except the ability to update the book cover once created. Download the TRY version
→ New version: HurryCover 3 for ID CC/CS6/CS5/CS4.
IndexBrutal & IndexMatic 1
IndexBrutal. — Index-by-word-list Tool for InDesign CS/CS2/CS3 — EN/FR — Version 2.1b (Oct. 12, 2009). Download the archive
Note. — A patch has been applied to IndexBrutal to fix a UTF-8 issue, but this is in essence the very first version of the script.
IndexMatic 1. – Index-by-style Tool for InDesign CS2/CS3 — EN — Version 1.02b (July 15, 2008). Download the archive
Note. — IndexBrutal and IndexMatic 1 are still available here for the sake of archiving and to provide reasonable alternatives to CS2 users. Anyway, those ‘ancient’ scripts have been definitely overtaken by IndexMatic³ for InDesign CC/CS6/CS5/CS4. IndexMatic³—abbreviated iX³—integrates all the functionnalities of IndexBrutal + IndexMatic 1 + IndexMatic², but it also provides unparalleled features and results because of its ability to combine a large number of settings and filters. iX³ is based on a completely different implementation, algorithm, and query interpreter. I strongly encourage new users to discover this solution:
→ New version for experts: IndexMatic³ for ID CC/CS6/CS5/CS4
InDiCode
Unicode Analyzer for InDesign CS/CS2/CS3 — EN/FR — Version 1.0c (Sept. 27, 2007). Download the archive
SwapItems
Swap two selected objects, InDesign CS/CS2/CS3 — Version 1.0 (Aug. 30, 2006). Download the archive