How to Make Your Laundry Dry Faster (Without Buying a New Dryer) 30 Oct 1:26 PM (21 hours ago)


You know the feeling—you hear the dryer beep, expecting a warm, fluffy pile of clothes, but when you reach in… they’re still damp. So you close the door, restart the cycle, and hope this time it’ll finish the job.
When that keeps happening, it’s easy to assume your dryer is on its last leg. Maybe it’s the heating element, or maybe it’s just getting old. But before you start researching repair costs or shopping for a new machine, there’s a much simpler (and cheaper) fix worth trying first: wool dryer balls.
It’s one of those things that sounds almost too simple, but it really does work—just ask Darleen:
“My dryer heating element is going out, and I was desperate for some drying help while I get the dryer figured out, and guess what? Yep, you guessed right, the dryer balls make a HUGE difference in the time it takes my dryer to dry. I was skeptical at first, but I was desperate, and Jillee is the real deal and true to her word! I am so happy!”
When I read Darleen’s message, I knew I had to share it—because she’s far from the only one who’s noticed this kind of difference. And the best part is, there’s real science behind it.

The Simple Science Behind Dryer Balls
Wool dryer balls might look unassuming, but there’s a reason so many people swear by them. They make your laundry dry faster—not by magic, but by improving how air and moisture move inside your dryer.
Here’s what’s happening behind the scenes:
They Improve Airflow
As the balls tumble around, they separate layers of damp fabric and create small pockets of air throughout the load. Those air gaps allow heat to circulate more freely, so moisture can evaporate faster instead of getting trapped inside twisted towels or tangled sheets.
They Absorb and Release Moisture
Wool fibers can hold up to 30% of their weight in water without feeling wet. Early in the drying cycle, the balls soak up a bit of moisture from your laundry, then slowly release it as steam. That gentle steam helps prevent static and wrinkles while speeding up overall drying time.
They Keep Clothes From Clumping Together
Bulky items like bedding and jeans tend to twist into tight balls that trap damp air inside. The dryer balls help break up those clumps, ensuring that every item dries evenly and efficiently.
“I recently purchased new sheets. I love them, but for some reason, they sometimes come out of the dryer with pillow cases pushed into the corners of the fitted sheets, and they always have areas of the sheets that are still wet. Try as I would to separate everything as they went into the dryer, it was not helping.
Then I read Jillee’s article about dryer balls. I didn’t have a lot of hope, after all, I had used dryer balls in the past without much luck. Jillee said these were not the same as others, that they were wool and would help to keep things separate in the dryer! Ok, I thought, I’ll try them. I will try anything at this point.
I washed my sheets last night. Placed them in the dryer, the same way I always do, but put the balls between the fitted and flat sheet. Once the dryer stopped, indicating the sheets should be dry, I opened up the door to find…everything dry, clean, and just perfect! I am so happy with these!!! I couldn’t believe what a difference these dryer balls made, so glad I purchased them! Thank you, Jillee!!”
Janice D.
All those small improvements add up! A typical load of laundry takes 45 to 60 minutes to dry in a standard household dryer, and heavier loads—like towels or bedding—can stretch to 75 minutes or more. When you add wool dryer balls, that time often drops by 10 to 25%, depending on your fabric type and load size
That means:
- A 60-minute load might finish in 45 to 50 minutes
- A 75-minute load could finish in 55 to 60 minutes
Even shaving off 10 or 15 minutes per load makes a noticeable difference—saving energy, reducing wear on your dryer, and giving you one less thing to wait on.
“I wondered if I would notice a difference in the length of time it takes to dry a usual load but I noticed that it does indeed take less time for a usual load and even a heavy load like my bedding. Works great!”
Andrea B.

Why It’s Worth Helping Your Laundry Dry Faster
Sure, it’s nice to finish laundry sooner—but there are plenty of other reasons to care about how efficiently your dryer works. When your clothes dry faster, you save energy, protect your fabrics, and make your whole laundry routine a little easier.
You’ll Save On Energy Costs: Your dryer is one of the biggest energy users in your home. Cutting just 10–15 minutes off each cycle can lower your energy use (and your utility bill) by as much as 20–25%. Over the course of a year, that adds up to real savings—especially if you’re running multiple loads every week.
“My electric bill has increased considerably this past year, and I am trying to cut corners wherever I can. We have four adults in the house, and they use a lot of towels for bathing, showering, etc. The one thing I started to do was put several towels in the dryer at one time to try and save a bit on power. The problem was that, at the end of the dryer cycle, some of the towels were dry, but some of them were still damp. I had to put the damp ones back in the dryer again.
I then decided to order the dryer balls, hoping they would help me with the dryer problem. Wow, did they ever help. I put two of the dryer balls in a very large load of wet towels, and they all came out perfectly dry. I was so pleased to find the answer to that problem. These dryer balls are a must-have.”
Sharon C.
Your Dryer Will Last Longer: The less time your dryer has to run, the less wear and tear it experiences. Shorter drying cycles mean less strain on the motor and heating element, which can help your appliance run more efficiently for years to come.
Your Clothes Will Last Longer, Too: Heat and friction are tough on fabric fibers. Reducing drying time helps minimize fading, pilling, and shrinking—so your clothes, towels, and bedding stay looking and feeling their best.
You’ll Reduce Wrinkles And Static: When clothes spend less time tumbling in hot air, they’re less likely to over-dry, which is one of the main causes of static cling and deep-set wrinkles. The bit of natural humidity from wool dryer balls helps prevent both.
“What a difference! I read the reviews before I bought this product. I had to see for myself it was true. And yes! My drying time was reduced and there were less wrinkles in my clothes.”
Judy W.
You’ll Save Time (And Maybe Your Sanity): A faster-drying load means you can finally keep the laundry moving—no more waiting around to switch the next load or start folding before bed.
Those benefits are what make wool dryer balls such a small but mighty upgrade for your laundry routine. You’re saving time, money, and energy—not to mention giving your clothes and dryer a longer life.

How To Use Wool Dryer Balls
Using dryer balls couldn’t be easier—just toss a few of them into your dryer along with your wet laundry! I usually use between four and six balls at a time, depending on the size of the load.
If you’ve never tried them before, now’s a great time to see what a difference they can make—our Fall Cleaning Sale has them 30% off, just $17.49 for a 6-pack (regularly $24.99)!
Or, if you’re ready for the full laundry refresh, the Laundry Kit is 40% off and includes a set of dryer balls, a bottle of my Freshly Washed Essential Oil Blend, and my How to Wash Everything eBook. It’s everything you need for naturally fresh, faster-drying laundry.

4 Other Easy Ways To Help Laundry Dry Faster
Wool dryer balls can make a big difference on their own, but you’ll get the best results when you combine them with a few simple drying habits.
1. Don’t Overload (Or Underload) Your Dryer
Fabric expands as it dries, which means an overstuffed drum doesn’t leave enough room for air to circulate. Too few items can cause clumping and wasted energy. Split large loads into two smaller ones, and if you’re drying just a few items, toss in a couple of clean, lint-free towels to help everything tumble more freely.
2. Take Advantage of Residual Heat
If you have multiple loads to do, run them back-to-back. The dryer drum stays warm from the previous cycle, so you’re not starting from room temperature each time. Avoid opening the door mid-cycle, too—every time you do, you lose built-up heat and add extra minutes to your drying time.
3. Keep Your Lint Trap Clean
A clogged lint screen restricts airflow, forcing your dryer to work harder and run longer. Clean the lint trap before or after every load, and once a month, wash it with warm, soapy water to remove any residue from fabric softeners or dryer sheets.
Read More: These Simple Dryer Tips Can Help Prevent A Fire
4. Deep Clean Your Dryer Regularly
Lint and dust can collect inside the vent hose and around the drum. Taking a few minutes once a month to vacuum those areas helps air move freely and reduces the risk of dryer fires.
Even a few of these small adjustments can add up to big time and energy savings—and they’ll help your dryer perform at its best.
When To Call A Repair Tech (Or Start Shopping For a New Dryer)
If you’ve tried all the easy fixes—like cleaning the lint trap, lightening your loads, and adding wool dryer balls—and your dryer still seems to run forever, it might be time to call in a professional.
Here are a few signs that something bigger might be going on:
- It’s taking more than 90 minutes to dry even small loads.
- Your dryer or laundry room feels unusually hot.
- You smell something burning or notice unusual noises.
- Your dryer is 10–15 years old.
When in doubt, start by checking your dryer vent—it’s one of the most common culprits for slow drying times. If that’s clear and the problem persists, it’s worth calling a repair tech before assuming you need a new machine.

If your dryer feels like it’s taking all day to finish a single load, don’t give up on it just yet. A few simple tweaks—starting with a set of wool dryer balls—can make a surprising difference.
They’re an easy, affordable upgrade that saves time, energy, and frustration. And right now, you can get them for 30% off during our Fall Cleaning Sale!
Pair them with the Laundry Kit for even more savings, and enjoy the satisfaction of laundry that dries faster, smells fresher, and feels softer—without buying a new dryer.


This Viral Grout Cleaner Is Actually Pretty Amazing 29 Oct 2:44 PM (yesterday, 2:44 pm)
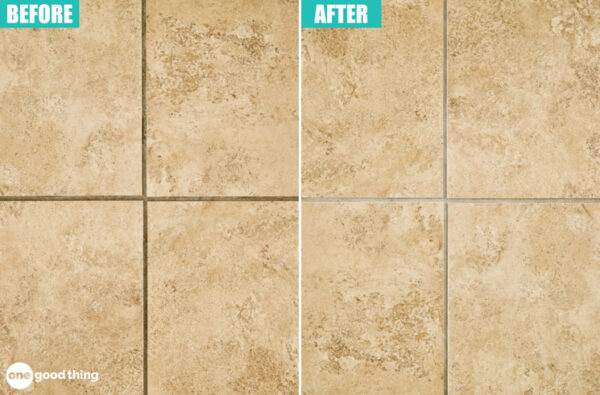

Does This Viral Grout Cleaner Live Up to the Hype?
The purpose of this blog has always been to share the very best homemaking tips that can help you save money and time. So when I started seeing all sorts of amazing claims about Zep Grout Cleaner on social media and around the web, I knew I had to find out if it was really worth the hype, so I could pass that information along to you!
Before we get to my honest review, I want to review some of the basics of what this grout cleaner is, how it works, and share some of the hype that inspired me to give it a try for myself.
Related: Here’s How To Clean Grout So It Looks Like New

Zep Grout Cleaner: What Is It & How Does It Work?
Believe it or not, this professional-strength grout cleaner doesn’t rely on bleach for its cleaning and brightening power. Its main active ingredients are urea hydrochloride and hydrochloric acid, “strong but safe” acids that generate a bubbling action that immediately gets to work lifting grime and muck off of grout and other surfaces.

What Are People Saying About Zep?
This viral TikTok video initially brought my attention to Zep Grout Cleaner. After reading up on the product online, I came across plenty of rave reviews from Amazon customers who had tried it in their bathrooms, including these:
- “Wow, wow, wow! I am blown away by the cleaning power in this stuff! I have struggled with my bathroom floors consistently for five years. Between the water and traffic, my floors have taken a serious beating. Coincidentally, I was on TikTok watching cleaning videos, and this was used. I figured, what the heck do I have to lose? Much to my surprise, it BLASTED through tough dirt and grime! I applied the cleaner…and boom, brand-spanking-new tile floor.”
- “This product worked miracles in our bathroom. When we moved in, the grout was a dark gray from years of dirt buildup. This product was unbelievable. It only took one application to work its wonders. All-around incredible transformation!”
Between the video and reviews like these, I’m sure you can see why I simply had to try it out for myself!

Zep Grout Cleaner Review: My Honest Opinion
I have to admit, I was amazed by how well this product worked on my grout. In fact, I think my Zep Grout Cleaner before and after photos at the top of this post speak volumes about its effectiveness!
You can see it start to work as soon as you apply it. You simply apply it to a small section, let it sit for a couple of minutes, scrub with a grout brush or old toothbrush, then rinse with water. It’s so easy!
Zep is also a huge time-saver, removing age-old stains and discoloration without a lot of arduous scrubbing. In addition to being a cleaner, this product is also a brightener, so it leaves tiles looking sparklier as well. (As always, it’s a good idea to test it out in an inconspicuous area to see how your grout and tile react to it before getting started!)
How Does It Compare To Other Grout Cleaners?
I’ve tried other grout cleaners, including Soft Scrub Gel with Bleach, another popular option for cleaning grout. I didn’t like it as much for two reasons: first, I find bleach too harsh on grout, and I find that a gentler approach keeps grout in better shape. Second, it was a bit messy and difficult to use. (Zep has a thinner formula that makes it a lot easier to use on large areas.)
In my opinion, the best grout cleaner for everyday cleaning is a solution of water, vinegar, and dish soap. But I also understand that really grimy grout lines may need an extra-strength cleaner to make a distinct difference. In those instances, Zep is an excellent option, and I know I’ll be adding it to my list of miracle solutions for cleaning floors!

Tips For Using Zep Grout Cleaner Safely And Effectively
If your grout has been sealed, you may need to remove the sealer with a strong stripper before using Zep to avoid uneven cleaning results. This can be quite the chore, but it would be worth the effort in the long run!
Even though Zep is safe to use as directed, it’s a powerful cleaner that should be used in a well-ventilated area and handled with care. Keep it away from your skin, and never mix it with other cleaning products (which, as we all know, can be a dangerous cleaning mistake!)
And finally, although Zep works wonderfully on ceramic tile and grout lines, it should NOT be used on marble, terrazzo, travertine, natural stone, chrome, stainless steel, brass, or Corian. Better safe than sorry!
Check Out My Other Product Reviews!
- My reviews of various vacuums: The Best Vacuum For Your Money (And Other Great Vacs)
- My review of a viral multi-purpose cleaner: This Colorful Cleaner Is Trending Online For Good Reason
- My review of a viral stain remover: I Tried The Highest Rated Stain Remover On Amazon, And Here’s My Opinion
Do you have any grimy grout lines that could use a good cleaning?
How To Use Zep Grout Cleaner
Equipment
- Bucket
- Scrub Brush
- Towels or cloths
Ingredients
- Zep Grout Cleaner
Instructions
- Apply Zep to a small section of dirty grout and let it sit for a couple of minutes.
- Scrub with a grout cleaning brush or an old toothbrush.
- Rinse the area thoroughly with water.
- Dry the area with a clean towel or cloth.
Notes
- If your grout has been sealed, you may need to remove the sealer with a strong stripper beforehand to avoid uneven cleaning results.
- Zep is safe to use as directed, but it is a powerful cleaner that should be used in a well-ventilated area and handled with care. Keep it away from your skin, and never mix it with other cleaning products.
- Zep works wonderfully on ceramic tile and grout lines, but should NOT be used on marble, terrazzo, travertine, natural stone, chrome, stainless steel, brass, or Corian.
9 MORE Brilliant iPhone Hacks That Will Make Life Easier 28 Oct 2:12 PM (2 days ago)


Just when I think I know everything there is to know about my phone, I learn another tip or trick that proves me wrong! And with as much as I rely on my phone throughout the day, discovering new features not only saves me time and frustration, it often makes my life a little bit easier too!
But since I can’t keep a good tip to myself, I tuck away all the clever iPhone hacks and tips I learn so that someday, I can share them with you here on my blog! And that someday is today, because I’ve collected a fresh bunch of 9 useful tips that will help you make the most of your iPhone!
(If you missed any of my previous installments of iPhone hacks and smartphone tips and want to revisit them, I’ve provided a list of links to them at the bottom of this post!)
9 More Brilliant iPhone Hacks

1. Homework Help
The calculator app is already useful for calculating tips and splitting up costs, but it can also come in handy for solving more complicated equations too! With the calculator app open, hold your phone in landscape mode to reveal additional buttons and functions that aren’t visible in portrait mode.
Now you won’t have to go digging for your old graphing calculator every time you want to help your kids or grandkids with their math homework. :-)

2. Hide Photos
We all hand our phones over to friend or family when we have a photo or video we want them to see, but it can be little nerve-racking if your photo library also contains private photos or screenshots of sensitive information! For a quick fix to this problem, start utilizing the Hidden album within your photo library. Simply scroll to a photo you want to hide, tap the three dots in the upper right corner, then select Hide.
The photo will disappear from all folders and locations within your library, but will remain safely tucked away in your Hidden folder (which you can access via the Albums tab under the Other Albums header.) Thanks to this handy feature, you can hand over your phone without worrying about accidental photo swipe mishaps.

3. Fix Your Sleep Schedule
Could you use some help setting and sticking to a normal sleep schedule? There’s a handy feature in the Clock app called Bedtime that is designed to do just that!
Just tap the Bedtime tab at the bottom of the Clock app, then hit the Set Up button to get started. You’ll tell the app when you want to wake up, when you’d like to go to bed, what type of alarm you want to wake up to, and which days of the week you want to follow your new schedule.
Once it’s up and running, your phone will notify you when it’s time for bed and automatically enable the Do Not Disturb function for you. And over time, Bedtime will also let you know how well you’re doing at hitting your sleep targets.

4. Flash Notifications
There are now more options than ever for choosing how to receive notifications from your iPhone. In addition to the standard options of audio alerts and vibrating notifications, you also have the option to receive visual notifications in the form of an LED flash from your phone’s light.
To use flash notifications, go to Settings > Accessibility > Hearing > Audio & Visual. At the bottom you’ll find LED Flash for Alerts — toggle the switch to turn it on.

5. Pump Up The Volume
Want to play some music, but the volume from your iPhone’s speakers just isn’t cutting it? Go to Settings > Apps > Music > and turn off the Sound Check toggle.

6. Fine Tune Your Flashlight
You probably already know you can use your phone as a flashlight by swiping up and tapping the flashlight icon. But you may not know that the brightness of the flashlight function is fully adjustable!
Instead of tapping on the flashlight icon, press down and hold it to bring up the brightness slider. I frequently use my phone’s flashlight to navigate around my bedroom during the night, and I’m so happy to have learned how to dim the flashlight to avoid blinding myself!

7. Close Multiple Apps
To close apps you aren’t currently using, access the App Switcher by double clicking the Home button and then swiping up on the apps you want to close. (For models from iPhone X and later, you access the App Switcher by dragging up from the bottom of the screen.)
But if you have a lot of apps open that you want to close, that can be a lot of swiping! You can make the process faster by using multiple fingers to swipe up on multiple apps to close them at the same time.

8. App Finder
If you have a lot of apps on your phone or use a lot of different folders to keep them organized, it can sometimes take a while to find the app you’re looking for! If you’re in a hurry and you need that app now (say, to Shazam a song that’s about to end) using the search function can be a lifesaver.
From your home screen, swipe down to bring up the search bar. Start typing in the app name, and it will pop right up! (You can also use this search bar to find contacts, messages, emails, and more.) If you only need to find an app, there’s a dedicated app search on the last page of your home screen – just swipe to the end.

9. Custom Emoji Shortcuts
One of the recent iOS updates introduced emoji suggestions to the keyboard experience, where it suggests emojis to use based on the text you’re writing. But if Apple’s emoji choices just aren’t reflective of your own unique emoji language, you can set up your own custom emoji shortcuts!
To create one, go to Settings > General > Keyboard > Text Replacement. Enter the emoji(s) into the “Phrase” field, and set a trigger word into “Shortcut” field. (For example, you could type “ugh” to trigger the eye-rolling emoji, etc.)
Want Even More Smartphone Hacks?
- For even more clever hacks that will make your smartphone more useful and easier to use, check out the other posts in the “iPhone Hacks” series!
- Click here to explore the “iPhone Hacks” series archive.
Do you know any clever iPhone hacks that aren’t mentioned here?
These Unassuming Mixing Bowls Are Secretly The Best Ever 27 Oct 2:35 PM (3 days ago)


Sometimes it’s the little things in life that bring us the most joy. Whether you’re sipping your favorite hot drink on a rainy day or your favorite song comes on the radio while you’re running errands, the little things provide moments of joy that can brighten our everyday routines.
And nothing has brightened my everyday routine as much as one particular kitchen item that I bought recently. So today I want to tell you all about it, and explain how such an innocuous purchase has managed to improve my time in the kitchen by such a large margin!

Stainless Steel Mixing Bowl Set With Lids
I recently decided to buy a set of three stainless steel mixing bowls after reading about them on Epicurious. I didn’t necessarily need to replace my current mixing bowls, but I was curious to see if I might like them better.
And honestly, I never anticipated that I would end up loving this set of bowls as much as I do! And here are a few of the specifics on why these particular bowls are so nice to have in the kitchen.
5 Things I Love About These Mixing Bowls

1. The Set Includes 3 Useful Sizes
One thing I like about this set is that each bowl is a different size. You get a 1 1/2-quart bowl, a 3-quart bowl, and a 5-quart bowl, which makes each one useful for a different sort of cooking or baking task.
Between the three sizes, they work perfectly for about 99% of kitchen tasks that require a mixing bowl! (The only time I need to use a different bowl is when I’m making a huge batch of holiday treats—then I use my 12-quart bowl instead.)

2. Each Bowl Has Its Own Lid
Each bowl in the set comes with its own sturdy plastic lid. The lids are so useful when it comes to storing leftovers, chilling doughs or dressings, and more!
It may not seem like a big difference at first, but using a lid rather than covering the bowl with plastic wrap. But snapping a lid on top is so much faster than struggling with plastic wrap, and saves me a lot of frustration!

3. They Have Tall Sides
Mixing something in a shallow bowl can be so frustrating because the food has a tendency to jump out over the sides. But that’s a non-issue with these bowls, because they have extra tall sides that help keep everything contained!
Another reason why I like the taller profile of these bowls is that they take up less room in my fridge. Wide, shallow bowls take up a ton of space, and I never have much room to spare in my fridge to begin with!

4. They’re Lightweight (Yet Sturdy)
While I love the look of ceramic mixing bowls, I don’t love how heavy they are. It makes it more of a chore to pull them out of low or high cupboards when you need them.
But these mixing bowls are made of stainless steel, making them very lightweight! They’re easy to take out of any cupboard, even if they’re nested together.
But if you’re worried about sacrificing sturdiness for a lighter material, never fear! These bowls certainly aren’t flimsy, and they don’t wobble around like some stainless steel bowls tend to do.

5. They Pour Neatly
It’s hard to anticipate how easily you’ll be able to pour something out of any given bowl. But you can rest assured that these bowls work perfectly for pouring!
They have a flat rim that prevents liquids from simply running down the side when you’re trying to pour them into another container. They’re much more neat and tidy than other bowls I’ve used in the past.
So if you’re in the market for some new mixing bowls, consider giving this set a try! They’ve certainly brought more joy into my kitchen, and I know they’ll do the same for you! :-)
Do you have a favorite item in your kitchen you would recommend to others?
7 Things You Should Clear Out of Your Fridge 26 Oct 12:34 PM (4 days ago)


I think we all put things into our refrigerators without really thinking it through from time to time, especially when we’re in a hurry or multitasking. I know I make a lot of assumptions about what foods will stay safe and delicious in the cold environment of my fridge, but that’s not always going to be the case!
Some things don’t belong in your fridge for longer than a few days, for reasons ranging from bacteria and mold growth to bad smells. If these 7 foods are in your fridge, you may want to evaluate whether you’re better off tossing them out.
7 Things in Your Fridge You Should Throw Away

1. Old Homemade Dressings or Sauces
Store-bought sauces and dressings contain preservatives, but your tasty homemade versions don’t. For that reason, homemade dressings and sauces don’t really keep for more than a week or so. If you’ve got any that are older than that, it’s time to throw them out.
The next time you whip up your favorite sauce, try mixing up just enough for tonight’s dinner. If you still have leftovers, mark them with the date and use them up as soon as you can.

2. Double-Dipped or Shared Foods
Unfortunately, germs from our noses and mouths can easily be transferred to the foods we eat. Anything in your fridge that has already come in contact with someone’s mouth should be thrown out, including that sandwich you only took a couple of bites from!
To avoid wasting food, put out small dishes for each person to use for dips, and make it a firm rule that there will be no drinking from cartons. If you like to bring home leftovers when you go out to eat, ask for a box right away and divide your meal before you start to eat. Refrigerate the leftovers as soon as you get home and eat them within a couple of days.

3. Dairy in the Door
Although some refrigerators come with a cute little egg keeper in the door, it’s not the safest place to keep your eggs or dairy products. That’s because the shelves inside the door can stay up to five degrees warmer than the rest of your fridge.
Reserve your refrigerator door shelves for condiments, soda, and other foods that contain preservatives. If you’ve been storing dairy or eggs in the door, you’ll want to at least evaluate how fresh they are, and possibly toss them out.

4. Open Containers
Having food in an uncovered container isn’t always a food safety issue, but uncovered foods can easily dry out and lose their flavor (not to mention fill your refrigerator with food odors!)
Avoiding these problems is easy—just be sure to store your food in lidded containers or cover the containers with plastic wrap before refrigerating. As for what’s currently in your fridge, anything that’s dried up or has a hard film on top should get tossed.

5. Old Cooked Meat
I love saving money and time by cooking up several pounds of ground beef or a couple of chickens at a time, but those leftovers shouldn’t be stored in your fridge for more than a few days. If you’re pre-cooking for future dinners, cool the food in your fridge before wrapping them up or sealing them in something airtight, then date them and store them in your freezer.

6. Homemade Broths or Stocks
Sadly, your delicious homemade stock will only last about four days in the refrigerator. If you like to make big batches of broth or stock for future use, divide it up into individual portions, label and date them, then freeze. (I like using freezer pods for this—they’re great for freezing foods in useful portions!)

7. Moldy Fruit
You may be tempted to simply remove the moldy portion of an otherwise fine-looking piece of fruit, but mold doesn’t just live on the surface. According to the US Department of Agriculture, any visible mold on fruit means there are likely root threads inside that you can’t see, but can still make you sick. Yuck!
As far as firmer vegetables like carrots, cabbage, and bell peppers go, it’s probably fine to trim off an inch past any moldy spots, but all fruits and any soft vegetables with mold should be thrown away ASAP.
To avoid mold, be sure to examine your produce thoroughly at the store to avoid coming home with something that already has mold on it. Also, avoid washing fruits or vegetables until just before you are going to eat them.
Is there anything in your fridge that ought to be thrown away?
This One Bottle Can Clean Your Entire Home 25 Oct 1:48 PM (5 days ago)

If you’ve been around here for a while, you know how much I love a good DIY cleaner. There’s just something satisfying about making your own cleaning products—knowing exactly what’s in them, saving money, and still getting sparkling results.
Over the years, I’ve come to rely on a handful of versatile, trustworthy ingredients that I use again and again in my homemade cleaners. And one that’s been a staple in my cleaning cabinet for years is Castile soap.
Read More: These 9 Powerful Ingredients Are The MVPs Of Cleaning
This simple, plant-based soap does so much with so little. It’s gentle enough for washing your hands, strong enough to cut through kitchen grease, and versatile enough to use in dozens of homemade cleaning recipes—including my favorite all-purpose spray that I’ve used for years.
In this post, I’ll walk you through what Castile soap is, what makes it special, which ingredients you should (and shouldn’t!) mix it with, and my favorite ways to use it for everyday cleaning.

What Is Castile Soap?
Castile soap is one of those wonderfully simple, old-fashioned products that just works. It’s a plant-based soap that’s been around for centuries, loved for being both gentle and surprisingly powerful.
Unlike most soaps that are made with animal fats, Castile soap is made entirely from vegetable oils—usually olive, coconut, or sunflower—which give it a creamy lather and mild, effective cleaning power.
It originally came from Spain’s Castile region, where it was made with local olive oil and prized for its purity. Over time, it spread across Europe and beyond because it was just that good. Today, “Castile” simply means any true soap made from plant-based oils instead of synthetic detergents or animal fats.

Which Castile Soap Should I Use?
There are plenty of great Castile soaps out there, and for the most part, choosing one just means checking the ingredients list. A true Castile soap should be made from plant-based oils—no synthetic detergents, artificial fragrances, or animal fats hiding in the mix.
That said, I’ll admit I’m a little biased toward the one I just added to my shop—it checks all the boxes for being gentle, effective, and truly pure! I’m so excited to share that you can now find a 16-ounce bottle of pure, unscented Castile soap in the By Jillee Shop. It’s made with organic plant oils and zero synthetic detergents, so it’s safe for sensitive skin but tough enough to tackle dirty dishes or grimy counters. You can use it for just about anything—DIY hand soap, body wash, dish soap, or all-purpose cleaner. It’s one bottle that really does it all.
Our Castile soap is made from a thoughtful blend of sunflower, coconut, olive, and castor oils, which work together to create a balanced, skin-friendly formula. Each oil brings something special—olive oil keeps it gentle, coconut oil boosts cleansing power, sunflower oil nourishes, and castor oil adds luxurious lather. We also include citric acid to balance pH and organic aloe to soothe skin and add a silky feel.
And while what’s inside the bottle matters most, I have to admit—I love how it looks, too! The bottle features our signature floral print with gold foil accents, so it’s pretty enough to leave sitting out on your kitchen counter, laundry shelf, or bathroom sink.

What Not to Mix With Castile Soap
Before we get to all the great ways you can use Castile soap around the house, let’s talk about what not to mix it with. Because if there’s one thing I’ve learned after more than a decade of making DIY cleaners, it’s that “two good things” don’t always make a better one!
Here’s what to avoid (and why):
Vinegar: Vinegar and Castile soap are like siblings who can’t stop bickering—they just don’t get along. Vinegar is an acid, while Castile soap is a base, and when you mix them together, they cancel each other out in a process called unsaponification. The result? A goopy mess that won’t clean a thing.
Hydrogen Peroxide: This one sounds promising, but doesn’t deliver. When peroxide meets Castile soap and water, it quickly breaks down into plain old water and oxygen. That means you lose its disinfecting power and end up with a bubbly, unstable mix that’s not doing you any favors.
Dawn Dish Soap: I love Dawn for certain cleaning jobs, but pairing it with Castile soap just doesn’t make sense. If you’re reaching for Castile soap, you’re probably going for something natural and plant-based—so keep it simple and skip the mix.
Rubbing Alcohol: Alcohol interferes with Castile soap’s natural foaming and cleaning ability, especially in higher concentrations. If you want to clean and disinfect, do it in two steps: wash with soap first, then follow up with rubbing alcohol or a disinfecting spray once the surface is clean.
Read More: This Is What You Need To Know About Cleaning Vs. Disinfecting
Bleach: Mixing bleach with Castile soap isn’t as dangerous as combining it with ammonia (which creates toxic chloramine gas), but it’s still not a good idea. It doesn’t make either one more effective—in fact, it creates a higher-pH mixture that can irritate your skin and lungs.

What to Mix With Castile Soap
Now, let’s talk about the ingredients that make great partners for Castile soap! These combinations not only make your cleaners more effective but also help you get the most out of every drop of soap.
Water: Water is Castile soap’s best friend. It’s what you’ll use to dilute the concentrated soap for things like hand soap, all-purpose cleaner, and dish soap. It also helps rinse away dirt and residue, leaving behind a clean, streak-free surface.
I have particularly hard water, so I almost always opt for distilled water when I make homemade cleaners. Because it’s free of minerals and impurities, distilled water helps prevent cloudiness, mineral buildup, and bacterial growth—keeping homemade cleaners fresh, clear, and effective for longer.
Essential Oils: I chose an unscented Castile soap for my shop so you can easily customize it with your favorite essential oils.
My Simple Clean blend is perfect for everyday cleaning, Freshly Washed adds a bright citrus scent, and Harvest Spice brings a warm, seasonal touch. Or keep it simple with single oils like lavender, lemon, or sweet orange.
Borax: Borax and Castile soap are a dynamic duo for heavy-duty cleaning. Borax helps stabilize the soap’s pH, softens hard water, and boosts cleaning power—especially in laundry or bathroom cleaners.
Baking Soda: Baking soda adds gentle scrubbing power to Castile soap, making it great for sinks, tubs, and stovetops. It’s perfect for tackling tough grime without scratching surfaces.
Washing Soda: Washing soda (sodium carbonate) is similar to baking soda (sodium bicarbonate), but it’s a bit stronger and more alkaline, which makes it even better for cutting through grease and grime. It pairs beautifully with Castile soap in laundry and deep-cleaning recipes, helping to soften water and break down stubborn buildup.
Read More: The Difference Between Baking Soda, Washing Soda, And Borax

9 Ways to Use Castile Soap Around Your House
I’ve been using Castile soap for years in my DIY cleaners and love how it lets me mix up exactly what I need—without a cabinet full of store-bought bottles. Here are some of my favorite ways to use it around the house.

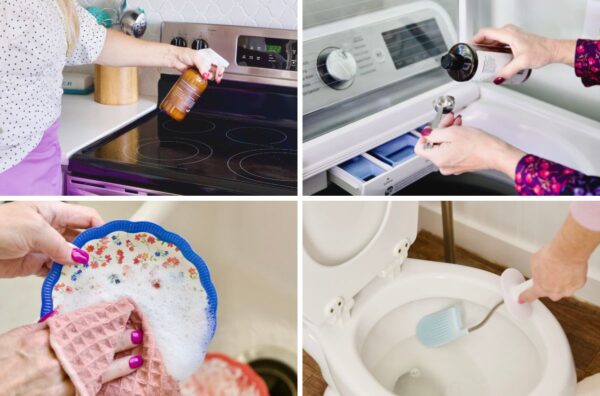
1. Foaming Hand Soap
One of my personal favorite ways to use Castile soap is for foaming hand soap. It’s so simple! In a foaming soap dispenser, mix 1 part Castile soap to 3 parts water, and add 10–15 drops of essential oil for scent. I’ve been using my new Harvest Spice blend lately, and it makes the whole sink area smell warm and cozy every time I wash my hands. It’s gentle, effective, and leaves your hands clean without feeling dry.
When a recipe calls for “parts,” it just means you can use any unit of measurement you like—as long as you keep the same ratio. For example, if you mix 1 part Castile soap to 3 parts water, that could be 1 tablespoon of soap and 3 tablespoons of water, or 1 cup of soap and 3 cups of water. The proportions stay the same no matter what size “part” you use.

2. All-Purpose Cleaning Spray
Castile soap makes a wonderful all-purpose cleaner for everyday messes. Just add 2 tablespoons of Castile soap to a 16-ounce spray bottle filled with water (distilled if possible), and mix in 20 drops of my Simple Clean Essential Oil Blend for a fresh, bright scent.
Use it on just about any surface that’s safe to get wet—stone countertops, tile, sealed wood, stainless steel, sinks, toilets, and more. It’s simple, effective, and one of those cleaners you’ll find yourself reaching for every day.

3. Reusable Cleaning Wipes
If you love the convenience of cleaning wipes but hate the waste, this one’s for you. I like to make my own by filling a quart-sized mason jar with clean cloths or rags. In a separate container, mix 1½ cups distilled water, 1 tablespoon Castile soap, and 20 drops of my Simple Clean Essential Oil Blend, then pour the mixture over the cloths. Let them soak for about 20 minutes so they absorb all the liquid, and you’ve got reusable wipes that are just as convenient as store-bought—without the cost or the plastic waste.

4. “Soft Scrub” Cleanser
For tough jobs like soap scum, sinks, or dirty grout, Castile soap makes a fantastic base for a homemade “Soft Scrub”-style cleaner.
In a small bowl, combine ¾ cup baking soda and ¼ cup Castile soap, then add 1 tablespoon of water and 10 drops of my Simple Clean Essential Oil Blend. Stir until it forms a thick paste, then transfer it to a container for storage. Scoop a little onto a damp sponge and scrub away! It’s gentle on most surfaces but tough on grime. Just avoid using it on porous materials like untreated wood or granite.

5. Toilet Bowl Cleaner
This one couldn’t be easier. Squirt a few drops of Castile soap directly into your toilet bowl, scrub with your brush, and flush. For extra cleaning power, sprinkle a bit of baking soda onto the brush before scrubbing. It’s quick, effective, and leaves the bathroom smelling fresh—no harsh chemicals required.

6. Mopping Solution
When it’s time to mop, make your own natural floor cleaner instead of reaching for something store-bought. Add 2½ tablespoons of Castile soap to 1 gallon of hot water, then mop as usual. It works beautifully on tile, vinyl, and laminate floors, leaving them clean and shiny. Just be careful not to overdo it on wood floors—use a lightly damp mop rather than a soaking wet one to avoid damage.

7. Citrus Degreaser
For greasy kitchen messes, I like making a quick citrus degreaser spray that smells as good as it works. In a 16-ounce spray bottle, combine 2 cups of warm water, 2 tablespoons of baking soda, 2 teaspoons of Castile soap, and 20 drops of lemon essential oil. Shake well before each use, spray onto greasy spots, and wipe clean with a damp microfiber cloth. Follow with a dry cloth for a streak-free shine. It works wonders on stovetops, range hoods, and even the inside of your oven.

8. Laundry Soap
Castile soap works beautifully as a gentle, natural laundry detergent. Add 2–4 tablespoons to an HE washer or 4–8 tablespoons to a standard machine, depending on your load size. It cleans effectively without harsh chemicals and is especially great for people with sensitive skin. During the rinse cycle, add ½ cup of white vinegar as a natural fabric softener—just be sure it’s the rinse cycle so it doesn’t mix directly with the soap.

9. Dish Soap
Castile soap also makes a fantastic handwashing dish soap. Fill your sink with warm water and add 1–2 tablespoons of Castile soap. Wash and rinse your dishes as usual for sparkling clean results. To make a bottled version, mix 1 part Castile soap with 10 parts water in a squeeze or pump bottle. Because Castile soap creates a lot of suds, it’s best not to use it in the dishwasher—but for handwashing, it’s a gentle, non-toxic alternative that leaves your dishes squeaky clean.

The Bottom Line
If you’ve been looking for one simple product that can take the place of a dozen bottles under your sink, Castile soap might just be your new go-to. It’s gentle, effective, and endlessly versatile—perfect for anyone who loves a clean home without harsh chemicals or waste.
I’ve used Castile soap for years in my own DIY cleaners, and I’m so happy to now offer a pure, unscented version in my shop that’s earned a permanent spot in my cleaning routine. Whether you use it for hand soap, a mopping solution, or your next homemade cleaner, I think you’ll be amazed by how much this one bottle can do—and how easy it makes keeping your home naturally clean.
And there’s no better time to give it a try!
Right now, during my “Clear the Cobwebs” Fall Cleaning Sale, you can get 30% off my new Castile Soap, my Harvest Spice Essential Oil Blend, and all your other homemaking essentials.
It’s the perfect time to stock up on everything you need to make the recipes in this post—like spray bottles, labels, Simple Clean, Freshly Washed Essential Oil Blends, and more. You’ll also find favorites like dryer balls and microfiber cloths on sale, too, so you can refresh your cleaning routine from top to bottom.
This Is Why You Should Start Sleeping With Socks On 24 Oct 2:35 PM (6 days ago)

Most of the time, the OGT Team is a pretty easygoing bunch, but once in a while a conversation topic will spark a pretty heated debate. That’s precisely what happened after someone mentioned wearing socks to sleep.
I wasn’t aware before that that sleeping in socks might be a polarizing issue, and the whole debate made me wonder about the real pros and cons of sleeping in socks!
Related: This Is The Only Thing That Helps Me Sleep Without Feeling Groggy
In this post, I’ll be sharing what my research revealed about real benefits you can enjoy when you wear socks to sleep. (And don’t worry—if you’re really not a fan of wearing socks to sleep, I’ve included a few alternatives as well!)
Superstitions About Sleeping In Socks
While many people will or won’t wear socks to sleep based simply on their personal preference, others may be swayed by superstitious beliefs. For example, one anti-sock superstition suggests that sleeping with socks on will lead to nightmares.
But not all sleep-related superstitions about socks are so negative. In fact, one superstition states that sleeping with a sock tied around your neck will cure a sore throat! (That sounds like a choking hazard to me, but I digress.) And others believe that wearing a pair of wet socks to sleep is a surefire way to cure a fever or even a hangover!
And while these sock superstitions are mostly old wives’ tales and urban legends, that doesn’t mean that sleeping in socks doesn’t have real effects. In fact, there are actually four good reasons you may want to start doing it yourself!
Related: 9 Surprising Old Wives’ Tales That Turned Out To Be True
4 Surprising Benefits Of Sleeping In Socks
1. Fall Asleep Faster
According to the National Sleep Foundation, warming your feet before you go to bed can act like a signal to your brain that it’s time for sleep. And a 2007 study seems to support that idea, which observed that participants who were sleeping in socks experienced faster sleep onset.

2. Prevent Hot Flashes
Wearing socks helps with the process of vasodilation, or the opening of your blood vessels. Dilated blood vessels make it easier for your blood to flow around your body. And good blood flow helps your body maintain a consistent temperature while you sleep, preventing things like hot flashes or cold sweats from interrupting your precious sleeping time.

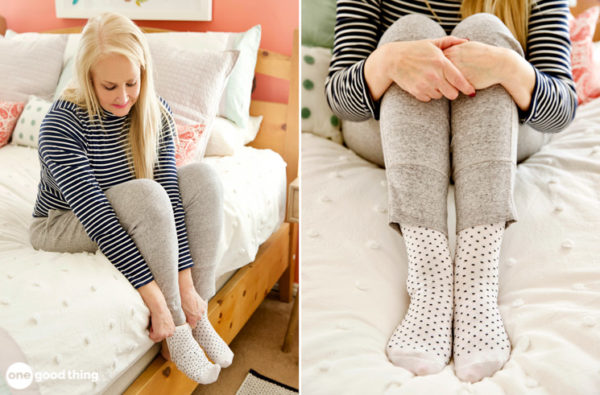
3. Improve Cracked Heels
Tired of dealing with painfully dry heels and feet? Apply a moisturizing lotion to your feet before bedtime, then pull on a pair of cotton socks. The socks will help keep the lotion from rubbing off or drying out, and you’ll wake up with softer, smoother feet!
4. Better Sex
(Warning: If you’re not comfortable with sex talk, you may want to skip ahead to the next section!) As, well… unsexy as wearing socks to bed might seem, it may actually improve your chances of having an orgasm.
According to a 2005 news story, about 80% of the couples who participated in a study in the Netherlands achieved orgasm when wearing socks, compared to only 50% of couples who were not wearing socks. It might be circumstantial evidence at best, but it certainly can’t hurt to give it a try for yourself! ;-)
An Important Note About Sock Choice
Does it matter which socks you wear to sleep? On the whole, not really. You can wear ankle socks, crew socks, or fuzzy chenille socks—it’s up to you! But you definitely want to avoid sleeping in compression socks.
Compression socks are great for long flights or as part of your workwear, but they’re not meant to be worn to sleep. The compression may hinder your blood flow to your feet when you’re lying down. But feel free to sleep in any non-compression socks you want to! :-)
Hate Sleeping In Socks? Try These Alternatives
Some people just can’t stand wearing socks to bed, and that’s okay! There are plenty of ways to warm your feet up to get the benefits I mentioned above, sans socks. Here are a few alternatives you can try!
- Enjoy a warm foot bath before bedtime
- Wear a warm pair of slippers for an hour or two before bed
- Sleep with a hot water bottle near the foot of your bed
- Sleep with an extra blanket draped over the foot of your bed
- Take a warm bath an hour or two before bed
Are you pro-socks or anti-socks when it comes to sleeping?